


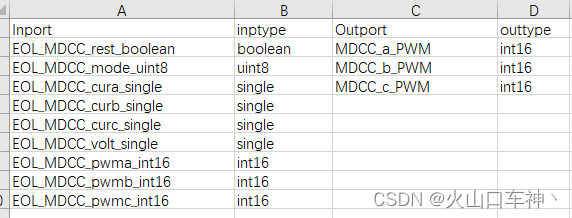
01--通过Excel表格创建好输入输出及信号的数据类型
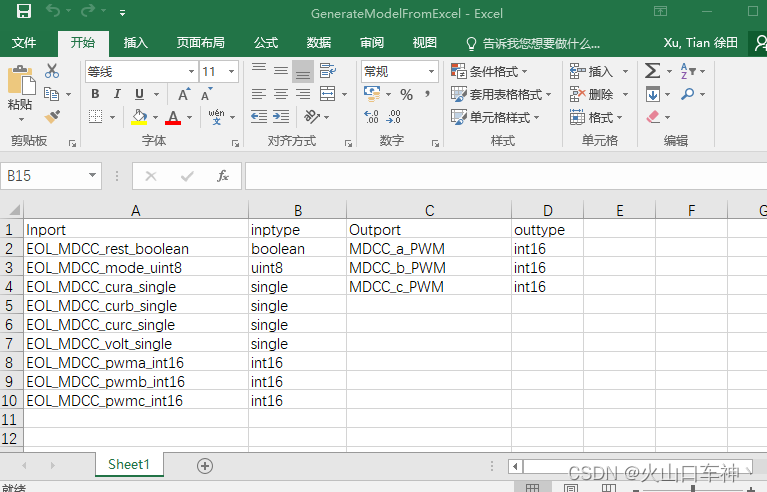
首先,需要创建一个表格,在表格内填写好输入输出信号名称及数据类型,如下图所示:
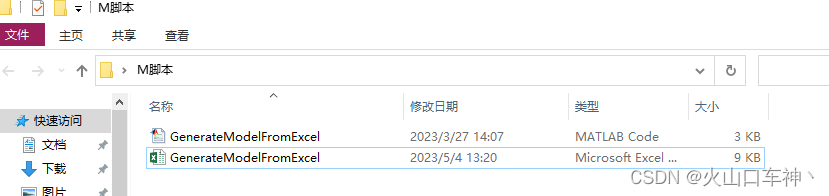
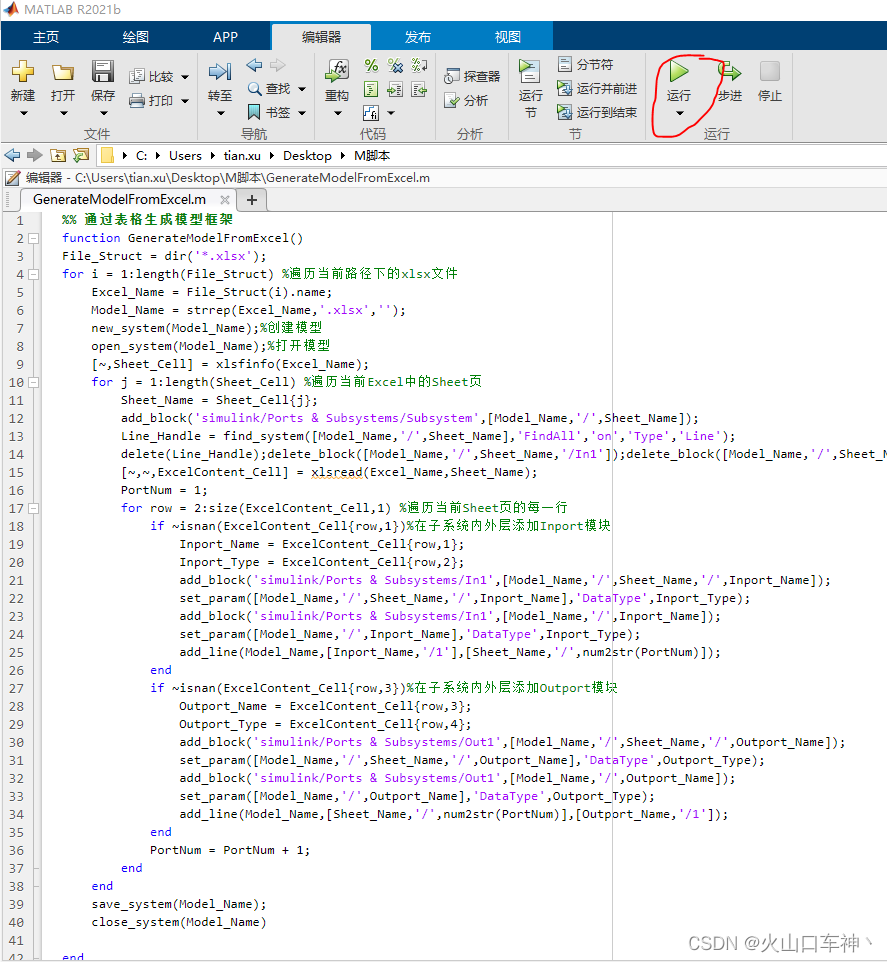
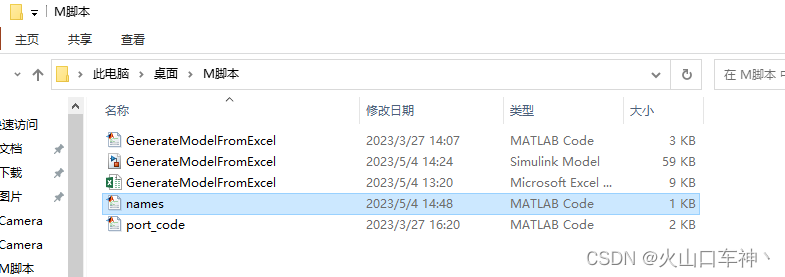
将如下代码保存至MATLAB中的m文件中,并通过MATLAB打开,该文件要放到上面的Excel表格的同一路径下。
%% 通过表格生成模型框架
function GenerateModelFromExcel()
File_Struct = dir('*.xlsx');
for i = 1:length(File_Struct) %遍历当前路径下的xlsx文件
Excel_Name = File_Struct(i).name;
Model_Name = strrep(Excel_Name,'.xlsx','');
new_system(Model_Name);%创建模型
open_system(Model_Name);%打开模型
[~,Sheet_Cell] = xlsfinfo(Excel_Name);
for j = 1:length(Sheet_Cell) %遍历当前Excel中的Sheet页
Sheet_Name = Sheet_Cell{j};
add_block('simulink/Ports & Subsystems/Subsystem',[Model_Name,'/',Sheet_Name]);
Line_Handle = find_system([Model_Name,'/',Sheet_Name],'FindAll','on','Type','Line');
delete(Line_Handle);delete_block([Model_Name,'/',Sheet_Name,'/In1']);delete_block([Model_Name,'/',Sheet_Name,'/Out1']);
[~,~,ExcelContent_Cell] = xlsread(Excel_Name,Sheet_Name);
PortNum = 1;
for row = 2:size(ExcelContent_Cell,1) %遍历当前Sheet页的每一行
if ~isnan(ExcelContent_Cell{row,1})%在子系统内外层添加Inport模块
Inport_Name = ExcelContent_Cell{row,1};
Inport_Type = ExcelContent_Cell{row,2};
add_block('simulink/Ports & Subsystems/In1',[Model_Name,'/',Sheet_Name,'/',Inport_Name]);
set_param([Model_Name,'/',Sheet_Name,'/',Inport_Name],'DataType',Inport_Type);
add_block('simulink/Ports & Subsystems/In1',[Model_Name,'/',Inport_Name]);
set_param([Model_Name,'/',Inport_Name],'DataType',Inport_Type);
add_line(Model_Name,[Inport_Name,'/1'],[Sheet_Name,'/',num2str(PortNum)]);
end
if ~isnan(ExcelContent_Cell{row,3})%在子系统内外层添加Outport模块
Outport_Name = ExcelContent_Cell{row,3};
Outport_Type = ExcelContent_Cell{row,4};
add_block('simulink/Ports & Subsystems/Out1',[Model_Name,'/',Sheet_Name,'/',Outport_Name]);
set_param([Model_Name,'/',Sheet_Name,'/',Outport_Name],'DataType',Outport_Type);
add_block('simulink/Ports & Subsystems/Out1',[Model_Name,'/',Outport_Name]);
set_param([Model_Name,'/',Outport_Name],'DataType',Outport_Type);
add_line(Model_Name,[Sheet_Name,'/',num2str(PortNum)],[Outport_Name,'/1']);
end
PortNum = PortNum + 1;
end
end
save_system(Model_Name);
close_system(Model_Name)
end
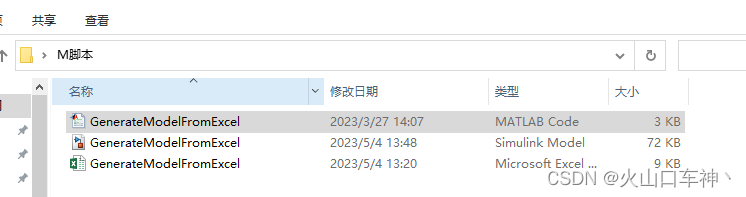
end同一个路径,创建好的simulink模型将以Excel表格的名字命名
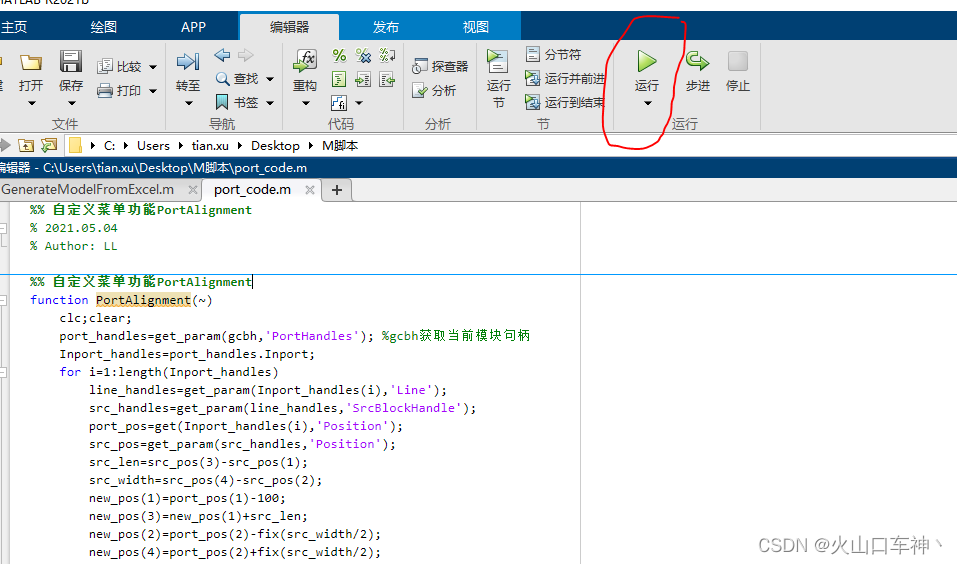
在MATLAB中打开GenerateModelFromExcel.m文件并点击运行
可以发现,在该路径下自动生成了Excel表格名称的simulink模型
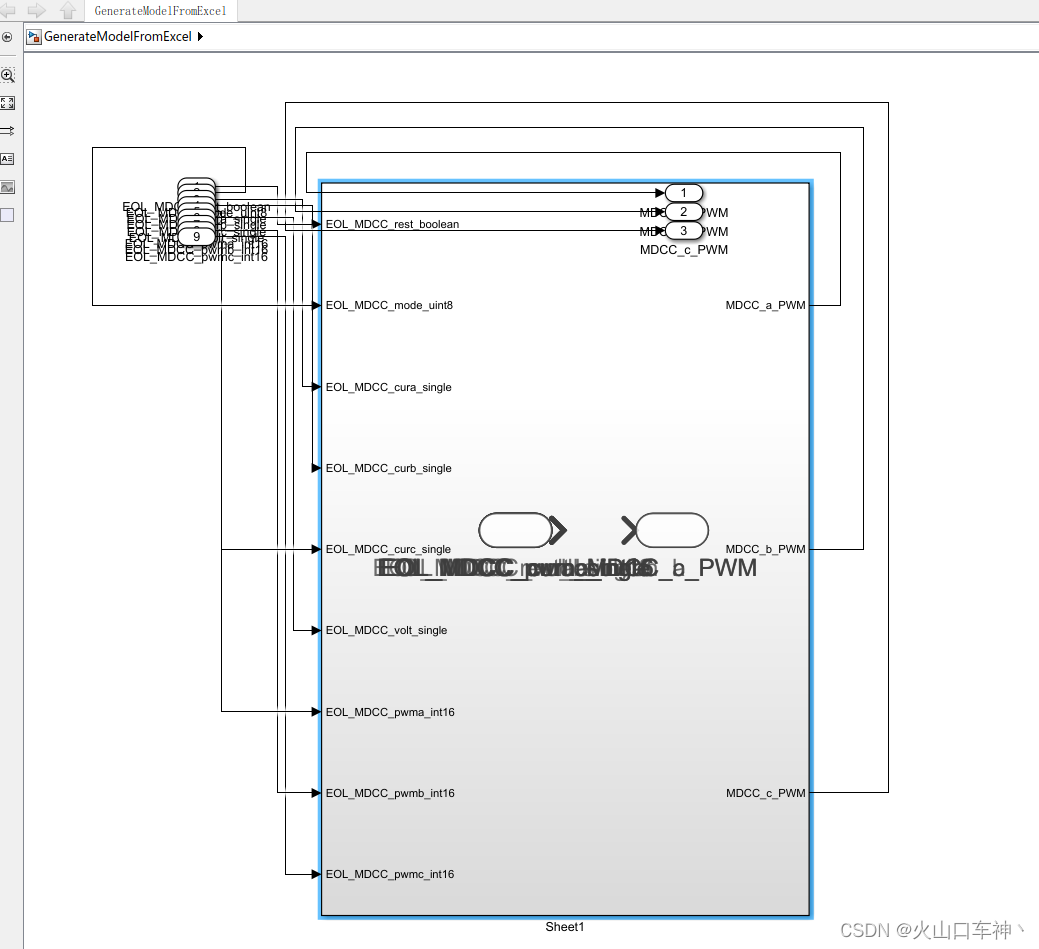
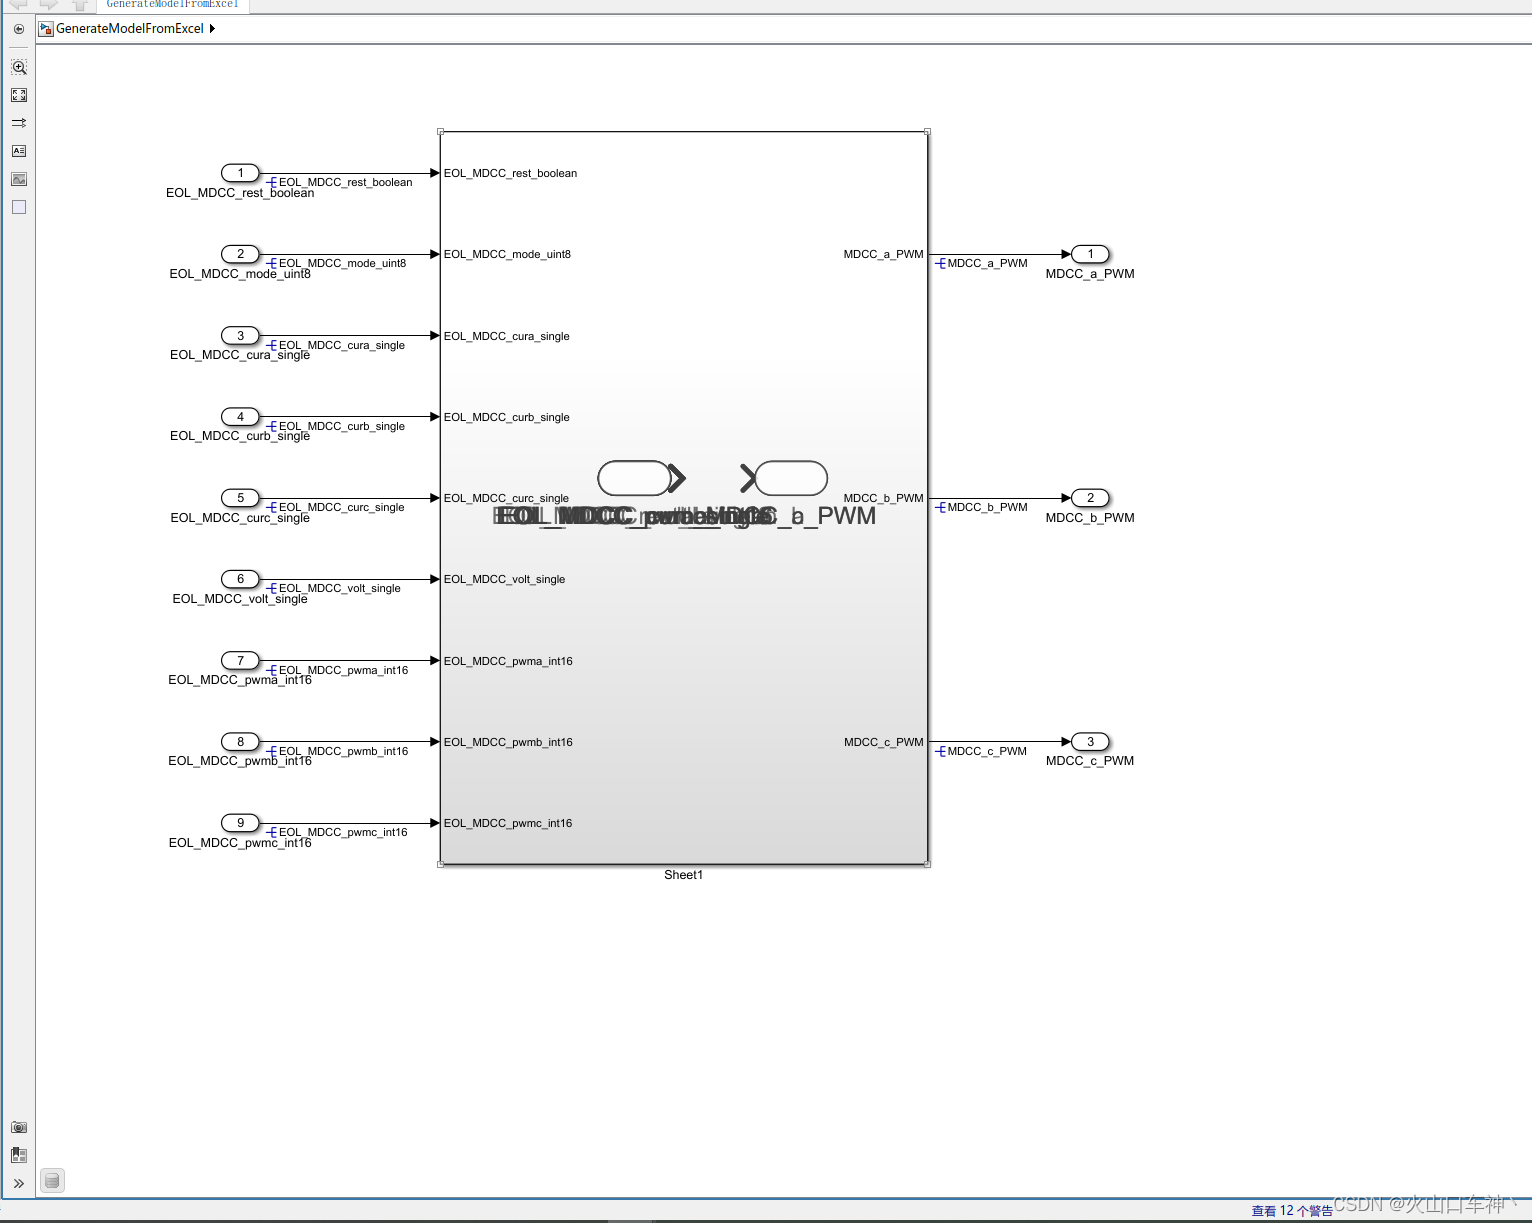
打开模型,发现Excel表格对应的信号及数据类型都自动创建好了
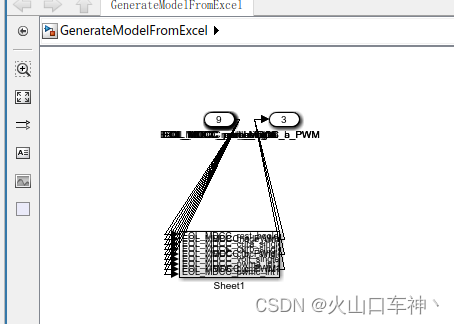

02--将输入输出信号的端口自动对齐
很明显,我们发现,模型虽然自动创建好了,但是端口全部堆叠在一起,如果信号比较少,是可以手动去拖动对齐,但是如果信号比较多,比如几百个,这样的话效率将非常低下,我们用端口自动对齐脚本可以解决该问题。
%% 自定义菜单功能PortAlignment
function PortAlignment(~)
    clc;clear;
    port_handles=get_param(gcbh,'PortHandles'); %gcbh获取当前模块句柄
    Inport_handles=port_handles.Inport;
    for i=1:length(Inport_handles)
        line_handles=get_param(Inport_handles(i),'Line');
        src_handles=get_param(line_handles,'SrcBlockHandle');
        port_pos=get(Inport_handles(i),'Position');
        src_pos=get_param(src_handles,'Position');
        src_len=src_pos(3)-src_pos(1);
        src_width=src_pos(4)-src_pos(2);
        new_pos(1)=port_pos(1)-100;
        new_pos(3)=new_pos(1)+src_len;
        new_pos(2)=port_pos(2)-fix(src_width/2);
        new_pos(4)=port_pos(2)+fix(src_width/2);
        set_param(src_handles,'Position',new_pos);
    end
    outport_handles=port_handles.Outport;
    for i=1:length(outport_handles)
        line_handles = get_param(outport_handles(i),'Line');
        src_handles =get_param(line_handles,'DstBlockHandle');
        port_pos=get(outport_handles(i),'Position');
        src_pos=get_param(src_handles,'Position');
        src_len=src_pos(3)-src_pos(1);
        src_width=src_pos(4)-src_pos(2);
        new_pos(3)=port_pos(1)+200;
        new_pos(1)=new_pos(3)-src_len;
        new_pos(2)=port_pos(2)-fix(src_width/2);
        new_pos(4)=port_pos(2)+fix(src_width/2);
        set_param(src_handles,'Position',new_pos);
    end
    clear;
end
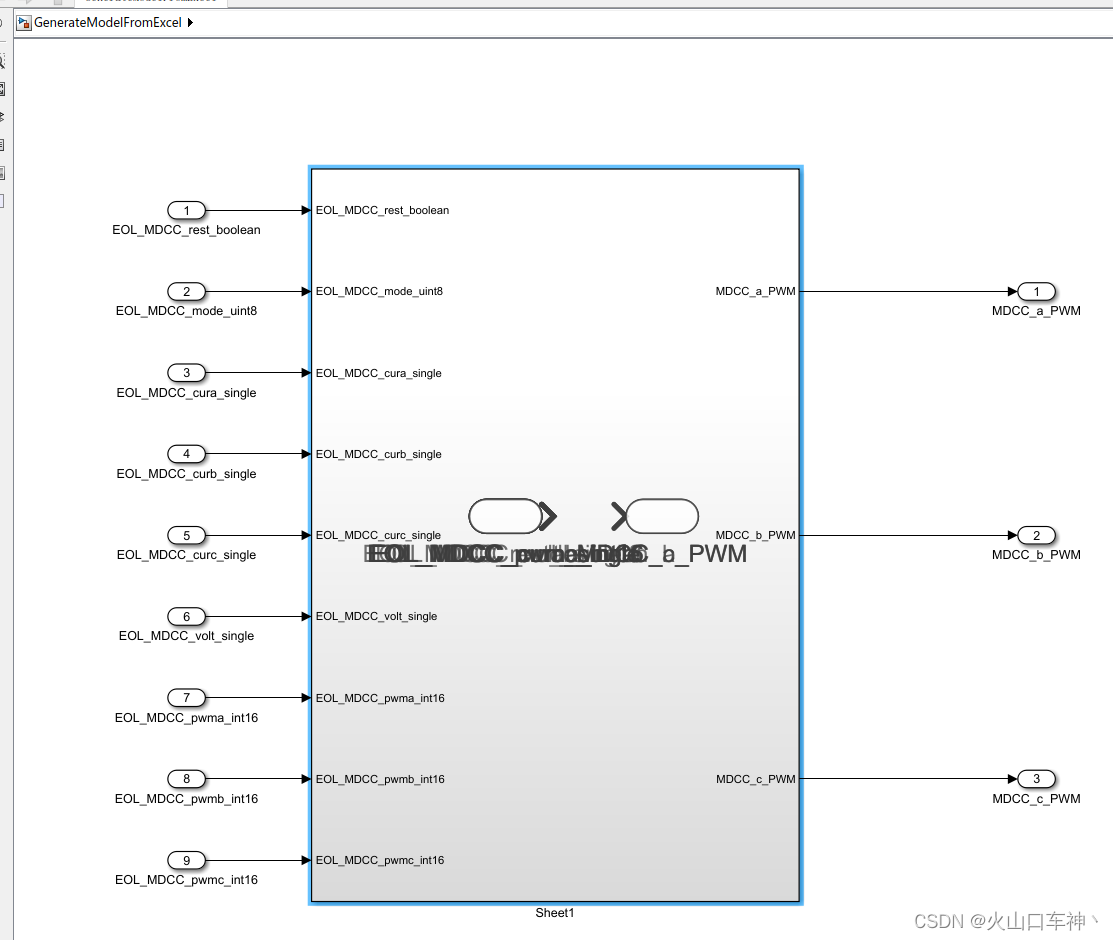
在运行该脚本之前,需要点击需要应用的simulink子系统,这里我们就点击sheet1子系统
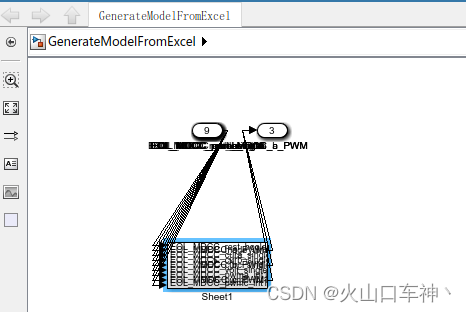
运行后效果如下图,发现信号之间的间距存在一些问题
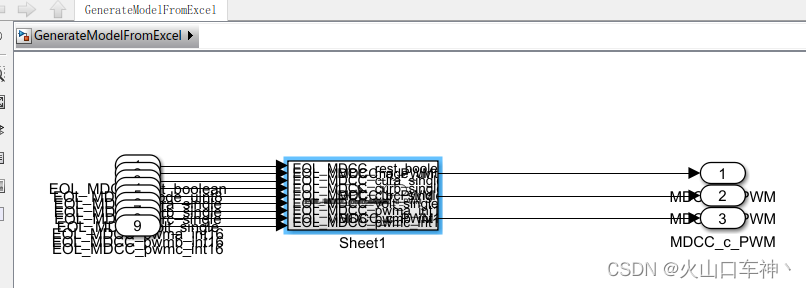
调整下信号间距(即调整子系统的大小)
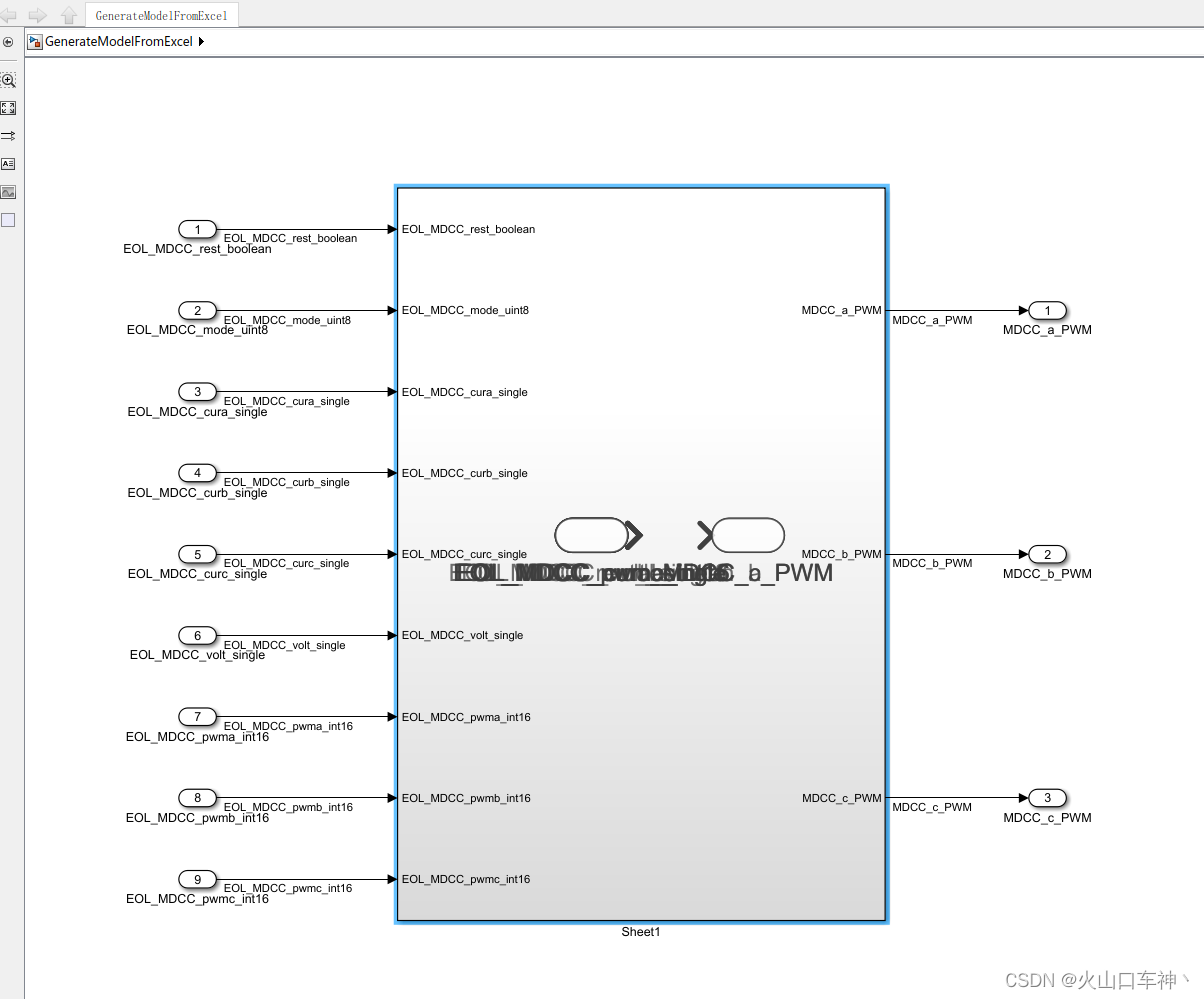
点击该子系统,再次运行m脚本,效果图如下
03--设置信号线上的信号属性名称
可以将输入信号和输出信号线上加上该信号名称
运行以下m脚本的代码
h1=get_param(gcb,'LineHandles');h2=get_param(gcb,'PortConnectivity');
for i=1:length(h1.Inport)
    set_param(h1.Inport(i),'Name',get(h2(i).SrcBlock,'Name'));
end
for i=1:length(h1.Outport)
    set_param(h1.Outport(i),'Name',get(h2(length(h1.Inport)+i).DstBlock,'Name'));
end
运行时也需要点击需要应用的子系统
04--信号观测
若上述输入信号需要观测,可以在上面的m脚本对应行添加如下代码
set(h1.Inport(i),'MustResolveToSignalObject',true);
set(h1.Outport(i),'MustResolveToSignalObject',true);
添加完成后的信号属性,还需要自行去配置sldd,才能达到全局变量的观测。
h1=get_param(gcb,'LineHandles');
h2=get_param(gcb,'PortConnectivity');
for i=1:length(h1.Inport)
    set_param(h1.Inport(i),'Name',get(h2(i).SrcBlock,'Name'));
    set(h1.Inport(i),'MustResolveToSignalObject',true);
end
for i=1:length(h1.Outport)
    set_param(h1.Outport(i),'Name',get(h2(length(h1.Inport)+i).DstBlock,'Name'));
    set(h1.Outport(i),'MustResolveToSignalObject',true);
end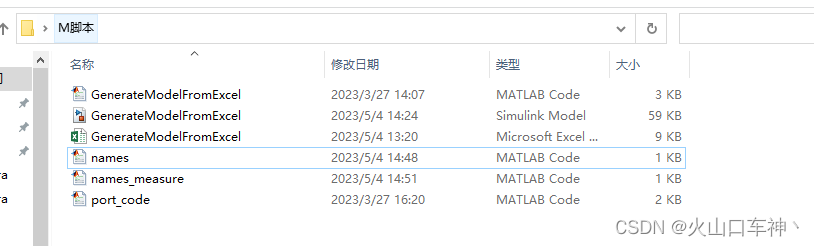

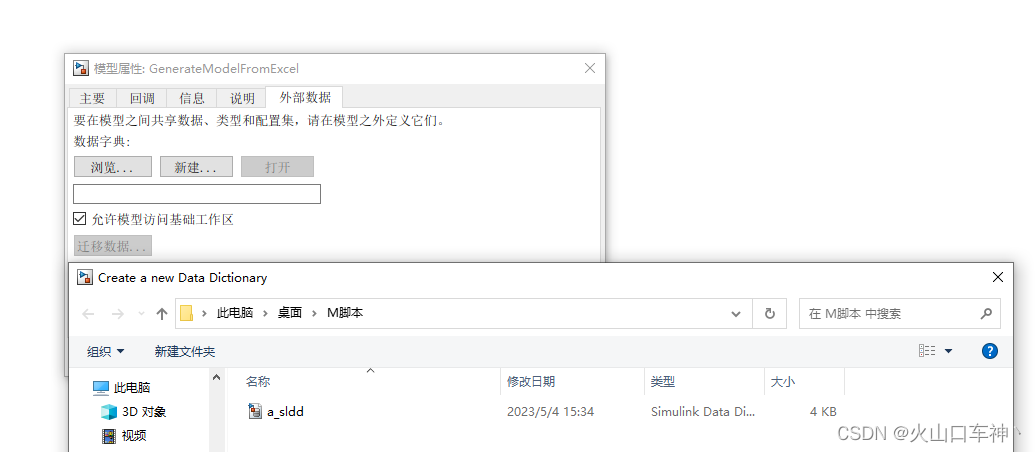
05--通过excel表格数据自动生成sldd文件脚本
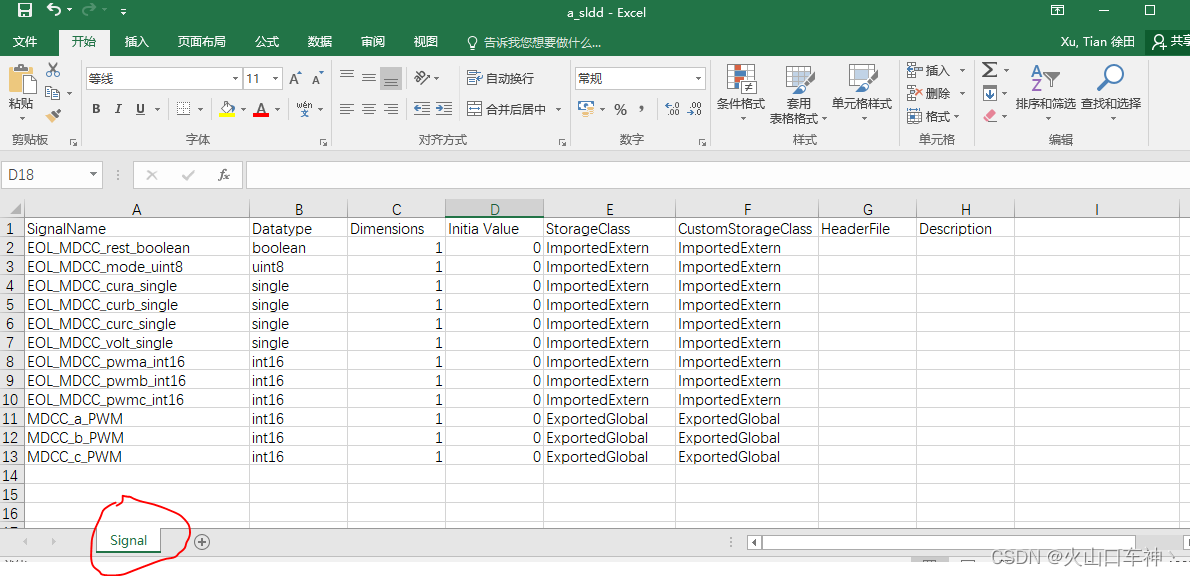
如果想要信号成为全局变量,还需要配置sldd数据字典,如前面所述一样,手动会非常的慢,影响效率,将我们用的Excel按照如下进行配置,
原来的Excel:
更新后的Excel:
按照表格的格式,主要是m脚本已经写上了对应标签,这个可以自行根据脚本去更改
运行如下脚本中的代码:
%% 自定义CreateSldd
function CreateSldd(~)
    clc;clear;
    %% 定义Excel各列内容
    %% step1:选择Excel文件
    Excel_name = 'a_sldd'; %获取表格名称
    disp(Excel_name);
    mfile_name = strcat(Excel_name,'Var.m'); %生成的m文件名
    DictName = strcat(Excel_name,'.sldd');
    fid = fopen(mfile_name,'w');
    fprintf(fid,'\n\n\n');

    %% step2:导入Simulink/mpt.Signal
    waitbarName = strcat('正在打开Excel文件:',Excel_name,'.xlsx...');
    f = waitbar(0,waitbarName);
    [~,Signal_Cell] = xlsread(Excel_name,'Signal'); %导入Signal工作表为单元数组 数据要转换为char类型
    SignalNum = 0;
    for row = 2:size(Signal_Cell) %从第2行开始循环处理每一行内容
        % 提取Excel数据
        OrgName = char(Signal_Cell(row,1)); %SignalName
        DataType = char(Signal_Cell(row,2)); %DataType
        Dimensions = char(Signal_Cell(row,3)); %Dimensions
        InitialValue = char(Signal_Cell(row,4)); %InitiaValue
        StorageClass = char(Signal_Cell(row,5)); %StorageClass
        if isequal(StorageClass,'Custom')
            CustomStorageClass = char(Signal_Cell(row,6)); %CustomStorageClass
        end
        HeaderFile = char(Signal_Cell(row,7)); %HeaderFile
        Description = char(Signal_Cell(row,8)); %Description

        if ~isempty(OrgName)
            SignalNum = SignalNum+1;

            SignalName = OrgName;

            str_tmp = strcat(SignalName,' =',32,'mpt.Signal',';','\n'); %mpt Simulink
            fprintf(fid, str_tmp);
            str_tmp = strcat(SignalName,'.CoderInfo.StorageClass = ''',StorageClass,''';','\n');
            fprintf(fid, str_tmp);
            if contains(DataType ,'Enum')
                rDataType = strcat('Enum:',32,DataType);
                str_tmp = strcat(SignalName,'.DataType = ''',rDataType,''';','\n');
            else
                str_tmp = strcat(SignalName,'.DataType = ''',DataType,''';','\n');
            end
            fprintf(fid, str_tmp);

            if ~isempty(Dimensions)
                str_tmp = strcat(SignalName,'.Dimensions = ',Dimensions,';','\n');
                fprintf(fid, str_tmp);
            end
            if ~isempty(Description)
                str_tmp = strcat(SignalName,'.Description = ''',Description,''';','\n');
                fprintf(fid, str_tmp);
            end
            if ~isempty(InitialValue)
                str_tmp = strcat(SignalName,'.InitialValue = ''',InitialValue,''';','\n');
                fprintf(fid, str_tmp);
            end
            if isequal(StorageClass,'Custom')
                str_tmp = strcat(SignalName,'.CoderInfo.CustomStorageClass = ''',CustomStorageClass,''';','\n');
                fprintf(fid, str_tmp);
                if isequal(CustomStorageClass,'GetSet')
                    if ~isempty(HeaderFile)
                        str_tmp = strcat(SignalName,'.CoderInfo.CustomAttributes.HeaderFile = ''',HeaderFile,''';','\n');
                        fprintf(fid, str_tmp);
                    end
                    if isequal(DataType,'boolean')
                        rDataType = 'bool';
                    else
                        rDataType = DataType;
                    end
                    GetFunction = strcat('Get_',rDataType,'_',OrgName);
                    SetFunction = strcat('Set_',rDataType,'_',OrgName);
                    str_tmp = strcat(SignalName,'.CoderInfo.CustomAttributes.GetFunction = ''',GetFunction,''';','\n');
                    fprintf(fid, str_tmp);
                    str_tmp = strcat(SignalName,'.CoderInfo.CustomAttributes.SetFunction = ''',SetFunction,''';','\n');
                    fprintf(fid, str_tmp);
                end
            end
            fprintf(fid,'\n');
        end
        waitbar(row/(length(Signal_Cell)),f,'正在获取Singnal...'); %更新waitbar进度
    end

    %% step3:生成数据字典
    fclose(fid);
    waitbar(0,f,'正在生成数据字典...'); %更新waitbar进度

    exist_flag = exist(DictName,'file'); %判断数据字典是否已经建立
    if exist_flag == 0
        DictObj = Simulink.data.dictionary.create(DictName);
        Result = '数据字典已生成!!!';
    else
        DictObj = Simulink.data.dictionary.open(DictName);
        Result = '数据字典已更新!!!';
    end
    SectObj = getSection(DictObj,'Design Data');
    importFromFile(SectObj,mfile_name,'existingVarsAction','overwrite');
    saveChanges(DictObj);
    waitbar(1,f,'正在生成数据字典...'); %更新waitbar进度
    delete(f);
    clear;
end
生成了sldd文件
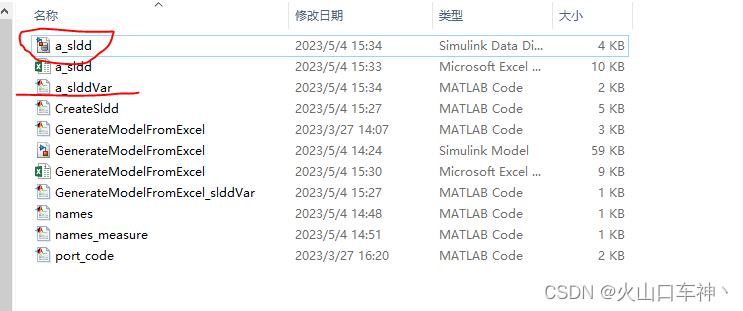
将该sldd文件与模型关联起来并运行
最终运行模型之后,
没有报错,模型运行正常
上述脚本在建模过程中会大大提高建模的效率。还有很多其他的脚本,持续摸索中。。。


 1757
1757


 被折叠的 条评论
为什么被折叠?
被折叠的 条评论
为什么被折叠?
 到【灌水乐园】发言


