


前言
在之前的基础上,这一次的记录加了注册中心和负载均衡,说实话springcloud的代码量确实很少,高度集成和自动化装配让开发者省去了不少的时间,只需要做简单的配置,就可以实现。
在之前的工程上创建Eureka模块
添加依赖
<?xml version="1.0" encoding="UTF-8"?>
<project xmlns="http://maven.apache.org/POM/4.0.0"
         xmlns:xsi="http://www.w3.org/2001/XMLSchema-instance"
         xsi:schemaLocation="http://maven.apache.org/POM/4.0.0 http://maven.apache.org/xsd/maven-4.0.0.xsd">
    <parent>
        <artifactId>springcloud</artifactId>
        <groupId>com.study</groupId>
        <version>1.0-SNAPSHOT</version>
    </parent>
    <modelVersion>4.0.0</modelVersion>

    <artifactId>cloud</artifactId>
    <dependencies>
        <dependency>
            <groupId>org.springframework.cloud</groupId>
            <artifactId>spring-cloud-starter-eureka-server</artifactId>
            <version>1.4.6.RELEASE</version>
        </dependency>
        <dependency>
            <groupId>org.springframework.boot</groupId>
            <artifactId>spring-boot-devtools</artifactId>
            <scope>runtime</scope>
        </dependency>
    </dependencies>
</project>
填写yml配置文件
server:
  port: 7001
eureka:
  instance:
    hostname: localhost # 服务端的实例名称
  client:
    register-with-eureka: false #表示是否想eureka注册中心注册自己
    fetch-registry: false #设置false 表示自己是一个注册中心
    service-url:
      defaultZone: http://${eureka.instance/hostname}:${server.port}/eureka/
配置文件只需要配置这么些就可以了
最后添加一个启动类
package com.study.eureka;

import org.springframework.boot.SpringApplication;
import org.springframework.boot.autoconfigure.SpringBootApplication;
import org.springframework.cloud.netflix.eureka.server.EnableEurekaServer;

/**
 * @description:
 * 启动之后访问http://localhost:7001/ 可以进入控制中心
 * @author: Leo
 * @createDate: 2020/2/11
 * @version: 1.0
 */
@EnableEurekaServer
@SpringBootApplication
public class EurekaApp7001
{
    public static void main(String[] args)
    {
        SpringApplication.run(EurekaApp7001.class,args);
    }
}
主启动类加上@EnableEurekaServer,表示他是eureka服务端
启动之后访问http://localhost:7001/ 可以进入控制中心

看到这样注册中心就算完成了,可能有的人刚进来会看到一串红字提醒。不用管它。
继续添加两个模块
可以叫Eureka7002和Eureka7003,因为我们要模仿集群环境,所以需要增加几个。
这里有一个注意点,就是7001和7002和7003这三个服务器怎么才能让他们产生交集呢?
我们要对配置文件进行修改:
7001:
server:
  port: 7001
eureka:
  instance:
    hostname: localhost # 服务端的实例名称
  client:
    register-with-eureka: false #表示是否想eureka注册中心注册自己
    fetch-registry: false #设置false 表示自己是一个注册中心
    service-url:
      defaultZone: http://localhost:7002/eureka/,http://localhost:7003/eureka/
7002:
server:
  port: 7001
eureka:
  instance:
    hostname: localhost # 服务端的实例名称
  client:
    register-with-eureka: false #表示是否想eureka注册中心注册自己
    fetch-registry: false #设置false 表示自己是一个注册中心
    service-url:
      defaultZone: http://localhost:7001/eureka/,http://localhost:7003/eureka/
7003:
server:
  port: 7001
eureka:
  instance:
    hostname: localhost # 服务端的实例名称
  client:
    register-with-eureka: false #表示是否想eureka注册中心注册自己
    fetch-registry: false #设置false 表示自己是一个注册中心
    service-url:
      defaultZone: http://localhost:7002/eureka/,http://localhost:7001/eureka/
改造服务提供端
首先在pom依赖里加eureka的依赖
        <dependency>
            <groupId>org.springframework.cloud</groupId>
            <artifactId>spring-cloud-starter-eureka</artifactId>
            <version>1.4.6.RELEASE</version>
        </dependency>
其次在服务端上的主启动类上加上@EnableEurekaClient,表示这是客户端,这里我就不贴代码了,我发现手机端CSDN上,代码加载有问题。

那么最后我们要改哪里?与我们之前打eureka服务端的次序一样,添加依赖加上注解加上配置文件,最后我们要改的地方就是配置文件了
eureka:
  client:
    service-url:
      defaultZone: http://localhost:7001/eureka/,http://localhost:7002/eureka/,http://localhost:7003/eureka/
告诉他,他可访问的服务端有哪些!
服务消费者的改造
改造起来异曲同工,只是在消费者端需要加上一个负载均衡实现的依赖ribbon。
        <dependency>
            <groupId>org.springframework.cloud</groupId>
            <artifactId>spring-cloud-starter-eureka</artifactId>
            <version>1.4.6.RELEASE</version>
        </dependency>
        <dependency>
            <groupId>org.springframework.cloud</groupId>
            <artifactId>spring-cloud-starter-ribbon</artifactId>
            <version>1.4.6.RELEASE</version>
        </dependency>
老样子,改主启动类

好了,那么怎么简单实现负载均衡呢?
package com.study.cloud.config;

import org.springframework.cloud.client.loadbalancer.LoadBalanced;
import org.springframework.context.annotation.Bean;
import org.springframework.context.annotation.Configuration;
import org.springframework.web.client.RestTemplate;

/**
 * @description:
 * @author: Leo
 * @createDate: 2020/2/10
 * @version: 1.0
 */
@Configuration //这是springboot中的注解,他的作用相当于spring中的applicationContext.xml
public class ConfigBean
{
    //配置RestTemplate
    @Bean
    @LoadBalanced
    public RestTemplate restTemplate(){
        return new RestTemplate();
    }

}
只在原来配置类里的RestTemplate 方法上加上 @LoadBalanced就可以了
最后配置文件老样子
server:
  port: 80
eureka:
  client:
    register-with-eureka: false #不向eureka中注册自己
    service-url:
      defaultZone: http://localhost:7001/eureka/,http://localhost:7002/eureka/,http://localhost:7003/eureka/
最后还有一个问题,就是服务提供端被注册到了三个注册中心里,对应的接口是7001,7002,7003那么客户端在调用方法的时候,该怎么配置请求方法了?
我们可以先启动一个Eureka,在启动服务提供者看一下东西。

他就是之前我们在提供端配置的名字
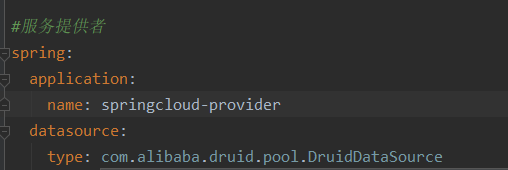
因为现在提供端也注册到了服务中心,现在服务中心有三个,所以我们只要去请求服务中心的对应服务提供端的名字就可以了。

    //private static final String REST_URL_PREFIX = "http://localhost:8001/book/provide";
    private static final String REST_URL_PREFIX = "http://SPRINGCLOUD-PROVIDER/book/provide";
可以自行对比差别。
最后测试
启动三个eureka服务,再启动provider和consumer,会很耗电脑性能,所以电脑稍差的朋友开两个服务端吧。

ok,现在关闭一个服务端,保留另外的。继续请求(这里我给个建议,就是要么换个请求,不要请求之前的方法,要么就是重开一个网页请求,避免缓存)

OK,还是没问题。
还有一点,可能有的人会报错,那是因为在其他注册中心,服务提供端还没注册进来,存在一定的延迟。所以请耐心等待。等你在其他的注册中心里看到服务提供端进来,再发送请求。就会成功。
Learn From 狂神说
Author By 朝花不迟暮


 1196
1196


 被折叠的 条评论
为什么被折叠?
被折叠的 条评论
为什么被折叠?
 到【灌水乐园】发言


