


官方安装教程网址:https://github.com/Vaa3D/Vaa3D_Wiki/wiki/Build-Vaa3D-on-Windows-%28VS2010-and-QMake%29
安装方法主要按以上网址的步骤进行。但是途中依然会碰到很多问题。以下对我遇到的一些问题进行小结,用黄色标注的为我注释的一些问题的解决办法。
如果你想要安装windows下的VS2013版本,可以在本博客基础上参考我的博客:https://blog.csdn.net/DOGIMA/article/details/102812273
在Ubuntu系统下V3D安装方法参考我以前的博客:
https://blog.csdn.net/DOGIMA/article/details/89671537?spm=1001.2014.3001.5501
注:如果你的电脑上已有一个V3D编译版本,你想重新装一个覆盖掉这个版本,请记得提前把你在这个旧版本里的代码备份好!代码备份好!代码备份好!
重要提示:V3D开发版对VS的环境干净程度要求挺高,最好不要同时有VS2010以上的版本,不然很容易有各种冲突。虽然网址中提示可以安装VS2010 SP1,但是亲测的效果不行,问题依然很多。如果电脑装过比较多版本的话,按照步骤和以下办法都不能成功的话,建议重装64位系统。看似麻烦,但是却是最有效的最终手段。WIN7,WIN8,WIN10系统上都测试可以成功安装。
注:安装方法中的命令行都是在Visual Studio X64 Win64命令提示(2010)中完成的。不要用成普通的cmd了。
网页内容如下:
Build Vaa3D on Windows (VS2010 and QMake)
This is an instruction to build a 64-bit Vaa3D and its plugins on Windows, using QMake and MS Visual Studio 2010.
Open a 64-bit command prompt
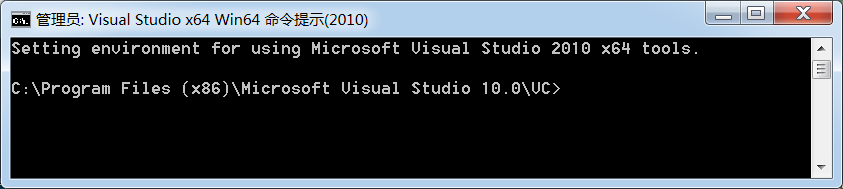
Open “Visual Studio 2010 x64 Win64 Command Prompt” (for 64bit building) window.
Note: All commands throughout the instruction are meant to be executed in this command prompt.
注:可以在开始菜单中找到Visual Studio x64 Win64 命令提示(2010),安装成功打开会有Setting environment for using Microsoft Visual Studio 2010 x64 tools的字样,如图。
Download Vaa3D Source Code
Check out source code from github code repositories, one for main Vaa3D code and one for released plugins. You can follow the instructions for both Vaa3D program and its default plugins. Choose one of the below approaches at your convenience.
First, enter the directory where you want Vaa3D to be installed.
Approach 1 – via git commands
Make sure you have GIT installed. If not, it can be downloaded here: https://git-scm.com/downloads.
git clone --recursive https://github.com/Vaa3D/v3d_external.git
git clone https://github.com/Vaa3D/vaa3d_tools.git
注:git clone下载要等所有都显示100%,中途可能会断,这样文件就不齐全,需要重新下载。一般Git bash 下载的默认目录是Administrator下。也可以右
 最低0.47元/天 解锁文章


 1746
1746


 被折叠的 条评论
为什么被折叠?
被折叠的 条评论
为什么被折叠?
 到【灌水乐园】发言


