


提示:文章写完后,目录可以自动生成,如何生成可参考右边的帮助文档
跨域请求携带cookie
前言
跨域请求怎么携带cookie呢:
1.学会withCredentials属性;
2.学会axios配置withCredentials;
3.学会设置Access-Control-Allow-Origin属性;
4.学会设置Access-Control-Allow-Credentials属性;
5.学会解决跨域请求携带源站cookie的问题;
一、搭建一个跨域请求的环境
思路:
- 使用express搭建第一个服务A(http://localhost:8000),运行在8000端口上;
- A服务托管index.html(用于在前端页面发送网络请求)文件;
- 在A服务中写一个处理请求的路由,加载index.html页面时,种下cookie(这里种cookie为了在请求B服务时携带上);
- 使用express搭建第二个服务B(http://localhost:8003),运行在8003端口上;
- 在A服务托管的index.html页面去请求B服务,然后把cookie传过去;
代码结构:
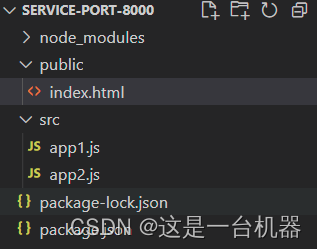
A服务的代码:
// src/app1.js
const express = require("express");
const app = express();
// `index.html` 加载时会请求login接口
// 设置`cookie`
app.get("/login", (req, res) => {
res.cookie("user", "jay", { maxAge: 2000000, httpOnly: true });
res.json({ code: 0, message: "登录成功" });
});
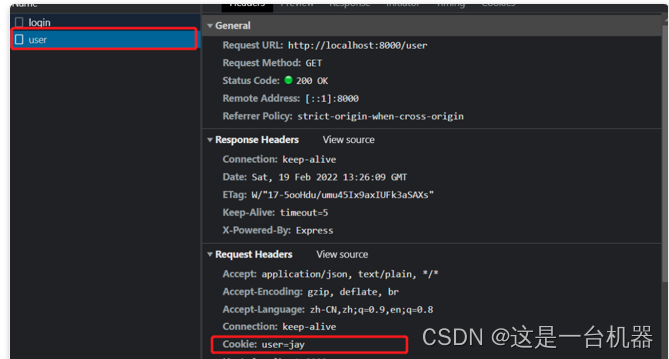
// 此接口是检测`cookie`是否设置成功,如果设置成功的话,浏览器会自动携带上`cookie`
app.get("/user", (req, res) => {
// req.headers.cookie: user=jay
const user = req.headers.cookie.split("=")[1];
res.json({ code: 0, user });
});
// 托管`index.html`页面
// 这样的话在`index.html`中发起的请求,默认的源就是`http://localhost:8000`
// 然后再去请求`http://localhost:8003`就会出现跨域了
app.use("/static", express.static("public"));
app.listen("8000", () => {
console.log("app1 running at port 8000");
});
index.html的代码:
<!DOCTYPE html>
<html lang="en">
  <head>
    <meta charset="UTF-8" />
    <meta http-equiv="X-UA-Compatible" content="IE=edge" />
    <meta name="viewport" content="width=device-width, initial-scale=1.0" />
    <title>Document</title>
  </head>
  <body>
    <h2>this is index.html at port 8000</h2>
    <button id="button">发送同源请求</button>
    <button id="cross-button">发送跨域请求</button>
    <script src="https://cdn.jsdelivr.net/npm/axios/dist/axios.min.js"></script>
    <script>
      const button = document.querySelector("#button");
      const crossButton = document.querySelector("#cross-button");

      axios.get("http://localhost:8000/login", {}).then((res) => {
        console.log(res);
      });
      // 发送同域请求
      button.onclick = function () {
        axios.get("http://localhost:8000/user", {}).then((res) => {
          console.log(res);
        });
      };
      // 发送跨域请求
      crossButton.onclick = function () {
        axios({
          method: "get",
          url: "http://localhost:8003/anotherService",
        }).then((res) => {
          console.log(res);
        });
      };
    </script>
  </body>
</html>
B服务的代码:
// src/app2.js
const express = require("express");
const app = express();

// 定义一个接口,index.html页面请求这个接口就是跨域(因为端口不同)
app.get("/anotherService", (req, res) => {
  res.json({ code: 0, msg: "这是8003端口返回的" });
});

app.listen("8003", () => {
  console.log("app2 running at port 8003");
});
此时环境基本搭建好了
二、解决跨域携带cookie问题
首先我们先在A服务的index.html页面中得到一个cookie,运行A服务:
npm install express -D
node src/app1.js
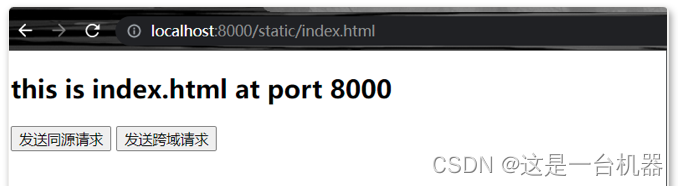
然后打开http://localhost:8000/static/index.html: 没有问题的话,页面长这样:
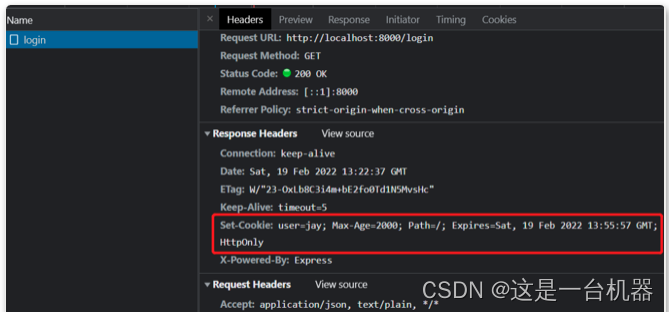
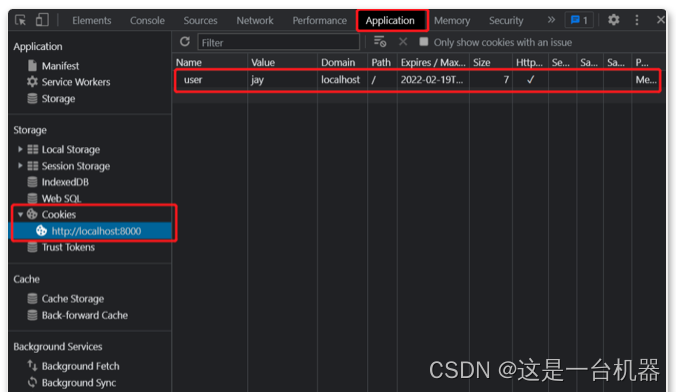
这个时候F12打开控制台:可以看到发送了一个login请求,并且设置了cookie,也可以选择浏览器控制台的Application页签,选中cookie,可以看到cookie的信息:
然后我们点击页面上的发送同源请求按钮,可以看到发送了一个user请求,并且已经携带上了cookie:
接下来点击 发送跨域请求 按钮,出现了跨域请求的报错:

重点:接下来开始解决跨域携带cookie问题:
1.在前端请求的时候设置request对象的属性withCredentials为true;
什么是withCredentials?
XMLHttpRequest.withCredentials 属性是一个Boolean类型,它指示了是否该使用类似cookies,authorization headers(头部授权)或者TLS客户端证书这一类资格证书来创建一个跨站点访问控制(cross-site Access-Control)请求。在同一个站点下使用withCredentials属性是无效的。
如果在发送来自其他域的XMLHttpRequest请求之前,未设置withCredentials 为true,那么就不能为它自己的域设置cookie值。而通过设置withCredentials 为true获得的第三方cookies,将会依旧享受同源策略,因此不能被通过document.cookie或者从头部相应请求的脚本等访问。
修改跨域请求的代码(示例):
// 修改跨域请求的代码
crossButton.onclick = function () {
    axios({
      withCredentials: true, // ++ 新增
      method: "get",
      url: "http://localhost:8003/anotherService",
    }).then((res) => {
      console.log(res);
    });
};
这个时候再去发送一个跨域请求,你会发现依旧报错,但是我们仔细看下报错,意思是需要设置header的Access-Control-Allow-Origin属性:

2.在服务端设置Access-Control-Allow-Origin
我们修改B(app2.js)服务的代码:
在所有路由前增加,可以拦截所有请求(示例):
// 在所有路由前增加,可以拦截所有请求
app.all("*", (req, res, next) => {
  res.header("Access-Control-Allow-Origin", "http://localhost:8000");
  next();
});
修改完之后再次发送一个跨域请求,你会发现,又报错了(接近崩溃),但是跟之前报的错不一样了,意思大概就是Access-Control-Allow-Credentials这个属性应该设置为true,但是显示得到的是个’ ':

3.在服务端设置Access-Control-Allow-Credentials
再次修改B服务的代码(每次修改后需要重新运行):
在所有路由前增加,可以拦截所有请求(示例):
// 在所有路由前增加,可以拦截所有请求
app.all("*", (req, res, next) => {
  res.header("Access-Control-Allow-Origin", "http://localhost:8000");
  res.header("Access-Control-Allow-Credentials", "true"); // ++ 新增
  next();
});
4.再发送一个跨域请求:
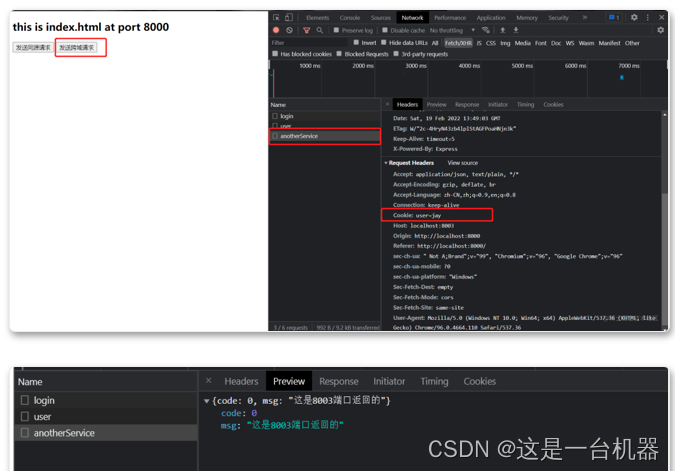
可以看到,这个跨域请求已经请求成功并且返回数据了!而且也携带了A服务的cookie,这个时候已经大功告成了。
总结
- 前端请求时在request对象中配置"withCredentials": true;
- 服务端在response的header中配置"Access-Control-Allow-Origin",
“http://xxx:${port}”; - 服务端在response的header中配置"Access-Control-Allow-Credentials", “true”


 2784
2784


 被折叠的 条评论
为什么被折叠?
被折叠的 条评论
为什么被折叠?
 到【灌水乐园】发言


