


Java之try-with-resources
最近做了一个下载文件的接口,实现过程中一直频繁的try-catch-finally,代码很冗余,最后在用SonarLint检测的时候,给了解决方案:
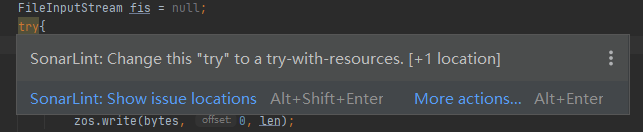
这是SonarLint里的规则简介:
Try-with-resources should be used
Java 7 introduced the try-with-resources statement, which guarantees that the resource in question will be closed. Since the new syntax is closer to bullet-proof, it should be preferred over the older try/catch/finally version.
This rule checks that close-able resources are opened in a try-with-resources statement.
Note that this rule is automatically disabled when the project’s sonar.java.source is lower than 7.
示例:
try (FileReader fr = new FileReader(fileName);BufferedReader br = new BufferedReader(fr)) {
	return br.readLine();
	} catch (...) {}
or
try (BufferedReader br = new BufferedReader(new FileReader(fileName))) {
   // no need to name intermediate resources if you don't want to    return br.readLine();
   }  catch (...) {}
简而言之,Java7新语法:Try-with-resources,只需要在try的()中创建资源,程序即可自动完成关闭资源的操作,不用再繁琐的写finally代码块来关闭了~
资源包含:connections, streams, files, and other classes【连接、流、文件和其他类】
那么问题来了:
1. 其实现原理是什么?
2. 如上述示例,try的()中可创建多个资源,资源创建和关闭顺序是什么?
然后我在网上找到了这篇文章:《理解try-with-resources语句及示例》。文章是中英对照的,作者对原文做了翻译。参考文章方法,我自己做了测试实验。
创建两个资源类【一定要实现AutoCloseable类】:
public class Cat implements AutoCloseable{
    public Cat() {
        System.out.println("Cat was born;");
    }
    public void play() {
        System.out.println("Cat is playing;");
    }
    @Override
    public void close() throws Exception {
        System.out.println("Cat is closed;");
    }
}
Panda类加了异常,为了测试异常情况下执行结果:
public class Panda implements AutoCloseable{
    public Panda(){
        System.out.println("Panda was born;");
    }
    @Override
    public void close() throws Exception {
        System.out.println("Panda is closed;");
        throw new Exception("panda.close() 的异常");
    }
    public void play() throws Exception {
        System.out.println("Panda is playing;");
        throw new Exception("panda.play() 的异常");
    }
}
测试类:
public class Test {
    public static void main(String[] args) throws Exception {
        try (Cat cat = new Cat(); Panda panda = new Panda()) {
            cat.play();
            panda.play();
        } catch (Exception e) {
            throw new Exception(e);
        } finally {
            System.out.println("Finally!");
        }
    }
}
测试结果:
Cat was born;
Panda was born;
Cat is playing;
Panda is playing;
Panda is closed;
Cat is closed;
Finally!
Exception in thread "main" java.lang.Exception: java.lang.Exception: panda.play() 的异常
	at com.example.Test.main(Test.java:13)
Caused by: java.lang.Exception: panda.play() 的异常
	at com.example.Panda.play(Panda.java:21)
	at com.example.Test.main(Test.java:11)
	Suppressed: java.lang.Exception: panda.close() 的异常
		at com.example.Panda.close(Panda.java:16)
		at com.example.Test.main(Test.java:12)
结论:
1. try的()里的资源是依据写的顺序创建的,而其关闭顺序是倒序,即与创建顺序的相反顺序。
2. 即使抛出异常,资源依旧会关闭。
3. 依旧可以叠加finally代码块使用,close会在finally块前执行。
那么原理为何呢?
来查看下编译后的class文件【用反编译软件查看,或者在idea里查看项目target包下对应的class文件即可(推荐)】
Test类的class文件:
public class Test {
    public Test() {
    }
    public static void main(String[] args) {
        try {
            Cat cat = new Cat();
            Throwable var2 = null;

            try {
                Panda panda = new Panda();
                Throwable var4 = null;

                try {
                    cat.play();
                    panda.play();
                } catch (Throwable var42) {
                    var4 = var42;
                    throw var42;
                } finally {
                    if (panda != null) {
                        if (var4 != null) {
                            try {
                                panda.close();
                            } catch (Throwable var41) {
                                var4.addSuppressed(var41);
                            }
                        } else {
                            panda.close();
                        }
                    }

                }
            } catch (Throwable var44) {
                var2 = var44;
                throw var44;
            } finally {
                if (cat != null) {
                    if (var2 != null) {
                        try {
                            cat.close();
                        } catch (Throwable var40) {
                            var2.addSuppressed(var40);
                        }
                    } else {
                        cat.close();
                    }
                }

            }
        } catch (Exception var46) {
            var46.printStackTrace();
        } finally {
            System.out.println("Finally!");
        }

    }
}
原来是编译器在编译的时候自动生成了finally块,那么这和我们写过的传统try-catch-finally代码是一样喽。并不是!注意, 第25、42行多了addSuppressed方法。此方法作用为何呢?我在Java之Throwable.addSuppressed()此文中做了测试描述,得出:此方法是用作传递被抑制的异常。所以最开始的测试结果才会将两个异常都显示出来呀~
至此,try-with-resources才算是真的理解透彻。
但是使用过程中有几个前提条件:
1. 须要java7以上才具有try-with-resources语句。
2. 资源必须实现AutoCloseable类,此类只有close()一个方法,只需重写即可。


 4351
4351


 被折叠的 条评论
为什么被折叠?
被折叠的 条评论
为什么被折叠?
 到【灌水乐园】发言


