


QML 入门
- Qt 基本模块
- Qt Quick 开发所需基本技术
- QML 基本语法
- QML 数据类型
- 基本数据类型(39)
- bool
- color 颜色类型
- coordinate 坐标类型
- date 日期时间类型
- double
- enumeration 枚举类型
- font 字体类型
- geocircle 几何圆数据类型
- geopath 几何路径数据类型
- geopolygon 几何多边形类型,少于三个点的多边形是非法的
- georectangle 几何矩形类型
- geoshape 几何形状类型
- int
- list 列表类型
- matrix4x4 矩阵类型
- palette 调色版
- point 二维点数据类型
- quaternion 四元数类型
- real 浮点型
- rect 矩形区域类型
- size 大小类型
- string 字符串类型
- url 路径类型
- var 自动类型
- variant 和var类型类似
- vector2d 二维向量
- QML基础对象类型
- Accessible 给Item提供访问信息,主要用于屏幕阅读器
- AnchorChanges
- AnimatedImage 显示动图
- AnimatedSprite 动画精灵
- Animation 所有动画的基类
- BorderImage 带边框的图片
- BorderImageMesh 一种用于ShaderEffect的图片控件
- Canvas 画布控件
- CanvasGradient 设置渐变色
- Column 列定位器
- Context2D 2维上下文
- DoubleValidator(Validator 验证器)
- Drag 拖拽控件
- Flickable 可以鼠标拂动的控件
- Flipable 可翻转的控件
- Flow 漂浮布局
- FocusScope
- FontLoader 字体加载器
- FontMetrics 字体度量器
- Gradient 颜色梯度值
- GraphicsInfo 渲染信息控件([附加属性](https://doc.qt.io/qt-5/qtqml-referenceexamples-attached-example.html))
- GridMesh 网格点生成器
- HoverHandler 鼠标和手势处理控件
- Image 图片显示控件
- Item
- ItemGrabResult
- 对象类型
- 创建一个QtQuick工程
- QML 信号槽
- QML 枚举的使用
- QML 动态加载控件
- QML导入js文件
- c++和QML 交互
- QML 中的模型视图代理
- 数据存储
- QML 中的Scene Graph
- QML 插件
Qt 基本模块

Qt Quick 开发所需基本技术
- QML 语言(Qt Meta-Object Language)
- JavaScript 语言
- Qt C++
QML 基本语法
下面代码展示了QML的基本语法
 Rectangle {
     id: photo                                               // id on the first line makes it easy to find an object

     property bool thumbnail: false                          // property declarations
     property alias image: photoImage.source

     signal clicked                                          // signal declarations

     function doSomething(x)                                 // javascript functions
     {
         return x + photoImage.width
     }

     color: "gray"                                           // object properties
     x: 20                                                   // try to group related properties together
     y: 20
     height: 150
     width: {                                                // large bindings
         if (photoImage.width > 200) {
             photoImage.width;
         } else {
             200;
         }
     }

     Rectangle {                                             // child objects
         id: border
         anchors.centerIn: parent; color: "white"

         Image {
             id: photoImage
             anchors.centerIn: parent
         }
     }

     states: State {                                         // states
         name: "selected"
         PropertyChanges { target: border; color: "red" }
     }

     transitions: Transition {                               // transitions
         from: ""
         to: "selected"
         ColorAnimation { target: border; duration: 200 }
     }
 }
QML中声明一个控件的格式如下:
控件名{
id:标实ID
属性:“”
function 函数名(参数1,参数2,…){}
子控件{}
…
}
QML 中所有控件都继承自Item控件,查看Qt帮助文档可以查看基本控件的属性和方法。:表示属性绑定,属性可以和某个常量,变量甚至函数绑定。函数的声明、表达式、条件语句的使用和js相同。
一般自定义控件的编码规范都按照上述规则,编写顺序为
- id
- property declarations
- signal declarations
- JavaScript functions
- object properties
- child objects
- states
- transitions
QML 数据类型
基本数据类型(39)
bool
color 颜色类型
-
表示形式有两种:
- SVG 颜色名称。如:“red” ,“green”
- 十六进制(三组或四组)。如: “#FF0000” “#800000FF”
QML 代码示例:
Rectangle { color: "steelblue" width: 40; height: 40 } Rectangle { color: "transparent" y: 40; width: 40; height: 40 } Rectangle { color: "#FF0000" y: 80; width: 40; height: 40 } Rectangle { color: "#800000FF" y: 120; width: 40; height: 40 } Rectangle { color: "#00000000" // ARGB fully transparent y: 160 width: 40; height: 40 } -
方法如下:
- Qt.rgba() :
color rgba(real red, real green, real blue, real alpha)- Qt.hsva():
color hsva(real hue, real saturation, real value, real alpha)- Qt.hsla()
color hsla(real hue, real saturation, real lightness, real alpha)- Qt.darker() 将基础加深。将RGB转为HSV,将V值乘以factor,然后转到RGB,factor默认值2.0
color darker(color baseColor, real factor)- Qt.lighter() 将基础颜色变浅,factor默认值1.5
color lighter(color baseColor, real factor)- Qt.tint() 给基础颜色设置一个色调
color tint(color baseColor, color tintColor)QML 代码示例:
		Item {
    	Rectangle {
        x: 0; width: 80; height: 80
        color: "lightsteelblue"
    	}
    	Rectangle {
        x: 100; width: 80; height: 80
        color: Qt.tint("lightsteelblue", "#10FF0000")
    	}
		}
coordinate 坐标类型
该类型和QGeoCoordinate类型对应,表示地球表面的几何位置。有维度(latitude)、经度(longitude)和海拔(altitude)组成。
维度:[-90,90] 经度:[-180,180]
QML 代码示例:
javascript import QtPositioning 5.2 Location { coordinate: QtPositioning.coordinate(-27.5, 153.1) }
+ 属性
* real latitude
* real longitude
* real altitude
* bool isValid
+ 方法
* real distanceTo(coordinate other)
* real azimuth(coordinate other) //方位角
* atDistanceAndAzimuth()
date 日期时间类型
c++ 类型的[QDate](https://doc.qt.io/qt-5/qdate.html)、[QDateTime](https://doc.qt.io/qt-5/qdatetime.html)以及Javascript Date Object都可与之自动相互转换。该类型为QML 基本数据类型,会自动转换为[Date](https://doc.qt.io/qt-5/qml-qtqml-date.html)对象。
格式化函数[Qt.formatDate()](https://doc.qt.io/qt-5/qml-qtqml-qt.html#formatDate-method) 和[Qt.formatDateTime()](https://doc.qt.io/qt-5/qml-qtqml-qt.html#formatDateTime-method)返回日期时间的格式化后的字符串。格式化详见函数链接。

*QML 示例代码*
```javascript
 var dateTime = new Date(2001, 5, 2, 14, 13, 09)
 console.log(Qt.formatDateTime(dateTime,"dd.MM.yyyy"))
 console.log(Qt.formatDateTime(dateTime,"ddd dd MM yyyy hh:mm::ss::zzz ap"))
 console.log(Qt.formatDateTime(dateTime,"dddd d MMM yy hh:mm::ss::zzz AP t"))
 console.log(Qt.formatDateTime(dateTime,"dddd d MMMM yy hh:mm::ss::zzz t"))

>>
qml: 02.06.2001
qml: 周六 02 06 2001 02:13::09::000 下午
qml: 星期六 2 6月 01 02:13::09::000 下午 中国标准时间
qml: 星期六 2 六月 01 14:13::09::000 中国标准时间
```
double
enumeration 枚举类型
该数据类型总是以<Type>.<value>这种形式呈现。比如Text.AlignRight。在与c++集成时,请注意,从c++传递到QML的任何枚举值都会自动转换为enumeration,反之亦然。
*QML 示例代码*
```javascript
	import QtQuick 2.0

	Item {
	    // refer to Text.AlignRight using an int type
	    property int enumValue: textItem.horizontalAlignment

	    signal valueEmitted(int someValue)

	    Text {
	        id: textItem
	        horizontalAlignment: Text.AlignRight
	    }

	    // emit valueEmitted() signal, which expects an int, with Text.AlignRight
	    Component.onCompleted: valueEmitted(Text.AlignRight)
	}
```
枚举类型可以是QML 自带类型、在QML中自定义类型或者C++导入的类型,详情见枚举属性[Enumeration Attributes](https://doc.qt.io/qt-5/qtqml-syntax-objectattributes.html#enumeration-attributes)
font 字体类型
经常使用的属性:
- *string* font.**family**   字体
- *bool* font.**bold**  加粗
- *bool* font.**italic** 斜体
- *bool* font.**underline** 下划线
- *real* font.**pointSize**  点大小
- *int* font.**pixelSize**	 像素大小
如果**pixSize** 和 **pointSize** 都指定了,那么将使用**pixelSize**的值
其他属性:
- *enumeration* font.**weight**  粗细
- *bool* font.**overline** 上划线
- *bool* font.**strikeout** 删除线
- *enumeration* font.**capitalization** 大小写
- *real* font.**letterSpacing** 字符间距
- *real* font.**wordSpacing**  单词间距
- *bool* font.**kerning** 是否突起
- *bool* font.**preferShaping**
- *enumeration* font.**hintingPreference**
- string font.styleName
geocircle 几何圆数据类型
用一个中心点和半径表示,和c++ Qt中的QGeoCircle类型对应。
属性:
-
center : coordinate //中心点,经纬度坐标类型
-
radius : real //半径
QML 示例代码import QtQuick.Window 2.12 import QtPositioning 5.2 Window { visible: true width: 640 height: 480 title: qsTr("Hello World") Item { property variant region: QtPositioning.circle(QtPositioning.coordinate(-27.5, 153.1), 1000) Component.onCompleted:{ console.log(region,region.center,region.radius) console.log(QtPositioning.coordinate(0, -153.1)) } } } >>qml: QGeoCircle({-27.5, 153.1}, 1000) 27° 30' 0.0" S, 153° 6' 0.0" E 1000 >>qml: 0° 0' 0.0", 153° 6' 0.0" W
geopath 几何路径数据类型
用一个列表path表示路径中的所有坐标点和c++ Qt中的QGeoPath类型对应。
属性:
- path : const QVariantList // const QList
- width : qreal
QML 示例代码
	import QtQuick 2.12
	import QtQuick.Window 2.12
	import QtPositioning 5.2

	Window {
	    visible: true
	    width: 640
	    height: 480
	    title: qsTr("Hello World")
	    Item {
	        property variant region: QtPositioning.path([QtPositioning.coordinate(2.5, 153.1),QtPositioning.coordinate(-7.5, 13.1),QtPositioning.coordinate(-27.5, 153.1)],3)
	        Component.onCompleted:{
	            console.log(region)
	            console.log(region.path)
	            console.log(region.width)
	        }
	    }
	}


	qml: QGeoPath([ 2° 30' 0.0" N, 153° 6' 0.0" E,7° 30' 0.0" S, 13° 6' 0.0" E,27° 30' 0.0" S, 153° 6' 0.0" E, ])
	qml: [2° 30' 0.0" N, 153° 6' 0.0" E,7° 30' 0.0" S, 13° 6' 0.0" E,27° 30' 0.0" S, 153° 6' 0.0" E]
	qml: 3
geopolygon 几何多边形类型,少于三个点的多边形是非法的
	帮助文档中显示属性不可以,经测试geopolygon的所有顶点用perimeter属性。
	*QML 示例代码*

```javascript
	import QtQuick 2.12
	import QtQuick.Window 2.12
	import QtPositioning 5.2

	Window {
	    visible: true
	    width: 640
	    height: 480
	    title: qsTr("Hello World")
	    Item {
	       property variant region: QtPositioning.polygon([QtPositioning.coordinate(2.5, 153.1),QtPositioning.coordinate(-7.5, 13.1),QtPositioning.coordinate(-27.5, 153.1)])
           Component.onCompleted:{
                console.log(region)
                console.log(region.type)
                console.log(region.perimeter)
            }
	        }
	    }
	}

	>>
	qml: QGeoPolygon([ 2° 30' 0.0" N, 153° 6' 0.0" E,7° 30' 0.0" S, 13° 6' 0.0" E,27° 30' 0.0" S, 153° 6' 0.0" E, ])
	qml: 4
	qml: [2° 30' 0.0" N, 153° 6' 0.0" E,7° 30' 0.0" S, 13° 6' 0.0" E,27° 30' 0.0" S, 153° 6' 0.0" E]
```
georectangle 几何矩形类型
geoshape 几何形状类型
上述的几何类型都是geoshape的子类型,上述的每个类型具有geoshape的属性和方法
另外,几何数据类型都用QtPositioning创建。
geoshape的属性有
- bool **isEmpty** 是否是空的
 - bool **isValid** 是否是合法的
- ShapeType **type** 类型 (前面介绍的几何类型的一种)
	- GeoShape.UnknownType
	- GeoShape.RectangleType
	- GeoShape.CircleType
	- GeoShape.PathType  (Since Qt 5.9)
	- GeoShape.PolygonType (Since Qt 5.10)
注意:有些类型的方法或者属性在帮助文档中有明确定义,但是使用时仍未定义(bug),此时可采用Qt creator的调试模式,看看这个对象具有哪些方法和属性。
int
list 列表类型
使用方法和javascript的数组类型,和c++中的[QQmlListProperty](https://doc.qt.io/qt-5/qqmllistproperty.html)类型可自动相互转换
创建:[]
长度属性:length
添加:push()
matrix4x4 矩阵类型
*QML 示例代码*
```javascript
var a = Qt.matrix4x4(1,2,3,4,5,6,7,8,9,10,11,12,13,14,15,16);
var b = Qt.matrix4x4(4,5,6,7,8,9,10,11,12,13,14,15,16,17,18,19);
var c = a.times(b);
console.log(c.toString());
// QMatrix4x4(120, 130, 140, 150, 280, 306, 332, 358, 440, 482,
//524, 566, 600, 658, 716, 774)
···

matrix4x4  方法如下:
- *toString*()    //用于打印矩阵
- matrix4x4 ***times***(matrix4x4 other)  	//矩阵相乘
- vector4d ***times***(vector4d vector)   	//矩阵乘以向量
- matrix4x4 ***times***(real factor)          	//矩阵乘以标量
- matrix4x4 ***plus***(matrix4x4 other)   	//矩阵相加
- matrix4x4 ***minus***(matrix4x4 other)   //矩阵相减
- vector4d ***row***(int which)                   //返回某一行
- vector4d ***column***(int which)             //返回某一列
- real ***determinant***()                           //返回矩阵的行列式
- matrix4x4 ***inverted***()                        //矩阵的逆矩阵
- matrix4x4 ***transposed***()                   //矩阵的转置矩阵
- bool ***fuzzyEquals***(matrix4x4 other, real epsilon)   //判断两个矩阵是否近似相等,(如果两个矩阵中的每个对应元素的误差都在epsilon范围之内,就认为是近似相等)
-
palette 调色版
使用调色板可以设置窗口的前景色和背景色,按钮的背景色和字体颜色,简单场景可使用。
使用palette:Control::palette, Popup::palette, ApplicationWindow::palette
point 二维点数据类型
和Qt C++ 中的QPoint 或 QPointF 可相互转换。使用如:var pos = Qt.point(0, 20)
quaternion 四元数类型
提供的属性有:***scalar x y z*** 该类型和Qt C++中的[QQuaternion](https://doc.qt.io/qt-5/qquaternion.html)对应,做复杂的旋转缩放建议在c++中使用QQuaternion。该数据类型需要对四元数的定义进行深入了解。
real 浮点型
rect 矩形区域类型
提供的属性有:***x y width height*** 如:var rigion = Qt.rect(50, 50, 100, 100)
size 大小类型
提供的属性有:***width height*** 如:var size = Qt.size(150, 50)
string 字符串类型
提供的属性有:***length*** ,提供的属性很少,仅用于显示文本和传递字符串,对字符串的高级处理需要在c++端使用QString
url 路径类型
该类型和Qt c++中的QUrl数据类型对应。对于url类型的属性,输入的字符串和url不能进行比较,因为两者类型不同,且url.toString()和其值也不相同。看官网示例代码:
 Image {
    source: "pics/logo.png"

    Component.onCompleted: {
        // This prints 'false'. Although "pics/logo.png" was the input string,
        // it's been converted from a string to a URL, so these two are not the same.
        console.log(source == "pics/logo.png")

        // This prints 'true' as Qt.resovledUrl() converts the string into a
        // URL with the correctly resolved path
        console.log(source == Qt.resolvedUrl("pics/logo.png"))

        // This prints the absolute path, e.g. "file:///path/to/pics/logo.png"
        console.log(source.toString())
    }
}
var 自动类型
variant 和var类型类似
vector2d 二维向量
向量类型都提供了两个向量的 ***加法 减法 点乘 对应元素相乘 乘以标量 近似相等*** [接口](https://doc.qt.io/qt-5/qml-vector2d.html)。
以下内容可查看官方文档
vector3d 三维向量
vector4d 四维向量
Binding
Component
Connections
Date
Locale
Number
Qt
QtObject
String
Timer
QML基础对象类型
Accessible 给Item提供访问信息,主要用于屏幕阅读器
AnchorChanges
在状态state数组中使用,用于改变锚布局,但是锚布局的间隔需要使用PropertyChanges设置,如果需要对 AnchorsChanges 添加动画,必须使用 AnchorAnimation 。AnchorChanges 官方示例代码如下:
import QtQuick 2.0

Rectangle {
    id: window
    width: 120; height: 120
    color: "black"

    Rectangle { id: myRect; width: 50; height: 50; color: "red" }

    states: State {
        name: "reanchored"

        AnchorChanges {
            target: myRect
            anchors.top: window.top
            anchors.bottom: window.bottom
        }
        PropertyChanges {
            target: myRect
            anchors.topMargin: 10
            anchors.bottomMargin: 10
        }
    }

    MouseArea { anchors.fill: parent; onClicked: window.state = "reanchored" }
}
AnimatedImage 显示动图
AnimatedSprite 动画精灵
可以将一张图片分割成几部分进行循环播放
Animation 所有动画的基类
官方给出了各种动画示例代码
属性:
- alwaysRunToEnd : bool 该值为true表示,停止动画时(比如调用stop() 或者设置running 为false),该动画会继续执行完当前一次循环。
- loops : int 循环次数 一直循环,设置该值为Animation.Infinite
- paused : bool 暂停属性,暂停后不会影响running的属性值。 示例:true - > false -> true === 暂停 -> 继续->暂停 。
- running : bool 是否正在执行属性 示例:true - > false -> true === 暂停 -> 继续->暂停
信号:
- finished() :动画正常结束时会发送该信号,设置running = false,不会触发该信号,除了loop 设置Animation.Infinite的情况。只对顶级独立动画有用。
- started() :动画启动时发送该信号
- stopped() :停止时发送该信号,
方法:
-
complete() 完成当前循环,直接设置最终结果,并结束动画。
-
pause() 暂停动画
-
restart() 重启
-
resume() 继续
-
start() 启动
-
stop() 直接停止动画(alwaysRunToEnd 属性为true时除外),同时running 属性和 paused属性都会设置false(此时,alwaysRunToEnd属性不影响running和paused直接设置为false).
动画有如下几种
AnchorAnimation 改变锚布局时提供动画
和AnchorChanges 结合使用,使用方法见[官方代码示例](https://doc.qt.io/qt-5/qml-qtquick-anchoranimation.html)。Animator 是一种特殊类型的动画
它直接在Qt Quick的场景图上操作,而不是像常规动画类型那样在QML对象及其属性上操作。这样做的好处是,即使UI线程被阻塞,基于Animator的动画也可以在场景图的渲染线程上进行动画处理。
其子类动画有:OpacityAnimator, RotationAnimator, ScaleAnimator, UniformAnimator, XAnimator, and YAnimator。其中 UniformAnimator 动画用于ShaderEffect 向着色器以动画的形式传递Uniform变量。
ShaderEffect 中利用UniformAnimator 动态设置颜色,官方示例代码如下
ShaderEffect {
id: shader
width: 200
height: 200
property variant t;
UniformAnimator {
target: shader
uniform: "t"
from: 0
to: 1
duration: 1000
running: true
loops: Animation.Infinite
}
fragmentShader:
"
uniform lowp float t;
varying highp vec2 qt_TexCoord0;
void main() {
lowp float c = qt_TexCoord0.y;
gl_FragColor = vec4(0, 0, c * t, 1);
}
"
}
```
效果图:

3. **ParallelAnimation** 并行动画,该动画中可以包含多个动画,这些动画同时触发。
4. **ParentAnimation** 父节点改变动画。搭配ParentChange使用。
官方示例代码如下:
```javascript
import QtQuick 2.0
Item {
width: 200; height: 100
Rectangle {
id: redRect
width: 100; height: 100
color: "red"
}
Rectangle {
id: blueRect
x: redRect.width
width: 50; height: 50
color: "blue"
states: State {
name: "reparented"
ParentChange { target: blueRect; parent: redRect; x: 10; y: 10 }
}
transitions: Transition {
ParentAnimation {
NumberAnimation { properties: "x,y"; duration: 1000 }
}
}
MouseArea { anchors.fill: parent; onClicked: blueRect.state = "reparented" }
}
}
PathAnimation 路径动画
将目标Item沿着路径path移动。
| 属性 | 类型 | 描述 |
|---|---|---|
| anchorPoint | point | 移动过程中旋转时的锚点 |
| duration | int | 动画时长 |
| easing | group | 缓冲曲线 / 动画曲线 |
| endRotation | real | 移动过程中旋转时的锚点 |
| orientation | enumeration | 移动过程中旋转枚举,控制移动过程中的旋转方式 |
| orientationEntryDuration | real | 开始转动时长(毫秒) |
| orientationExitDuration | real | 转动结束时长(毫秒) |
| path | Path | 移动路径 |
| target | Item | 移动目标 |
PauseAnimation 暂停动画
在串行动画中用于两个动画之间暂停一段时间。
PropertyAction
用于动画期间立即指定属性值,属性改变过程中没有动画。在某一段动画过程中,可能需要立即指定某个属性的值,就可以使用PropertyAction。
比如在顺序动画中,动画开始时指定不透明度为0.5,动画结束时指定动画为不透明度1.0
		SequentialAnimation {
		    PropertyAction { target: img; property: "opacity"; value: .5 }
		    NumberAnimation { target: img; property: "width"; to: 300; duration: 1000 }
		    PropertyAction { target: img; property: "opacity"; value: 1 }
		}
	```
	同样,官方例子给出在Transition 中使用,结合PropertyChanges,动画之前立即指定属性值。
	```javascript
	Item {
	   width: 400; height: 400

	   Rectangle {
	       id: rect
	       width: 200; height: 100
	       color: "red"

	       states: State {
	           name: "rotated"
	           PropertyChanges { target: rect; rotation: 180; transformOrigin: Item.BottomRight }
	       }

	       transitions: Transition {
	           SequentialAnimation {
        			PropertyAction { target: rect; property: "transformOrigin" } //对比屏蔽该行代码前后的动画效果
        			RotationAnimation { duration: 1000; direction: RotationAnimation.Counterclockwise }
    			}
	       }

	       MouseArea {
	           anchors.fill: parent
	           onClicked: rect.state = "rotated"
	       }
	   }
	}
PropertyAnimation 属性动画
子动画有四个:ColorAnimation, NumberAnimation, RotationAnimation, Vector3dAnimation
官方给出了五种使用场景
- 在Transition中使用
Rectangle { id: rect width: 100; height: 100 color: "red" states: State { name: "moved" PropertyChanges { target: rect; x: 50 } } transitions: Transition { PropertyAnimation { properties: "x,y"; easing.type: Easing.InOutQuad } } } - 在Behavior中
Rectangle { width: 100; height: 100 color: "red" Behavior on x { PropertyAnimation {} } MouseArea { anchors.fill: parent; onClicked: parent.x = 50 } } - 在动画组中
Rectangle { width: 100; height: 100 color: "red" SequentialAnimation on x { loops: Animation.Infinite PropertyAnimation { to: 50 } PropertyAnimation { to: 0 } } } - 在槽函数中(语句块中)
MouseArea { anchors.fill: theObject onClicked: PropertyAnimation { target: theObject; property: "opacity"; to: 0 } } - 单独作为子控件
Rectangle {
    id: theRect
    width: 100; height: 100
    color: "red"

    // this is a standalone animation, it's not running by default
    PropertyAnimation { id: animation;
                        target: theRect;
                        property: "width";
                        to: 30;
                        duration: 500 }

    MouseArea { anchors.fill: parent; onClicked: animation.running = true }
}
ScriptAction 脚本执行
在动画中的某个时间点指定一段脚本代码,与 StateChangeScript搭配使用
| 属性 | 类型 | 描述 |
|---|---|---|
| script | script | 要执行的脚本函数 |
| scriptName | string | 脚本名称 |
| 示例代码: |
SequentialAnimation {
    NumberAnimation {}
    ScriptAction { script: doSomething(); }
    NumberAnimation {}
}

State {
    name: "state1"
    StateChangeScript {
        name: "myScript"
        script: doStateStuff();
    }
    // ...
}
// ...
Transition {
    to: "state1"
    SequentialAnimation {
        NumberAnimation { /* ... */ }
        ScriptAction { scriptName: "myScript" }
        NumberAnimation { /* ... */ }
    }
}
SequentialAnimation 顺序动画组
AnimationController 动画控制器
| 属性 | 类型 | 描述 |
|---|---|---|
| animation | Animation | 动画 |
| progress | real | 进度 |
| 一般动画都是由内部定时器驱动的,AnimationController可以通过progress手动控制动画进度。 |
示例代码如下:
import QtQuick 2.15
import QtQuick.Window 2.12

import QtPositioning 5.15
import QtQuick.Controls 2.15
import QtQuick.Layouts 1.3

ApplicationWindow {
    //id:window
    visible: true
    width: 600
    height: 400
    title: qsTr("Hello World")
    color: "gray"

    Image {
        id: img
        width: 200
        height: 150
        source: "qrc:/image/t2.jpg"
        opacity:1.0

    }

    SequentialAnimation {
        id:ani
        PropertyAction { target: img; property: "opacity"; value: .5 }
        NumberAnimation { target: img; property: "width"; to: 500; duration: 1000 }
        NumberAnimation { target: img; property: "width"; to: 150; duration: 1000 }
        PropertyAction { target: img; property: "opacity"; value: 1 }
    }

    AnimationController{
        id:controller
        animation: ani
        progress: slider.value
    }

    Slider{
        id:slider
        anchors.bottom: parent.bottom
        from:0
        to:1
    }

}
Animator 高级动画类型
一种特殊的动画类型,直接操作Qt Quick’s scene graph,而不像Animation那样操作的是QML对象和对象属性。Animator是基于scene graph的渲染线程的,所以当UI线程阻塞时,Animator也能正常运行。
Behavior 行为动画
为某个属性创建动画。
使用方式有两种:
//第一种
 Behavior on width {
        NumberAnimation { duration: 1000 }
    }
//第二种 这种方式可以用于自定义Behavior
Behavior {
    id: root
    property Item fadeTarget: targetProperty.object
    SequentialAnimation {
        NumberAnimation {
            target: root.fadeTarget
            property: "opacity"
            to: 0
            easing.type: Easing.InQuad
        }
        PropertyAction { } // actually change the controlled property between the 2 other animations
        NumberAnimation {
            target: root.fadeTarget
            property: "opacity"
            to: 1
            easing.type: Easing.OutQuad
        }
    }
}
BorderImage 带边框的图片
BorderImage 分为9个区域, 调整大小过程中,1、3、7、9保持不变,2 8依赖horizontalTileMode 进行scale 或者tile,4、6依赖verticalTileMode 进行scale 或者tile。5依赖horizontalTileMode 和verticalTileMode 进行scale 或者tile。
| 属性 | 类型 | 描述 |
|---|---|---|
| asynchronous | bool | 是否异步加载 |
| border.bottom | int | 下边距 |
| border.left | int | 左边距 |
| border.righ | int | 右边距 |
| border.top | int | 上边距 |
| currentFrame | int | 当前显示的帧索引[0 ~ frameCount -1],亲测改变其值不能动态显示动图,动图用AnimatedImage |
| frameCount | int | 图片帧总数 |
| horizontalTileMode | bool | 水平填充模式 |
| mirror | bool | 是否镜像 |
| progress | bool | 加载进度,多用于网络图片 |
| source | bool | 图片路径,可以是网址 |
| sourceSize | bool | 原图大小,只读属性 |
| status | bool | 加载状态 |
| verticalTileMode | bool | 垂直填充模式 |
 |
BorderImageMesh 一种用于ShaderEffect的图片控件
当使用BorderImage作为ShaderEffectSource时,可选用该控件作为ShaderEffect的mesh属性,其性能最优。
Canvas 画布控件
画布控件用于绘制各种图形,线条,复杂形状,图片,图案,阴影,文本等,可以将画布的输出保存为一个图片或者序列化为一个URL。在画布上渲染需要借助Context2D对象。
渲染目标有两种:Canvas.Image and Canvas.FramebufferObject
Canvas.Image 使用系统内存渲染。支持background thread 渲染。如果绘制的内容很复杂,比如有大量动画,就需要使用Canvas.FramebufferObject。
另外,Canvas可以作为纹理提供者,作为ShaderEffect的输入。同时,还可以通过实现QQuickPaintedItem用于绘制。
其属性如下:
| 属性 | 类型 | 描述 |
|---|---|---|
| available | bool | |
| canvasSize | size | 画布大小 |
| context | object | 画笔 |
| contextType | string | |
| renderStrategy | enumeration | |
| renderTarget | enumeration | |
| 绘制图片时,在onImageLoaded槽函数中,调用requestPaint()。 |
toDataURL() 函数将Canvas 输出为一个DataUrl,可用于在网页中显示(imag 标签的src),但是绘制的本地图片会在网页中加载失败。
示例代码:
import QtQuick 2.0
Canvas {
    id: mycanvas
    width: 100
    height: 200
    onPaint: {
        var ctx = getContext("2d");
        ctx.fillStyle = Qt.rgba(1, 0, 0, 1);
        ctx.fillRect(0, 0, width, height);
    }
}
Canvas 绘制图片有三种方式,其中会用到CanvasImageData 对象类型
import QtQuick 2.2

Rectangle{

    width: 480;
    height: 400;
    id: root;

    //绘制一个随机像素的图片
    Canvas{

        id: randomImageData;
        width: 120;
        height: 100;
        contextType: "2d";
        property var imageData: null;
        onPaint: {
            if(imageData == null){
                imageData = context.createImageData(120 , 100);
                for(var i = 0 ; i < 48000 ; i += 4){
                    imageData.data[i] = Math.floor(Math.random() *255);
                    imageData.data[i + 1] = Math.floor(Math.random() *255);
                    imageData.data[i + 2] = Math.floor(Math.random() *255);
                    imageData.data[i + 3] = Math.floor(Math.random() *255);
                }
            }
            context.drawImage(imageData , 0 , 0 );
        }
    }

    //绘制一个和本地颜色相同的图片
    Canvas{

        id: imageCanvas;
        property var poster: "icon.jpg";
        anchors.left: parent.left;
        anchors.top: randomImageData.bottom;
        anchors.topMargin: 20;
        width: 200;
        height: 230;
        onPaint: {

            var ctx  = getContext("2d");
            ctx.drawImage(poster , 0 ,0, width , height);
        }
        Component.onCompleted: loadImage(poster);
        onImageLoaded: {
            requestPaint();
            negative.setImageData(getContext("2d").createImageData(poster));
        }
    }

    //利用CanvasImageData绘图,并将图片颜色反转
    Canvas{

        id: negative;
        anchors.left: imageCanvas.right;
        anchors.leftMargin: 10;
        anchors.top: imageCanvas.top;
        width: 200;
        height: 230;
        contextType: "2d";
        property var imageData: null;

        onPaint: {
            if(imageData != null){
                context.drawImage(imageData , 0 ,0 , width , height);
            }
        }
        function setImageData(data){

            imageData = data;
            var limit = data.width *data.height * 4;

            for(var i = 0 ; i < limit ; i+= 4 ){
                imageData.data[i] = 255 - data.data[i];
                imageData.data[i + 1] = 255 - data.data[i + 1];
                imageData.data[i + 2] = 255 - data.data[i + 2];
                imageData.data[i + 3] = data.data[i + 3];

            }
            requestPaint();
        }
    }
}
CanvasGradient 设置渐变色
设置Context2D的渐变色,
创建线性渐变色:context.createLinearGradient()
创建圆锥形渐变色:context.createConicalGradient()
创建圆弧形渐变色:context.createRadialGradient()
示例代码:
  	context.strokeStyle="red"
      // 设置渐变色
      var gradient=context.createRadialGradient(40,40,70,80,80, 50)
      gradient.addColorStop(0.0, Qt.rgba(1,0,0,0.5))
      gradient.addColorStop(0.5, Qt.rgba(0,1,0,0.5))
      gradient.addColorStop(1.0, Qt.rgba(0,0,1,0.5))
      context.fillStyle=gradient
      context.beginPath()
      context.rect(0, 0, 100, 100)
      context.fill()
      context.stroke()
Column 列定位器
定位器布局控件有:Column, Row, Grid, and Flow
属性
| 属性 | 类型 | 描述 |
|---|---|---|
| padding | real | 四周间隔 |
| bottomPadding | real | |
| leftPadding | real | |
| rightPadding | real | |
| topPadding | real | |
| add | Transition | 添加或者显示子控件时的过渡 |
| move | Transition | 移动时动画 |
| populate | Transition | 定位器初次创建时的过渡 |
| spacing | real | 间隔 |
注意:过渡(Transition)和动画(Animation)有区别。
官方示例
Context2D 2维上下文
在Canvas中绘制图案的所需对象。该对象的方法较多,绘制几何图形较为复杂。详情查看官方文档
DoubleValidator(Validator 验证器)
QML 中提供的验证器,IntValidator DoubleValidator RegExpValidator RegularExpressionValidator
| 属性 | 类型 | 描述 |
|---|---|---|
| bottom | real | 最小值 默认负无穷大 |
| top | real | 最大值 默认负穷大 |
| decimals | int | 精度,小数个数,默认1000 |
| locale | string | 本地字符集,格式:language[_territory][.codeset][@modifier]" or “C” |
| notation | enumeration | 标记法:DoubleValidator.StandardNotation 标准 DoubleValidator.ScientificNotation 科学计数法 允许输入科学计数法 |
Drag 拖拽控件
注意:使用锚布局的控件作为Darg的target,该控件无法拖动。如果想要拖拽某个控件(未使用锚布局),又不需要其自身移动,可以使用一个Item作为拖拽目标,设置Drag.imageSource为该控件的grabImage.
拖拽使用的三个控件DropArea DragEvent Drag
DropArea 的 entered 、 positionChanged 、 dropped 信号的参数都是 DragEvent。 博客示例
官方示例
import QtQuick 2.8

Item {
    width: 200; height: 200

    Rectangle {
        anchors.centerIn: parent  // 使用了锚布局,无法拖动
        width: text.implicitWidth + 20; height: text.implicitHeight + 10
        color: "green"
        radius: 5

        Drag.active: dragArea.drag.active
        Drag.dragType: Drag.Automatic
        Drag.supportedActions: Qt.CopyAction
        Drag.mimeData: {
            "text/plain": "Copied text"
        }

        Text {
            id: text
            anchors.centerIn: parent
            text: "Drag me"
        }

        MouseArea {
            id: dragArea
            anchors.fill: parent

            drag.target: parent
            onPressed: parent.grabToImage(function(result) {
                parent.Drag.imageSource = result.url
            })
        }
    }
}
Flickable 可以鼠标拂动的控件
该控件属性较多,相对比较基础,可以查看官方说明文档
Flipable 可翻转的控件
| 属性 | 类型 | 描述 |
|---|---|---|
| back | Item | 背面的Item |
| front | Item | 正面的Item |
| side | enumeration | 当前显示的是正面(Flipable.Front)还是背面(Flipable.Back) |
示例代码
Flipable {
        id: flipable
        anchors.centerIn: parent
        width: 240
        height: 240

        property bool flipped: false

        front: AnimatedImage { source: "qrc:/image/004.gif"; anchors.centerIn: parent }
        back: AnimatedImage { source: "qrc:/image/002.gif"; anchors.centerIn: parent }

        transform: Rotation {
            id: rotation
            origin.x: flipable.width/2
            origin.y: flipable.height/2
            axis.x: 0; axis.y: 1; axis.z: 0     // set axis.y to 1 to rotate around y-axis
            angle: 0    // the default angle
        }

        states: State {
            name: "back"
            PropertyChanges { target: rotation; angle: 180 }
            when: flipable.flipped
        }

        transitions: Transition {
            NumberAnimation { target: rotation; property: "angle"; duration: 1000 }
        }

        MouseArea {
            anchors.fill: parent
            onClicked: flipable.flipped = !flipable.flipped
        }
    }
Flow 漂浮布局
属于定位器布局,和Column 大多属性相同。因为漂浮存在上下漂浮和左右漂浮,所以有flow和layoutDirection 属性
| 属性 | 类型 | 描述 |
|---|---|---|
| flow | enumeration | 漂浮的方向:Flow.LeftToRight(默认) Flow.TopToBottom |
| layoutDirection | enumeration | 布局方向 |
FocusScope
焦点控件,如果调用了FocusScope子控件(包括子控件的子控件)的forceActiveFocus(),那么,FocusScope的activeFocus属性将为true.
引用一位博主的一段话:
*
在一个FocusScope的内部,只能有一个元素将focus属性设置为true,如果有多个元素将focus属性设置为true,则只有第一个被设置为true,其它元素的被设置为false。
如果一个FocusScope获得了活动焦点,则它包含的元素中设置focus属性为true的元素(如果有的话),也同样获得活动焦点。如果FocusScope包含的元素仍为FocusScope,则前面的特性将一直延续下去。
示例代码
import QtQuick 2.0

FocusScope{
    id:root
    Rectangle {
        width: 300
        height: 300
        border.color:root.activeFocus? "gray":"green"
        border.width: 2
        Rectangle{
            width: 100
            height: 100
            color: "red"
            anchors.centerIn: parent
            MouseArea{
                anchors.fill: parent
                onPressed: {
                    parent.forceActiveFocus()
                }
            }
        }
    }
}
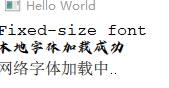
FontLoader 字体加载器
可加载系统字体、本地文件字体和网络字体
示例代码
import QtQuick 2.12
import QtQuick.Window 2.12

Window {
    visible: true
    width: 640
    height: 480
    title: qsTr("Hello World")
    Column {
        FontLoader { id: fixedFont; name: "Courier" }
        FontLoader { id: localFont; source: "qrc:/FZZJ-HYJTJW.TTF" }
        FontLoader { id: webFont; source: "http://www.mysite.com/myfont.ttf" }

        Text { text: "Fixed-size font"; font.family: fixedFont.name }
        Text { text: localFont.status == FontLoader.Ready ? '本地字体加载成功' : '本地字体加载中..'; font.family: localFont.name }
        Text { text: webFont.status == FontLoader.Ready ? '网络字体加载成功' : '网络字体加载中..';font.family: webFont.name }
    }
}
FontMetrics 字体度量器
可以获取字体的一些基本信息。可以通过font属性获取或者设置字体的信息。同时提供了一些方法,可以省略文本或者获取文本的外接矩形。
Gradient 颜色梯度值
属性
| 属性 | 类型 | 描述 |
|---|---|---|
| orientation | enumeration | 方向 Gradient.Vertical Gradient.Horizontal |
| stops | list<GradientStop> | 中间值,控制梯度值 |
官方示例代码
Rectangle {
    width: 100; height: 100
    gradient: Gradient {
        GradientStop { position: 0.0; color: "red" }
        GradientStop { position: 0.33; color: "yellow" }
        GradientStop { position: 1.0; color: "green" }
    }
}
GraphicsInfo 渲染信息控件(附加属性)
可获取当前Item使用的渲染引擎类型,版本和着色器编译类型信息,该属性为附加属性,不可以单独创建。
示例代码:获取Text的渲染信息
Text {
    anchors.centerIn: parent
    text: GraphicsInfo.shaderType
    Component.onCompleted: {
        console.log(GraphicsInfo.shaderType,GraphicsInfo.renderableType,GraphicsInfo.api)
    }
}
Grid 格子定位器
具有定位器的基本动画属性和方向属性。可指定行数和列数,默认四列,可不指定行数。具体属性看官方文档,使用相对简单。
官方示例代码
import QtQuick 2.0

Grid {
    columns: 3
    spacing: 2
    Rectangle { color: "red"; width: 50; height: 50 }
    Rectangle { color: "green"; width: 20; height: 50 }
    Rectangle { color: "blue"; width: 50; height: 20 }
    Rectangle { color: "cyan"; width: 50; height: 50 }
    Rectangle { color: "magenta"; width: 10; height: 10 }
}

GridMesh 网格点生成器
GridMesh定义了一个矩形网格,它由均匀分布在网格中的顶点组成。它用于生成几何图形。使用resolution属性指定网格分辨率。主要用与ShaderEffect生成网格点,类似再顶点之间插值多个网格点,使得传入顶点着色器的顶点数量增加。
示例代码
    ShaderEffect {
        anchors.centerIn: parent
        width: 400
        height: 400
        mesh: GridMesh {
            resolution: Qt.size(100, 100)
        }
        property variant source: Image {
            source: "qrc:/image/t2.jpg"
            sourceSize { width: 400; height: 400 }
        }
                vertexShader: "
                uniform highp mat4 qt_Matrix;
                attribute highp vec4 qt_Vertex;
                attribute highp vec2 qt_MultiTexCoord0;
                varying highp vec2 qt_TexCoord0;
                uniform highp float width;
                void main() {
                    highp vec4 pos = qt_Vertex;
                    highp float d = .5 * smoothstep(0., 1., qt_MultiTexCoord0.y);
                    pos.x = width * mix(d, 1.0 - d, qt_MultiTexCoord0.x);
                    gl_Position = qt_Matrix * pos;
                    qt_TexCoord0 = qt_MultiTexCoord0;
                }"
    }
使用mesh 和不使用mesh的区别。


HoverHandler 鼠标和手势处理控件
相应鼠标时间和平板的光标事件。该类事件的基类是PointerHandler
Image 图片显示控件
支持矢量图和位图。如果要显示动图,请使用AnimatedSprite 和 AnimatedImage.
1 .加载大图片时,可以通过设置asynchronous 属性,让系统利用一个优先级较低的线程去加载。
2.加载网路图片时,自动会利用异步加载。
3.相同source 的image是共享数据的。
4.可以加载OpenGL 纹理文件(未亲测)。
PKM (since Qt 5.10)
KTX (since Qt 5.11)
ASTC (since Qt 5.13)
属性如下:
| 属性 | 名称 | 描述 |
|---|---|---|
| asynchronous | bool | 是否异步加载,只对加载本地文件有效,加载网络文件默认是异步的。 |
| autoTransform | bool | 是否自动使用图片的原始变换信息,比如EXIF 方向。 |
| cache | bool | 是否缓存,一般处理大图像时设置false |
| currentFrame | int | 亲测该属性不好用,加载动图后,设置该属性不起作用 |
| fillMode | enumeration | 填充方式,详细见官方 |
| frameCount | int | 图片总的帧数 |
| horizontalAlignment | enumeration | 当fillMode不是铺满时有用。 |
| verticalAlignment | enumeration | 当fillMode不是铺满时有用。 |
| mipmap | bool | 设置为ture,缩放时,画质较高,但是性能较低。 |
| mirror | bool | 是否镜像 |
| paintedHeight | real | 只读属性,显示的高度和宽度,当fillMode是Image.PreserveAspectFit Image.PreserveAspectCrop 时,和height可能不一致。其他大多数情况两者都相等。 |
| paintedWidth | real | |
| progress | real | 异步加载进度 |
| smooth | bool | 是否进行平滑处理 |
| source | url | 路径,可以是本地,也可以是网址。 |
| sourceClipRect | rect | 裁剪区域 |
| sourceSize | QSize | 只读属性,图片的真实大小 |
| status | enumeration | 加载状态 (Image.Null/Image.Ready/Image.Loading/Image.Error) |
Item
该控件是Qt Quick中的可见控件的父控件。Item本身不可见,但是其属性可以控制其子控件的可见属性,比如位置和大小等。
附加属性:
Keys :按键处理
LayoutMirroring:布局镜像
Layers:分层处理,Item将会被渲染到一个离屏的surface上,当渲染的Item具有复杂的层次关系时,使用分层可以得到优化处理。
按键处理:Key Handling
Item中有一个附加属性:可以处理键盘事件。
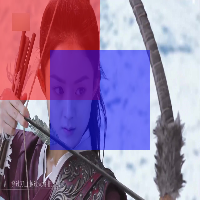
当启用分层时,透明度的设置后,重叠区域不会混合。示例如下:
启用分层时的不透明度设置为0.5:
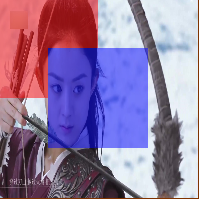
关闭分层时的不透明度设置为0.5:
import QtQuick 2.15
import QtQuick.Window 2.15
import QtQuick.Controls 2.15
Window {
    id:window
    visible: true
    width: 1000
    height: 800
    title: qsTr("Kompass")
    color: Qt.rgba(0.5,0.2,0.0,1.0)
    Image{
        width: 200
        height: 200
        source: "qrc:/image/imag5.jpg"
    }

    Item {
        id: name
        opacity: 0.5
        //layer.enabled: true  // 启动分层
        width: 200
         height: 200
        Rectangle{
            width: 100
            height: 100
            color: "red"
        }
        Rectangle{
            x:50
            y:50
            width: 100
            height: 100
            color: "blue"
        }
    }

}
Item复杂属性
| 属性 | 类型 | 描述 |
|---|---|---|
| anchors.baseline | AnchorLine | 不含文本的该属性和anchors.top相同,含有文本item,该值设置文本的下边对齐线 |
| antialiasing | bool | 抗锯齿 |
| containmentMask | QObject* | 设置遮罩模板对象,使用该对象的contains函数 |
| implicitHeight | real | 隐式的宽度和高度,当Item的大小根据其内容大小设置时有用。大多数Item该属性为0,Text Image等控件的隐式大小不为0. |
| implicitWidth | real | 同上 |
| layer.effect | Component | 为该控件加特效,一般使用ShaderEffet |
| layer.enabled | bool | Item的层次是否启用。若为false ,layer的其他属性不生效。 |
| layer.format | enumeration | 纹理格式 |
| layer.mipmap | bool | 开启多级纹理mipmap |
| layer.samplerName | string | 采样器名称,还没具体明白其含义 |
| layer.samples | enumeration | 一个像素点的采样个数,比如设置为2,4 ,将会使用多重采样。 |
| layer.smooth | bool | 是否平滑处理 |
| layer.sourceRect | rect | 设置图层的大小和位置,可用于裁剪控件内容 |
| layer.textureMirroring | enumeration | 纹理是否镜像 |
| layer.textureSize | size | 设置纹理的大小,当纹理大小小于控件时,画面会模糊 |
| layer.wrapMode | enumeration | 边缘拉伸模式 |
| resources | list<Object> | 不可见子控件列表 |
| children | list | 可见控件列表 |
| data | list | resources 和children 的并集 |
| state | string | 状态 |
| states | list<State> | |
| transform | list<Transform> | |
| transformOrigin | enumeration | |
| transitions | list<Transition> |
示例
anchors.baseline
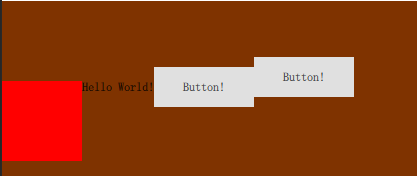
    Item {
        width: 400; height: 200
        Rectangle {
            y:80
            id: rectangle
            width: 80; height: 80
            color: "red"
        }
        Text {
            id:tex
            text: "Hello World!"
            //anchors.baseline: rectangle.baseline
            anchors.left: rectangle.right
            anchors.top: rectangle.top
        }
        Button{
            id:btn1
            text: "Button!"
            anchors.baseline: tex.baseline
            anchors.left: tex.right
        }
        Button{
            text: "Button!"
            anchors.baseline: rectangle.baseline
            anchors.left: btn1.right
        }
   }
containmentMask 使用shape作为Item的mask,鼠标事件仅在shape区域之内生效。
    Rectangle {
        width: 120
        height: 120
        color: area.pressed ? "steelBlue" : "lightGray"
        containmentMask: ctr
        //TapHandler { id: th }
        MouseArea{
            id:area
            anchors.fill: parent
            onPressed: {
                console.log("contains:",parent.contains(Qt.point(mouse.x,mouse.y)))
            }
        }

        Shape {
            id: ctr
            anchors.fill: parent
            containsMode: Shape.FillContains

            ShapePath {
                strokeColor: "red"
                fillColor: "blue"
                startX: 30; startY: 30
                PathLine { x: ctr.width - 30; y: ctr.height - 30 }
                PathLine { x: 30; y: ctr.height - 30 }
                PathLine { x: 30; y: 30 }
            }
        }
    }
ItemGrabResult
该类型为 Item::grabToImage() 的返回值类型,其共有两个属性和一个方法
| 类型 | 属性 | 描述 |
|---|---|---|
| image | variant | 对应QImage |
| url | url | 用于保存路径或作为Image的source |
| void | saveToFile(fileName) | 保存截图到指定路径fileName |
对象类型
QtQuick导入的大多数对象类型都基于Item类型,它本身派生自QtObject。当您导入QtQuick时,Qt QML模块提供的QML对象类型(例如QtObject和Component)也可用。
创建一个QtQuick工程
QML 信号槽
QML 枚举的使用
QML 动态加载控件
QML导入js文件
c++和QML 交互
使用C++属性和导入QML类型
QML中要使用C++类或者对象一般由两种方式:c++定义方式,QML定义方式
- C++定义方式(主要使用setContextProperty()函数)
- QML的方式,(主要使用qmlRegisterType()函数)
在QML中使用C++属性、函数和信号
- 访问属性
- 访问函数
- 访问信号
注册QML类型
- 注册可实例化对象类型
- 注册不可实例化对象类型
有时需要注册一个不可实例化的对象类型,比如一个C++类:- 是接口类型;使用qmlRegisterInterface()注册指定QML类型名称的Qt接口类型;
- 一个基类,不需要通过QML代码访问;使用无参的qmlRegisterType()函数;
- 仅仅提供一些有用的枚举;使用qmlRegisterUncreatableType()函数
- 是一个单例,只能使用其唯一的实例,不应该从QML进行实例化。使用qmlRegisterSingletonType()函数
QML 中的模型视图代理
数据存储
(保存和加载数据)
SQL
XML
JSON
Local Storage
QSetting
Qt Resource System
文件压缩(File Archiving)


 625
625


 被折叠的 条评论
为什么被折叠?
被折叠的 条评论
为什么被折叠?
 到【灌水乐园】发言


