


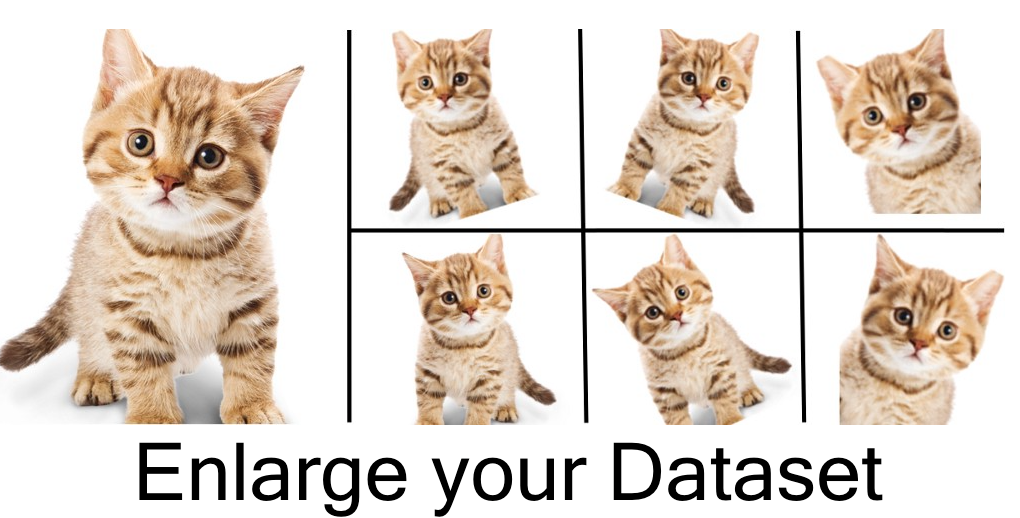
对于工程算法训练,在参数和训练方法确定以后,大部分的时间是在增加数据的多样性,普适性 一方面可以防止overfiting,另外一方面可以是模型在真实场景中有更好的泛化作用。
那么如何增大我们的数据集合呢?可以通过视频数据解析,网络爬虫,数据库拖库等方法增大数据集的量级。但是一些特别的需求,比如 “face emotion”训练, 这些数据是很难通过网络进行获取的,而且通过人工tagger方法也会面临很多问题,比如每个标注人员的看法不一,有的人认为上图是哭泣?,有的人则认为他是开心^_^

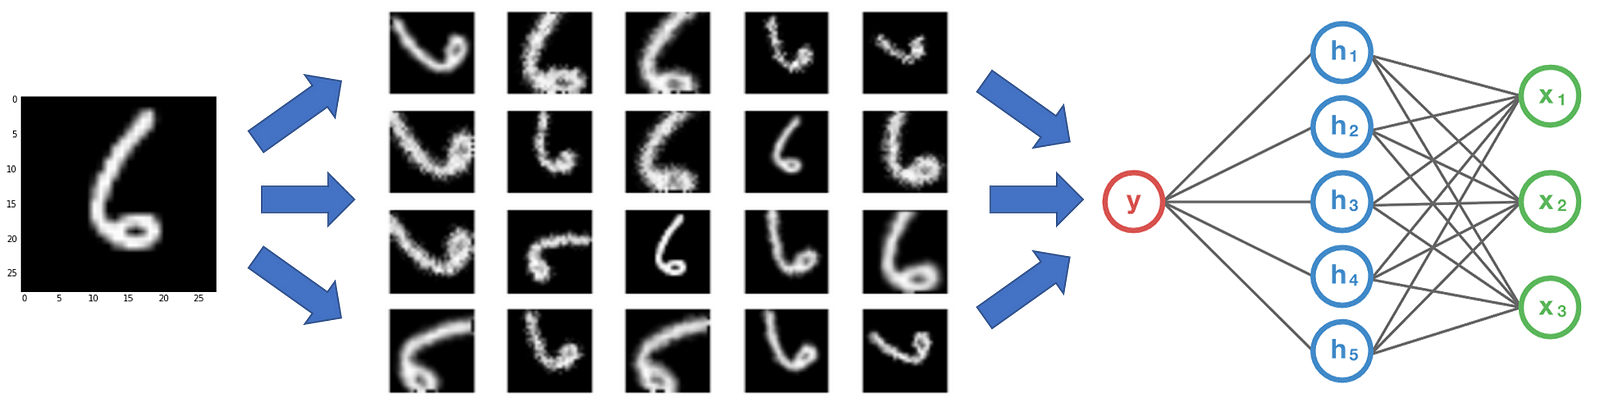
通过机器则更难对这些信息进行学习和训练,那么如何使小量的数据集进行多样化处理,使其价值double或者treble呢?
can my “state-of-the-art” neural network perform well with the meagre amount of data I have?
Yes.我们的优化目的,是当参数沿着正确的方向调整时,模型的loss可以达到最低。
How do I get more data, if I don’t have “more data”?
因此,为了获得更多数据,我们只需要对现有数据集进行微小改动。轻微更改,例如翻转或翻译或轮换。无论如何,我们的神经网络会认为这些是不同的图像。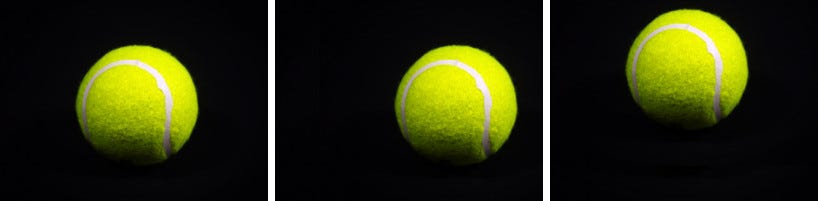
卷积神经网络CNN,对放置在不同方向的对象,也能进行稳健的分类,即具有不变性的属性。更具体地,CNN对于平移,不同视角,尺度大小或光照等(或上述的组合)可以是不变的。
这基本上是数据增加的前提。在实际场景中,我们可能会在一组有限的条件下获取图像数据集。但是,我们的目标应用可能存在于各种条件下,例如不同的方向,位置,比例,亮度等。我们通过使用额外的合成对数据进行修改,并训练我们的神经网络来解释这些情况。
Can augmentation help even if I have lots of data?
是。它有助于增加数据集中的相关数据量。这与神经网络学习的方式有关。
Your neural network is only as good as the data you feed it.
Where do we augment data in our ML pipeline?
答案似乎很明显;我们在将数据提供给模型之前进行扩充吗?是的,但你有两个选择。一种选择是事先执行所有必要的转换,从根本上增加数据集的大小。另一种选择是在将小批量送到机器学习模型之前,在小批量上执行这些转换。
- 第一个选项称为离线扩充。对于相对较小的数据集,此方法是首选,因为您最终会将数据集的大小增加一个等于您执行的转换次数的因子(例如,通过翻转我的所有图像,我会增加数据集的大小系数为2)。
- 第二个选项称为在线增强,或即时增强。对于较大的数据集,此方法是首选,因为您无法承受大小的爆炸式增长。相反,您将对要提供给模型的迷你批次执行转换。一些机器学习框架支持在线增强,可以在GPU上加速。
Popular Augmentation Techniques
数据增强的方法有很多,PIL、OpenCV、skimage等都提供了对应的接口,我们也可以自定义kernel对像素进行操作,实现我们的增强效果,在Pytorch中torchvision.transforms这个包提供了resize、crop等常见的data augmentation操作,基本上PyTorch中的data augmentation操作都可以通过该接口实现。该包主要包含两个脚本:transformas.py和functional.py,前者定义了各种data augmentation的类,在每个类中通过调用functional.py中对应的函数完成data augmentation操作。
1、Compose
compose参数是一个参数列表transforms,通过循环遍历对一个图像进行迭代覆盖操作,返回最终结果。
class Compose(object):
    """Composes several transforms together.

    Args:
        transforms (list of ``Transform`` objects): list of transforms to compose.

    Example:
        >>> transforms.Compose([
        >>>     transforms.CenterCrop(10),
        >>>     transforms.ToTensor(),
        >>> ])
    """

    def __init__(self, transforms):
        self.transforms = transforms

    def __call__(self, img):
        for t in self.transforms:
            img = t(img)
        return img

    def __repr__(self):
        format_string = self.__class__.__name__ + '('
        for t in self.transforms:
            format_string += '\n'
            format_string += '    {0}'.format(t)
        format_string += '\n)'
        return format_string
其中transforms中可以包含下面系统给我们准备的方法:
__all__ = ["Compose", "ToTensor", "ToPILImage", "Normalize", "Resize", "Scale", "CenterCrop", "Pad",
           "Lambda", "RandomApply", "RandomChoice", "RandomOrder", "RandomCrop", "RandomHorizontalFlip",
           "RandomVerticalFlip", "RandomResizedCrop", "RandomSizedCrop", "FiveCrop", "TenCrop", "LinearTransformation",
           "ColorJitter", "RandomRotation", "RandomAffine", "Grayscale", "RandomGrayscale",
           "RandomPerspective"]
2、Flip(RandomHorizontalFlip&RandomVerticalFlip)
翻转指的是水平方面对折翻转(常见)和垂直方向的翻转不常见,其中的参数是随机翻转的概率(float),默认是0.5 可以自己定义
参数:
p- 概率,默认值为 0.5
class RandomHorizontalFlip(object):
    """Horizontally flip the given PIL Image randomly with a given probability.

    Args:
        p (float): probability of the image being flipped. Default value is 0.5
    """

    def __init__(self, p=0.5):
        self.p = p

    def __call__(self, img):
        """
        Args:
            img (PIL Image): Image to be flipped.

        Returns:
            PIL Image: Randomly flipped image.
        """
        if random.random() < self.p:
            return F.hflip(img)
        return img

    def __repr__(self):
        return self.__class__.__name__ + '(p={})'.format(self.p)


class RandomVerticalFlip(object):
    """Vertically flip the given PIL Image randomly with a given probability.

    Args:
        p (float): probability of the image being flipped. Default value is 0.5
    """

    def __init__(self, p=0.5):
        self.p = p

    def __call__(self, img):
        """
        Args:
            img (PIL Image): Image to be flipped.

        Returns:
            PIL Image: Randomly flipped image.
        """
        if random.random() < self.p:
            return F.vflip(img)
        return img

    def __repr__(self):
        return self.__class__.__name__ + '(p={})'.format(self.p)
水平翻转(1,2)垂直翻转(1,3)

3、Rotation旋转
通常对于旋转来说,我们会使用RandomRotation(10)或者RandomRotation(5)表示在|args|内进行旋转下图是旋转90度的demo
参数:
class torchvision.transforms.RandomRotation(degrees, resample=False, expand=False, center=None)
- degress- (sequence or float or int) ,若为单个数,如 30,则表示在(-30,+30)之间随机旋转若为sequence,如(30,60),则表示在30-60度之间随机旋转
- resample- 重采样方法选择,可选 PIL.Image.NEAREST, PIL.Image.BILINEAR, PIL.Image.BICUBIC,默认为最近邻
- expand- ?
- center- 可选为中心旋转还是左上角旋转

class RandomRotation(object):
    """Rotate the image by angle."""
    def __init__(self, degrees, resample=False, expand=False, center=None):
        if isinstance(degrees, numbers.Number):
            if degrees < 0:
                raise ValueError("If degrees is a single number, it must be positive.")
            self.degrees = (-degrees, degrees)
        else:
            if len(degrees) != 2:
                raise ValueError("If degrees is a sequence, it must be of len 2.")
            self.degrees = degrees
        self.resample = resample
        self.expand = expand
        self.center = center
    @staticmethod
    def get_params(degrees):
        """Get parameters for ``rotate`` for a random rotation.
        Returns:
            sequence: params to be passed to ``rotate`` for random rotation.
        """
        angle = random.uniform(degrees[0], degrees[1])
        return angle

    def __call__(self, img):
        """
        Args:
            img (PIL Image): Image to be rotated.

        Returns:
            PIL Image: Rotated image.
        """
        angle = self.get_params(self.degrees)
        return F.rotate(img, angle, self.resample, self.expand, self.center)
4、Crop 裁剪操作
crop操作给定了5个API,随机裁剪:transforms.RandomCrop 中心裁剪:transforms.CenterCrop随机长宽比裁剪 transforms.RandomResizedCrop上下左右中心裁剪:transforms.FiveCrop 上下左右中心裁剪后翻转: transforms.TenCrop
下述的两种是常见的:
1)随机裁剪:transforms.RandomCrop依据给定的size随机裁剪
参数:
class torchvision.transforms.RandomCrop(size, padding=None, pad_if_needed=False, fill=0, padding_mode=‘constant’)
- size- (sequence or int),若为sequence,则为(h,w),若为int,则(size,size)
- padding-(sequence or int, optional),此参数是设置填充多少个pixel。
- 当为int时,图像上下左右均填充int个,例如padding=4,则上下左右均填充4个pixel,若为3232,则会变成4040。
- 当为sequence时,若有2个数,则第一个数表示左右扩充多少,第二个数表示上下的。当有4个数时,则为左,上,右,下。
- fill- (int or tuple) 填充的值是什么(仅当填充模式为constant时有用)。int时,各通道均填充该值,当长度为3的tuple时,表示RGB通道需要填充的值。
- padding_mode- 填充模式,这里提供了4种填充模式,1.constant,常量 2.edge 按照图片边缘的像素值来填充 3.reflect,暂不了解 4. symmetric,暂不了解。
2)随机长宽比裁剪 transforms.RandomResizedCrop
随机大小,随机长宽比裁剪原始图片,最后将图片resize到设定好的size
参数:
class torchvision.transforms.RandomResizedCrop(size, scale=(0.08, 1.0), ratio=(0.75, 1.3333333333333333), interpolation=2)
- size- 输出的分辨率
- scale- 随机crop的大小区间,如scale=(0.08, 1.0),表示随机crop出来的图片会在的0.08倍至1倍之间。
- ratio- 随机长宽比设置
- interpolation- 插值的方法,默认为双线性插值(PIL.Image.BILINEAR)

5、ColorJitter
修改输入图像的4大参数值:brightness, contrast and saturation,hue,也就是亮度,对比度,饱和度和色度。可以根据注释来合理设置这4个参数。
参数:
brightness - [max(0, 1 - brightness), 1 + brightness]
contrast - [max(0, 1 - contrast), 1 + contrast]
saturation - [max(0, 1 - saturation), 1 + saturation]
hue - [-hue, hue] && 0<=hue<= 0.5
6、Resize
Resize类是对PIL Image做resize操作的,几乎都要用到。这里输入可以是int,此时表示将输入图像的短边resize到这个int数,长边则根据对应比例调整,图像的长宽比不变。如果输入是个(h,w)的序列,h和w都是int,则直接将输入图像resize到这个(h,w)尺寸
class Resize(object):
    #Resize the input PIL Image to the given size.
    def __init__(self, size, interpolation=Image.BILINEAR):
        assert isinstance(size, int) or (isinstance(size, Iterable) and len(size) == 2)
        self.size = size
        self.interpolation = interpolation

    def __call__(self, img):
        """
        Args:
            img (PIL Image): Image to be scaled.

        Returns:
            PIL Image: Rescaled image.
        """
        return F.resize(img, self.size, self.interpolation)

    def __repr__(self):
        interpolate_str = _pil_interpolation_to_str[self.interpolation]
        return self.__class__.__name__ + '(size={0}, interpolation={1})'.format(self.size, interpolate_str)
7、Normalize
对数据按通道进行标准化,即先减均值,再除以标准差
参数:
mean-均值
std-标准差
class Normalize(object):
    """Normalize a tensor image with mean and standard deviation.
    Given mean: ``(M1,...,Mn)`` and std: ``(S1,..,Sn)`` for ``n`` channels, this transform
    will normalize each channel of the input ``torch.*Tensor`` i.e.
    ``input[channel] = (input[channel] - mean[channel]) / std[channel]``

    .. note::
        This transform acts out of place, i.e., it does not mutates the input tensor.

    Args:
        mean (sequence): Sequence of means for each channel.
        std (sequence): Sequence of standard deviations for each channel.
    """

    def __init__(self, mean, std, inplace=False):
        self.mean = mean
        self.std = std
        self.inplace = inplace

    def __call__(self, tensor):
        """
        Args:
            tensor (Tensor): Tensor image of size (C, H, W) to be normalized.

        Returns:
            Tensor: Normalized Tensor image.
        """
        return F.normalize(tensor, self.mean, self.std, self.inplace)

    def __repr__(self):
        return self.__class__.__name__ + '(mean={0}, std={1})'.format(self.mean, self.std)
8、ToPILImage
将 tensor 或者 ndarray 的数据转换为 PIL Image 类型数据
参数:
mode- 为 None 时,为 1 通道, mode=3 通道默认转换为 RGB, 4 通道默认转换为 RGBA
class ToPILImage(object):
    """Convert a tensor or an ndarray to PIL Image.

    Converts a torch.*Tensor of shape C x H x W or a numpy ndarray of shape
    H x W x C to a PIL Image while preserving the value range.

    Args:
        mode (`PIL.Image mode`_): color space and pixel depth of input data (optional).
            If ``mode`` is ``None`` (default) there are some assumptions made about the input data:
             - If the input has 4 channels, the ``mode`` is assumed to be ``RGBA``.
             - If the input has 3 channels, the ``mode`` is assumed to be ``RGB``.
             - If the input has 2 channels, the ``mode`` is assumed to be ``LA``.
             - If the input has 1 channel, the ``mode`` is determined by the data type (i.e ``int``, ``float``,
              ``short``).

    .. _PIL.Image mode: https://pillow.readthedocs.io/en/latest/handbook/concepts.html#concept-modes
    """
    def __init__(self, mode=None):
        self.mode = mode

    def __call__(self, pic):
        """
        Args:
            pic (Tensor or numpy.ndarray): Image to be converted to PIL Image.

        Returns:
            PIL Image: Image converted to PIL Image.

        """
        return F.to_pil_image(pic, self.mode)

    def __repr__(self):
        format_string = self.__class__.__name__ + '('
        if self.mode is not None:
            format_string += 'mode={0}'.format(self.mode)
        format_string += ')'
        return format_string
9、ToTensor
将 PIL Image 或者 ndarray 转换为 tensor,并且归一化至[0-1]
class ToTensor(object):
    """Convert a ``PIL Image`` or ``numpy.ndarray`` to tensor.

    Converts a PIL Image or numpy.ndarray (H x W x C) in the range
    [0, 255] to a torch.FloatTensor of shape (C x H x W) in the range [0.0, 1.0]
    if the PIL Image belongs to one of the modes (L, LA, P, I, F, RGB, YCbCr, RGBA, CMYK, 1)
    or if the numpy.ndarray has dtype = np.uint8

    In the other cases, tensors are returned without scaling.
    """

    def __call__(self, pic):
        """
        Args:
            pic (PIL Image or numpy.ndarray): Image to be converted to tensor.

        Returns:
            Tensor: Converted image.
        """
        return F.to_tensor(pic)

    def __repr__(self):
        return self.__class__.__name__ + '()'
坚持一件事情或许很难,但坚持下来一定很酷!^_^


 463
463

 被折叠的 条评论
为什么被折叠?
被折叠的 条评论
为什么被折叠?
 到【灌水乐园】发言


