场景一:使用属性动画完成登录的动效
效果图

方案
控制输入框的宽度和显隐状态实现第一段动画,输入框的缩放动画完成后onFinish隐藏输入框,同时展示加载动画。
核心代码
Column() {

LoadingProgress()

.width(60)

.height(60)

}

.width(80)

.height(80)

.borderRadius(40)

.backgroundColor(Color.White)

.justifyContent(FlexAlign.Center)

.position({ x: 90, y: 0 })

.opacity(this.loadingOpacity)

.animation({

duration: 300,

playMode: PlayMode.Alternate,

expectedFrameRateRange: {

min: 20,

max: 120,

expected: 90,

}

})

TextInput({ text: $this.username, placeholder: "请输入用户名", controller: this.controller })

.placeholderColor("#D4D3D1")

.backgroundColor("#ffffff")

.width(this.inputWidth)

.height(40)

.visibility(this.inputVisibility)

.border({

width: {

left: 0,

right: 0,

top: 0,

bottom: 1

},

color: { bottom: Color.Gray },

radius: { topLeft: this.inputRadius, topRight: this.inputRadius },

style: { bottom: BorderStyle.Solid }

})

.id("username")

.defaultFocus(true)

.animation({

duration: 300,

playMode: PlayMode.Alternate,

onFinish: () => {

if (this.isLogin) {

this.inputVisibility = Visibility.Hidden;

this.loadingOpacity = 1;

this.isLogin = false;

}

},

expectedFrameRateRange: {

min: 20,

max: 120,

expected: 90,

}

})
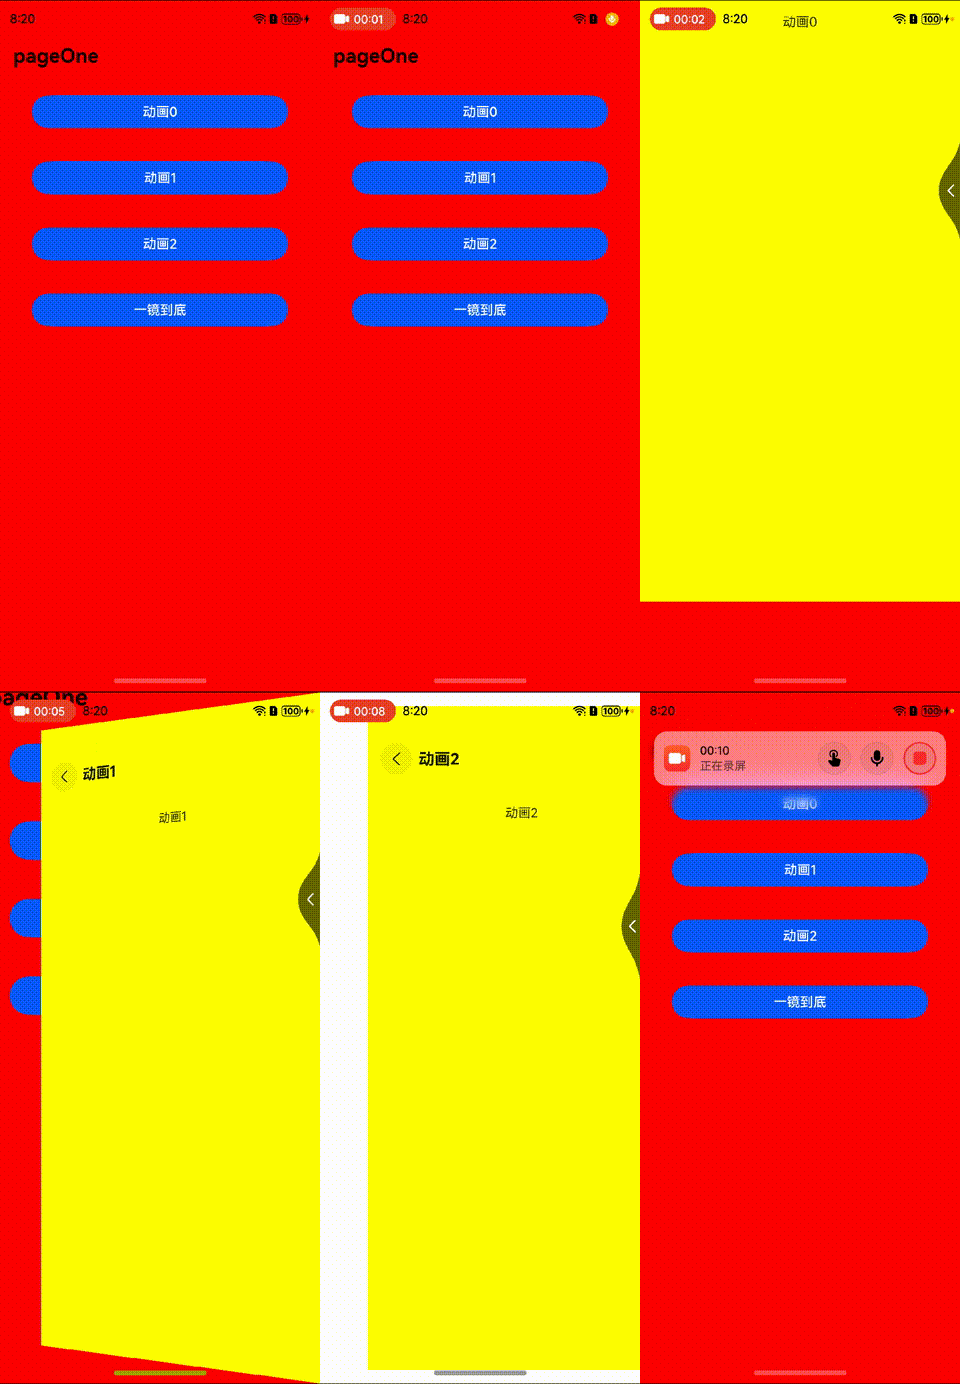
场景二:使用Navigation完成不同的转场动画。
效果图

方案
配置完自定义的转场动画,然后将name指定的NavDestination页面信息入栈。
核心代码
// PageOne.ets

Button('动画1', { stateEffect: true, type: ButtonType.Capsule })Button('动画0', { stateEffect: true, type: ButtonType.Capsule })

.width('80%')

.height(40)

.margin(20)

.onClick(() => {

CustomTransition.getInstance().registerNavParam(this.pageId, (isPush: boolean, isExit: boolean) => {

}, (isPush: boolean, isExit: boolean)=> {

}, (isPush: boolean, isExit: boolean) => {

}, 200);

this.pageInfos.pushPathByName('pageTwo', null) //将name指定的NavDestination页面信息入栈,传递的数据为param

})

Button('动画1', { stateEffect: true, type: ButtonType.Capsule })

.width('80%')

.height(40)

.margin(20)

.onClick(() => {

CustomTransition.getInstance().registerNavParam(this.pageId, (isPush: boolean, isExit: boolean) => {

this.myScale = isExit ? 1 : 1.2;

}, (isPush: boolean, isExit: boolean)=> {

this.myScale = isExit ? 1.2 : 1;

}, (isPush: boolean, isExit: boolean) => {

this.myScale = 1;

}, 200);

this.pageInfos.pushPathByName('pageThree', null) //将name指定的NavDestination页面信息入栈,传递的数据为param

})

Button('动画2', { stateEffect: true, type: ButtonType.Capsule })

.width('80%')

.height(40)

.margin(20)

.onClick(() => {

CustomTransition.getInstance().registerNavParam(this.pageId, (isPush: boolean, isExit: boolean) => {

this.myScale = isExit ? 1 : 0.7;

this.x = isExit ? 0 : '-100%';

}, (isPush: boolean, isExit: boolean)=> {

this.myScale = isExit ? 0.7 : 1;

this.x = isExit ? '-100%' : 0;

}, (isPush: boolean, isExit: boolean) => {

this.myScale = 1;

this.x = 0

}, 200);

this.pageInfos.pushPathByName('pageFour', null) //将name指定的NavDestination页面信息入栈,传递的数据为param

})

......

// PageTwo.ets

import {CustomTransition} from './CustomNavigationUtils'

@Component

export struct PageTwoTemp {

@Consume('pageInfos') pageInfos: NavPathStack

@State y: number|string = '100%'

pageId: number = 0

aboutToAppear() {

this.pageId = this.pageInfos.getAllPathName().length - 1;

console.log('this.pageInfos.getAllPathName()',JSON.stringify(this.pageInfos.getAllPathName()))

CustomTransition.getInstance().registerNavParam(this.pageId, (isPush: boolean, isExit: boolean)=>{

console.log("current page is pageOne")

this.y = isExit ? 0 : isPush ? '-100%' : '100%';

}, (isPush: boolean, isExit: boolean)=>{

this.y = isExit ? isPush ? '100%' : '-100%' : 0;

}, (isPush: boolean, isExit: boolean) => {

this.y = 0;

}, 2000)

}

build() {

NavDestination() {

Column() {

Text('动画0')

.width('80%')

.height(40)

.margin(20)

.textAlign(TextAlign.Center)

}.width('100%').height('100%')

}.title('动画0')

.onBackPressed(() => {

const popDestinationInfo = this.pageInfos.pop() // 弹出路由栈栈顶元素

console.log('pop' + '返回值' + JSON.stringify(popDestinationInfo))

return true

})

.onDisAppear(()=>{

CustomTransition.getInstance().unRegisterNavParam(this.pageId)

})

.translate({x: 0, y: this.y})

.backgroundColor(Color.Yellow)

}

}
场景三:使用Navigation实现一镜到底的动画效果。
方案
配置完自定义的转场动画,然后将name指定的NavDestination页面信息入栈,同时传参给对应页面,在跳转的页面使用onReady事件接收参数
核心代码
// PageLookTakeWaterFlow.ets

.onClick(()=>{

this.currentIndex = index

const itemPX:number = this.scroller.getItemRect(index).x

const itemPY:number = this.scroller.getItemRect(index).y

this.lineNum = -1

CustomTransition.getInstance().registerNavParam(this.pageId, (isPush: boolean, isExit: boolean)=>{

this.itemRealW = isExit ? '100%' : isPush ? '100%' : this.screenW

this.itemRealH = isExit ? '' : isPush ? '' : this.screenH

this.itemOffsetX = isExit ? 0 : isPush ? 0 : -itemPX

this.itemOffsetY = isExit ? 0 : isPush ? 0 : -itemPY

// this.lineNum = isExit ? 2 : isPush ? 2 : -1

}, (isPush: boolean, isExit: boolean)=>{

this.itemRealW = isExit ? isPush ? this.screenW : this.screenW : '100%'

this.itemRealH = isExit ? isPush ? this.screenH : this.screenH : ''

this.itemOffsetX = isExit ? isPush ? -itemPX : -itemPX : 0

this.itemOffsetY = isExit ? isPush ? -itemPY : -itemPY : 0

// this.lineNum = isExit ? isPush ? -1 : -1 : 2

}, (isPush: boolean, isExit: boolean) => {

this.itemRealW = '100%'

this.itemRealH = ''

this.itemOffsetX = 0

this.itemOffsetY = 0

this.lineNum = 2

}, 2000)

let temp = new itemData(this.title,this.content,index)

this.pageInfos.pushPathByName('pageLookTakeDetail', temp)

console.log('is click')

})

// PageLookTakeDetail.ets

import { CustomTransition, itemData } from './CustomNavigationUtils'

@Component

export struct PageLookTakeDetailTemp {

@Consume('pageInfos') pageInfos: NavPathStack

@State opacityNum: number = 1

pageId: number = 0;

@State title: string = ''

@State content: string = ''

@State itemIndex: number = 0

aboutToAppear() {

this.pageId = this.pageInfos.getAllPathName().length - 1;

console.log('this.pageInfos.getAllPathName()', JSON.stringify(this.pageInfos.getAllPathName()))

CustomTransition.getInstance().registerNavParam(this.pageId, (isPush: boolean, isExit: boolean) => {

console.log("current page is pageOne")

this.opacityNum = isExit ? 1 : isPush ? 0 : 1;

}, (isPush: boolean, isExit: boolean) => {

this.opacityNum = isExit ? isPush ? 0 : 0 : 0;

}, (isPush: boolean, isExit: boolean) => {

this.opacityNum = 1

}, 2000)

}

build() {

NavDestination() {

Scroll() {

Column({ space: 10 }) {

Image($r('app.media.food'))

.width('100%')

Text(this.title + this.itemIndex)

.fontSize(20)

Text(this.content)

// .maxLines(2)

// .textOverflow({overflow:TextOverflow.Ellipsis})

}

}

}

.title('动画2')

.hideTitleBar(true)

.onBackPressed(() => {

const popDestinationInfo = this.pageInfos.pop() // 弹出路由栈栈顶元素

console.log('pop' + '返回值' + JSON.stringify(popDestinationInfo))

return true

})

.onDisAppear(() => {

CustomTransition.getInstance().unRegisterNavParam(this.pageId)

})

.opacity(this.opacityNum)

.onReady((ctx: NavDestinationContext) => {

// 在NavDestination中能够拿到传来的NavPathInfo和当前所处的NavPathStack

try {

this.title = (ctx?.pathInfo?.param as itemData)?.title

this.content = (ctx?.pathInfo?.param as itemData)?.content;

this.itemIndex = (ctx?.pathInfo?.param as itemData)?.itemIndex;

} catch (e) {

console.log(`testTag onReady catch exception: ${JSON.stringify(e)}`)

}

})

}

}
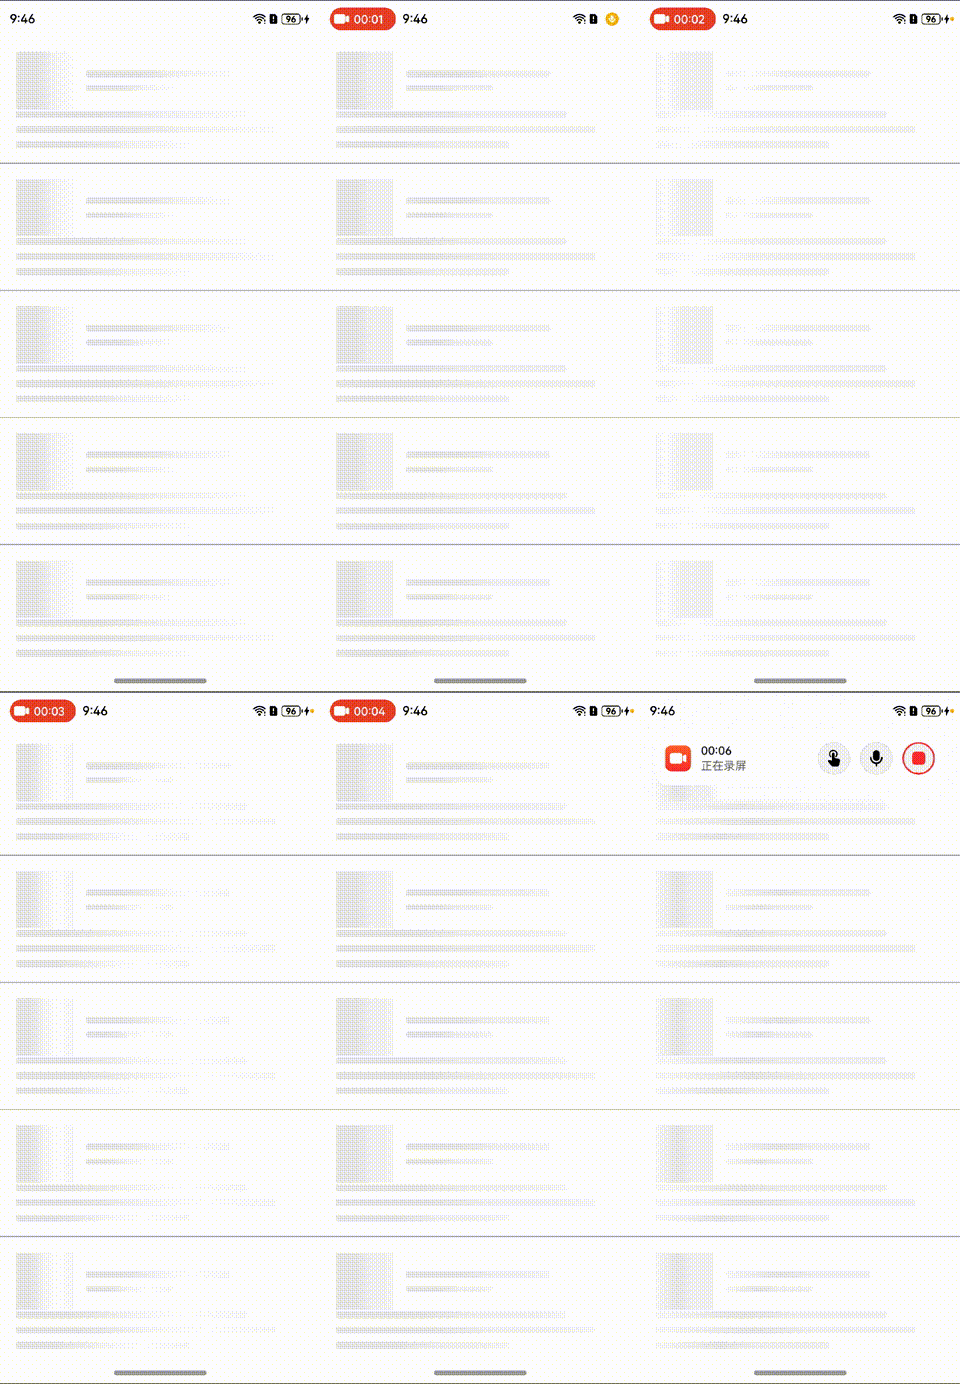
场景四:使用关键帧动画实现骨架屏效果。
效果图

方案
通过Stack嵌套双层Column,然后获取UIContext实例,使用.keyframeAnimateTo控制上层Column的translate的x偏移实现骨架屏效果
核心代码
@Builder columnShow(width: string, height:string, aspectRatioNum?:number){

Stack(){

Column()

.linearGradient({

angle: 90,

colors: [["f2f2f2", 0.25], ["#e6e6e6", 0.37], ["#f2f2f2", 0.63]],

})

.height('100%')

.width('100%')

Column()

.height('100%')

.width('100%')

.translate({ x: this.translateValue })

.linearGradient({

angle: 90,

colors: [

['rgba(255,255,255,0)', 0],

['rgba(255,255,255,1)', 0.5],

['rgba(255,255,255,0)', 1]

]

})

}

.width(width)

.height(height)

.borderRadius(2)

.aspectRatio(aspectRatioNum)

.clip(true)

}

......

.onAppear(() => {

// this.translateValue = '100%'

this.uiContext?.keyframeAnimateTo({

iterations: -1,

}, [

{

duration: 500,

curve: Curve.Linear,

event: () => {

this.translateValue = '0'

}

},

{

duration: 500,

curve: Curve.Linear,

event: () => {

this.translateValue = '100%'

}

},

]);

})
写在最后
●如果你觉得这篇内容对你还蛮有帮助,我想邀请你帮我三个小忙:
●点赞,转发,有你们的 『点赞和评论』,才是我创造的动力。
●关注小编,同时可以期待后续文章ing🚀,不定期分享原创知识。
●更多鸿蒙最新技术知识点,请移步前往小编:https://gitee.com/


 512
512

 被折叠的 条评论
为什么被折叠?


