


分布式事务Seata1.3搭建集成(nacos、mybatis plus)
微服务环境下,分布式事务不得不考虑,因为整体框架本身偏向cloud alibaba,所以就用了seata来做分布式管理,这里使用的是AT模式,记录一下集成步骤和遇到的问题。
1 项目环境
这里版本参考了cloud alibaba版本说明
| 组件 | 版本 |
|---|---|
| spring-boot | 2.1.13.RELEASE |
| spring-cloud | Greenwich.SR6 |
| spring-cloud-alibaba | 2.1.4.RELEASE |
| nacos | 1.4.1 |
| seata | 1.3.0 |
| MySQL | 5.7 |
| mybatis plus | 2.1.0 |
2 seata-server搭建
2.1 下载
这里源码和打包好的server包都下载下来,官网和github都可以
seata官网下载页
seata github下载页
2.2 建库建表
新建一个数据库给seata服务端用,数据库名自己起
-- the table to store GlobalSession data
CREATE TABLE IF NOT EXISTS `global_table`
(
    `xid`                       VARCHAR(128) NOT NULL,
    `transaction_id`            BIGINT,
    `status`                    TINYINT      NOT NULL,
    `application_id`            VARCHAR(32),
    `transaction_service_group` VARCHAR(32),
    `transaction_name`          VARCHAR(128),
    `timeout`                   INT,
    `begin_time`                BIGINT,
    `application_data`          VARCHAR(2000),
    `gmt_create`                DATETIME,
    `gmt_modified`              DATETIME,
    PRIMARY KEY (`xid`),
    KEY `idx_gmt_modified_status` (`gmt_modified`, `status`),
    KEY `idx_transaction_id` (`transaction_id`)
) ENGINE = InnoDB
  DEFAULT CHARSET = utf8;

-- the table to store BranchSession data
CREATE TABLE IF NOT EXISTS `branch_table`
(
    `branch_id`         BIGINT       NOT NULL,
    `xid`               VARCHAR(128) NOT NULL,
    `transaction_id`    BIGINT,
    `resource_group_id` VARCHAR(32),
    `resource_id`       VARCHAR(256),
    `branch_type`       VARCHAR(8),
    `status`            TINYINT,
    `client_id`         VARCHAR(64),
    `application_data`  VARCHAR(2000),
    `gmt_create`        DATETIME(6),
    `gmt_modified`      DATETIME(6),
    PRIMARY KEY (`branch_id`),
    KEY `idx_xid` (`xid`)
) ENGINE = InnoDB
  DEFAULT CHARSET = utf8;

-- the table to store lock data
CREATE TABLE IF NOT EXISTS `lock_table`
(
    `row_key`        VARCHAR(128) NOT NULL,
    `xid`            VARCHAR(96),
    `transaction_id` BIGINT,
    `branch_id`      BIGINT       NOT NULL,
    `resource_id`    VARCHAR(256),
    `table_name`     VARCHAR(32),
    `pk`             VARCHAR(36),
    `gmt_create`     DATETIME,
    `gmt_modified`   DATETIME,
    PRIMARY KEY (`row_key`),
    KEY `idx_branch_id` (`branch_id`)
) ENGINE = InnoDB
  DEFAULT CHARSET = utf8;
附上sql来源
2.3 安装配置
这里偷个懒就用window环境演示了,用linux还是docker安装,应该都差不多,都是改改配置
2.3.1 将配置上传到nacos
把下载下来的seata1.3.0源码用idea打开,找到config.txt和nacos-config.sh,这两个是要用到的。
或者在github也可以获取到:config.txt nacos-config.sh

首先打开config.txt,修改如下配置:
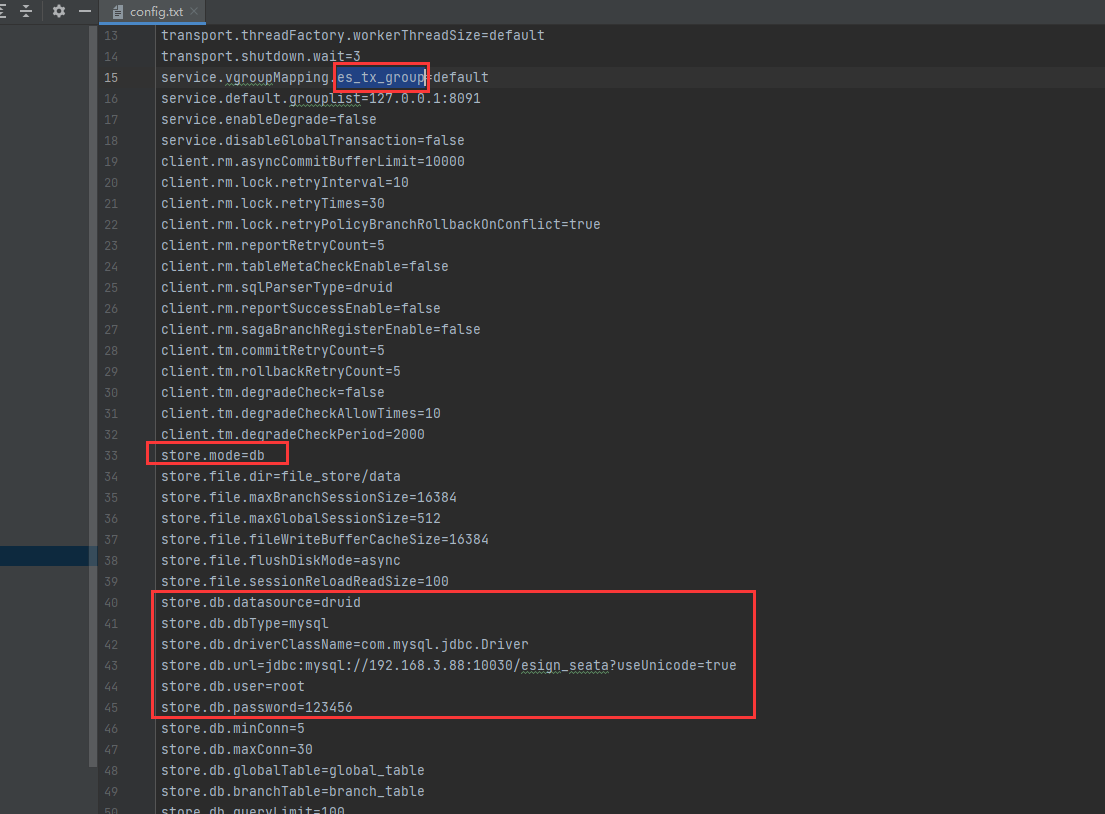
上面的是事务组的名字,后面要用,下边的就是把之前建的数据库信息配置进去,修改好后把这两个文件复制出来。
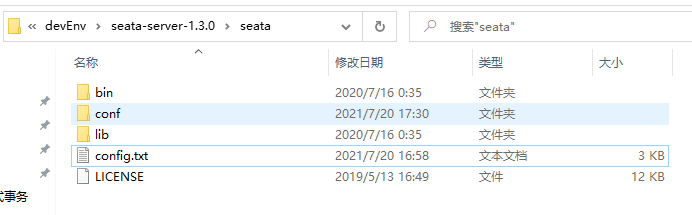
解压之前下载好的seata-server,把config.txt复制到根路径下,nacos-config.sh复制到bin或者conf目录下
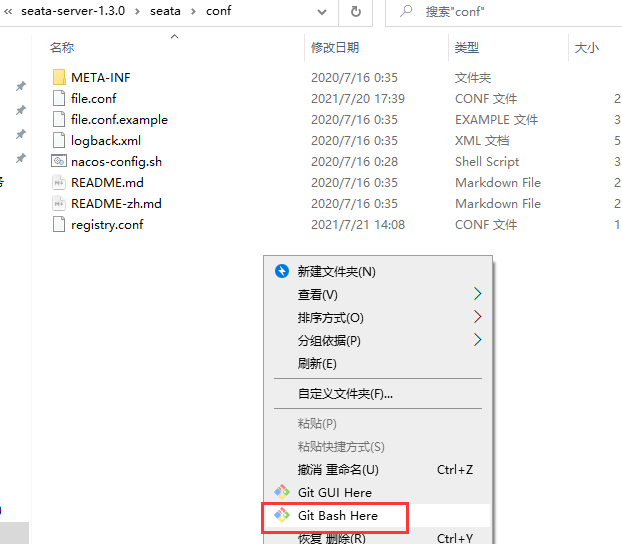
在nacos-config.sh所在目录下打开git bash窗口
输入命令
sh nacos-config.sh -h 你的nacosIP -p 你的nacos端口 -t 推送目标namespace -g 推送目标group
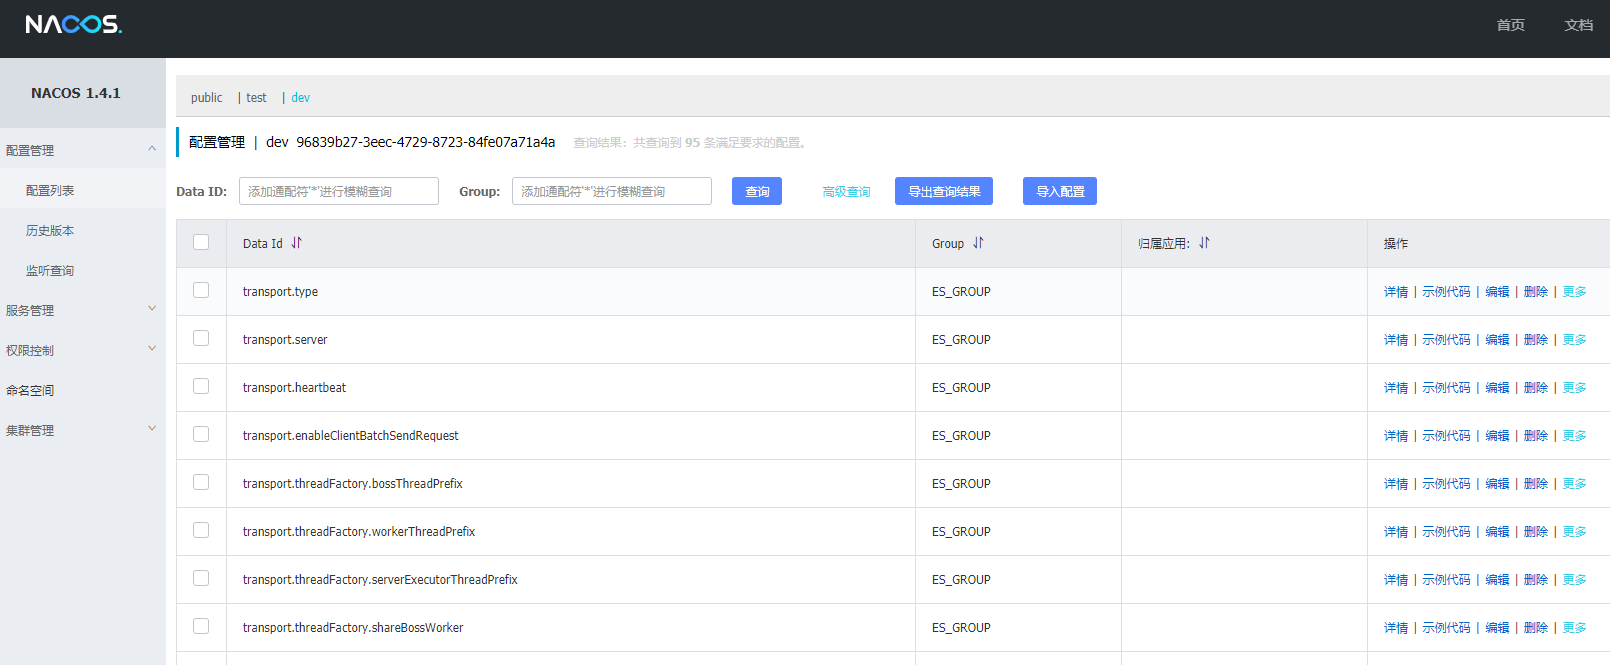
成功后提示 init nacos config finished, please start seata-server,这个时候登录nacos 就可以看到推送上去的配置了
2.3.2 server配置修改
打开conf/registry.conf文件
修改信息,保留nacos配置
registry {
  # file 、nacos 、eureka、redis、zk、consul、etcd3、sofa
  type = "nacos"

  nacos {
    application = "seata-server"
    serverAddr = "192.168.3.88:10210"
    group = "ES_GROUP"
    namespace = "96839b27-3eec-4729-8723-84fe07a71a4a"
    cluster = "default"
    username = "nacos"
    password = "123456"
  }

}

config {
  # file、nacos 、apollo、zk、consul、etcd3
  type = "nacos"

  nacos {
    serverAddr = "192.168.3.88:10210"
    namespace = "96839b27-3eec-4729-8723-84fe07a71a4a"
    group = "ES_GROUP"
    username = "nacos"
    password = "123456"
  }

}
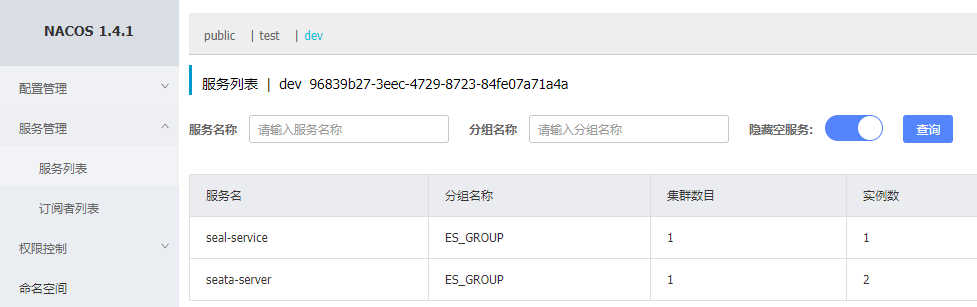
修改完成后,到bin目录下运行脚本启动seata,提示:Server started, listen port: 8091
到nacos里可以看到,名为seata-server的服务已经注册进来了,至此seata-server搭建完成
3 服务集成seata
3.1 添加undo_log表
参加事务的业务服务数据库需要添加数据库表,github获取地址
CREATE TABLE IF NOT EXISTS `undo_log`
(
    `branch_id`     BIGINT(20)   NOT NULL COMMENT 'branch transaction id',
    `xid`           VARCHAR(100) NOT NULL COMMENT 'global transaction id',
    `context`       VARCHAR(128) NOT NULL COMMENT 'undo_log context,such as serialization',
    `rollback_info` LONGBLOB     NOT NULL COMMENT 'rollback info',
    `log_status`    INT(11)      NOT NULL COMMENT '0:normal status,1:defense status',
    `log_created`   DATETIME(6)  NOT NULL COMMENT 'create datetime',
    `log_modified`  DATETIME(6)  NOT NULL COMMENT 'modify datetime',
    UNIQUE KEY `ux_undo_log` (`xid`, `branch_id`)
) ENGINE = InnoDB
  AUTO_INCREMENT = 1
  DEFAULT CHARSET = utf8 COMMENT ='AT transaction mode undo table';
3.2 引入依赖
 <!-- Seata -->
 <dependency>
     <groupId>com.alibaba.cloud</groupId>
     <artifactId>spring-cloud-starter-alibaba-seata</artifactId>
 </dependency>
3.3 配置文件
seata:
  enabled: true
  application-id: ${spring.application.name}
  tx-service-group: es_tx_group # 这里事务组的名称是config.txt里配置的,已推送到nacos
  enable-auto-data-source-proxy: true
  config:
    type: nacos
    nacos:
      serverAddr: 192.168.3.88:10210
      namespace: 96839b27-3eec-4729-8723-84fe07a71a4a
      group: ES_GROUP
      userName: "nacos"
      password: "123456"
  registry:
    type: nacos
    nacos:
      application: seata-server
      server-addr: 192.168.3.88:10210
      namespace: 96839b27-3eec-4729-8723-84fe07a71a4a
      group: ES_GROUP
      userName: "nacos"
      password: "123456"
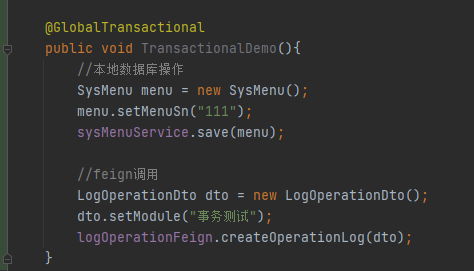
3.4 加入事务控制
在代码方法前加上@GlobalTransactional注解即可,然后启动项目即可,这里就不演示了(因为会报错哈哈哈,问题在第四章描述)
3.4 启动项目
可见事务注册信息

4 问题及处理
4.1 zipkin+seata导致openfeign调用出错
4.1.1 描述
调用接口时,会发现服务在nacos上正常,但feign调用崩了
com.netflix.client.ClientException: Load balancer does not have available server for client
4.1.2 原因
项目 pom 引入的 Zipkin 包含 Sleuth,而 Sleuth 的配置类TraceFeignClientAutoConfiguration 和 Seata 的配置类 SeataFeignClientAutoConfiguration 都创建了 Bean:feignHystrixBuilder,冲突导致上面的错误
4.1.3 解决办法
启动类上排除SeataFeignClientAutoConfiguration
@SpringBootApplication(exclude = {SeataFeignClientAutoConfiguration.class})
使用分布式事务的业务服务,加上拦截器传递XID
import feign.RequestInterceptor;
import feign.RequestTemplate;
import io.seata.core.context.RootContext;
import io.seata.spring.annotation.GlobalTransactional;
import org.apache.commons.lang3.StringUtils;
import org.springframework.boot.autoconfigure.condition.ConditionalOnClass;
import org.springframework.stereotype.Component;

/**
 * @Description 传递事务XID
 * @Author LX
 * @Date 2021-07-21 15:42
 */
@Component
@ConditionalOnClass({RequestInterceptor.class, GlobalTransactional.class})
public class SetSeataInterceptor implements RequestInterceptor {

    @Override
    public void apply(RequestTemplate template) {
        String currentXid = RootContext.getXID();
        if (!StringUtils.isEmpty(currentXid)) {
            template.header(RootContext.KEY_XID, currentXid);
        }
    }
}
这样就可以正常进行feign调用了
4.2 mybatis plus组件失效
4.2.1 描述
参考了seata提供的例子,用到mybatis plus的小伙伴可能会为了适配,配置过一个类似于这样的类,但是配置过后发现seata之后,mybatis的分页插件好像失效了。
@Configuration
public class DataSourceProxyConfig {

    @Bean
    @ConfigurationProperties(prefix = "spring.datasource")
    public DataSource dataSource() {
        return new DruidDataSource();
    }

    @Bean
    @ConfigurationProperties(prefix = "mybatis-plus")
    public MybatisSqlSessionFactoryBean sqlSessionFactoryBean(DataSource dataSource) throws IOException {
        // 这里用 MybatisSqlSessionFactoryBean 代替了 SqlSessionFactoryBean,否则 MyBatisPlus 不会生效
        MybatisSqlSessionFactoryBean mybatisSqlSessionFactoryBean = new MybatisSqlSessionFactoryBean();
        mybatisSqlSessionFactoryBean.setDataSource(dataSource);
        mybatisSqlSessionFactoryBean.setMapperLocations(new PathMatchingResourcePatternResolver()
                .getResources("classpath*:/mapper/mapper/*.xml"));
        return mybatisSqlSessionFactoryBean;
    }
}
4.2.2 原因
虽然这里为了适配mybatis plus,将返回值改为了MybatisSqlSessionFactoryBean,但是同样需要在这个方法里加入分页插件再返回(但实际上是多此一举)
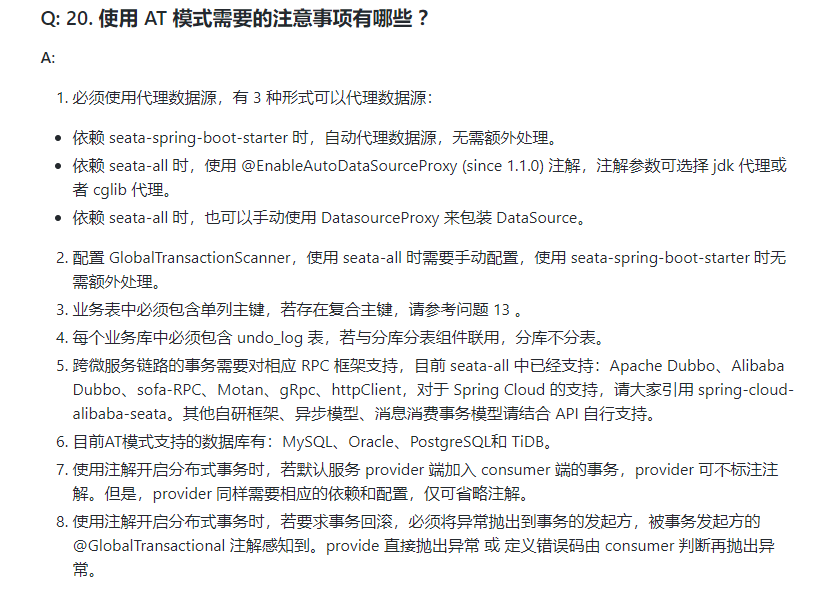
可以参考seata官网FAQ中的描述
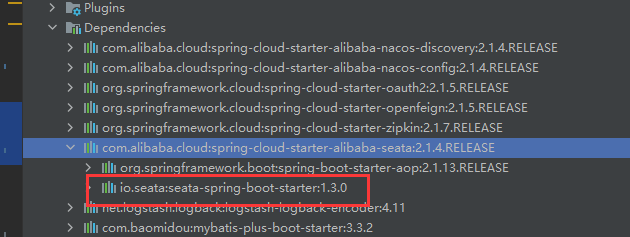
可以看到我们依赖的是seata-spring-boot-starter,且在前面的配置文件中也写入了enable-auto-data-source-proxy: true,所以我们没必要再做数据源代理的配置了。
4.2.3 解决办法
把上面的配置文件干掉!
5 结语
由于本人技术水平有限或对组件理解不到位,上述内容可能有纰漏或者错误,欢迎各位大佬指正!
因为自己一直不善于去整理记录东西,工作中也会遇到很多问题,总是做完就结束。后面遇到同样的问题的时候,还是会忘记或者再次踩坑,所以想慢慢的让自己慢慢的养成记录的习惯,好记性不如烂笔头!
6 参考
[1] seata 官网:http://seata.io/zh-cn/index.html
[2] seata github:https://github.com/seata/seata
[3] 博客:https://blog.csdn.net/ZaiZuoYuZuo/article/details/107636180
[4] 博客:https://blog.csdn.net/qq_35721287/article/details/103282589


 5837
5837


 被折叠的 条评论
为什么被折叠?
被折叠的 条评论
为什么被折叠?
 到【灌水乐园】发言


