


之前已经写了如何将github上的项目导入到AS 中,接下来继续讲解TabLayout 的使用
链接地址:如何把github上项目import 到AS 中
- 确定你的工程是否能运行 当AS 的界面如下显示 就是OK 的
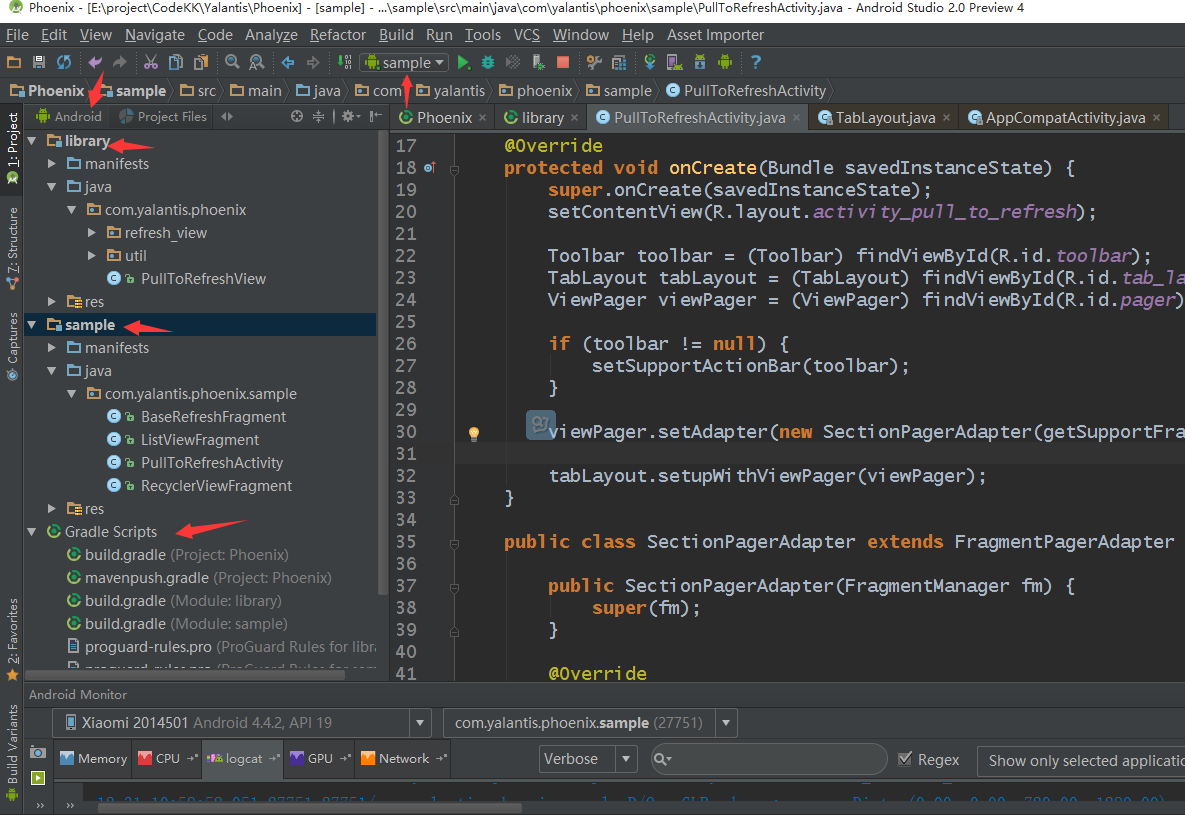
- 先进入 主界面 在进入 XML 文件
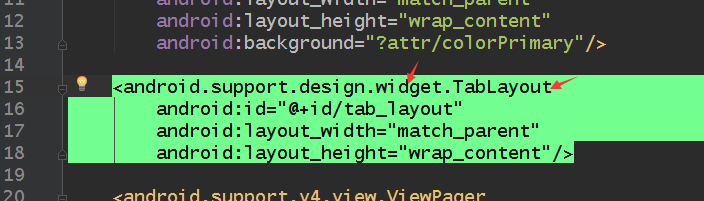
2 . <android.support.design.widget.TabLayout
android:id="@+id/tab_layout"
android:layout_width="match_parent"
android:layout_height="wrap_content"/>
使用的是android.support.design.widget. 这个包下的 所以确定你的build.gradle 中已经加入了相关的依赖工程
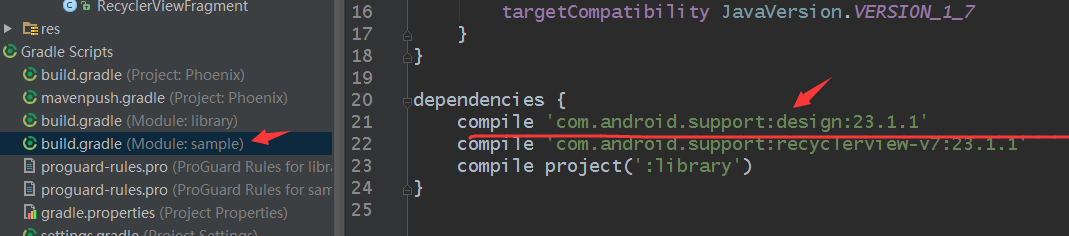
compile 'com.android.support:design:23.1.1'dependencies {
compile 'com.android.support:design:23.1.1'
compile 'com.android.support:recyclerview-v7:23.1.1'
compile project(':library')
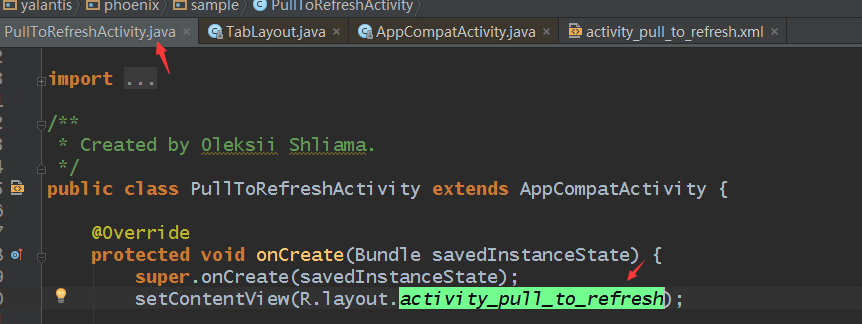
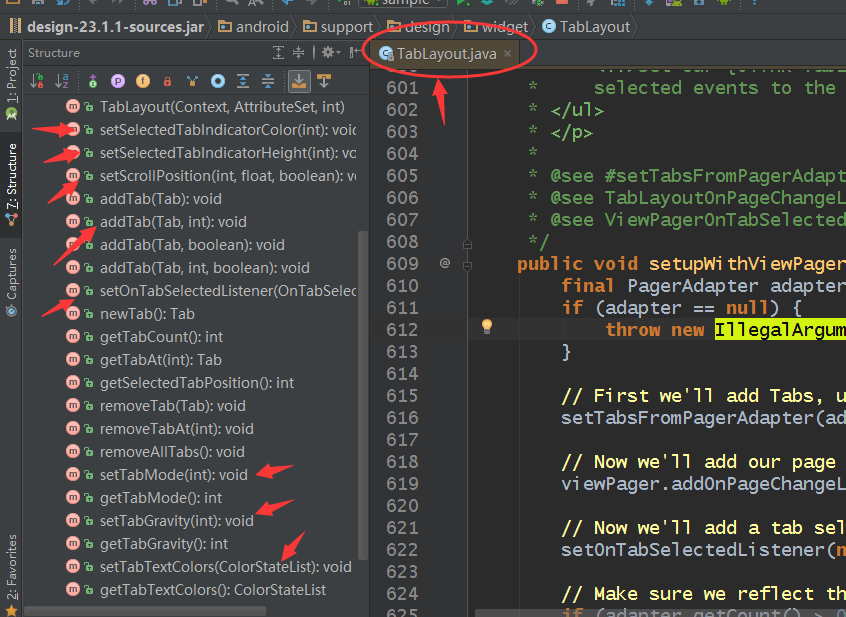
}3 . 然后看相关代码 重点是 进入TabLayout 这个类 查看它 都给我们提供了什么方法
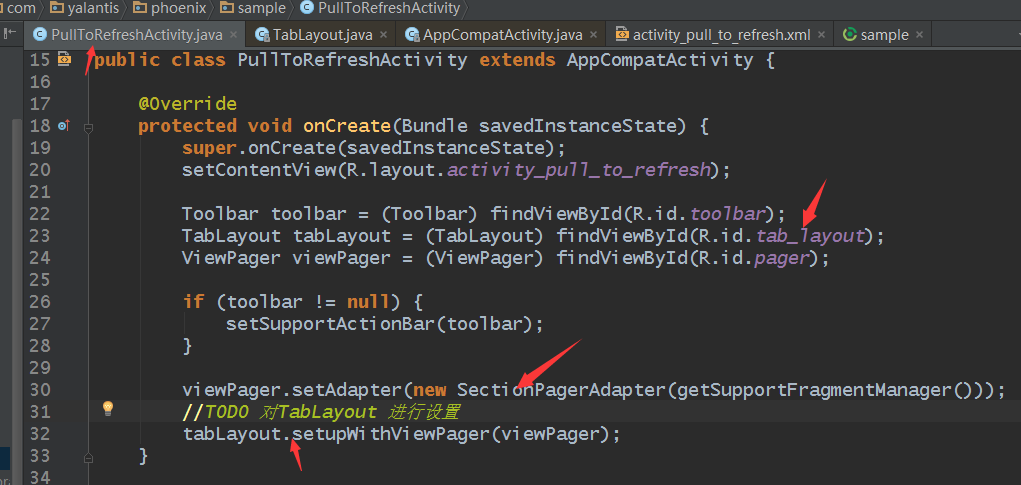
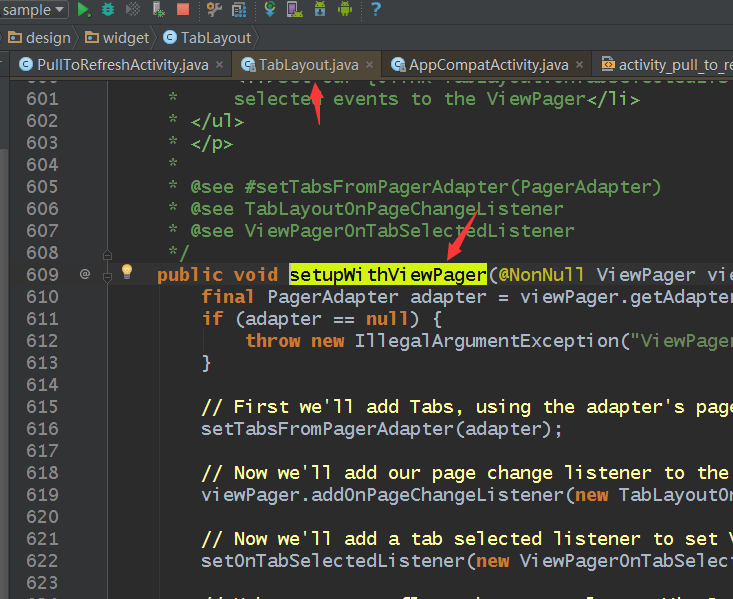
左侧点 structure 看它的结构 方法 看到它给我们提供了这么多方法。设置监听,设置字体颜色 布局 等等等. 接下来 就常用的 项目需要改的 介绍几个 其他的可自行研究。
在XML里面设置
<android.support.design.widget.TabLayout
        android:id="@+id/tab_layout"
        android:layout_width="match_parent"
        android:layout_height="wrap_content"
        app:tabIndicatorColor="@android:color/holo_green_light"
        app:tabSelectedTextColor="@android:color/holo_blue_light"
        app:tabTextColor="@android:color/holo_orange_light"
        app:tabIndicatorHeight="5dp"
        tools:targetApi="ice_cream_sandwich" />
设置不同状态的文本颜色
- setTabTextColors(int normalColor, int selectedColor)
常用的应该是这个,正常颜色和 选择后的颜色。
还可以细看下源码 这个方法调用的也是下面的方法
public void setTabTextColors(int normalColor, int selectedColor)
 {
 setTabTextColors(createColorStateList(normalColor, selectedColor));
 }
2. setTabTextColors(@Nullable ColorStateList textColor)
设置为当前选中的选项卡标签指示的颜色
setSelectedTabIndicatorColor
设置标签指示符的高度对当前选中的选项卡。
setSelectedTabIndicatorHeight(int height)
未完待续……


 1294
1294

 被折叠的 条评论
为什么被折叠?
被折叠的 条评论
为什么被折叠?
 到【灌水乐园】发言


