


安装环境
安装npm
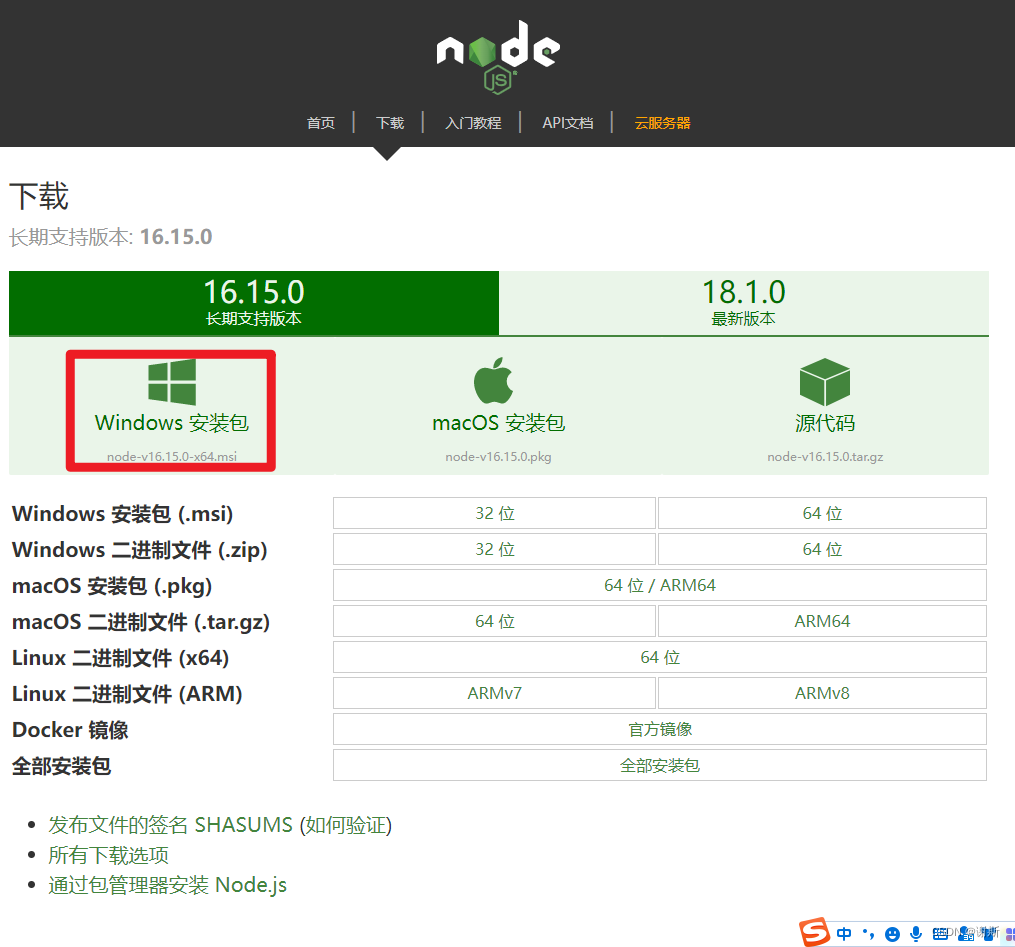
# npm升级
sudo npm install -g npm

# 安装完成查看nodejs版本
npm -v
安装vuecli
官方:https://cli.vuejs.org/zh/guide/installation.html
# 全局安装vue
sudo npm install -g @vue/cli

# 安装完成查看vue版本
vue --version
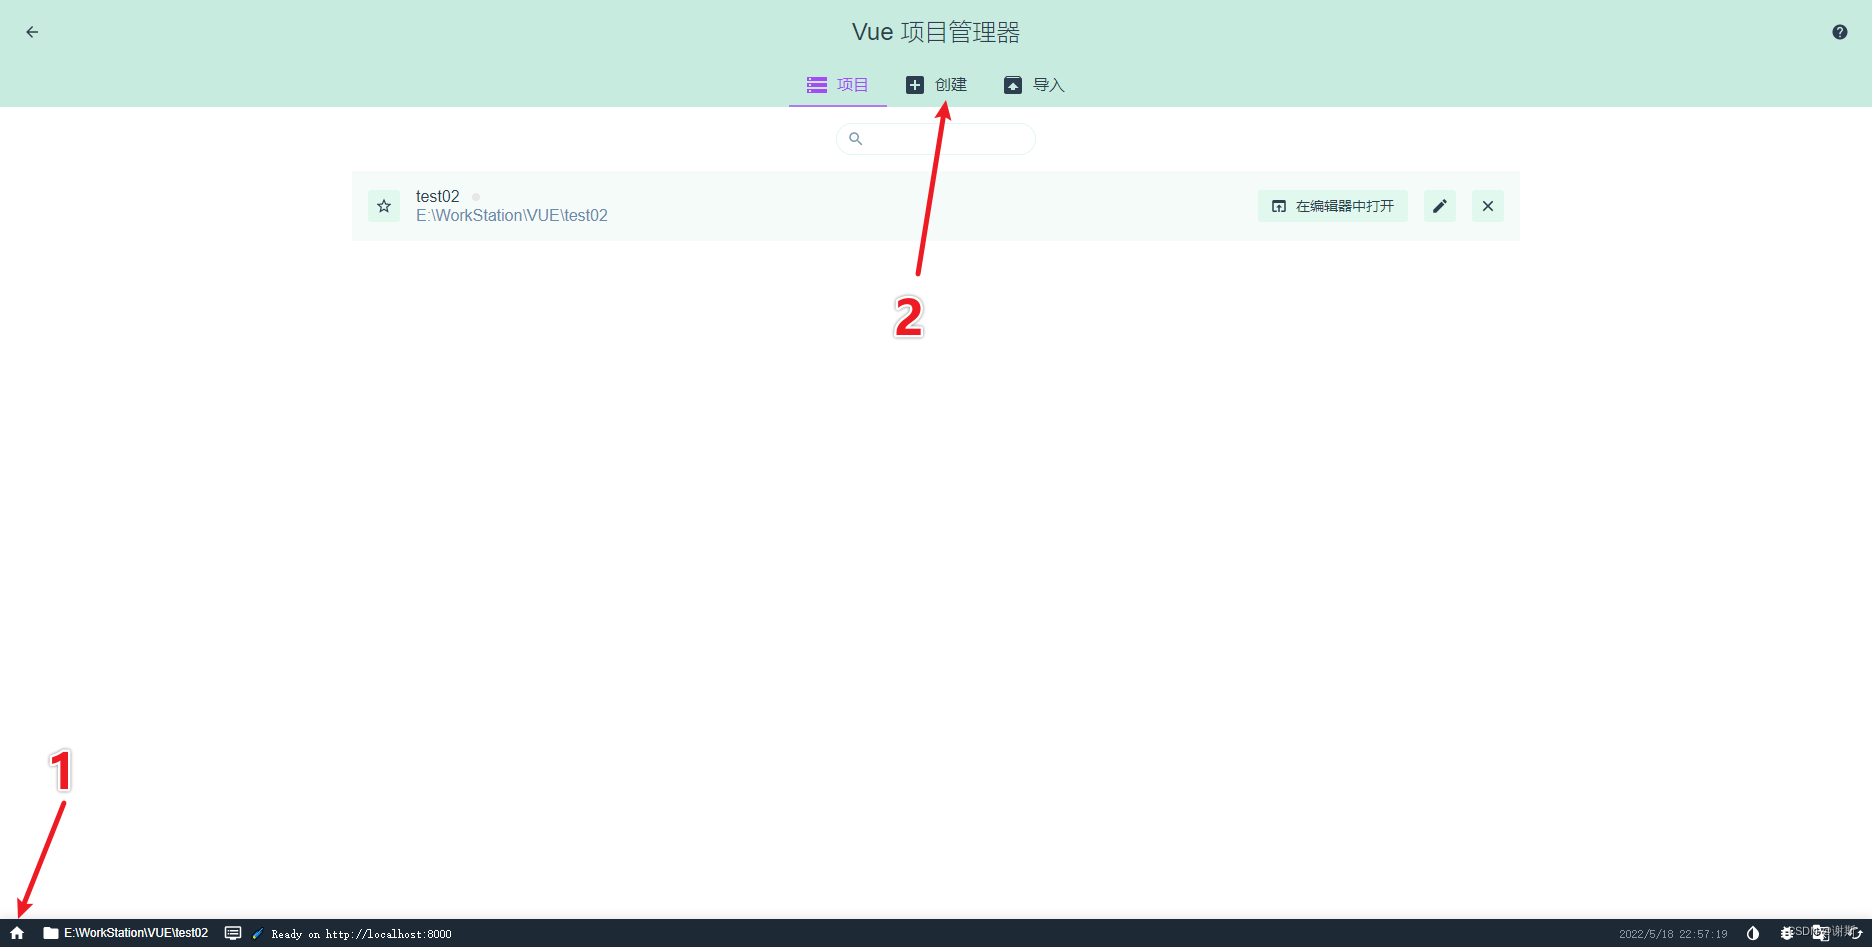
创建vue项目
# 打开vueui服务,使用页面进行本机vue管理
vue ui
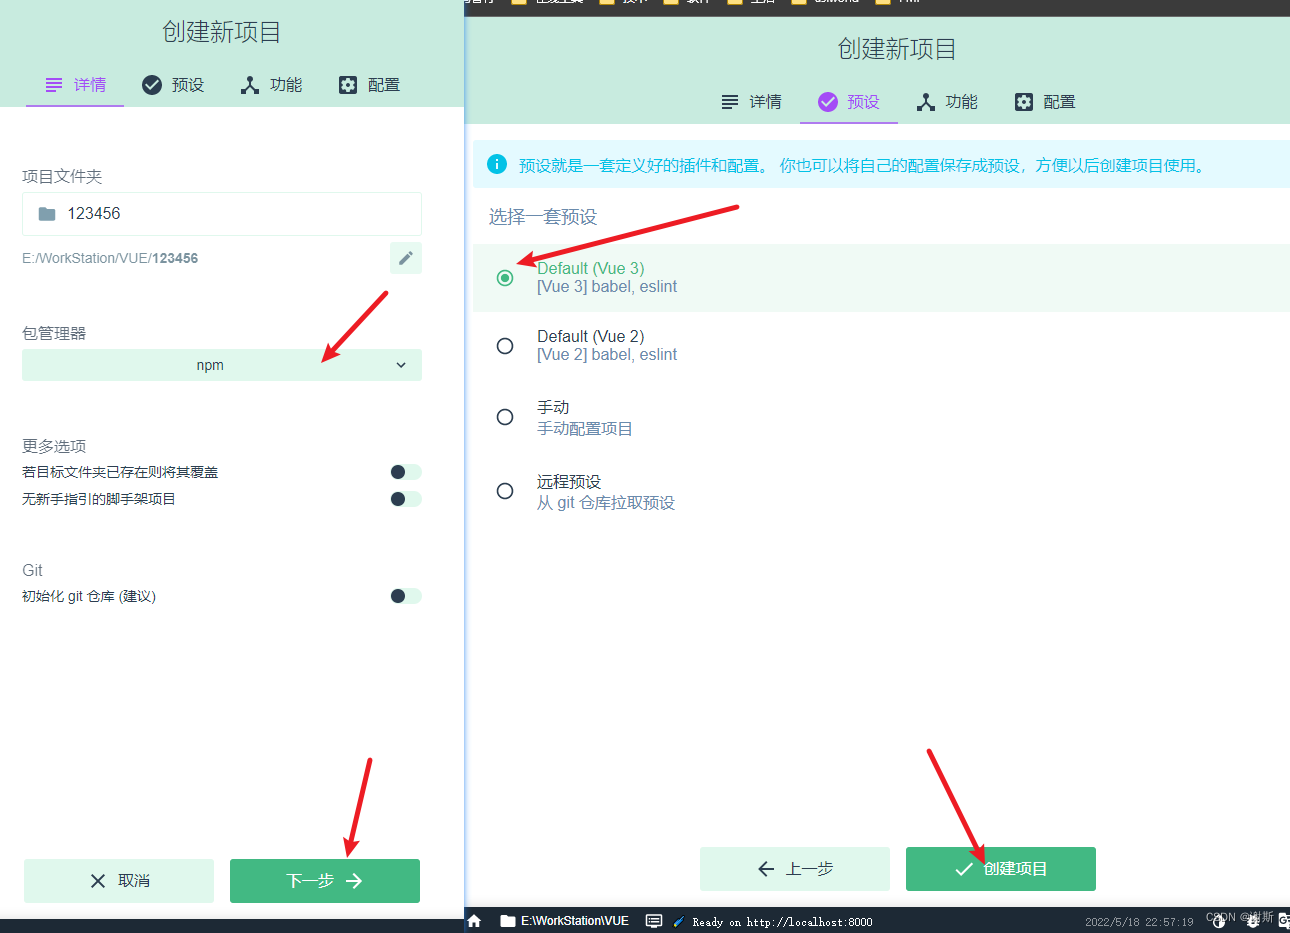
完成创建工作
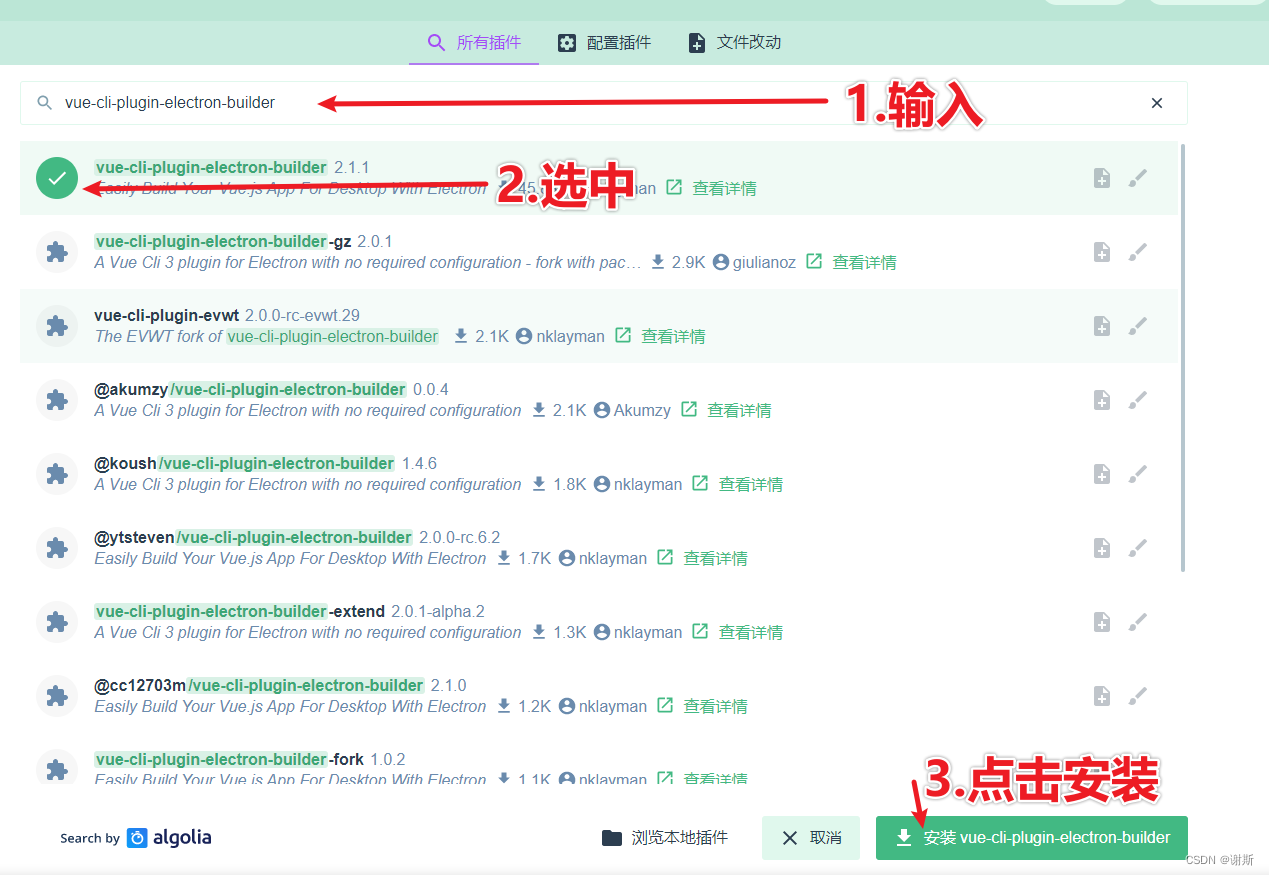
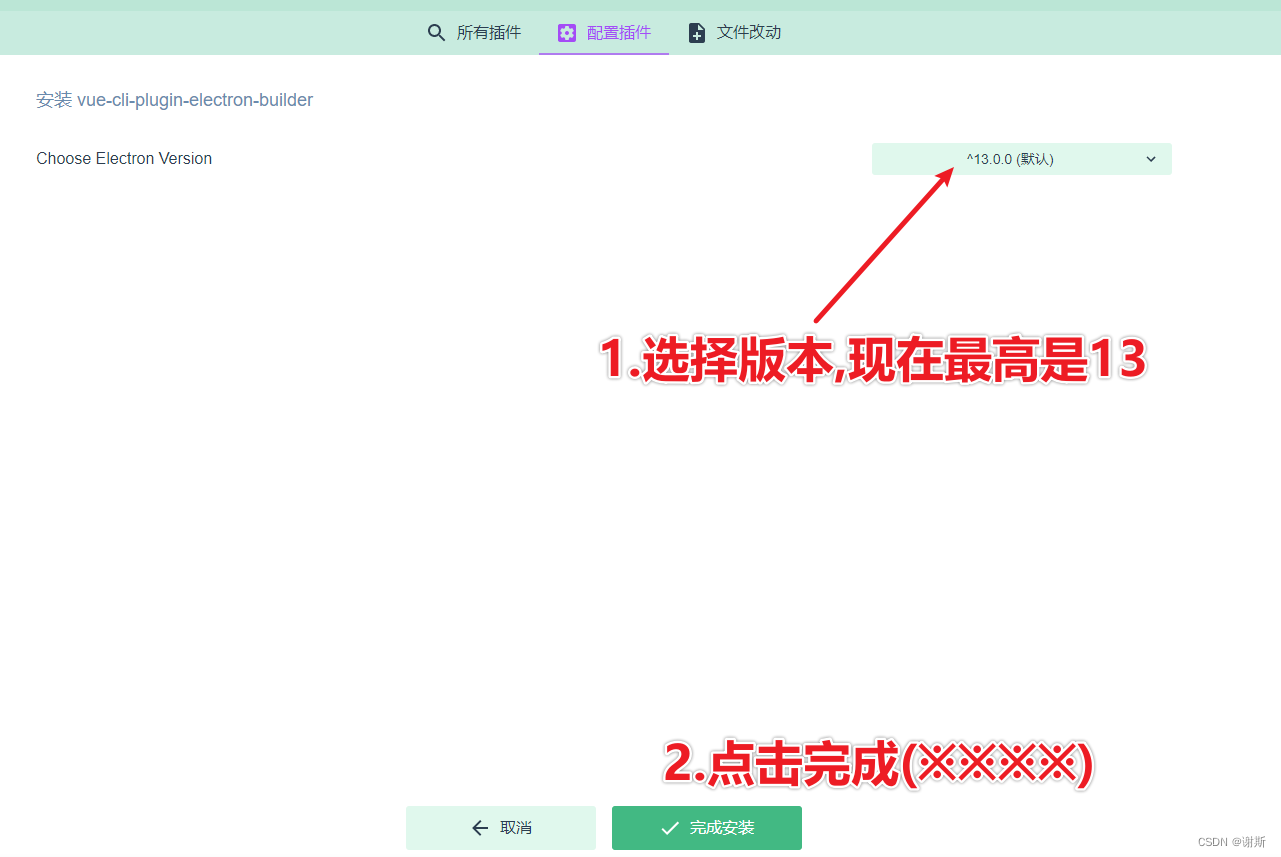
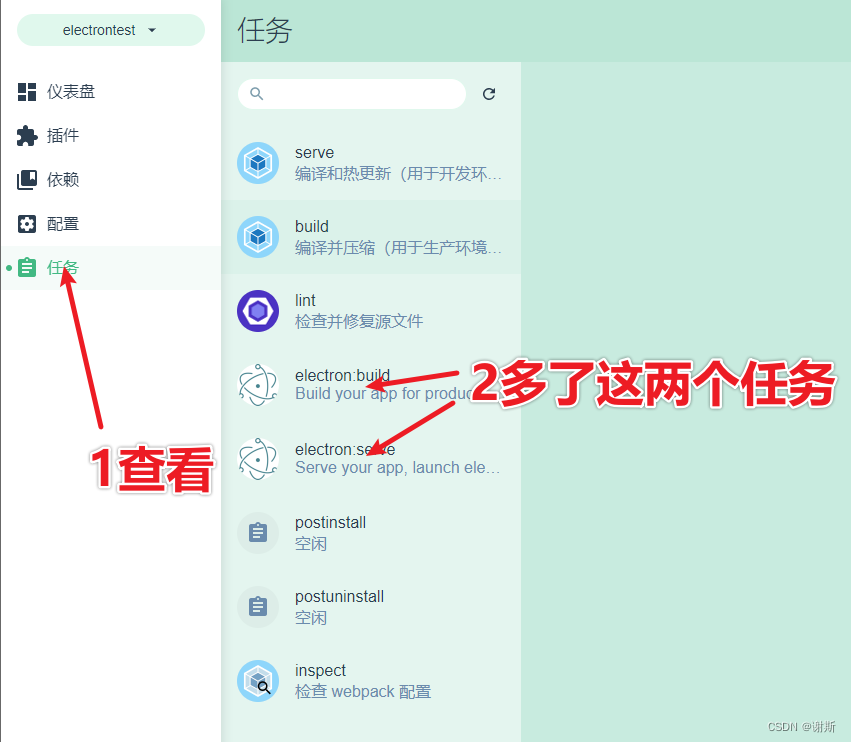
添加vue-cli-plugin-electron-builder插件
vue-cli-plugin-electron-builder
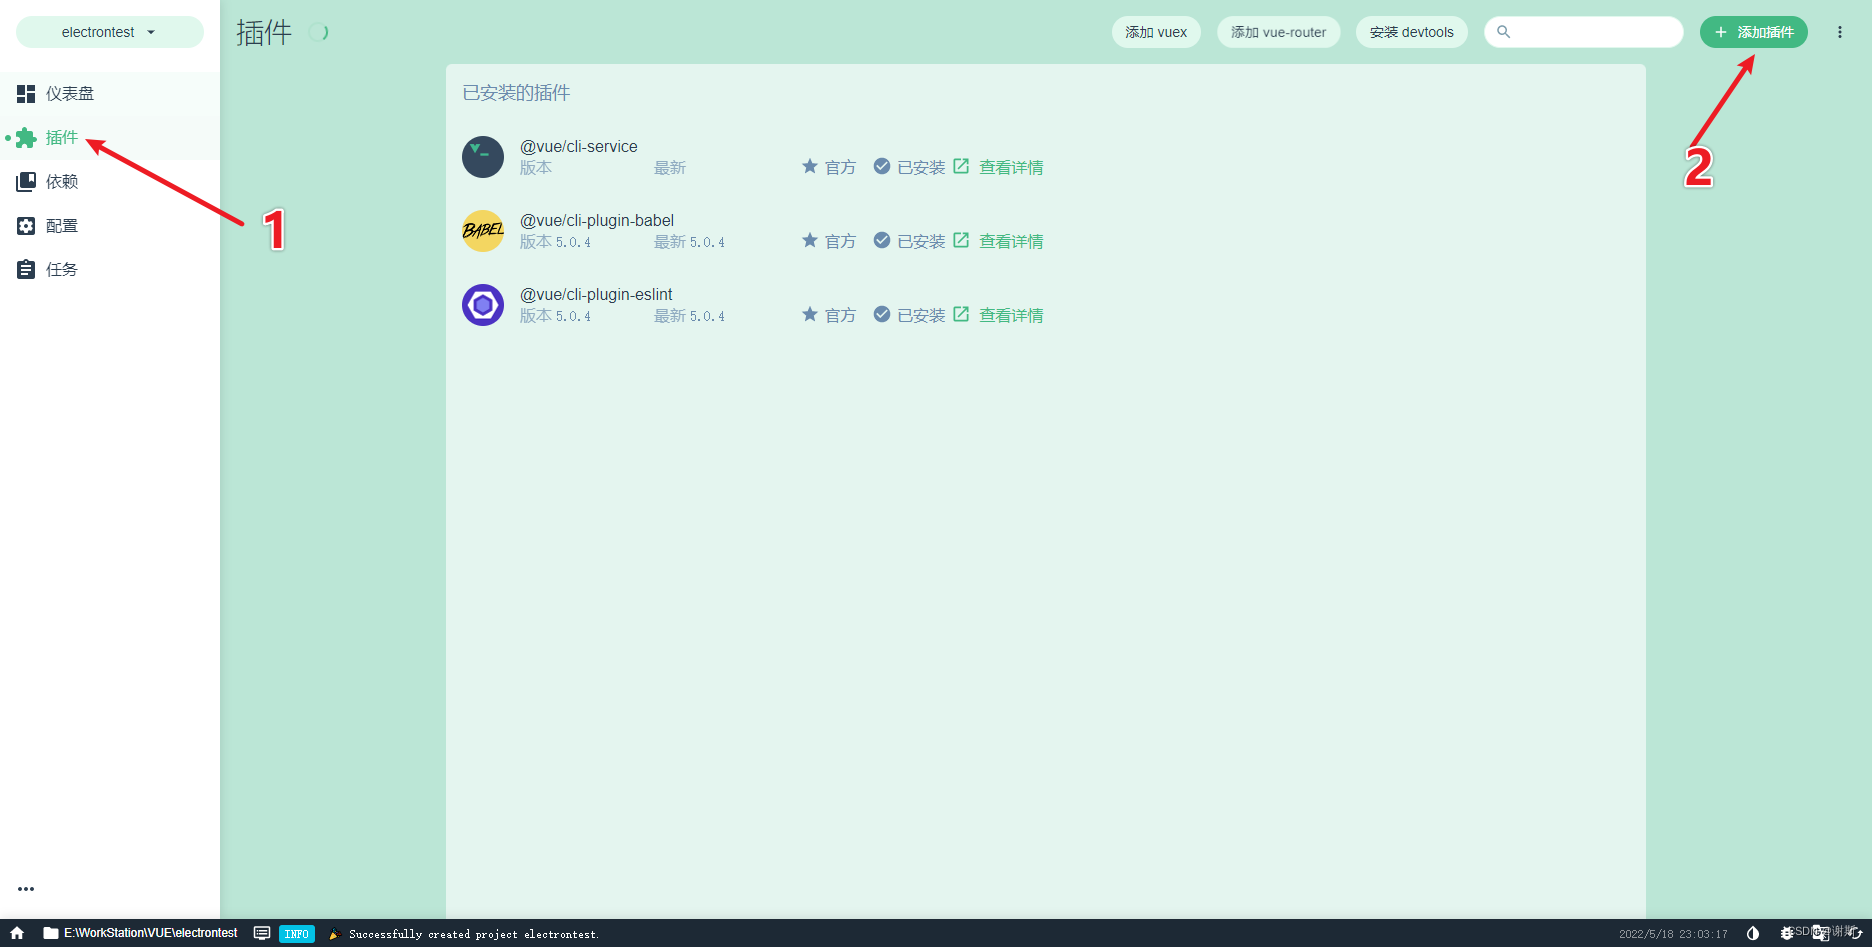
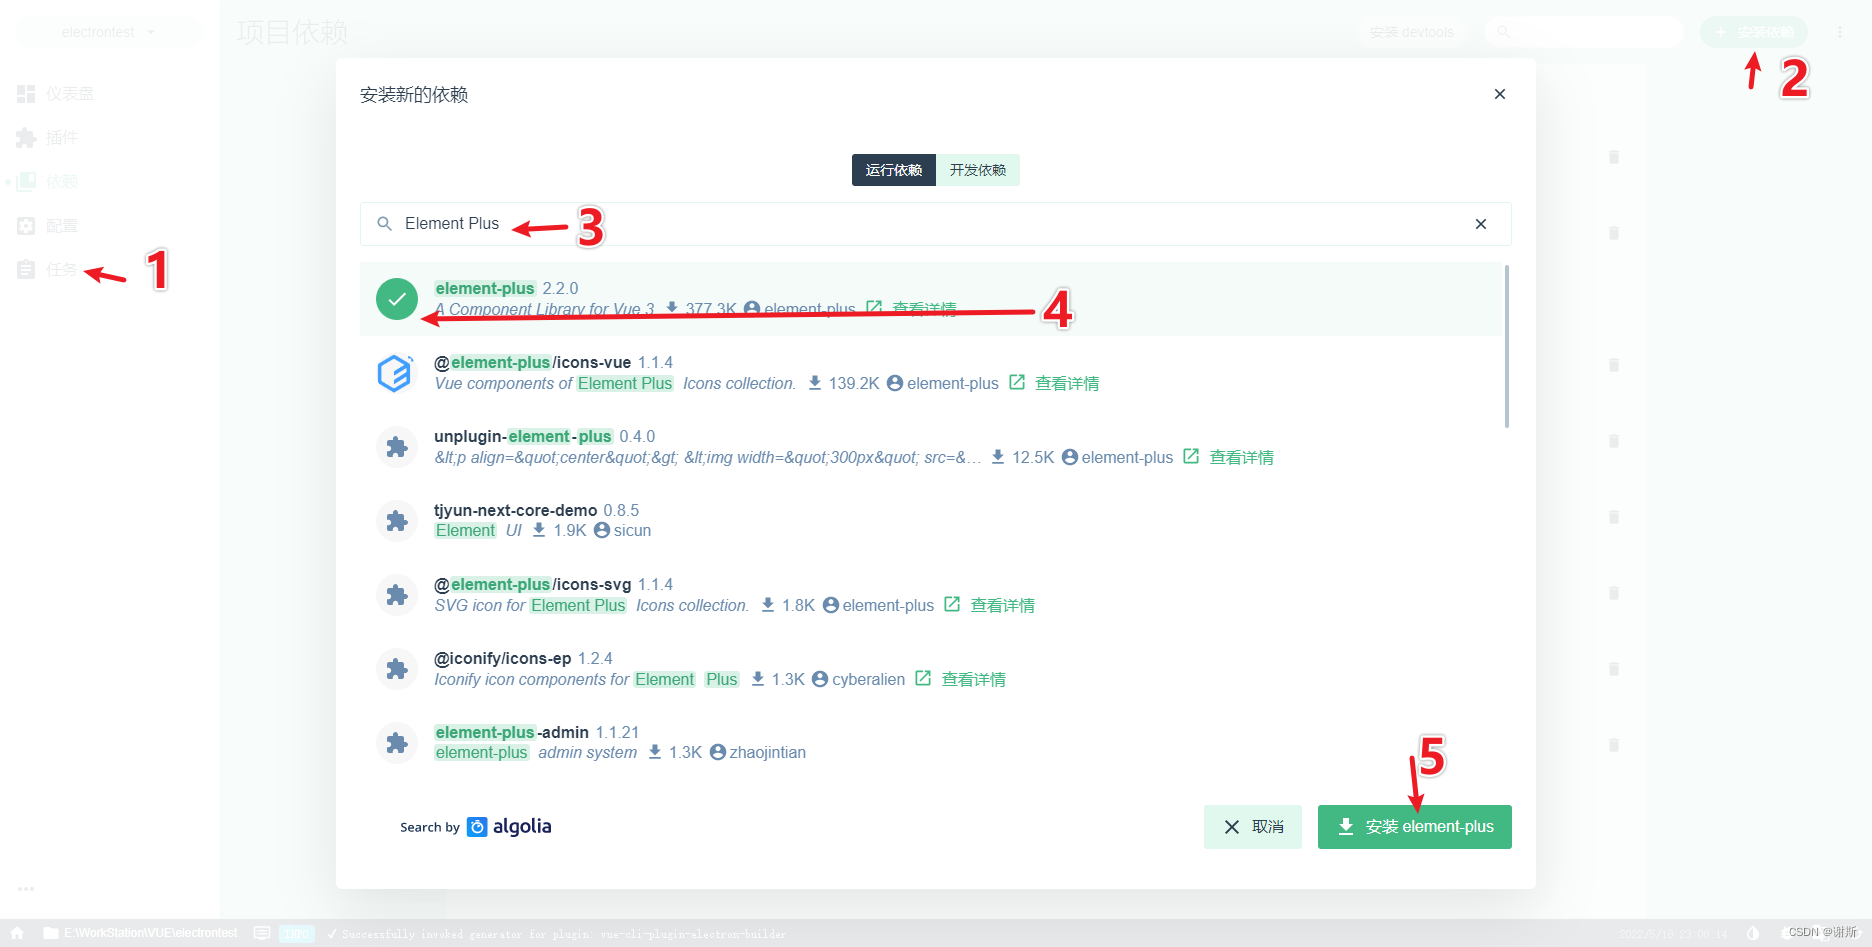
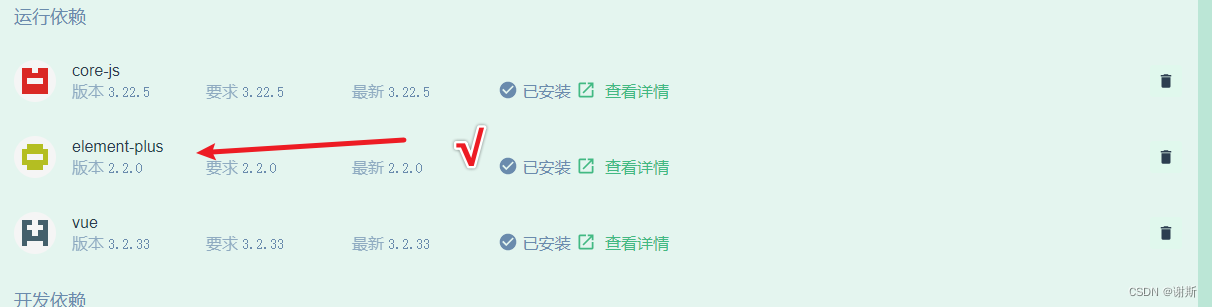
添加Element Plus运行依赖
Element Plus
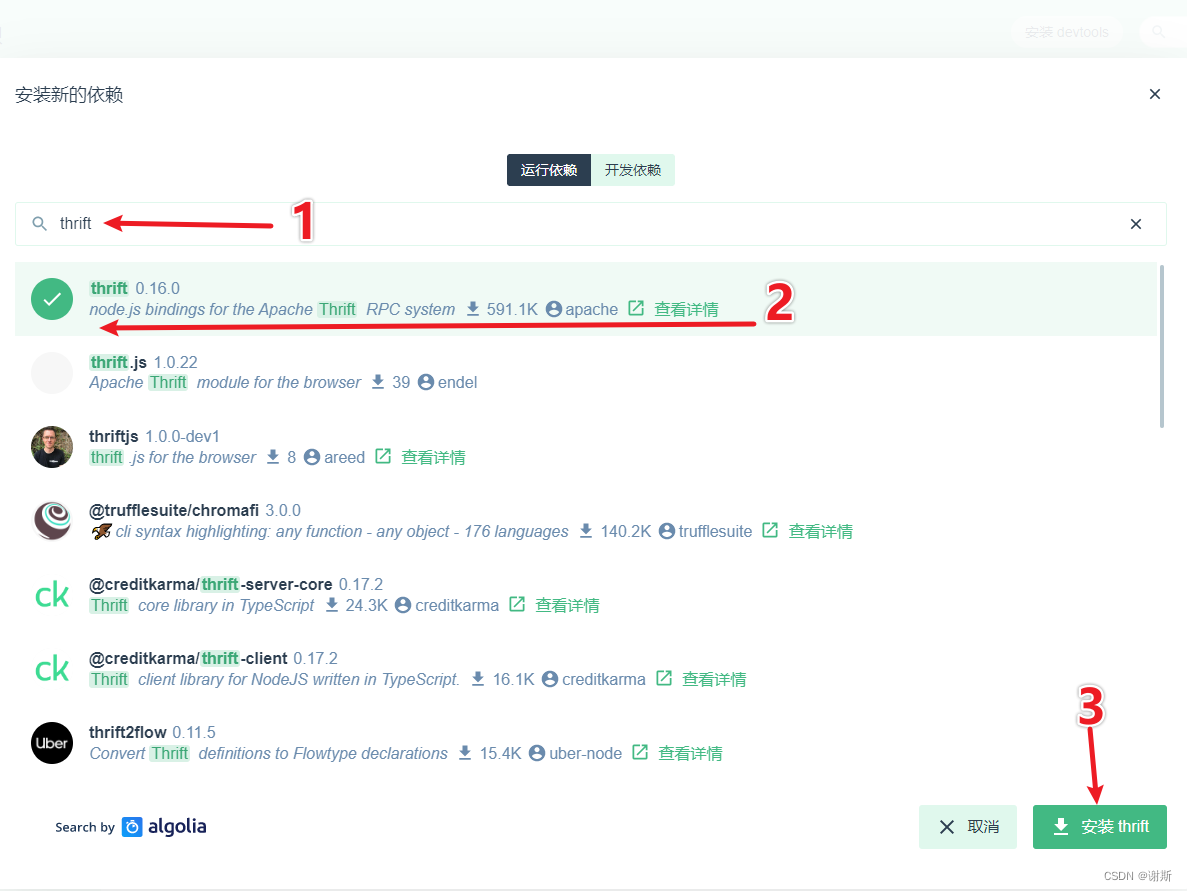
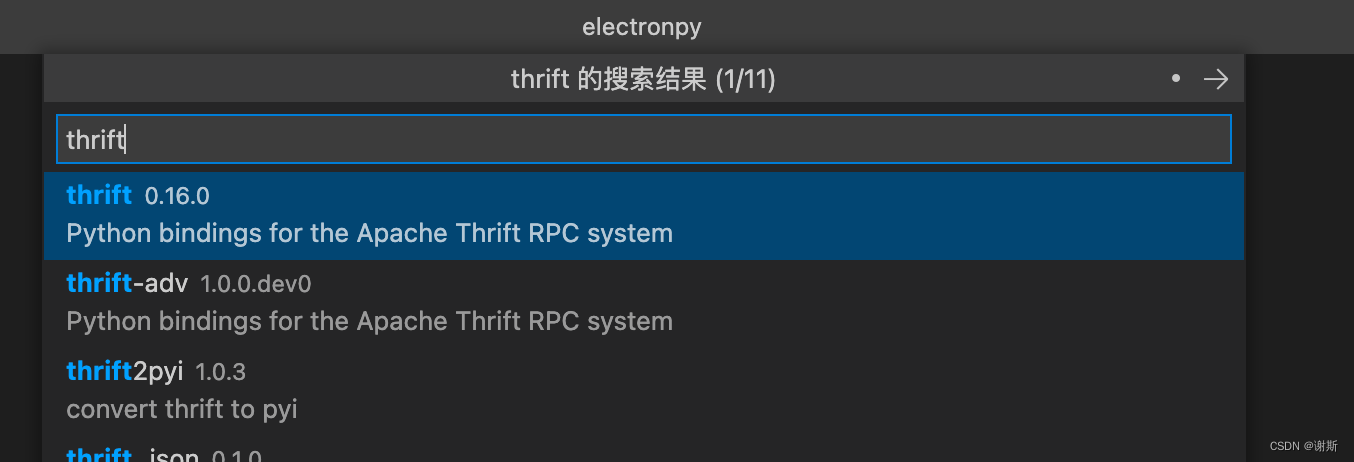
添加thrift插件
thrift
官方下载thrift
windows
https://thrift.apache.org/download
可以加到path中这样就可以在cmd中直接进行使用
mac
brew install thrift
验证安装成功
thrift -version
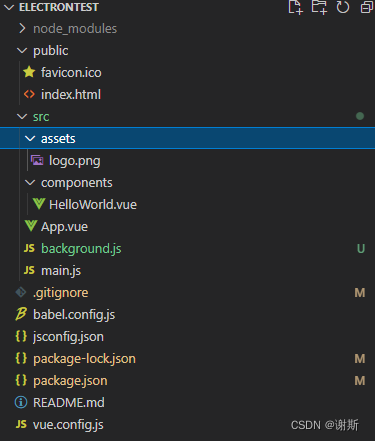
你将得到的工程
前端开发
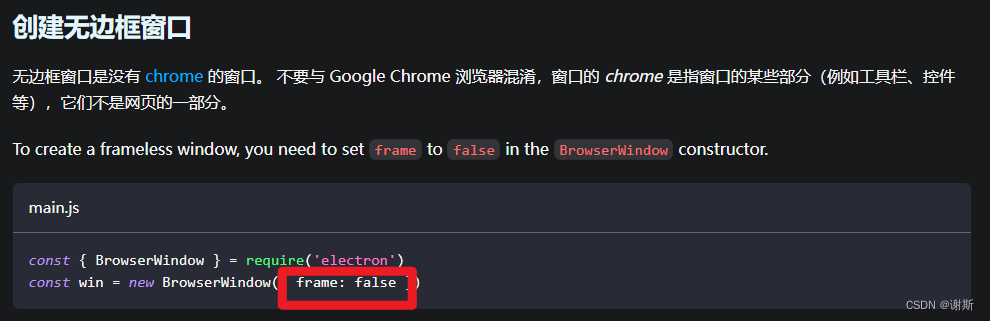
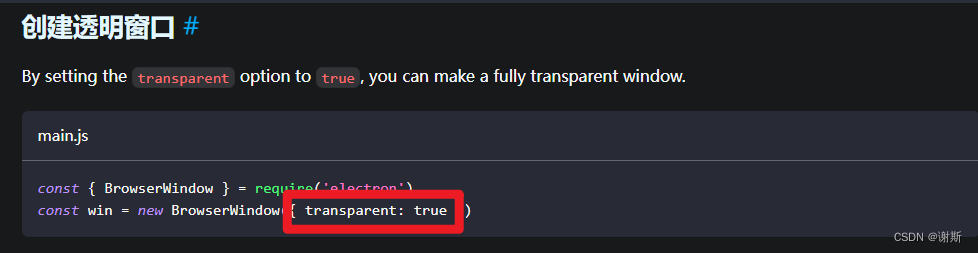
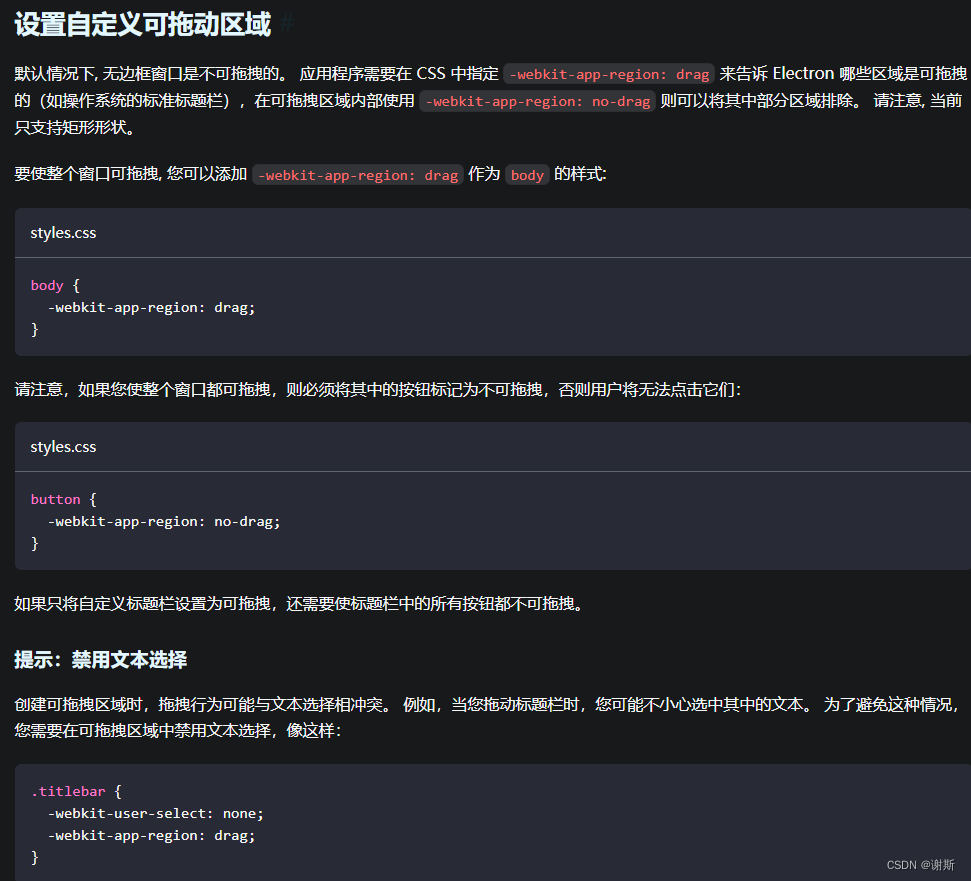
设置electron客户端自定义窗口样式
https://www.electronjs.org/zh/docs/latest/tutorial/window-customization
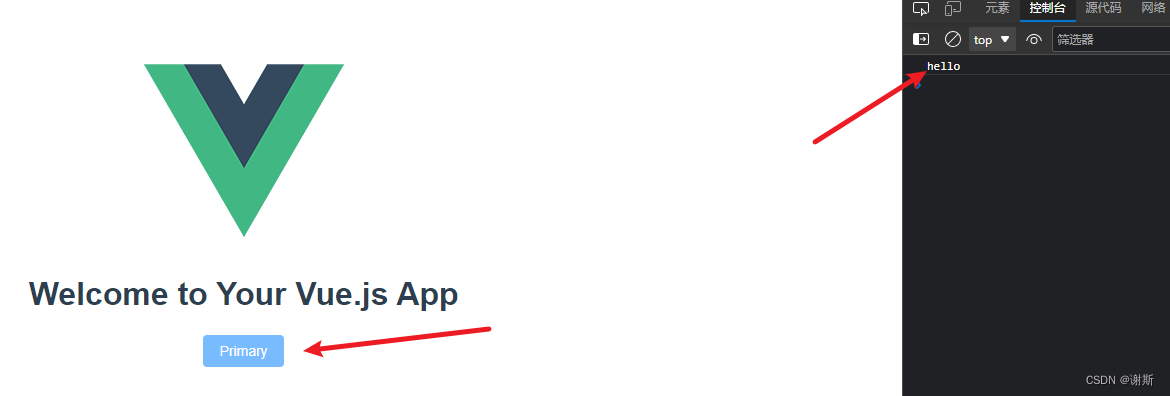
添加element中的button,并关联到electron的console.log
全局引用elementplus
https://element-plus.org/zh-CN/guide/quickstart.html
// main.ts
import { createApp } from 'vue'
import ElementPlus from 'element-plus'
import 'element-plus/dist/index.css'
import App from './App.vue'

const app = createApp(App)

app.use(ElementPlus)
app.mount('#app')
加入button
https://element-plus.org/zh-CN/component/button.html


添加preload.js文件
https://nklayman.github.io/vue-cli-plugin-electron-builder/guide/guide.html#preload-files
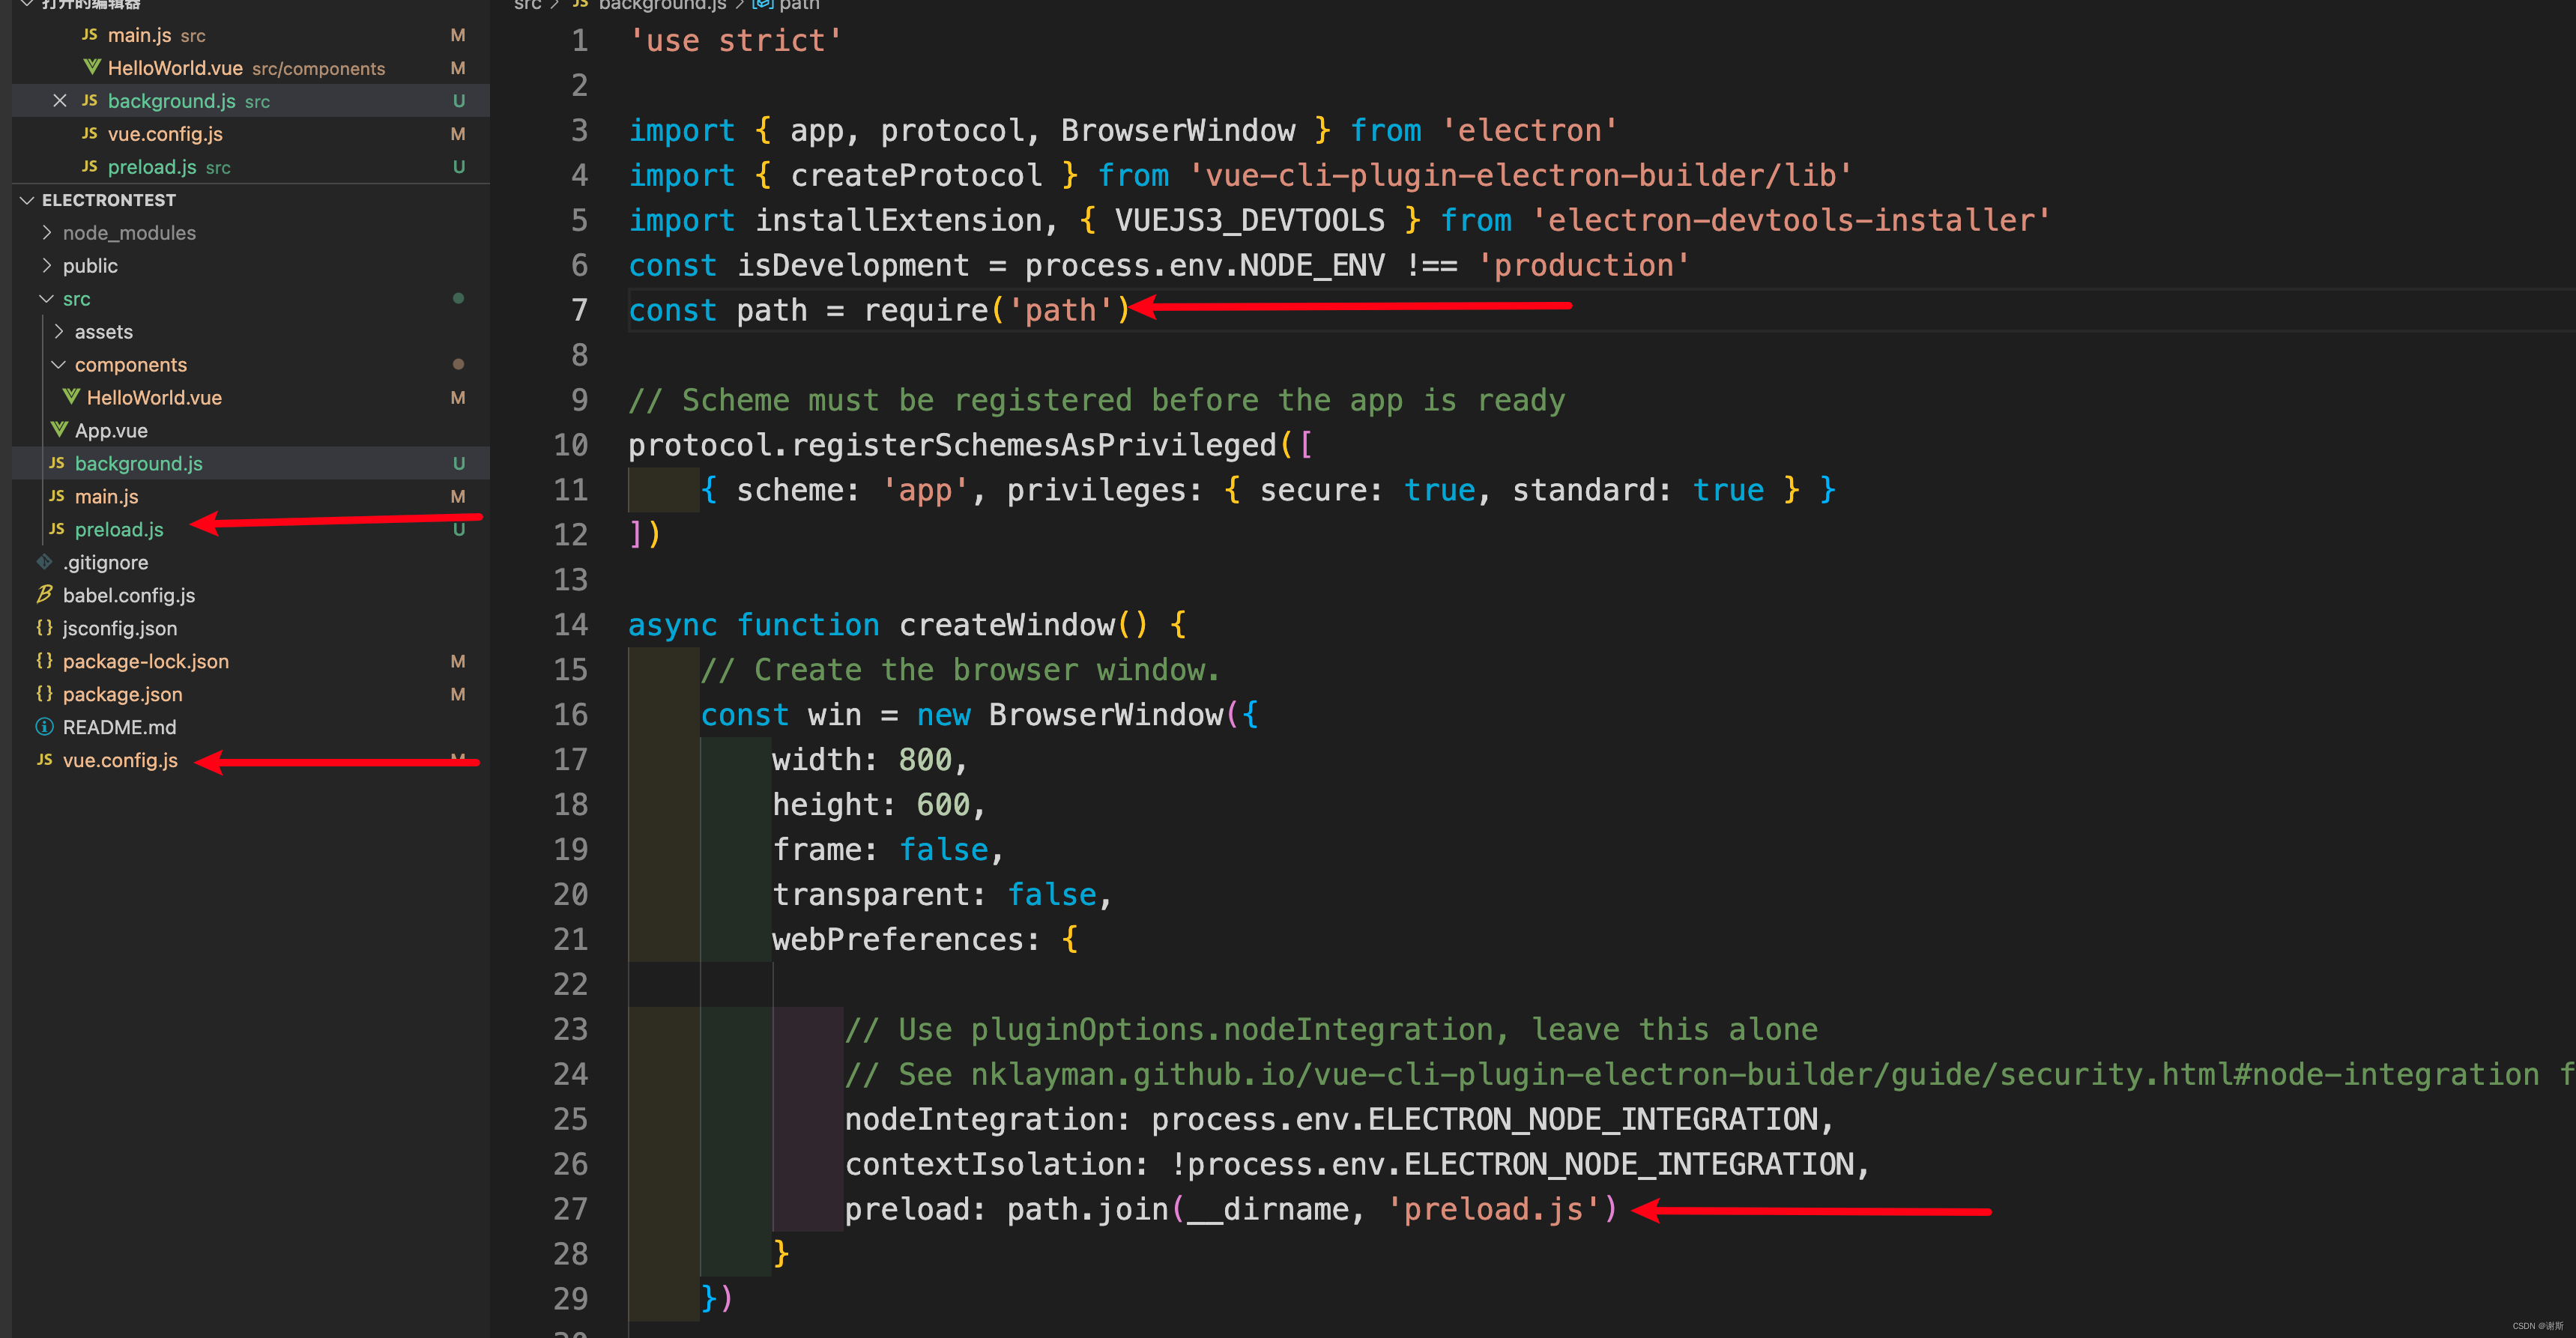
const path = require('path')
preload: path.join(__dirname, 'preload.js')
# vue.config.js
module.exports = {
    pluginOptions: {
        electronBuilder: {
            preload: 'src/preload.js',
        }
    }
}
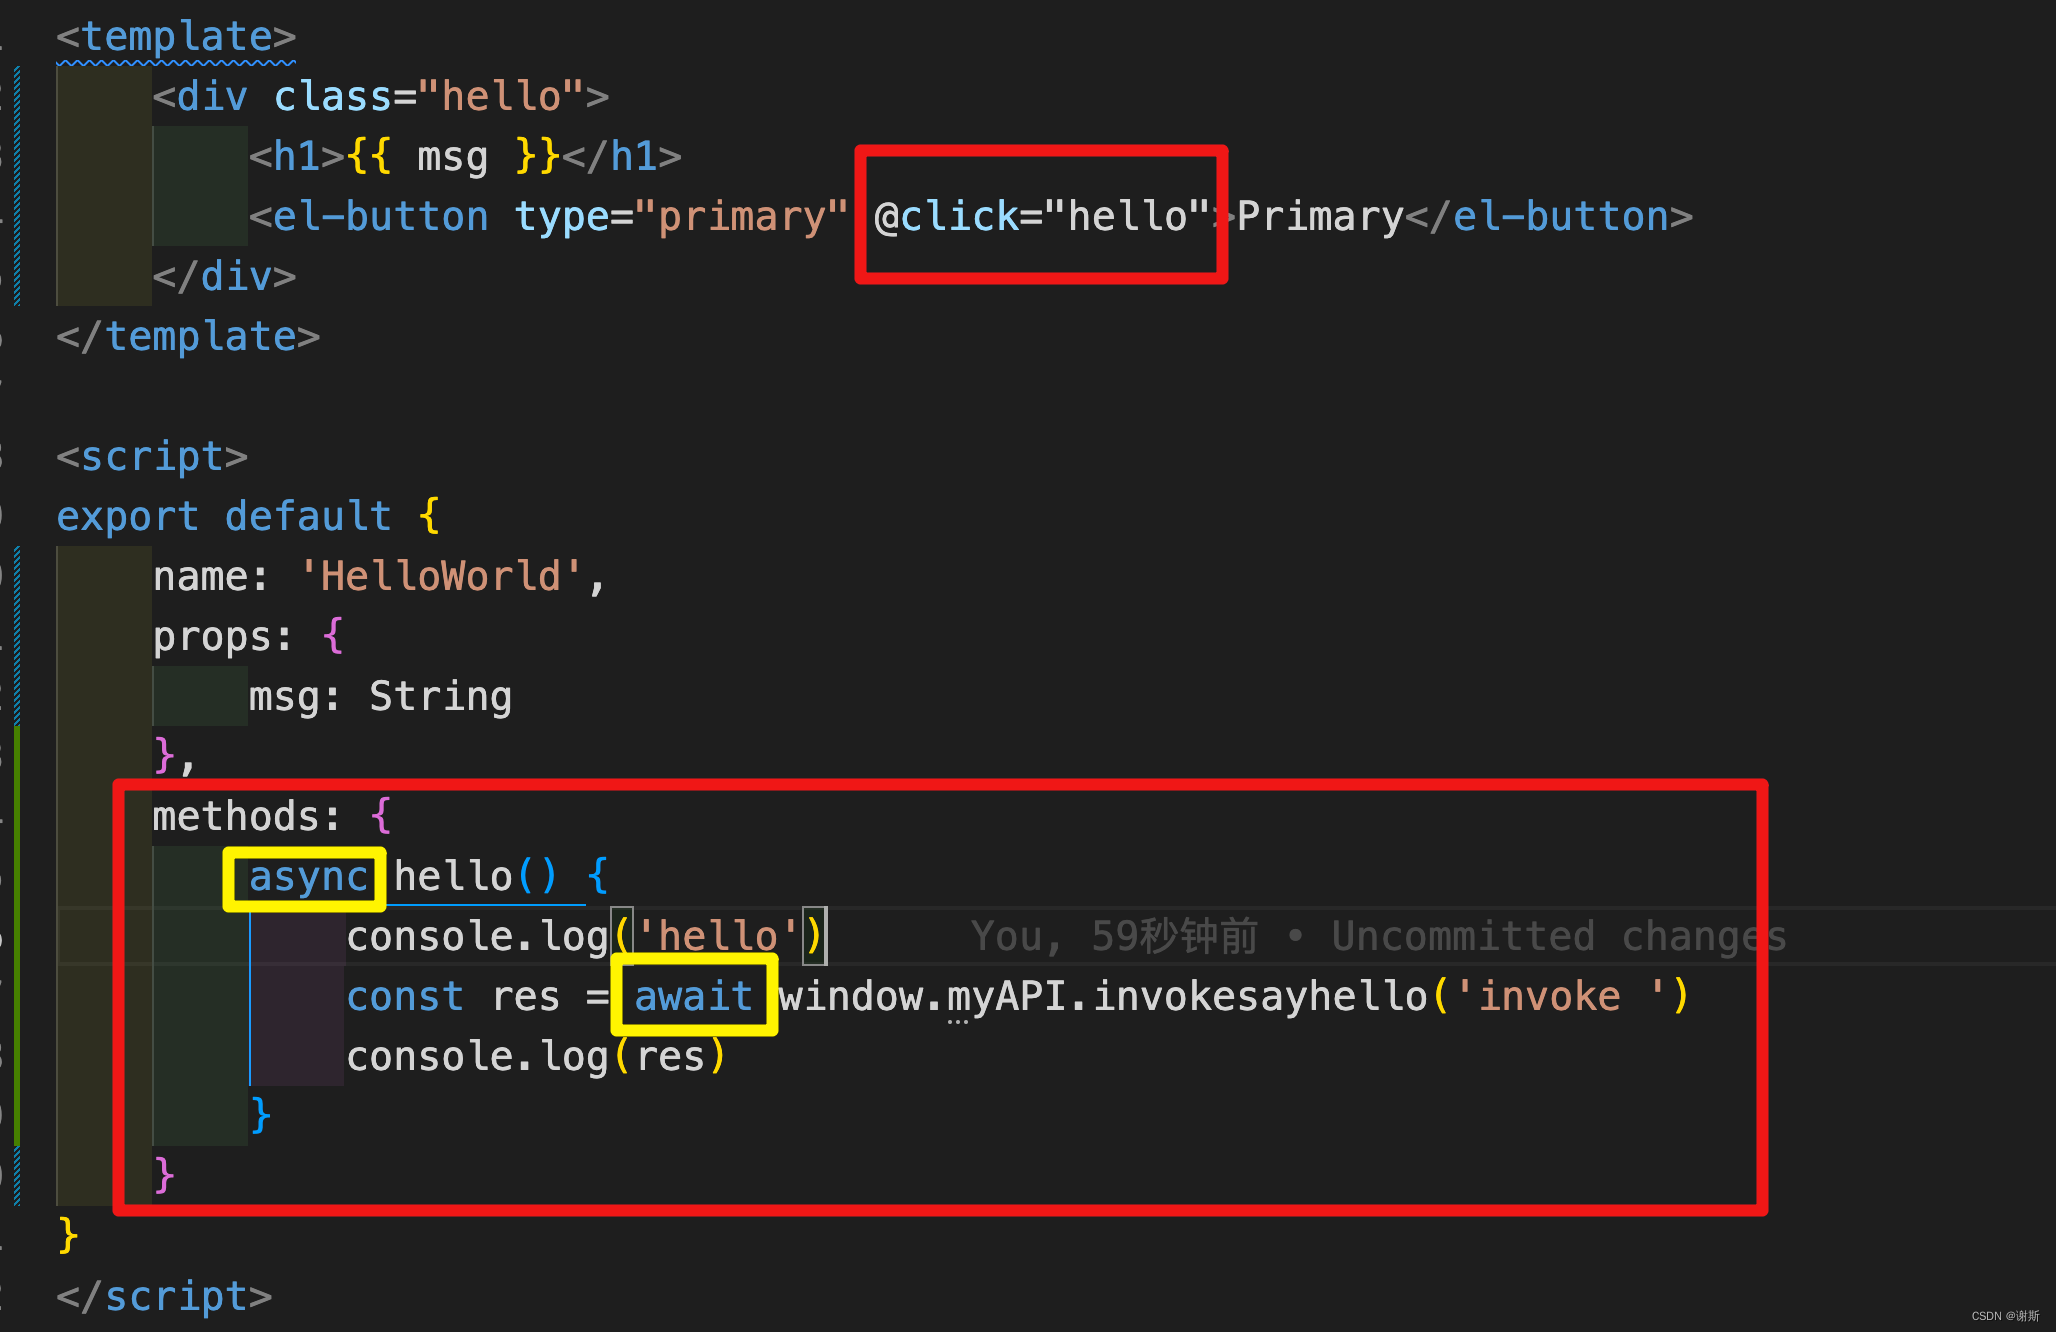
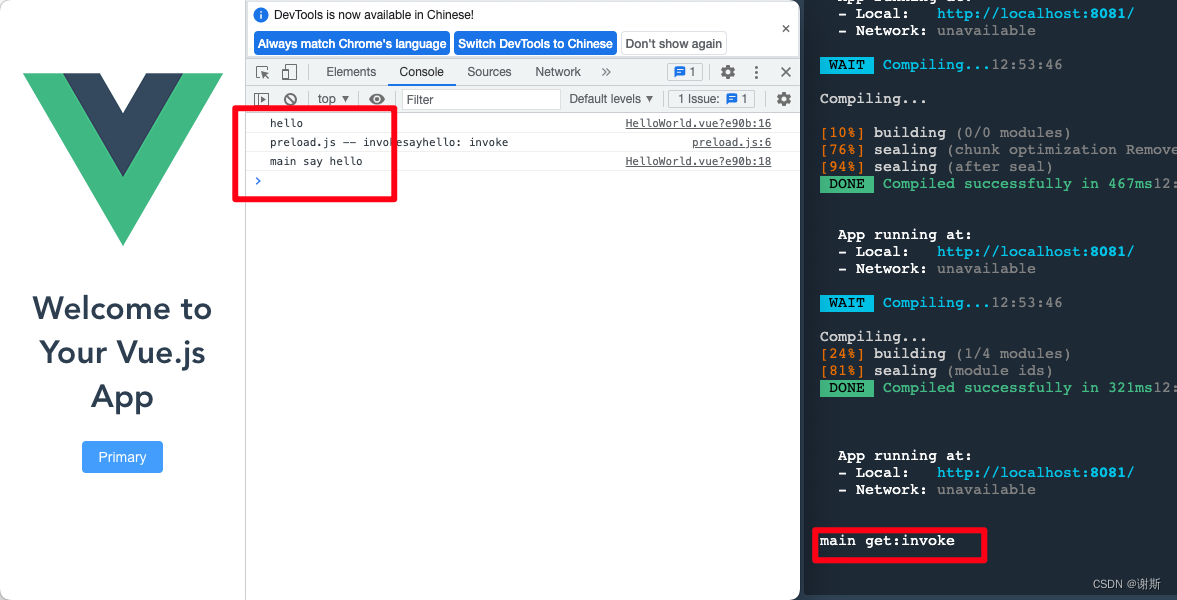
添加响应事件
hellowolrd.vue
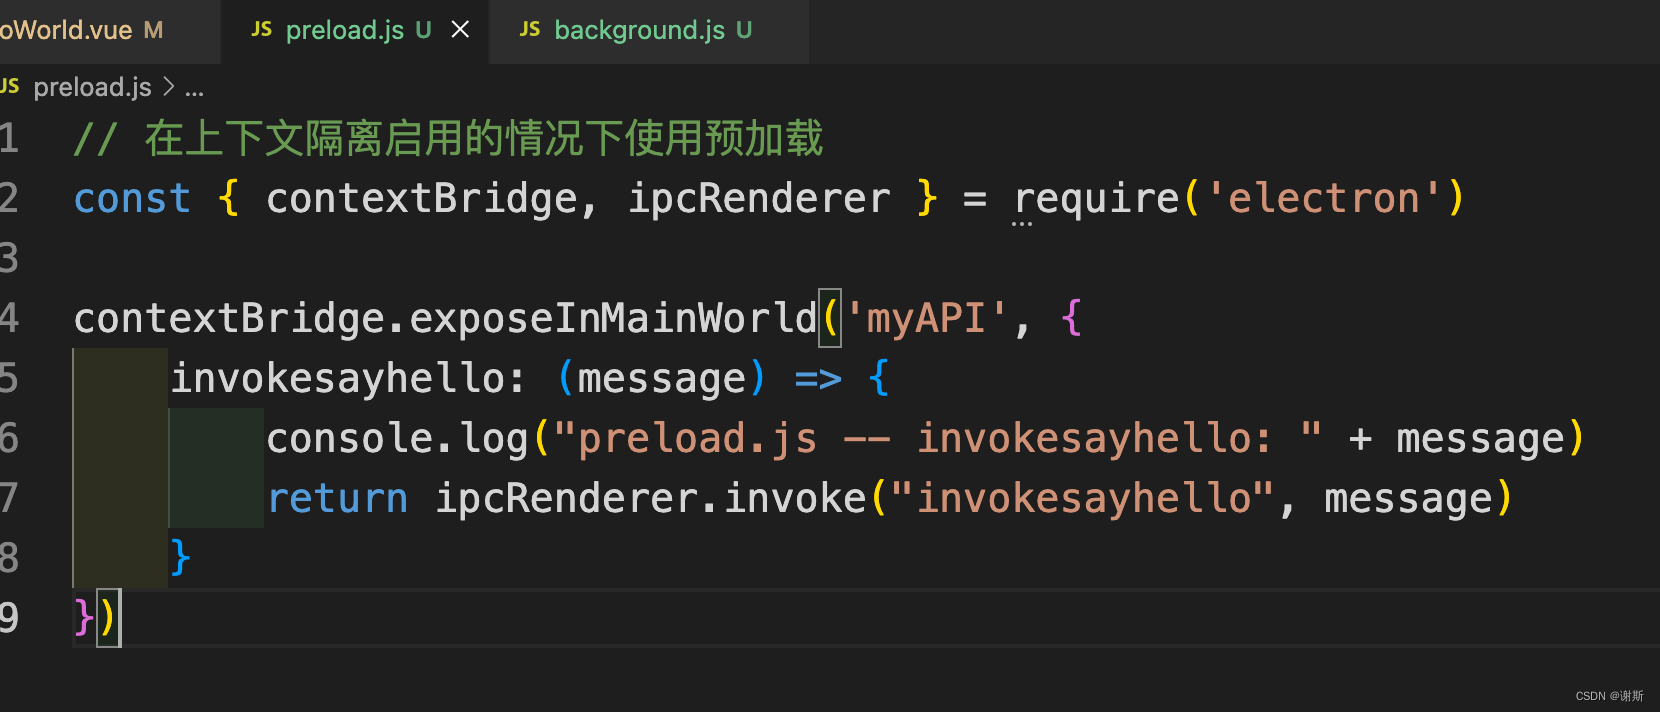
preload.js
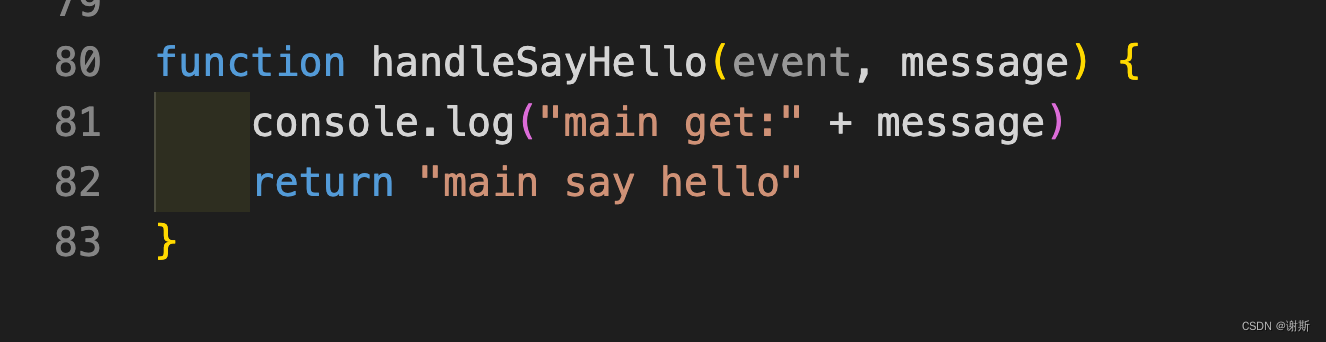
background.js


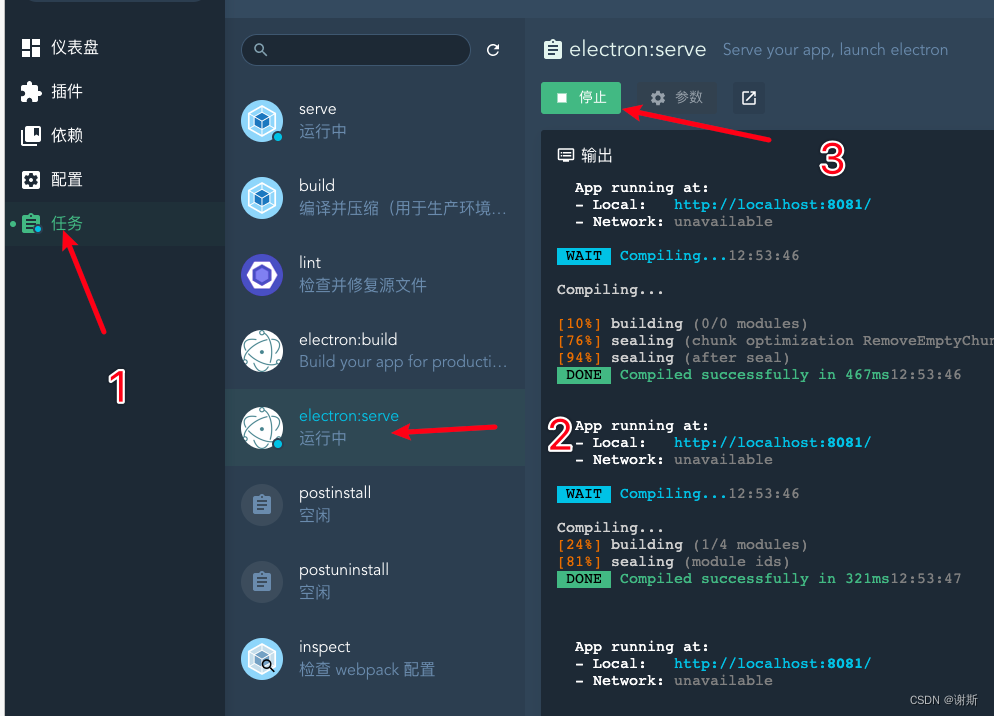
开启electronserver,查看样式
后端开发
安装python的thrift
pip3 install thrift
整合开发
参考官网编写thrift接口文档
# 生成py代码
thrift -r --gen py tutorial.thrift
# 生成nodejs代码
thrift -r --gen js:node tutorial.thrift
官方关键字说明
https://thrift.apache.org/docs/idl.htmlÏÎÎÎ
官方示例
https://raw.githubusercontent.com/apache/thrift/master/test/ThriftTest.thrift
py示例
https://thrift.apache.org/tutorial/py.html
nodejs示例
https://thrift.apache.org/tutorial/nodejs.html
使用thrift.exe生成python和nodejs的代码
thrift接口定义
electron.thrift
service xiesi
{
    string add(1: i8 arg0, 2: i8 arg1)
}
# 生成py代码
thrift -out ./ -r --gen py electron.thrift
# 生成nodejs代码
thrift -out ./ -r --gen js:node electron.thrift
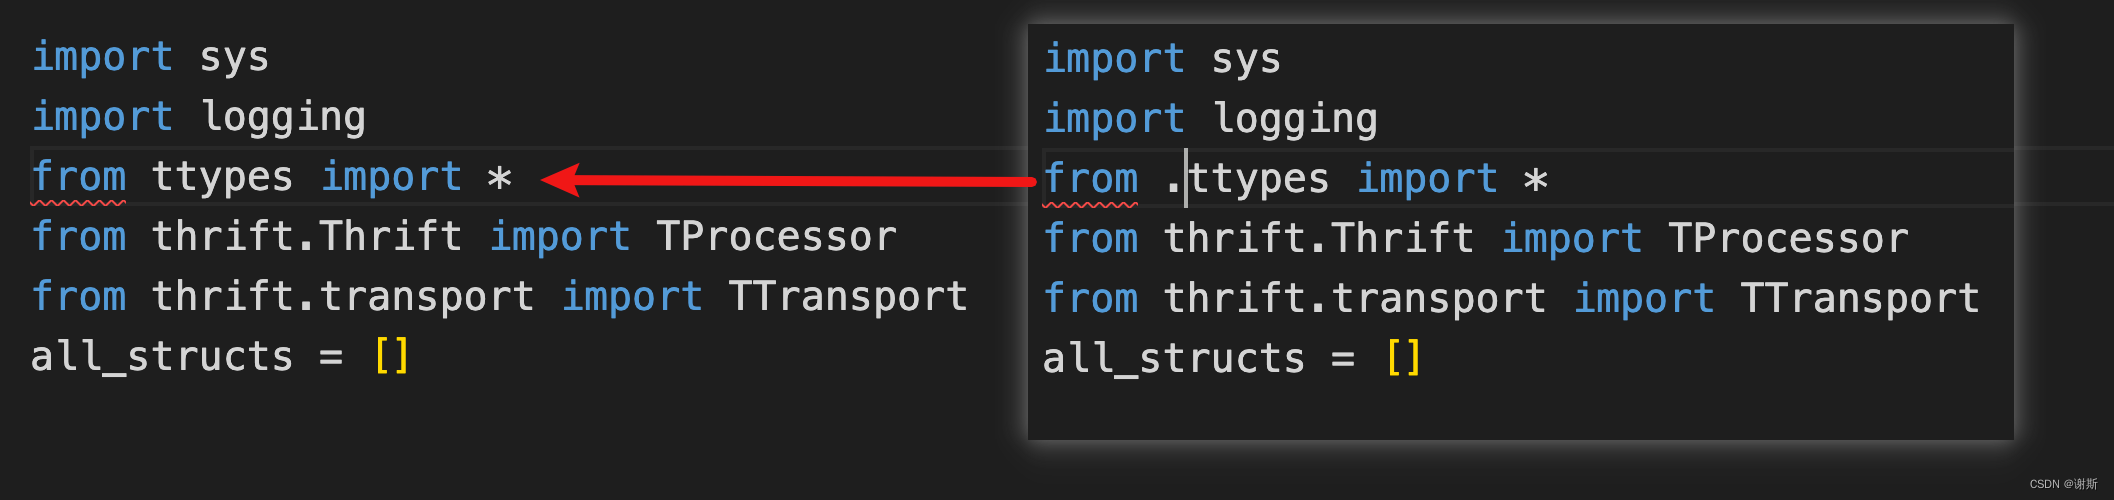
python调整部分
py目录结构
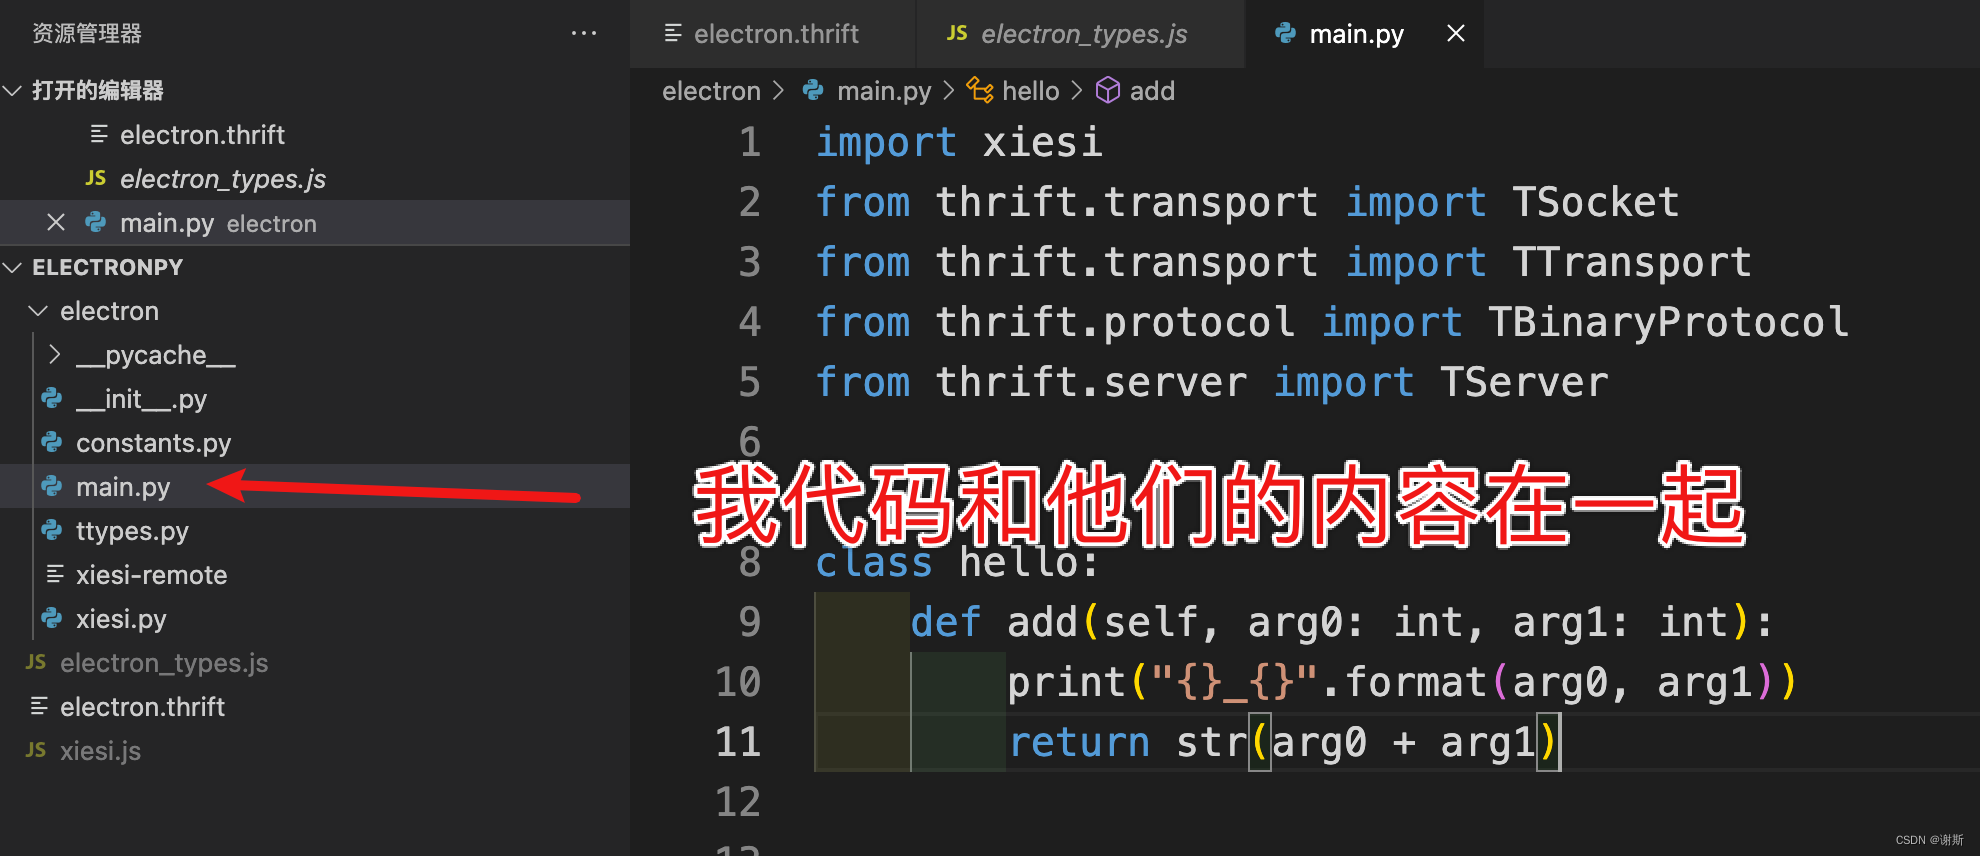
xiesi.py(生成的文件)
代码调整
main.py
import xiesi
from thrift.transport import TSocket
from thrift.transport import TTransport
from thrift.protocol import TBinaryProtocol
from thrift.server import TServer
class hello:
def add(self, arg0: int, arg1: int):
print("{}_{}".format(arg0, arg1))
return str(arg0 + arg1)
if __name__ == "__main__":
handler = hello()
processor = xiesi.Processor(handler)
transport = TSocket.TServerSocket(host="127.0.0.1", port=9090)
tfactory = TTransport.TBufferedTransportFactory()
pfactory = TBinaryProtocol.TBinaryProtocolFactory()
server = TServer.TSimpleServer(processor, transport, tfactory, pfactory)
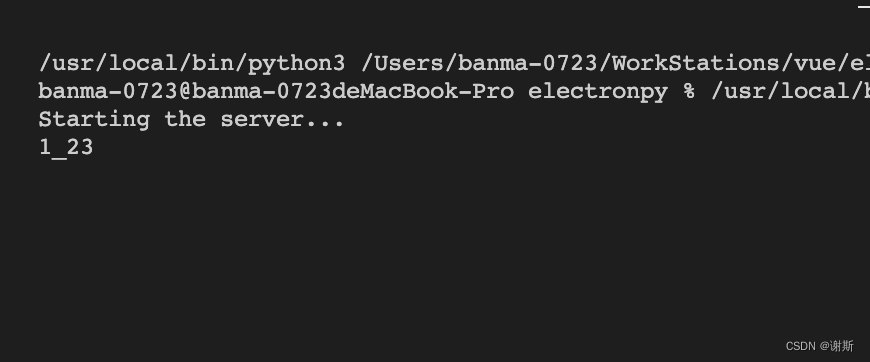
print("Starting the server...")
server.serve()
print("done.")
electron部分
目录结构
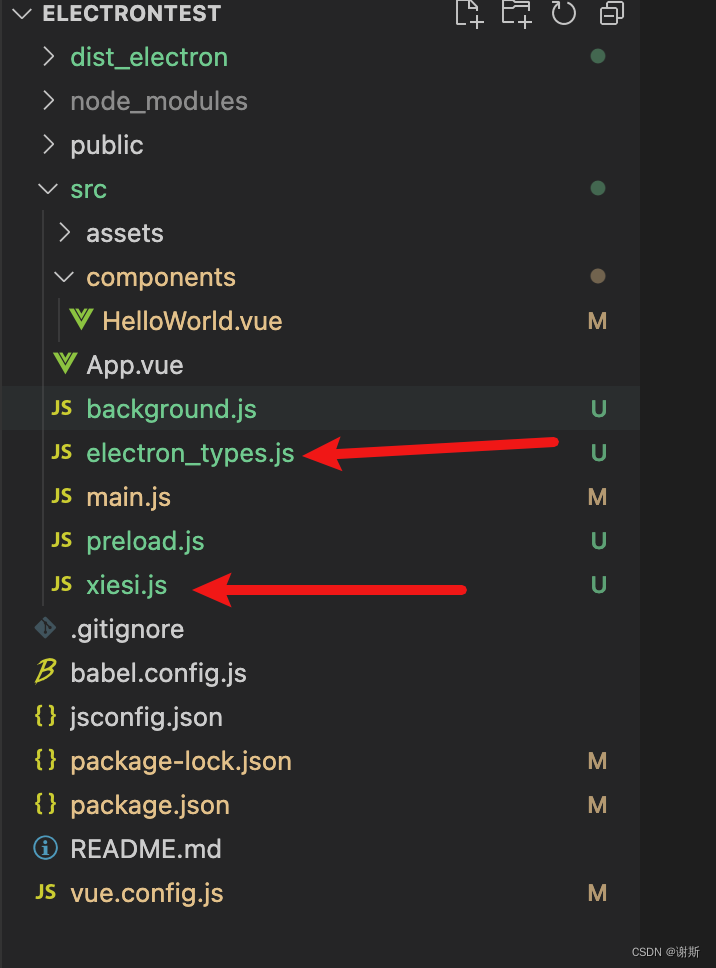
background.js
const thrift = require("thrift");
var xiesi = require('./xiesi.js');
var transport = thrift.TBufferedTransport;
var protocol2 = thrift.TBinaryProtocol;
var connection = thrift.createConnection("localhost", 9090, {
    transport: transport,
    protocol: protocol2
});

connection.on('error', function (err) {
    console.log(err)
});


function handleSayHello(event, message) {
    console.log("main get:" + message)


    if (connection.connected == false) {
        connection = thrift.createConnection("localhost", 9090, {
            transport: transport,
            protocol: protocol2
        });
    }
    // Create a Calculator client with the connection
    var client = thrift.createClient(xiesi, connection);
    client.add(1, 23, function (err, response) {
        console.log(response)
    });

    return "main say hello"
}
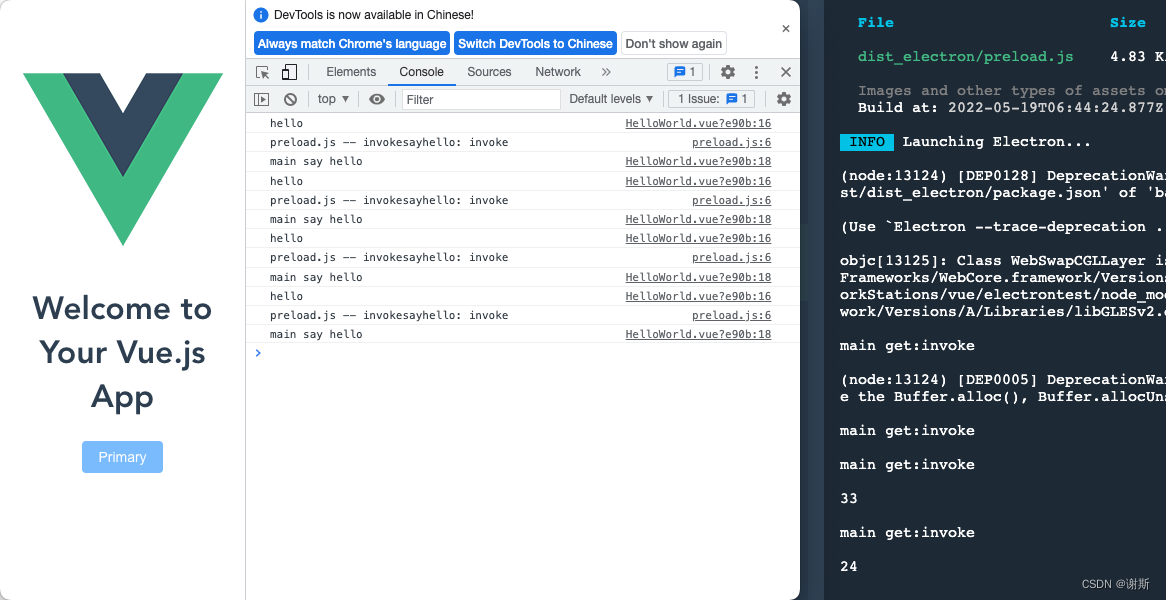
效果图
python
electron
python 打包
pyinstaller main.py -p /Users/xxx/WorkStations/vue/electronpy/electron


 被折叠的 条评论
为什么被折叠?
被折叠的 条评论
为什么被折叠?
 到【灌水乐园】发言


