


系统版本:centos7.7
一、Elasticsearch+Kibana 搭建
ES主机IP:155.159.255.122
#关闭防火墙
systemctl stop firewalld #暂停防火墙
systemctl disable firewalld #移除防火墙
#安装vim wget
yum install -y vim wget
#安装java
wget https://download.java.net/java/GA/jdk11/13/GPL/openjdk-11.0.1_linux-x64_bin.tar.gz
tar -zxvf openjdk-11.0.1_linux-x64_bin.tar.gz -C /usr/local
#java 环境变量设置,
vi /etc/profile
#测试java
java -version
#末行添加
export JAVA_HOME=/usr/local/jdk-11.0.1/
export PATH=$PATH:$JAVA_HOME/bin
export CLASSPATH=.:$JAVA_HOME/lib/tools.jar:$JAVA_HOME/lib/dt.jar:$CLASSPATH
#让配置文件生效
source /etc/profile
#安装Elasticsearch,下载地址:下载中心 - Elastic 中文社区
wget https://artifacts.elastic.co/downloads/elasticsearch/elasticsearch-7.5.0-x86_64.rpm
rpm -ivh elasticsearch-7.5.0-x86_64.rpm
#Elasticsearch 配置文件,修改下列参数
[root@HK1-R31-133 ~]# cat /etc/elasticsearch/elasticsearch.yml |grep -v "^#"
node.name: node-1
path.data: /var/lib/elasticsearch
path.logs: /var/log/elasticsearch
network.host: 0.0.0.0
http.port: 9200
cluster.initial_master_nodes: ["node-1"]
#在配置文件末行添加下列参数
xpack.security.enabled: true
xpack.license.self_generated.type: basic
xpack.security.transport.ssl.enabled: true
http.cors.enabled: true
http.cors.allow-origin: "*"
http.cors.allow-methods: OPTIONS, HEAD, GET, POST, PUT, DELETE
http.cors.allow-headers: "X-Requested-With, Content-Type, Content-Length, X-User"
#修改运行内存
vim /etc/elasticsearch/jvm.options
-Xms1g
-Xmx1g
#设置内核
vi /etc/sysctl.conf
vm.max_map_count=655360
#使其配置生效
sysctl -p
#配置limits,末行添加,重新连接ssh后生效
vim /etc/security/limits.conf
* soft nofile 65536
* hard nofile 65536
* soft nproc 4096
* hard nproc 4096
#开启ES
systemctl start elasticsearch
systemctl enable elasticsearch
#配置ES密码,需要设置多个密码,建议都设置为同一个方便记忆
/usr/share/elasticsearch/bin/elasticsearch-setup-passwords interactive
#测试
访问:http://155.159.255.122:9200
用户名:elastic
密码: 自己设置的密码
二、安装kibana
wget https://artifacts.elastic.co/downloads/kibana/kibana-7.5.0-x86_64.rpm
rpm -ivh kibana-7.5.0-x86_64.rpm
#Kibana 配置文件设置,修改下列参数
# cat /etc/kibana/kibana.yml |grep -v "^#"
server.port: 5601
server.host: "0.0.0.0"
elasticsearch.hosts: ["http://localhost:9200"]
elasticsearch.username: "kibana"
elasticsearch.password: "asjh123."
i18n.locale: "zh-CN"
#开启Kibana,并设置开机启动
systemctl start kibana
systemctl enable kibana
#测试
访问:http://155.159.255.122:5601
用户名:elastic
密码: 自己设置的密码
三、配置Rsyslog和logstash
logstash主机IP:155.159.255.114
#关闭防火墙
systemctl stop firewalld #暂停防火墙
systemctl disable firewalld #移除防火墙
#安装vim wget
yum install -y vim wget
#安装java
wget https://download.java.net/java/GA/jdk11/13/GPL/openjdk-11.0.1_linux-x64_bin.tar.gz
tar -zxvf openjdk-11.0.1_linux-x64_bin.tar.gz -C /usr/local/
#java 环境变量设置,
vi /etc/profile
#末行添加
export JAVA_HOME=/usr/local/jdk-11.0.1/
export PATH=$PATH:$JAVA_HOME/bin
export CLASSPATH=.:$JAVA_HOME/lib/tools.jar:$JAVA_HOME/lib/dt.jar:$CLASSPATH
#安装logstash
wget https://artifacts.elastic.co/downloads/logstash/logstash-7.5.0.tar.gz
tar -zxvf logstash-7.5.0.tar.gz -C /usr/local/
#创建logstash配置
# vim /usr/local/logstash-7.5.0/config/logstash.conf
input {
file {
path => "/mnt/huawei/168.206.255.129.log"
start_position => "beginning"
type => "elasticsearch"
}
}
filter{
date{
match => ["datetime", "yyyy-MM-dd HH:mm:ss,SSS"]
target => "@timestamp"
}
mutate {
# 屏蔽掉不想要的属性
remove_field => ["path","host", "@version", "_id", "_score","_type","_index","type"]
}
}
output {
stdout {
codec => rubydebug
}
elasticsearch {
hosts => ["http://155.159.255.122:9200"]
index => "test-route-%{+YYYY.MM}"
user => "elastic"
password => "自己设置的密码"
}
}
#配置rsyslog
systemctl start rsyslog
systemctl enable rsyslog
#修改下列参数
# egrep -v "*#|^$" /etc/rsyslog.conf
$ModLoad imudp
$UDPServerRun 514
$ModLoad imtcp
$InputTCPServerRun 514
$WorkDirectory /var/lib/rsyslog
$template myformat,"%$NOW% %TIMESTAMP:8:15% %hostname% %syslogtag% %msg%\n"
$ActionFileDefaultTemplate myformat
$IncludeConfig /etc/rsyslog.d/*.conf
$OmitLocalLogging on
*.info;mail.none;authpriv.none;cron.none;local6.none /var/log/messages
authpriv.* /var/log/secure
mail.* -/var/log/maillog
cron.* /var/log/cron
*.emerg :omusrmsg:*
uucp,news.crit /var/log/spooler
local7.* /var/log/boot.log
$template huawei,"/mnt/huawei/%FROMHOST-IP%.log" #末行添加
local6.* ?huawei #末行添加
#重启rsyslog
systemctl restart rsyslog
#华为交换机配置-R31
info-center loghost source Vlanif1310 #选择交换机和服务器互联的vlan
info-center loghost 155.159.255.114 facility local6 #设置消息等级以及指定rsyslog服务器地址
#启动logstash服务,指定配置文件
/usr/local/logstash-7.5.0/bin/logstash -f /usr/local/logstash-7.5.0/config/logstash.conf
#成功后
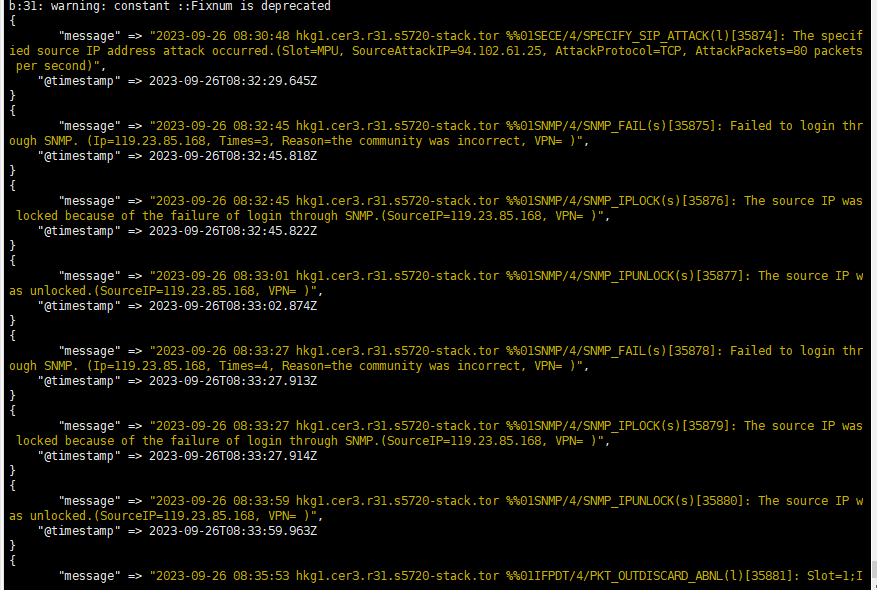
#在ES服务器上建立索引

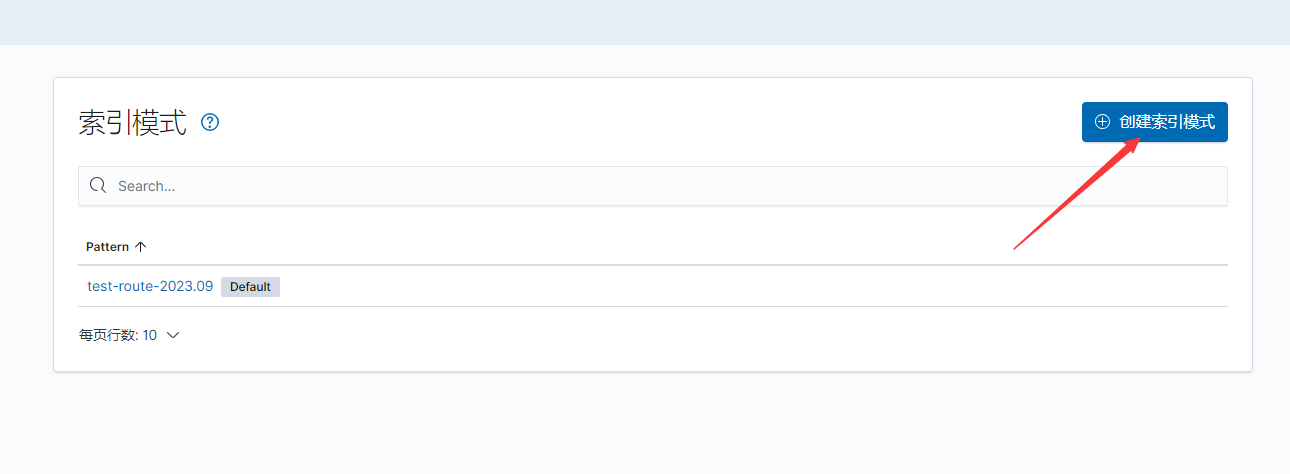

最后 点击下一步 完成即可
#不通过rsyslog,直接通过logstash监控日志的方法
systemctl stop rsyslog #展厅rsyslog服务
#安装logstash方法同上,安装好后
#创建并配置logstash文件
# vi /usr/local/logstash-7.5.0/config/switch.conf
input{
tcp { port => 5002
type => "Cisco"}
udp { port => 514
type => "HUAWEI"}
udp { port => 5002
type => "Cisco"}
udp { port => 5003
type => "H3C"}
}
filter {
if [type] == "Cisco" {
grok {
match => { "message" => "<%{BASE10NUM:syslog_pri}>%{NUMBER:log_sequence}: .%{SYSLOGTIMESTAMP:timestamp}: %%{DATA:facility}-%{POSINT:severity}-%{CISCO_REASON:mnemonic}: %{GREEDYDATA:message}" }
match => { "message" => "<%{BASE10NUM:syslog_pri}>%{NUMBER:log_sequence}: %{SYSLOGTIMESTAMP:timestamp}: %%{DATA:facility}-%{POSINT:severity}-%{CISCO_REASON:mnemonic}: %{GREEDYDATA:message}" }
add_field => {"severity_code" => "%{severity}"}
overwrite => ["message"]
}
}
elseif [type] == "H3C" {
grok {
match => { "message" => "<%{BASE10NUM:syslog_pri}>%{SYSLOGTIMESTAMP:timestamp} %{YEAR:year} %{DATA:hostname} %%%{DATA:vvmodule}/%{POSINT:severity}/%{DATA:digest}: %{GREEDYDATA:message}" }
remove_field => [ "year" ]
add_field => {"severity_code" => "%{severity}"}
overwrite => ["message"]
}
}
elseif [type] == "HUAWEI" {
grok {
match => { "message" => "<%{BASE10NUM:syslog_pri}>%{SYSLOGTIMESTAMP:timestamp} %{DATA:hostname} %%%{DATA:ddModuleName}/%{POSINT:severity}/%{DATA:Brief}:%{GREEDYDATA:message}"}
match => { "message" => "<%{BASE10NUM:syslog_pri}>%{SYSLOGTIMESTAMP:timestamp} %{DATA:hostname} %{DATA:ddModuleName}/%{POSINT:severity}/%{DATA:Brief}:%{GREEDYDATA:message}"}
remove_field => [ "timestamp" ]
add_field => {"severity_code" => "%{severity}"}
overwrite => ["message"]
}
}
#mutate {
# gsub => [
# "severity", "0", "Emergency",
# "severity", "1", "Alert",
# "severity", "2", "Critical",
# "severity", "3", "Error",
# "severity", "4", "Warning",
# "severity", "5", "Notice",
# "severity", "6", "Informational",
# "severity", "7", "Debug"
# ]
# }
}
output{
stdout {
codec => rubydebug
}
elasticsearch {
index =>
"syslog-%{+YYYY.MM.dd}"
hosts => ["155.159.255.122:9200"]
user => "elastic"
password => "自己设置的密码"
}
}
#华为交换机配置
info-center loghost source Vlanif1310 #选择交换机和服务器互联的vlan
info-center loghost 155.159.255.114 #指定logstash服务器地址
#启动logstash
/usr/local/logstash-7.5.0/bin/logstash -f /usr/local/logstash-7.5.0/config/switch.conf
#启动后静等2-3分钟


 1万+
1万+


 被折叠的 条评论
为什么被折叠?
被折叠的 条评论
为什么被折叠?
 到【灌水乐园】发言


