


B站刘二大人老师的《PyTorch深度学习实践》Lecture_06 重点回顾+手记+代码复现+报错解决
Lecture_06 逻辑回归 Logistic Regression
一、重点回顾
(一)分类任务的数据集
① The MNIST Dataset:handwritten digits
- Training set: 60,000 examples,
- Test set: 10,000 examples.
- Classes: 10
import torchvision
train_set = torchvision.datasets.MNIST(root='../dataset/mnist', train=True, download=True)
test_set = torchvision.datasets.MNIST(root='../dataset/mnist', train=False, download=True)
② The CIFAR-10 dataset:32×32的彩色小图片
- Training set: 50,000 examples,
- Test set: 10,000 examples.
- Classes: 10(飞机、车、鸟、猫、鹿、狗、青蛙、马、船、卡车)
import torchvision
train_set = torchvision.datasets.CIFAR10(…)
test_set = torchvision.datasets.CIFAR10(…)
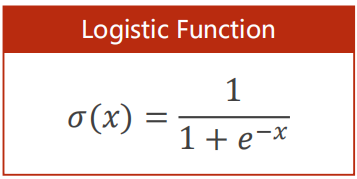
(二)Sigmoid functions
S型、饱和函数(导函数的极限为0)
Logistic Function
Logistic函数是最典型的Sigmoid函数

其他的Sigmoid Functions

(三)逻辑回归模型 Logistic Regression Model

import torch.nn.functional as F

class LogisticRegressionModel(torch.nn.Module):
	def __init__(self):
	super(LogisticRegressionModel, self).__init__()
	self.linear = torch.nn.Linear(1, 1)

def forward(self, x):
	y_pred = F.sigmoid(self.linear(x))
	return y_pred

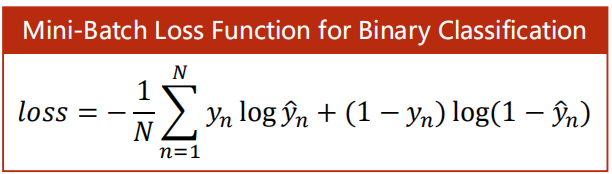
criterion = torch.nn.BCELoss()
二、手记

三、代码复现
import torch
import torch.nn.functional as F

# Prepare dataset
x_data = torch.Tensor([[1.0],[2.0],[3.0]])
y_data = torch.Tensor([[0],[0],[1]])

# Design Model
class LogisticRegressionModel(torch.nn.Module):
    def __init__(self):
        super(LogisticRegressionModel,self).__init__()
        self.linear = torch.nn.Linear(1,1)

    def forward(self, x):
        y_pred = F.sigmoid(self.linear(x))
        return  y_pred

model = LogisticRegressionModel()

# Construct Loss & Optimizer
criterion = torch.nn.BCELoss()
optimizer = torch.optim.SGD(model.parameters(),lr=0.01)

# Training Cycle
for epoch in range(1000):
	y_pred = model(x_data)
	loss = criterion(y_pred,y_data)
	print(epoch,loss.item())

	optimizer.zero_grad()
	loss.backward()
	optimizer.step()

# Result of Logistic Regression
import numpy as np
import matplotlib.pyplot as plt

x = np.linspace(0,10,200)
x_t = torch.Tensor(x).view((200,1))
y_t = model(x_t)
y = y_t.data.numpy()
plt.plot(x,y)
plt.plot([0,10],[0.5,0.5],c = 'r')
plt.xlabel('Hours')
plt.ylabel('Probability of Pass')
plt.grid()
plt.show()
注意:torch.sigmoid()、torch.nn.Sigmoid()和torch.nn.functional.sigmoid()三者比较

四、代码报错及解决
OMP: Error #15: Initializing libiomp5md.dll, but found libiomp5md.dll already initialized.

解决:
- 不完全解决方案
import os
os.environ["KMP_DUPLICATE_LIB_OK"]="TRUE"
As an unsafe, unsupported, undocumented workaround you can set the environment variable KMP_DUPLICATE_LIB_OK=TRUE to allow the program to continue to execute, but that may cause crashes or silently produce incorrect results.
- 升级numpy包(完美解决)
command命令下:pip install --upgrade numpy
参考:
https://blog.csdn.net/qq_37791134/article/details/107912975


 9289
9289


 被折叠的 条评论
为什么被折叠?
被折叠的 条评论
为什么被折叠?
 到【灌水乐园】发言


