


目录
1、触摸移动
// 触摸移动
const touch = {}
    function onShortcutTouchMove(e) {
        // console.log(e.target.dataset.index);
        // 通过触摸移动的量去计算当前的index
        touch.y2 = e.touches[0].pageY //正在变化的手指的位置
        // 偏移的index
        const deletaIndex = Math.floor((touch.y2 - touch.y1) / 18)
        //当前手指摸到的字母的index
        const anchorIndex = touch.anchorIndex + deletaIndex
        scrollTo(anchorIndex)

    }
使用绑定: @touchmove.prevent="onShortcutTouchMove"
2、触摸跳转
// 注册触摸跳转对呀的li
    function onShortcutTouchStart(e) {
        // 获取触摸字母的index
        // console.log(e.target.dataset.index);
        const anchorIndex = e.target.dataset.index / 1
        touch.y1 = e.touches[0].pageY//手指落下的初始值
        touch.anchorIndex = anchorIndex //初始index
        scrollTo(anchorIndex)

    }
使用: @touchstart.prevent="onShortcutTouchStart"
3、解决手指触摸超出范围
function scrollTo(index) {
        // 限制距离
        // index = Math.min(index, groupRef.value.children.length -1)
        index = Math.max(0,Math.min(index, groupRef.value.children.length -1))
        // console.log(scrollRef.value);
        const scroll = scrollRef.value.scroll
        // console.log(groupRef.value.children[index]);
        const targetEl = groupRef.value.children[index]
        // 官方提供的方法
        scroll.scrollToElement(targetEl)
    }
4、性能优化(会话存储)
本地存储在js文件夹下创建storage-api.js
// 歌手页数据封装
export default {
    // 设置临时会话存储
    setSession(key, item) {
        sessionStorage.setItem(key, JSON.stringify(item))
    },
    // 获取临时会话存储
    getSession(key) {
        return JSON.parse(sessionStorage.getItem(key))
    },
    // 设置永久存储
    setLocal(key, item) {
        localStorage.setItem(key, JSON.stringify(item))
    },
    // 获取永久存储
    getLocal(key, type) {
        let item = JSON.parse(localStorage.getItem(key))
        if (!item) {
            item = type
        }
        return item
    }
}
使用:导入js文件
import myStorage from "@/assets/js/storage-api";onMounted(async () => {
// 在本地存储查看
let storageArr = myStorage.getLocal("__singerList__", []);
if (storageArr.length) {
singerList.value = storageArr;
} else {
// console.log(arrStrUppercase);
const result = await getSingerList(arrStrUppercase.value);
// console.log(result);
singerList.value = result;
// 传的第一个参数为设置key,第二个默认result
myStorage.setLocal("__singerList__", result);
}
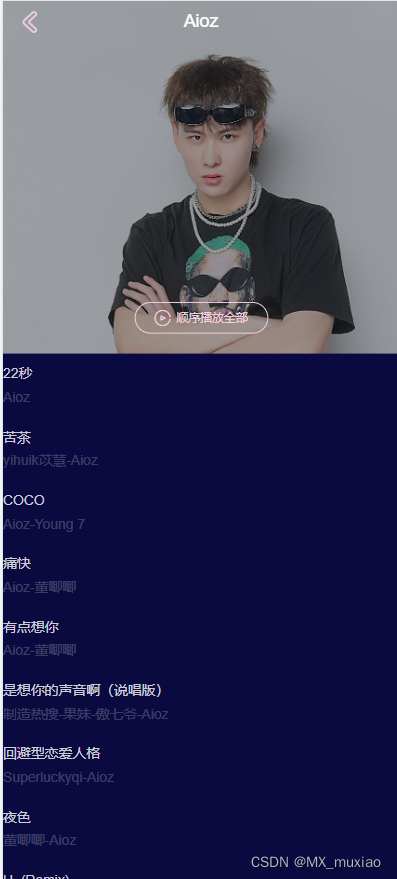
});5、歌手详情页
在view文件夹下创建SingerDetail.vue
<template>
  <div class="singer-detail">
    <my-musicList
      :picUrl="picUrl"
      :listTitle="listTitle"
      :songs="songs"
    ></my-musicList>
  </div>
</template>

<script setup>
import MyMusicList from "@/components/MusicList";
import { getSingerDetail } from "@/service/singer";
import { computed, onMounted,ref } from "@vue/runtime-core";
// 接收数据
const props = defineProps(["detailObj"]);
// 歌曲列表
const songs = ref([]);
// 背景图片
const picUrl = computed(() => {
  return props.detailObj.picUrl;
});
// 标题
const listTitle = computed(() => {
  return props.detailObj.name;
});

onMounted(async () => {
  //   console.log(props.detailObj);
  const result = await getSingerDetail(props.detailObj);
  console.log(result);
  songs.value = result.hotSongs;
  //   console.log(songs.value);
});
</script>

<style lang="scss" scoped>
.singer-detail {
  position: fixed;
  top: 0;
  left: 0;
  bottom: 0;
  right: 0;
  background: $color-background;
  z-index: 1;
}
</style>
配置路由
{
    path: '/singer',
    component: () => import('@/views/Singer'),
    children: [
      {
        path: ':id',
        component: () => import('@/views/SingerDetail')
      }
    ]
  },
因为从Singer.vue跳转所以设置一个路由出口
<router-view :detailObj="singerDetail"></router-view>在绑定一个点击事件@select="getSinger"
<my-singerList
      :singerList="singerList"
      :arrStr="arrStrUppercase"
      @select="getSinger"
    ></my-singerList>
import {useRouter} from "vue-router";
const singerDetail = ref({})
function getSinger(item) {
// console.log(item);
singerDetail.value = {
picUrl: item.picUrl,
id: item.id,
name: item.name
};
// 路由跳转
router.push({
path: `/singer/${item.id}`,
})
}然后在SingerList.vue接收一下自定义事件
const emit = defineEmits(["select"]);在对应的li绑定click事件
<li
            class="item"
            v-for="item in group.nameArr"
            :key="item.id"
            @click="selectItem(item)"
          >
然后触发父组件的select
function selectItem(item) {
  emit("select", item);
}
总结一下:在父组件Singer.vue绑定了自定义事件,就是为了打印一下到时候传过来的item,然后子组件里面接收了一下这个自定义事件,并且绑定了一个点击事件去触发它,绑定一个点击事件去触发这个selectItem并且把这个item传过去,然后触发了这个父组件的select事件之后呢就会打印这个item。(但是没生效官方默认把点击效果关闭,所以要手动开启)
Scroll.vue
<template>
  <div class="" ref="rootRef">
    <slot></slot>
  </div>
</template>

<script setup>
import { useScroll } from "@/assets/js/useScroll";

const props = defineProps({
  probeType: {
    type: Number,
    default: 1,
  },
//打开click点击事件才会生效
  click: {
    type: Boolean,
    default: true
  }
});
// 接受自定义事件
const emit = defineEmits(["scroll"]);
const { rootRef, scroll } = useScroll(props, emit);

// 暴露超出给父组件使用
defineExpose({
  scroll,
});
</script>

<style lang="scss" scoped>
</style>
6、抽离公共组件MusicList.vue
<template>
  <div class="music-list">
    <!-- 返回按钮 -->
    <div class="back">
      <i class="icon-back"></i>
    </div>
    <!-- 标题 -->
    <h1 class="title">{{ listTitle }}</h1>
    <!-- 封面背景图 -->
    <div class="bg-image" :style="bgImageStyle">
      <div class="play-btn-wrapper">
        <div class="play-btn">
          <i class="icon-play"></i>
          <span class="text">顺序播放全部</span>
        </div>
      </div>
      <!-- 模糊遮罩 -->
      <div class="filter"></div>
    </div>
    <!-- 歌曲列表 -->
    <my-scroll class="list" :probeType="3">
      <div class="song-list-wrapper">
        <my-songList :songs="songs"></my-songList>
      </div>
    </my-scroll>
  </div>
</template>

<script setup>
import { computed } from "@vue/runtime-core";
import MySongList from "@/components/base/SongList";
import MyScroll from "@/components/base/Scroll";

const props = defineProps({
  songs: {
    type: Array,
    default: [],
  },
  listTitle: String,
  picUrl: String,
});

const bgImageStyle = computed(() => {
  return {
    backgroundImage: `url(${props.picUrl})`,
  };
});
// console.log(props.picUrl);
</script>

<style lang="scss" scoped>
.music-list {
  position: fixed;
  width: 100%;
  top: 0;
  bottom: 0;
  .back {
    position: absolute;
    top: 0;
    left: 6px;
    z-index: 20;
    transform: translateZ(2px);
    .icon-back {
      display: block;
      padding: 10px;
      font-size: $font-size-large-x;
      color: $color-theme;
    }
  }
  .title {
    position: absolute;
    top: 0;
    left: 10%;
    width: 80%;
    z-index: 20;
    transform: translateZ(2px);
    @include no-wrap();
    text-align: center;
    line-height: 40px;
    font-size: $font-size-large;
    color: $color-text;
  }
  .bg-image {
    position: relative;
    width: 100%;
    height: 40%;
    transform-origin: top;
    background-size: cover;
    z-index: 0;
    .play-btn-wrapper {
      position: absolute;
      bottom: 20px;
      z-index: 10;
      width: 100%;
      .play-btn {
        box-sizing: border-box;
        width: 135px;
        padding: 7px 0;
        margin: 0 auto;
        text-align: center;
        border: 1px solid $color-theme;
        color: $color-theme;
        border-radius: 100px;
        font-size: 0;
      }
      .icon-play {
        display: inline-block;
        vertical-align: middle;
        margin-right: 6px;
        font-size: $font-size-medium-x;
      }
      .text {
        display: inline-block;
        vertical-align: middle;
        font-size: $font-size-small;
      }
    }
    .filter {
      position: absolute;
      top: 0;
      left: 0;
      width: 100%;
      height: 100%;
      background: rgba(7, 17, 27, 0.4);
    }
  }
  .list {
    position: absolute;
    bottom: 0;
    width: 100%;
    z-index: 0;
    .song-list-wrapper {
      padding: 20px 30px;
      min-height: 350px;
      background: $color-background;
    }
  }
}
</style>
请求数据service文件夹下singer.js
// 获取歌手单曲数据
export function getSingerDetail(singerItem) {
    return get('/artists', {
        id: singerItem.id
    })
}
在上面的SingerDetail.vue中打印数据并处理数据,通过这个组件传过去
<my-musicList
      :picUrl="picUrl"
      :listTitle="listTitle"
      :songs="songs"
    ></my-musicList>
在MusicList.vue接收props,渲染数据,在背景那里动态绑定一个bgImageStyle。
7、创建歌手歌曲列表SongLIst
在MusicList.vue中导入歌手歌曲列表,接收MusicList传过来的值,以及还有歌手名的处理:
<template>
  <ul class="song-list">
    <li class="item" v-for="item in songs" :key="item.id">
      <div class="content">
        <h2 class="name">{{ item.name }}</h2>
        <p class="desc">{{ handle(item) }}</p>
      </div>
    </li>
  </ul>
</template>

<script setup>
const props = defineProps({
  songs: {
    type: Array,
    default: [],
  },
});
//处理歌手名
function handle(item) {
  return item.ar
    .map((nameObj) => {
      return nameObj.name;
    }).join("-");
}
</script>

<style lang="scss" scoped>
.song-list {
  .item {
    display: flex;
    align-items: center;
    box-sizing: border-box;
    height: 64px;
    font-size: $font-size-medium;
    .content {
      flex: 1;
      line-height: 20px;
      overflow: hidden;
      .name {
        @include no-wrap();
        color: $color-text-ll;
      }
      .desc {
        @include no-wrap();
        margin-top: 4px;
        color: $color-text-d;
      }
    }
  }
}
</style>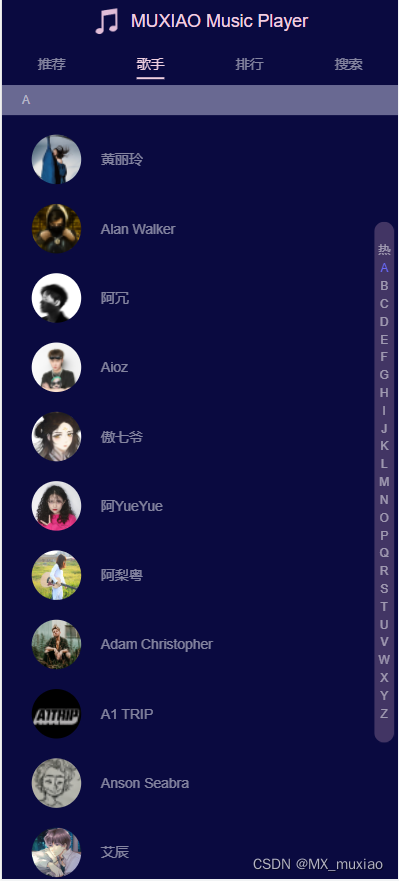


 3162
3162


 被折叠的 条评论
为什么被折叠?
被折叠的 条评论
为什么被折叠?
 到【灌水乐园】发言


