项目要点
- 4种天气数据的分类: cloudy, rain, shine, sunrise.
- all_img_path = glob.glob(r'G:\01-project\08-深度学习\day 56 迁移学习\dataset/*.jpg') # 指定文件夹 # import glob
- 获取随机数列: index = np.random.permutation(len(all_img_path))
- 建立数组和索引的关联: idx_to_species = dict((i, c) for i, c in enumerate(species))
- transform = transforms.Compose([transforms.Resize((96, 96)), transforms.ToTensor()]) # 转换为tensor # 定义transform
- 数据由numpy转换为tensor: torch.from_numpy(np.array(label)).long()
- 判断图片的通道数: if np.array(img).shape[-1] == 3
- 打开文件夹图片: img = Image.open(all_img_path[0])
- 数据转换为ndarray: np.asarray(img).shape
- train_d1 = torch.utils.data.DataLoader(train_ds, batch_size = 16, shuffle = True, collate_fn = MyDataset.collate_fn, drop_last = True) # 定义dataloader # 最后一批数据直接不用
定义模型:
- 添加卷积层: self.conv1 = nn.Conv2d(3, 32, 3)
- 添加激活层: x = self.pool(F.relu(self.conv1(x)))
- 添加BN层: self.bn1 = nn.BatchNorm2d(32) # x = self.bn1(x)
- 添加Flatten层: x = nn.Flatten()(x) # 用来将输入“压平”,即把多维的输入一维化,# 常用在从 卷积层到全连接层的过渡。
- 添加卷积层: self.fc1 = nn.Linear(64 * 10 * 10, 1024)
- 添加激活层: x = F.relu(self.fc1(x))
- 添加dropout: self.dropout = nn.Dropout() # 防止过拟合
- 添加输出层: self.fc3 = nn.Linear(256, 4)
- x = self.fc3(x)
- 定义程序运行位置: device = torch.device('cuda:0' if torch.cuda.is_available() else 'cpu')
- 定义优化器: optimizer = optim.Adam(model.parameters(), lr=0.001)
- 定义loss: loss_fn = nn.CrossEntropyLoss()
- 定义梯度下降:
for x, y in train_loader:
        x, y = x.to(device), y.to(device)
        y_pred = model(x)
        loss = loss_fn(y_pred, y)
        optimizer.zero_grad()
        loss.backward()
        optimizer.step()

        with torch.no_grad():
            y_pred = torch.argmax(y_pred, dim=1)
            correct += (y_pred == y).sum().item()
            total += y.size(0)
            running_loss += loss.item()
一 自定义数据集分类
4种天气数据的分类: cloudy, rain, shine, sunrise.

1.1 导包
import torch
import numpy as np
from torchvision import transforms
import glob
from PIL import Image
import torch.nn.functional as F
import torch.optim as optim
import matplotlib.pyplot as plt
1.2 数据导入
- 指定文件夹
all_img_path = glob.glob(r'G:\01-project\08-深度学习\day 56 迁移学习\dataset/*.jpg')- 打乱顺序
# permutation 排列组合
# 借助ndarray的索引取值的方法, 打乱数据
index = np.random.permutation(len(all_img_path))
index   # array([ 175, 1027,  530, ...,    4,  831,   65])
species = ['cloudy', 'rain', 'shine', 'sunrise']
# 建立类别和索引之间的映射关系
idx_to_species = dict((i, c) for i, c in enumerate(species))
# {0: 'cloudy', 1: 'rain', 2: 'shine', 3: 'sunrise'}
# 生成所有图片的label
all_labels = []
for img in all_img_path:
for i,c in enumerate(species):
if c in img:
all_labels.append(i)- 数据格式转换
all_labels = np.array(all_labels, dtype=np.int64)[index]
all_labels   # array([0, 3, 2, ..., 0, 3, 0], dtype=int64)
all_img_path = np.array(all_img_path)[index]
all_img_path
1.3 数据拆分
# 手动划分一下训练数据和测试数据
split = int(len(all_img_path) * 0.8)  # int 只取整数部分

train_imgs = all_img_path[:split]
train_labels = all_labels[:split]

test_imgs = all_img_path[split:]
test_labels = all_labels[split:]- 定义 transform
# 定义transform
transform = transforms.Compose([transforms.Resize((96, 96)),
                                transforms.ToTensor()])  # 转换为tensor
1.4 数据处理
class MyDataset(torch.utils.data.Dataset):
    def __init__(self, img_paths, labels, transform):  # 接受初始化数据
        self.imgs = img_paths
        self.labels = labels
        self.transforms = transform

    def __getitem__(self, index):   # 取上面的数据
        # 根据index获取item
        img_path = self.imgs[index]
        label = self.labels[index]

        # 通过PIL的Image读取图片
        img = Image.open(img_path)
        if np.array(img).shape[-1] == 3:
            data = self.transforms(img)

            return data, torch.from_numpy(np.array(label)).long()
        else:
            # 否则为有问题的图片
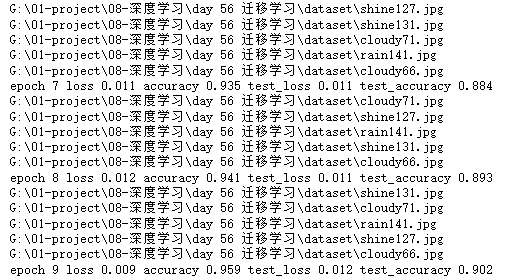
            print(img_path)
            # print(np.array(img).shape)
            # print(np.array(img))
            return self.__getitem__(index+1)

    def __len__(self):  # 调用数据时, 返回长度
        return len(self.imgs)  # 返回个数

    # 重写collate_fn
    @staticmethod
    def collate_fn(batch):
        # batch是列表, 长度是batch_size
        # 列表的每个元素是一个元组(x, y)
        # [(x1, y1), (x2, y2).......]
        # collate_fn 的作用, 把所有的x,y分别放到一起, x在一起, y在一起.
        # 把batch中返回值为空的部分过滤掉
        batch = [sample for sample in batch if sample is not None]
        # 简单方法, 直接调用默认的collate方法
        # from torch.utils.data.dataloader import default_collate
        # return default_collate(batch)

        # 方式二
        imgs, labels = zip(*batch)
        return torch.stack(imgs, 0), torch.stack(labels, 0)

dataset = MyDataset(all_img_path, all_labels, transform)
len(dataset)   # 1122
train_ds = MyDataset(train_imgs, train_labels, transform)
test_ds = MyDataset(test_imgs, test_labels, transform)
# dataloader
train_d1 = torch.utils.data.DataLoader(train_ds, batch_size = 16,
shuffle = True,
collate_fn=MyDataset.collate_fn,
drop_last = True) # 最后一批数据直接不用
test_d1 = torch.utils.data.DataLoader(test_ds, batch_size = 16 * 2,
collate_fn=MyDataset.collate_fn, drop_last = True)
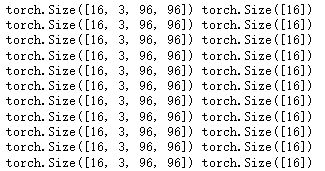
for x, y in train_d1:
print(x.shape,y.shape)
imgs, labels = next(iter(train_d1))
imgs.shape     # torch.Size([16, 3, 96, 96])
labels     # tensor([3, 3, 2, 3, 2, 3, 3, 0, 1, 1, 0, 3, 2, 0, 1, 1])
1.5 定义模型
# 定义模型  # 添加BN层
import torch.nn as nn
class Net(nn.Module):
    def __init__(self):
        super().__init__()
        self.conv1 = nn.Conv2d(3, 32, 3) # 卷积  # (96, 96, 3)  --> (32, 94, 94)
        # 主要做标准化处理
        self.bn1 = nn.BatchNorm2d(32)
        self.pool = nn.MaxPool2d(2, 2) # 池化   # (32, 47, 47)
        self.conv2 = nn.Conv2d(32, 32, 3)    # (32, 45, 45) --> pooling --> (32, 22, 22)
        self.bn2 = nn.BatchNorm2d(32)
        self.conv3 = nn.Conv2d(32, 64, 3)   # (64, 22, 22)  --> pooling --> (64, 10, 10)
        self.bn3 = nn.BatchNorm2d(64)
        self.dropout = nn.Dropout()  # 防止过拟合    #

        # batch, channel, height, width, 64
        # 全连接层
        self.fc1 = nn.Linear(64 * 10 * 10, 1024)
        self.bn_fc1 = nn.BatchNorm1d(1024)
        self.fc2 = nn.Linear(1024, 256)
        self.bn_fc2 = nn.BatchNorm1d(256)
        self.fc3 = nn.Linear(256, 4)

    def forward(self, x):
        x = self.pool(F.relu(self.conv1(x)))
        x = self.bn1(x)
        x = self.pool(F.relu(self.conv2(x)))
        x = self.bn2(x)
        x = self.pool(F.relu(self.conv3(x)))
        x = self.bn3(x)

        # x.view(-1, 64 * 10 * 10)
        # flatten , Flatten层用来将输入“压平”,即把多维的输入一维化,
        # 常用在从卷积层到全连接层的过渡。
        x = nn.Flatten()(x)
        x = F.relu(self.fc1(x))
        x = self.bn_fc1(x)
        x = self.dropout(x)
        x = F.relu(self.fc2(x))
        x = self.bn_fc2(x)
        x = self.dropout(x)
        x = self.fc3(x)
        return x
device = torch.device('cuda:0' if torch.cuda.is_available() else 'cpu')
device # device(type='cpu')
# 生成模型
model = Net()
# 把模型拷贝到GPU
if torch.cuda.is_available():
model.to(device)1.6 定义训练
optimizer = optim.Adam(model.parameters(), lr=0.001)
loss_fn = nn.CrossEntropyLoss()

# 定义训练过程
def fit(epoch, model, train_loader, test_loader):
    correct = 0
    total = 0
    running_loss = 0

    for x, y in train_loader:
        x, y = x.to(device), y.to(device)
        y_pred = model(x)
        loss = loss_fn(y_pred, y)
        optimizer.zero_grad()
        loss.backward()
        optimizer.step()

        with torch.no_grad():
            y_pred = torch.argmax(y_pred, dim=1)
            correct += (y_pred == y).sum().item()
            total += y.size(0)
            running_loss += loss.item()

    epoch_loss = running_loss / len(train_loader.dataset)
    epoch_acc = correct / total

    # 测试过程
    test_correct = 0
    test_total = 0
    test_running_loss = 0
    with torch.no_grad():
        for x, y in test_loader:
            x, y = x.to(device), y.to(device)
            y_pred = model(x)
            loss = loss_fn(y_pred, y)
            y_pred = torch.argmax(y_pred, dim=1)
            test_correct += (y_pred == y).sum().item()
            test_total += y.size(0)
            test_running_loss += loss.item()
    test_epoch_loss = test_running_loss / len(test_loader.dataset)
    test_epoch_acc = test_correct /test_total

    print('epoch', epoch,
          'loss', round(epoch_loss, 3),
          'accuracy', round(epoch_acc, 3),
          'test_loss', round(test_epoch_loss, 3),
          'test_accuracy', round(test_epoch_acc, 3))
return epoch_loss, epoch_acc, test_epoch_loss, test_epoch_acc- 指定训练
# 指定训练次数
epochs = 10
train_loss = []
train_acc = []
test_loss = []
test_acc = []

for epoch in range(epochs):
    epoch_loss, epoch_acc, test_epoch_loss, test_epoch_acc = fit(epoch, model,
                                                                 train_d1, test_d1)
    train_loss.append(epoch_loss)
    train_acc.append(epoch_acc)

    test_loss.append(epoch_loss)
    test_acc.append(epoch_acc)


 968
968


 被折叠的 条评论
为什么被折叠?


