


程序资源链接:点击打开链接
一、环境:
(一开始考虑的就是跨平台,所以Python代码能在Windows和Linux下面运行,唯一的要求是wxPython版本要在3.0以上,因为wxPython+matplotlib使用要求,其他任意,python2和3的区别只要改一下print函数就可以了)
因为基本上环境都兼容,只好说一说我自己的环境了。
Windows下:
1、Python+OpenCV环境配置:这个在Windows下超级简单,读者可以自行百度,唯一要提的就是连接OpenCV的wheel要和Python匹配。(我是Python3.5+OpenCV3.1.0)
2、wxPthon+Python配置:官网下载wxPython:点击打开链接,比如我是Python3.5,要下带cp35的,如果是Python2.7,要下cp27的。我下的是:wxPython-4.0.1-cp35-cp35m-win_amd64.whl。
将文件放置到Python安装目录的Scripts下,如我的是:D:\SoftWare\Python\Python\Scripts,利用pip命令进行安装,相信配置过Python+OpenCV,这里也会很简单(pip install wxPython-4.0.1-cp35-cp35m-win_amd64.whl)。
Linux下:
1、Python+OpenCV环境配置:我是CentOS7的环境(Ubuntun的别担心,也能跑),终端下输入python --version,python的默认版本是2.7.5,输入
pkg-config --modversion opencv 查看opencv版本OpenCV默认是2.4.5的,可以自行升级OpneCV,我升级到了OpnCV3.2.0,本来Python我也升级了,但是实验室的那个老师硬要我用2.7,那就又降
回了2.7,这里连接Python和OpenCV要用命令:pip install opencv-python
2、wxPthon+Python配置:官网下载对应Linux操作系统的wheel,点击打开链接,解压,进入目录,同样使用pip install进行安装,不用下包去编译,
如果你升级了Python,那么相应的pip命令也要升级,这个自行百度。
二、程序
先上图:
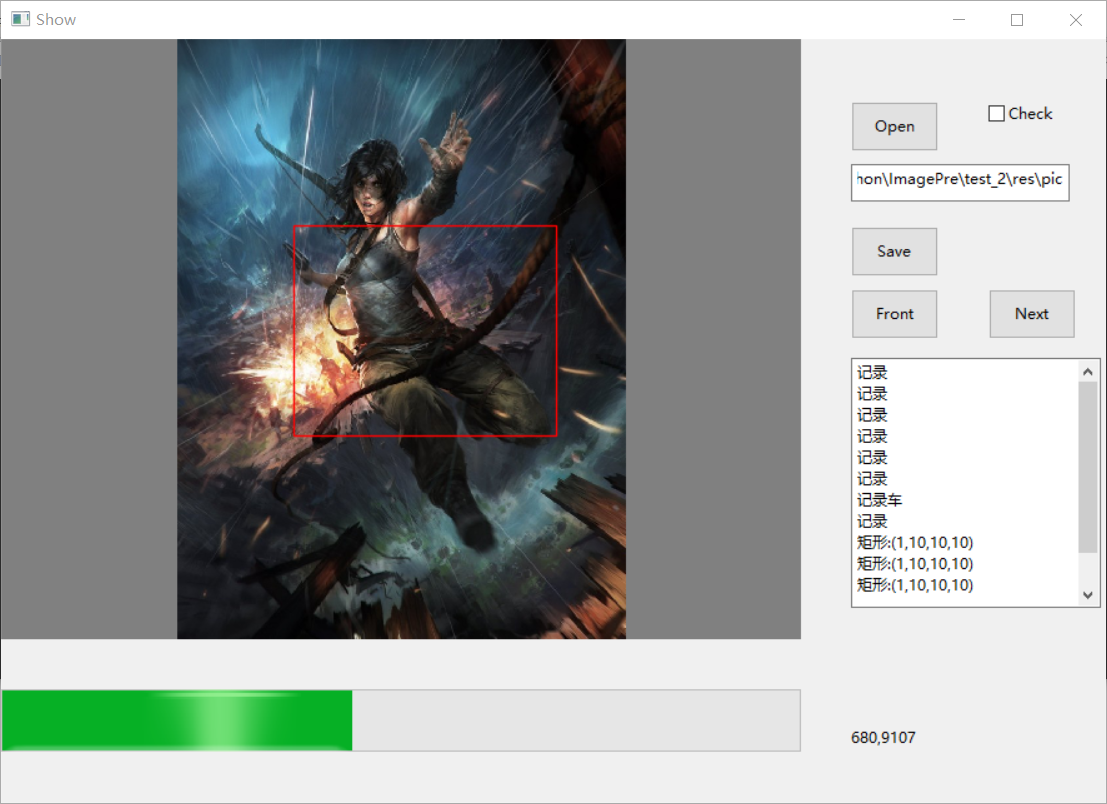
Windows下:

Linux下:
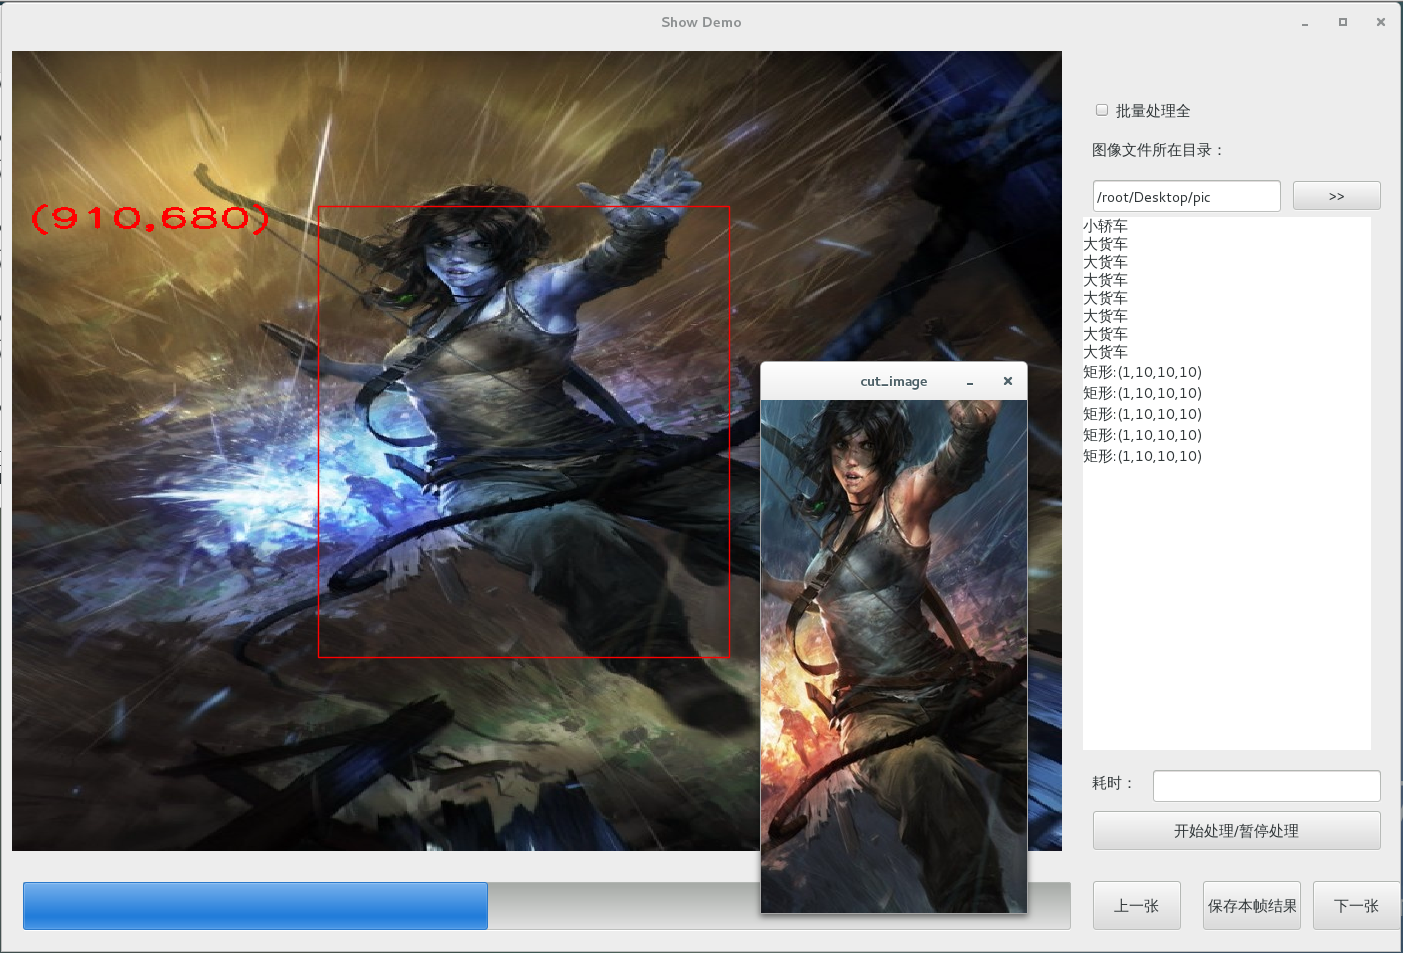
1、下面贴一下界面初始化的代码,注释用的是英文,不难,慢慢看,简单来说就是创建一个画布,
我们可以在画布上画矩形,显示图片,这个画布是嵌入到wxPython的面板panel里的。
参考过:点击打开链接,还有一些不记得了,百度 wxPython matplotlib就会出现一大堆资料
这里贴一下自己找的wxPython的使用教程:点击打开链接
    def __init__(self, parent, pathToImage=None):

        # Use English dialog
        self.locale = wx.Locale(wx.LANGUAGE_ENGLISH)

        # Initialise the parent
        wx.Panel.__init__(self, parent)

        # Intitialise the matplotlib figure
        #self.figure = plt.figure(facecolor='gray',figsize=(10.5, 8))
        self.figure = Figure(facecolor='gray',figsize=(10.5, 8))

        # Create an axes, turn off the labels and add them to the figure
        self.axes = plt.Axes(self.figure,[0,0,1,1])


        self.axes.set_axis_off()
        self.figure.add_axes(self.axes)

        self.panel=wx.Panel(self,-1,pos=(10,10),size=(1390,940))

        # Add the figure to the wxFigureCanvas
        self.canvas = FigureCanvas(self.panel, -1, self.figure)


        # Height,width
        #self.picSize=wx.TextCtrl(self,-1,"",pos=(1100,800),size=(100,30),style=wx.TE_READONLY)


        # Check box
        self.check=wx.CheckBox(self.panel,-1,u"批量处理全部图片",pos=(1080,50),size=(100,20))
        self.check.Bind(wx.EVT_CHECKBOX,self.onCheck)


        # StaticText
        wx.StaticText(self.panel,-1,u"图像文件所在目录:",pos=(1080,90))

        # Show dialog path
        self.pathText=wx.TextCtrl(self.panel,-1,"",pos=(1080,130),size=(190,30))

        # Add Button
        self.openBtn=wx.Button(self.panel,-1,u">>",pos=(1280,130),size=(90,30))
        self.frontBtn=wx.Button(self.panel,-1,u"上一张",pos=(1080,830),size=(90,50))
        self.saveBtn=wx.Button(self.panel,-1,u"保存本帧结果",pos=(1190,830),size=(100,50))
        self.nextBtn=wx.Button(self.panel,-1,u"下一张",pos=(1300,830),size=(90,50))
        self.workBtn=wx.Button(self.panel,-1,u"开始处理/暂停处理",pos=(1080,760),size=(290,40))
        # Progress Bar
        self.gauge=wx.Gauge(self.panel,-1,1000,(10,830),(1050,50))
        #self.gauge.SetValue(2)

        # StaticText
        wx.StaticText(self.panel,-1,u"耗时:",pos=(1080,723))
        # Show time
        self.timeText=wx.TextCtrl(self.panel,-1,"",pos=(1140,720),size=(230,30),style=wx.TE_READONLY)


        # Attach button with function
        self.Bind(wx.EVT_BUTTON,self.load,self.openBtn)
        self.Bind(wx.EVT_BUTTON,self.save,self.saveBtn)
        self.Bind(wx.EVT_BUTTON,self.front,self.frontBtn)
        self.Bind(wx.EVT_BUTTON,self.next,self.nextBtn)
        self.Bind(wx.EVT_BUTTON,self.work,self.workBtn)


        self.area_text = wx.TextCtrl(self, -1, u'小轿车',pos=(1080,175),size=(290,535),style=(wx.TE_MULTILINE))
        self.area_text.AppendText('\n大货车')
        self.area_text.AppendText('\n大货车')
        self.area_text.AppendText('\n大货车')
        self.area_text.AppendText('\n大货车')
        self.area_text.AppendText('\n大货车')
        self.area_text.AppendText('\n大货车')
        self.area_text.AppendText('\n大货车')
        self.area_text.AppendText('\n矩形:(1,10,10,10)')
        self.area_text.AppendText('\n矩形:(1,10,10,10)')
        self.area_text.AppendText('\n矩形:(1,10,10,10)')
        self.area_text.AppendText('\n矩形:(1,10,10,10)')
        self.area_text.AppendText('\n矩形:(1,10,10,10)')


        # Initialise the rectangle
        self.rect = Rectangle((0,0), 0, 0, facecolor='None', edgecolor='red')
        self.x0 = None
        self.y0 = None
        self.x1 = None
        self.y1 = None
        self.axes.add_patch(self.rect)


        # The list of the picture(absolute path)
        self.fileList=[]

        # Picture name
        self.picNameList=[]

        # Picture index in list
        self.count=0

        # Cut from the picture of the rectangle
        self.cut_img=None


        # Connect the mouse events to their relevant callbacks
        self.canvas.mpl_connect('button_press_event', self._onPress)
        self.canvas.mpl_connect('button_release_event', self._onRelease)
        self.canvas.mpl_connect('motion_notify_event', self._onMotion)


        # Lock to stop the motion event from behaving badly when the mouse isn't pressed
        self.pressed = False
2、显示图片:这里读入图片是用OpenCV的imread()实现的,用putText()把图像的宽高写在图像上,注意别写画布上,不然想清除就难了。
    # Show Picture
    def setImage(self, pathToImage):
        '''Sets the background image of the canvas'''
        # Clear the rectangle in front picture
        self.axes.text(100,100,'',None)
        self.rect.set_width(0)
        self.rect.set_height(0)
        self.rect.set_xy((0, 0))
        self.canvas.draw()

        # Load pic by OpenCV
        image=cv2.imread(pathToImage)


        self.imageSize = image.shape
        print pathToImage
        print "It's width and height:"
        print self.imageSize
        print "------------------------"

        # OpenCV add text on pic
        str1='(%s,%s)' % (str(self.imageSize[0]),str(self.imageSize[1]))
        #rev=wx.StaticText(self,-1,str1,(670,400))
        cv2.putText(image,str1,(10,200), cv2.FONT_HERSHEY_SIMPLEX, 1,(255,0,0),2)

        # Add the image to the figure and redraw the canvas. Also ensure the aspect ratio of the image is retained.
        self.axes.imshow(image,aspect='auto')
        self.canvas.draw()
3、鼠标交互截矩形:
简单思路就是绑定鼠标左、右键,检测到鼠标按下且移动就在画布上画矩形,直到释放鼠标。
4、程序入口:
if __name__ == "__main__":

    # Create an demo application
    app = wx.App()
    # Create a frame and a RectangleSelectorPanel
    frame = wx.Frame(None, -1,"Show Demo",size=(1400,950))
    panel = MyDialog(frame)

    # Start the demo app
    frame.Show()
    app.MainLoop()
三、总结
最后我得感谢一下那些我参考过代码的作者,因为做的时候浏览了很多资料,记不住具体的作者,只好在这里一起感谢了。
资源链接:点击打开链接


 272
272


 被折叠的 条评论
为什么被折叠?
被折叠的 条评论
为什么被折叠?
 到【灌水乐园】发言


