


作者:RayChiu_Labloy
版权声明:著作权归作者所有,商业转载请联系作者获得授权,非商业转载请注明出处
关键的几个函数:
1.cv2.threshold()函数阈值操作二值化
2.cv2.canny()边缘检测
3.cv2.findContours()得到轮廓,返回值contours是轮廓点的集合
4.cv2.boundingRect() # 用一个矩形将轮廓包围,返回四个值,分别是x,y,w,h;x,y是矩阵左上点的坐标,w,h是矩阵的宽和高
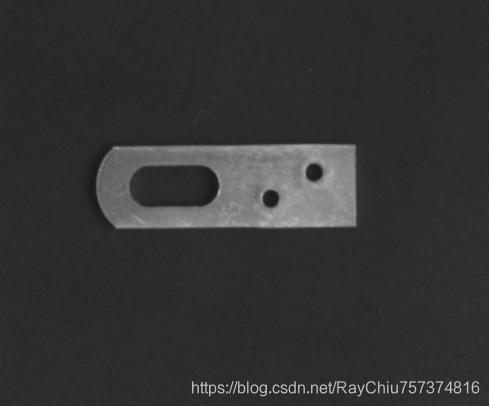
测试图片:
测试代码:
import cv2
import numpy as np
from PIL import Image, ImageDraw, ImageFont


# 用于给图片添加中文字符
def ImgText_CN(img, text, left, top, textColor=(0, 255, 0), textSize=20):
    if (isinstance(img, np.ndarray)):  # 判断是否为OpenCV图片类型
        img = Image.fromarray(cv2.cvtColor(img, cv2.COLOR_BGR2RGB))
    draw = ImageDraw.Draw(img)
    fontText = ImageFont.truetype(r'C:\Windows\Fonts\simsun.ttc', textSize, encoding="utf-8")  ##中文字体
    draw.text((left, top), text, textColor, font=fontText)  # 写文字
    return cv2.cvtColor(np.asarray(img), cv2.COLOR_RGB2BGR)


# 实现图片反色功能
def PointInvert(img):
    height, width = img.shape  # 获取图片尺寸
    for i in range(height):
        for j in range(width):
            pi = img[i, j]
            img[i, j] = 255 - pi
    return img


img = cv2.imread("E:/Users/raychiu/Desktop/4.jpg", 0)  # 加载彩色图
img1 = cv2.imread("E:/Users/raychiu/Desktop/4.jpg", 1)  # 加载灰度图

recimg = img[80:230, 90:230]  # 截取需要的部分
img2 = img1[80:230, 90:230]  # 截取需要的部分

#gray = cv2.cvtColor(image, cv2.COLOR_RGB2GRAY)  # 把输入图像灰度化
# ret, thresh1 =  cv2.threshold(image, 127, 255,  cv2.THRESH_BINARY)
# ret, thresh2 =  cv2.threshold(image, 127, 255,  cv2.THRESH_BINARY_INV)
#ret, thresh3 =  cv2.threshold(gray, 127, 255,  cv2.THRESH_TRUNC)
# ret, thresh4 =  cv2.threshold(image, 127, 255,  cv2.THRESH_TOZERO)
# ret, thresh5 =  cv2.threshold(image, 127, 255,  cv2.THRESH_TOZERO_INV)
# cv2.imshow("thresh1", thresh1)
# cv2.imshow("thresh2", thresh2)
#cv2.imshow("thresh", thresh3)
# cv2.imshow("thresh4", thresh4)
# cv2.imshow("thresh5", thresh5)
ret, th = cv2.threshold(recimg, 90, 255, cv2.THRESH_BINARY)  # threshold()函数阈值操作二值化

# canny边缘检测 第二个第三个参数代表低阈值和高阈值,高阈值用来将物体与背景区分开来,低的用于平滑连接高阈值产生的片段,使图像成一个整体
edges = cv2.Canny(th, 30, 70)
res = PointInvert(edges)  # 颜色反转
# 显示图片
cv2.imshow('original', th)  # 显示二值化后的图,主题为白色,背景为黑色 更加容易找出轮廓
key = cv2.waitKey(0)
if key == 27:  # 按esc键时,关闭所有窗口
    print(key)
    cv2.destroyAllWindows()

"""
findContours()提取图片轮廓方法中第二个和第三个参数讲解:
mode:定义轮廓的检索模式,可选项为cv2.RETR_EXTERNAL(只检索最外围轮廓)、cv2.RETR_TREE(检索所有轮廓,并建立一个等级树结构)、cv2.RETR_CCOMP( 检测所有轮廓,只建立两个等级,最外的轮廓及其内的轮廓)、cv2.RETR_LIST(检测所有轮廓,但是不建立等级关系)
method:定义轮廓的检索方式,可选项为cv2.CHAIN_APPROX_NONE(保存轮廓上的所有连续的点)、cv2.CHAIN_APPROX_SIMPLE(仅保留轮廓上的拐点信息,即关键点)
"""
contours, hierarchy = cv2.findContours(th, cv2.RETR_TREE, cv2.CHAIN_APPROX_SIMPLE)  # 得到轮廓,返回值contours是轮廓点的集合

cnt = contours[0]  # 取出第一个(最外边)轮廓

#创建白色幕布
temp = np.ones(edges.shape,np.uint8)*255
#画出轮廓:temp是白色幕布,contours是轮廓,-1表示全画,然后是颜色,厚度
cv2.drawContours(temp,contours,-1,(0,255,0),3)
cv2.imshow("contours",temp)

x, y, w, h = cv2.boundingRect(cnt)  # 用一个矩形将轮廓包围,返回四个值,分别是x,y,w,h;x,y是矩阵左上点的坐标,w,h是矩阵的宽和高

img_gray = cv2.cvtColor(res, cv2.COLOR_GRAY2BGR)  # 将灰度转化为彩色图片方便画图

cv2.line(img_gray, (x, y), (x + w, y), (0, 0, 255), 2, 5)  # 上边缘

cv2.line(img_gray, (x, y + h), (x + w, y + h), (0, 0, 255), 2, 5)  # 下边缘
img1[80:230, 90:230] = img_gray  # 用带有上下轮廓的图替换掉原图的对应部分

res1 = ImgText_CN(img1, '宽度%d' % h, 25, 25, textColor=(0, 255, 0), textSize=30)  # 绘制文字
# 显示图片
cv2.imshow('original', res1)
key = cv2.waitKey(0)
if key == 27:  # 按esc键时,关闭所有窗口
    print(key)
    cv2.destroyAllWindows()
【如果对您有帮助,交个朋友给个一键三连吧,您的肯定是我博客高质量维护的动力!!!】


 6849
6849


 被折叠的 条评论
为什么被折叠?
被折叠的 条评论
为什么被折叠?
 到【灌水乐园】发言


