


本教程展示了如何利用 Screaming Frog SEO Spider 最近发布的自定义 JavaScript 功能来大规模创建 JSON-LD 架构标记。我将通过少量代码演示如何从网页中提取元素,并将每个元素集成到包含变量的结构化数据脚本中。
对于那些可能不了解 JavaScript 或害怕任何代码的人,您可以使用您最喜欢的 LLM,例如 ChatGPT,来帮助您。我个人会推荐 Mike King 的 Kermit——一个自定义 GPT,旨在专门帮助您使用 Screaming Frog SEO Spider JS 片段!
在本教程的最后,我的目标是让您使用本指南通过 Screaming Frog SEO Spider 自动创建结构化数据——无论是数十个、数百个还是数千个网页!
什么是自定义 JavaScript 代码段?
2024 年 5 月,Screaming Frog SEO Spider 在其 20.0 版更新中引入了自定义 JavaScript 片段。根据发布说明,JS 片段允许您“作页面或提取数据,以及与 OpenAI 的 ChatGPT、本地 LLM 或其他库等 API 进行通信。
自定义 JS Snippet 设置预打包了一些开箱即用的片段,例如使用 AI 生成图像替代文本、查询 ChatGPT、提取嵌入等。
通过一些创造性的思考,您可以使用 JS 片段功能的功能将标准爬取输出转换为应对各种 SEO 挑战的强大工具,从而使网站爬取更加有效。
为什么使用 Screaming Frog 大规模创建结构化数据?
结构化数据是一种机器代码,有助于向搜索引擎描述网页。它可以影响搜索引擎解释和显示您的内容的方式。实施 JSON-LD 架构标记可以在 SERP 中产生丰富的片段,增强知识图谱,提高可见性,并可能提高点击率。
更可取的选项是始终以编程方式创建架构标记,无论是使用预构建的 CMS 功能、插件还是开发人员的支持。
但是,在某些情况下,您无权访问编程选项。这就是 Screaming Frog 的 JS 片段提供了一个实用的替代方案的时候,无需依赖在线模式标记生成器或为每个页面手动编写代码。所有这些都可能非常耗时且效率低下。
选择适当的架构类型和页面模板
在开始之前,我们需要确定需要什么结构化数据脚本。出于本文的目的,我使用了一个虚构的场景,在该场景中,我将使用 “article” 架构填充 Search Engine Journal (SEJ) 的每篇博客文章。
对于您网站的每个页面模板,您可能需要不同的脚本。例如,电子商务网站的主页、产品页面和博客文章可能需要不同的架构。
此外,您需要弄清楚网页上有哪些元素可用,您可以从文本或 HTML 中提取这些元素。这将确定 schema 标记的可能性。例如,如果您的博客文章没有引用作者,则添加 “author” 架构类型将毫无意义。
JSON-LD 架构标记模板
如前所述,在这个虚构的示例中,我将基于“article”架构类型创建一个 JSON-LD 脚本,该架构类型还将包括 “person”、“organization” 和 “website” 类型。通过一次抓取,该脚本将允许我们为 SEJ 的每篇博客文章生成一个有效的 schema。
我将使用 “Getting Started In International SEO: A Quick Reference Guide” 文章作为我的豚鼠测试页面,如下所示:

<script type="application/ld+json">
{
  "@context": "https://schema.org/",
  "@type": "Article",
  "url": "https://www.searchenginejournal.com/getting-started-in-international-seo-a-quick-reference-guide/529763/",
  "@id": "https://www.searchenginejournal.com/getting-started-in-international-seo-a-quick-reference-guide/529763/#article",
  "headline": "Getting Started In International SEO: A Quick Reference Guide",
  "description": "Expand your reach with international SEO. This guide explores the unique challenges and strategies for succeeding in global markets.",
  "datePublished": "2024-11-11T10:00:43+00:00",
  "wordCount": 2060,
  "timeRequired": "PT10M",
  "image": {
    "@type": "ImageObject",
    "url": "https://www.searchenginejournal.com/wp-content/uploads/2024/10/international-seo-794.png",
    "height": "840",
    "width": "1600"
  },
  "speakable": {
    "@type": "SpeakableSpecification",
    "cssSelector": [
      "h1",
      ".sej-article entrycontent"
    ]
  },
  "author": {
    "@type": "Person",
    "name": "Motoko Hunt",
    "url": "https://www.searchenginejournal.com/author/motoko-hunt/",
    "@id": "https://www.searchenginejournal.com/author/motoko-hunt//#person",
    "jobTitle": "President, International Search Marketing",
    "worksFor": {
      "@type": "Organization",
      "name": "AJPR",
      "url": "https://www.ajpr.com/"
    },
    "sameAs": [
      "https://www.searchenginejournal.com/author/motoko-hunt/feed/",
      "https://twitter.com/motokohunt",
      "https://www.linkedin.com/in/japaneseseo/"
    ]
  },
  "publisher": {
    "@type": "Organization",
    "@id": "https://www.searchenginejournal.com/#organization",
    "url": "https://www.searchenginejournal.com",
    "sameAs": [
      "https://twitter.com/sejournal",
      "https://www.facebook.com/SearchEngineJournal",
      "https://www.linkedin.com/company/search-engine-journal",
      "https://www.youtube.com/c/searchenginejournal",
      "https://www.reddit.com/user/SearchEngineJournal",
      "https://www.google.com/search?kgmid=/m/011sh7hw",
      "http://www.pinterest.com/sejournal/"
    ],
    "name": "Search Engine Journal",
    "logo": [
      {
        "@type": "ImageObject",
        "@id": "https://www.searchenginejournal.com/#logo",
        "inLanguage": "en-US",
        "url": "https://www.searchenginejournal.com/wp-content/themes/sej/images/schema/compact.png",
        "width": 1000,
        "height": 1000,
        "caption": "Search Engine Journal"
      }
    ],
    "foundingDate": "2003",
    "slogan": "In a world ruled by algorithms, SEJ brings timely, relevant information for SEOs, marketers, and entrepreneurs to optimize and grow their businesses -- and careers.",
    "description": "Search Engine Journal is dedicated to producing the latest news, the best guides and how-tos for the SEO and marketer community.",
    "legalName": "Search Engine Journal",
    "alternateName": "SEJ"
  },
  "isPartOf": {
    "@type": "WebSite",
    "name": "Search Engine Journal",
    "@id": "https://www.searchenginejournal.com/#website",
    "url": "https://www.searchenginejournal.com/",
    "mainEntity": {
      "@id": "https://www.searchenginejournal.com/getting-started-in-international-seo-a-quick-reference-guide/529763/#article"
    }
  }
}
</script>
该脚本使用 “article” 架构类型。首先,我将 “person” 架构类型嵌套在 “author” 属性中。其次,“organization” 将嵌套在 “publisher” 属性中,第三,“website” 架构类型将嵌套在 “isPartOf” 属性中。
更简单的 AI 编辑选项
要成功实施此方法,您需要对爬虫 Web 抓取和自定义提取功能有一定的基本了解。
您可以轻松地将下面的 JS 代码片段代码复制粘贴到您最喜欢的 LLM 或 Mike King 的 Kermit(Screaming Frog SEO Spider JS 片段 GPT)作为参考和起点。您必须创建自己的 JSON-LD 脚本,并向 LLM 详细说明要从网页中提取的元素。但是,繁重的工作应该为您完成,并且使用 AI 进行此编辑非常高效且具有时间效益。
对于那些想要更好地了解代码和每个部分的目的的人,您可以深入研究以下信息。
JS 代码段代码
当 Screaming Frog SEO Spider 抓取每个页面时,我将使用 JavaScript 代码从页面中提取各种元素,并将它们作为变量添加到 JSON-LD 结构化数据中。
以下是完整 JS Snippet 代码的参考:
// Extract the URL of the webpage
let url = window.location.href;
let urlId = `${url}#article`;


// Extract the first H1 tag
let h1 = document.querySelector('h1') ? document.querySelector('h1').textContent.trim() : '';


// Extract the meta description
let metaDescription = document.querySelector('meta[name="description"]') ? document.querySelector('meta[name="description"]').content.trim() : 'No Meta Description Found';


// Extract the published date from the datetime attribute in the <time> tag within .sej-auth-t
let datePublished = 'No Date Found';
let dateElement = document.querySelector('.sej-auth-t time');
if (dateElement) {
    datePublished = dateElement.getAttribute('datetime');
}


// Select the element containing the author information
let authorElement = document.querySelector('.dark-link.sej-auth-h');


// Initialize author details with empty strings
let authorName = '';
let authorUrl = '';
let authorId = '';
let sameAsLinks = '';


// Check if the author element exists, then extract the name and URL
if (authorElement) {
    authorName = authorElement.textContent.trim(); // Extract and clean up author name
    authorUrl = authorElement.href;                // Extract author URL
    authorId = `${authorUrl}/#person`;             // Construct @id by appending /#person


    // Extract all social media URLs within the .sej-asocial class for the sameAs array
    sameAsLinks = Array.from(document.querySelectorAll('.sej-asocial li a')).map(link => link.href);
}


// Extract the image URL for the author
let imageUrl = '';
let imageElement = document.querySelector('.avatar.img-circle');
if (imageElement) {
    imageUrl = imageElement.src;
}


// Count the total number of words on the page
let wordCount = document.body.innerText.split(/\s+/).length;


// Extract the reading time and convert to ISO 8601 duration
let timeRequired = '';
let readingTimeElement = document.querySelector('.sej-auth-t li:nth-child(3)');
if (readingTimeElement) {
    let readingTimeText = readingTimeElement.textContent.trim();
    let timeMatch = readingTimeText.match(/(\d+)\s*min/);
    if (timeMatch) {
        let minutes = parseInt(timeMatch[1]);
        timeRequired = `PT${minutes}M`; // Convert to ISO 8601 duration format
    }
}


// Extract hero image URL, width, and height directly from the hero image element
let heroImageUrl = '';
let heroImageWidth = '';
let heroImageHeight = '';


let heroImageElement = document.querySelector('.attachment-full.size-full.wp-post-image');
if (heroImageElement) {
    heroImageUrl = heroImageElement.src;


    // Try to get width and height from attributes first
    heroImageWidth = heroImageElement.getAttribute('width');
    heroImageHeight = heroImageElement.getAttribute('height');


    // If width or height are missing, parse the largest values from srcset
    if (!heroImageWidth || !heroImageHeight) {
        let srcset = heroImageElement.getAttribute('srcset');
        if (srcset) {
            let largestImage = srcset.split(',').map(entry => {
                let [url, size] = entry.trim().split(' ');
                return { url, size: parseInt(size) };
            }).sort((a, b) => b.size - a.size)[0];


            // Set hero image URL, width, and height based on largest image in srcset
            if (largestImage) {
                heroImageUrl = largestImage.url;
                heroImageWidth = largestImage.size;
                heroImageHeight = Math.round((heroImageWidth / 1600) * 840); // Adjust height based on aspect ratio if needed
            }
        }
    }
}


// Create the full JSON-LD object
let jsonLd = {
    "@context": "https://schema.org/",
    "@type": "Article",
    "url": url,
    "@id": urlId,
    "headline": h1,
    "description": metaDescription,
    "datePublished": datePublished,
    "wordCount": wordCount,
    "timeRequired": timeRequired,
    "image": {
        "@type": "ImageObject",
        "url": heroImageUrl,
        "height": heroImageHeight,
        "width": heroImageWidth
    },
    "speakable": {
        "@type": "SpeakableSpecification",
        "cssSelector": [
            "h1",
            ".sej-article entrycontent"
        ]
    },
    "author": {
        "@type": "Person",
        "name": authorName,
        "url": authorUrl,
        "@id": authorId,
        "sameAs":sameAsLinks
    },
    "publisher": {
        "@type": "Organization",
      "@id": "https://www.searchenginejournal.com/#organization",
      "url": "https://www.searchenginejournal.com",
      "sameAs": [
        "https://twitter.com/sejournal",
        "https://www.facebook.com/SearchEngineJournal",
        "https://www.linkedin.com/company/search-engine-journal",
        "https://www.youtube.com/c/searchenginejournal",
        "https://www.reddit.com/user/SearchEngineJournal",
        "https://www.google.com/search?kgmid=/m/011sh7hw",
        "http://www.pinterest.com/sejournal/"
      ],
      "name": "Search Engine Journal",
      "logo": [
        {
          "@type": "ImageObject",
          "@id": "https://www.searchenginejournal.com/#logo",
          "inLanguage": "en-US",
          "url": "https://www.searchenginejournal.com/wp-content/themes/sej/images/schema/compact.png",
          "width": 1000,
          "height": 1000,
          "caption": "Search Engine Journal"
        }
      ],
      "foundingDate": "2003",
      "slogan": "In a world ruled by algorithms, SEJ brings timely, relevant information for SEOs, marketers, and entrepreneurs to optimize and grow their businesses -- and careers.",
      "description": "Search Engine Journal is dedicated to producing the latest news, the best guides and how-tos for the SEO and marketer community.",
      "legalName": "Search Engine Journal",
      "alternateName": "SEJ"
    },
    "isPartOf": {
        "@type": "WebSite",
        "name": "Search Engine Journal",
        "@id": "https://www.searchenginejournal.com/#website",
        "url": "https://www.searchenginejournal.com/",
        "mainEntity": {
            "@id": urlId
        }
    }
};


// Beautify JSON-LD
let beautifiedJsonLd = JSON.stringify(jsonLd, null, 2);


// Manually wrap the JSON-LD with <script> tags
let scriptTagWrappedJsonLd = `<script type="application/ld+json">\n${beautifiedJsonLd}\n</script>`;


// Return the wrapped JSON-LD with <script> tags
return seoSpider.data(scriptTagWrappedJsonLd);
JavaScript 代码解释
现在,让我们分解代码的每一位,以解释如何将每个提取的元素作为变量动态添加到 JSON-LD 脚本中。
网页 URL 和@id
为了提取网页 URL 和@id,我使用了以下 JavaScript 代码:
// Extract the URL of the webpage
let url = window.location.href;
let urlId = `${url}#article`;
使用 window.location.href 提取 URL,该 URL 检索当前网页的完整 URL。
相同的 URL 变量用于填充 @id,该变量为 “article” 架构类型提供唯一标识符。但是,这一次,我使用了模板文本 (${url}#article) 将 #article 附加到 url。这种方法有效地使用特定标识符标记 url,以便 urlId 将被 https://example.com/page#article。
然后,它被填充到我的 JSON-LD 架构中,如下所示:
"url": url,
"@id": urlId,
头条新闻
为了填充文章的 “标题”,我将文章的标题定位在下面:
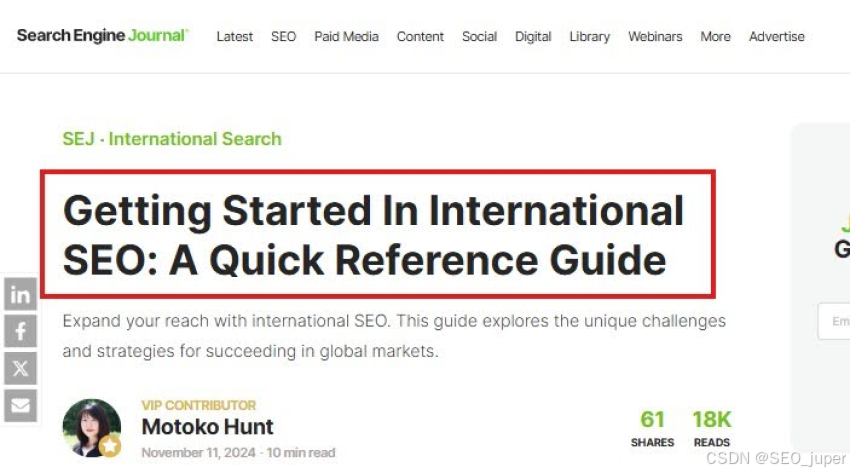
我使用以下代码提取 H1 标签:
// Extract the first H1 tag
let h1 = document.querySelector('h1') ? document.querySelector('h1').textContent.trim() : '""';
document.querySelector(‘h1’) 查找页面的第一个<H1>元素。如果找到一个,则返回该元素;否则,它将在引号内返回空值。
.textContent 提取<H1>和 .trim() 删除该文本周围的任何前导或尾随空格。
在架构标记脚本中,使用以下变量填充标题:
"headline": h1,
元描述
我使用以下 JavaScript 代码来提取元描述:
// Extract the meta description
let metaDescription = document.querySelector('meta[name="description"]') ? document.querySelector('meta[name="description"]').content.trim() : '""';
document.querySelector(‘meta[name=“description”]’) 行用于在 HTML 中查找带有 name=“description” 的标签。如果找到此标签,则返回该元素;否则,它将在引号内返回空值。.trim() 删除任何前导或尾随空格。
在架构标记脚本中,使用以下变量填充元描述值:
"description": metaDescription,
发布日期值
对于发布日期值,我需要确保它遵循 ISO 8601 日期时间格式进行验证。网页将发布日期显示为“2024 年 11 月 11 日”,但值得庆幸的是,代码以正确的 ISO 8601 格式显示日期时间值:
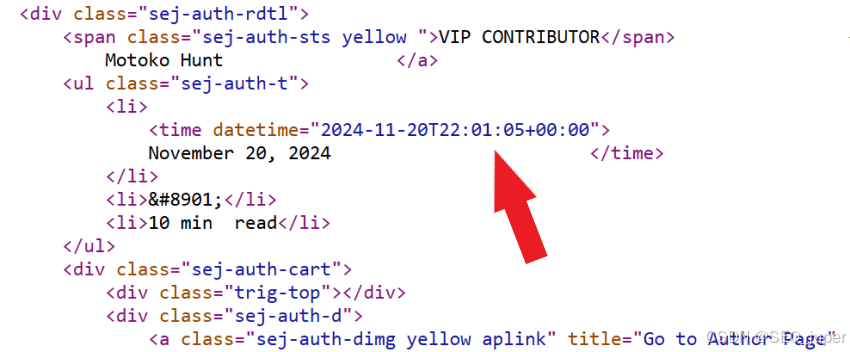
为了提取 datePublshed 变量的 datetime 值,我使用以下代码:
// Extract the published date from the datetime attribute in the <time> tag within .sej-auth-t
let datePublished = '""';
let dateElement = document.querySelector('.sej-auth-t time');
if (dateElement) {
    datePublished = dateElement.getAttribute('datetime');
}
此代码从<time>标记。
如果未找到 datetime 值,则返回引号内的空值。
在架构标记脚本中,使用以下变量填充 datePublished 值:
"datePublished": datePublished,
字数
为了提取和计算文章中的字数,我使用以下代码:
// Select the article element
let articleElement = document.querySelector('article[data-clarity-region="article"]');
// Count the total number of words within the article element
let wordCount = articleElement ? articleElement.innerText.split(/\s+/).length : 0;
在这里,我使用代码将<article>标记,该标记具有唯一标识文章内容的属性。
data-clarity-region="article"
wordCount 变量检查 articleElement 是否存在。如果是这样,innerText 会提取标记。之后,.split(/\s+/) 通过空格将此文本划分为单词数组,而 .length 给出单词数。
.length 给出了这个数组中项目(单词)的总数,而 String(…) 将此数字包装在 String() 中,以确保最终结果是一个字符串(例如,“123”而不是 123),这对于 JSON-LD 验证是必需的。
如果未找到 articleElement,则 wordCount 将设置为空引号作为回退。
输出将在此处填充到 JSON-LD 脚本中:
"wordCount": wordCount,
所需阅读时间
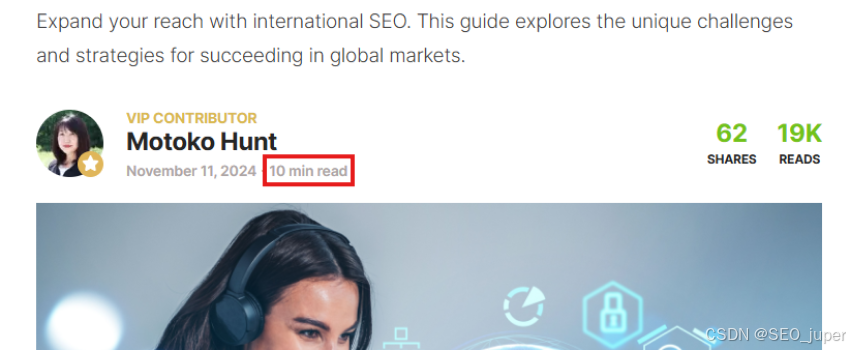
为了提取所需的阅读时间,我必须执行一些 JavaScript 魔法。格式需要采用 ISO 8601,例如“PT14M”,代表 14 分钟。
本文以以下格式显示阅读时间:“10 min read”。所以我们有一些工作要做。
初始代码如下所示:
// Extract the reading time and convert to ISO 8601 duration
let timeRequired = '';
let readingTimeElement = document.querySelector('.sej-auth-t li:nth-child(3)');
首先,我使用空字符串 (‘’) 初始化 timeRequired 变量。如果在页面上找到此变量,则此变量最终会以 ISO 8601 duration 格式存储读取时间。
readingTimeElement 尝试选择页面上的特定元素。它使用 document.querySelector(‘.sej-auth-t li:nth-child(3)’) 来查找第三个<li>元素。
以下代码部分检查并提取文本内容:
if (readingTimeElement) {
    let readingTimeText = readingTimeElement.textContent.trim();
    let timeMatch = readingTimeText.match(/(\d+)\s*min/);
if 语句检查是否找到 readingTimeElement。如果为 null(未找到),则此块中的代码将不会执行。
如果元素存在,readingTimeElement.textContent.trim() 会从此元素中检索可见的文本内容,并使用 .trim() 删除周围的任何空格。
timeMatch = readingTimeText.match(/(\d+)\s*min/);使用正则表达式查找 readingTimeText 中的读取时间。如果找到模式,timeMatch 将是一个数组,其中第一个捕获的组 (timeMatch[1]) 包含以分钟为单位的数字读取时间。
最后:
if (timeMatch) {
        let minutes = parseInt(timeMatch[1]);
        timeRequired = `PT${minutes}M`; // Convert to ISO 8601 duration format
    }
}
我将时间转换为 ISO 8601 持续时间格式。
如果 timeMatch 存在(意味着读取时间已成功匹配),则 timeMatch[1] 将分钟保存为字符串(例如,“10”)。
parseInt(timeMatch[1]) 将此字符串转换为整数(在本例中为 10),该整数存储在 minutes 变量中。
然后,该代码使用模板文本 ‘PT${minutes}M’ 构造 ISO 8601 持续时间格式。
最终的 JSON-LD 将包含以下变量和 timeRequired 输出:
"timeRequired": timeRequired,
ImageObject
我将“ImageObject”嵌套到“article”架构中,该架构以页面模板上的以下主图为目标:

我使用 JavaScript 提取主图的 URL、宽度和高度,并将提取的数据作为嵌套的“ImageObject”插入到标记中。这是代码:
// Extract hero image URL, width, and height directly from the hero image element
let heroImageUrl = '""';
let heroImageWidth = '""';
let heroImageHeight = '""';


let heroImageElement = document.querySelector('.attachment-full.size-full.wp-post-image');
if (heroImageElement) {
    heroImageUrl = heroImageElement.src;


    // Try to get width and height from attributes first
    heroImageWidth = heroImageElement.getAttribute('width');
    heroImageHeight = heroImageElement.getAttribute('height');


    // If width or height are missing, parse the largest values from srcset
    if (!heroImageWidth || !heroImageHeight) {
        let srcset = heroImageElement.getAttribute('srcset');
        if (srcset) {
            let largestImage = srcset.split(',').map(entry => {
                let [url, size] = entry.trim().split(' ');
                return { url, size: parseInt(size) };
            }).sort((a, b) => b.size - a.size)[0];


            // Set hero image URL, width, and height based on largest image in srcset
            if (largestImage) {
                heroImageUrl = largestImage.url;
                heroImageWidth = largestImage.size;
                heroImageHeight = Math.round((heroImageWidth / 1600) * 840); // Adjust height based on aspect ratio if needed
            }
        }
    }
}
让我们看一下代码块的各个部分。为了提取主图,我使用以下代码:
let heroImageElement = document.querySelector('.attachment-full.size-full.wp-post-image');
这将在网页中搜索<img>元素替换为 attachment-full 和 size-full 类。如果找到,则元素将存储在 heroImageElement 变量中。
接下来,我使用以下代码行提取主图 URL:
heroImageUrl = heroImageElement.src;
为了提取主图图像的宽度和高度,代码尝试直接从 image 元素中检索属性:
// Try to get width and height from attributes first
    heroImageWidth = heroImageElement.getAttribute('width');
    heroImageHeight = heroImageElement.getAttribute('height');
如果存在这些属性,则它们的值将分配给 heroImageWidth 和 heroImageHeight。
但是,如果缺少 width 或 height 属性,则代码将回退到 srcset 属性,该属性包含图像 URL 及其相应宽度的列表:
// If width or height are missing, parse the largest values from srcset
    if (!heroImageWidth || !heroImageHeight) {
        let srcset = heroImageElement.getAttribute('srcset');
        if (srcset) {
            let largestImage = srcset.split(',').map(entry => {
                let [url, size] = entry.trim().split(' ');
                return { url, size: parseInt(size) };
            }).sort((a, b) => b.size - a.size)[0];
如果缺少 height 属性,则代码使用假定的纵横比计算它:
// Set hero image URL, width, and height based on largest image in srcset
            if (largestImage) {
                heroImageUrl = largestImage.url;
                heroImageWidth = largestImage.size;
                heroImageHeight = Math.round((heroImageWidth / 1600) * 840); // Adjust height based on aspect ratio if needed
            }
最后,提取的值用于填充 JSON-LD 脚本中的 “ImageObject” 架构:
"image": {
        "@type": "ImageObject",
        "url": heroImageUrl,
        "height": heroImageHeight,
        "width": heroImageWidth
    }
可口述的 JSON-LD
这是可选的。但是,我决定添加“可说”的 JSON-LD 以进行语音搜索优化,并在架构标记中包含了以下代码段:
"speakable": {
        "@type": "SpeakableSpecification",
        "cssSelector": [
            "h1",
            ".sej-article entrycontent"
        ]
    },
该代码是静态的,因为它在所有博客文章网页中都保持不变。“speakable” 架构允许您指定网页中特别适合通过 Google Home 设备或 Alexa 等语音助手进行文本到语音转换的部分。此功能有助于提供内容的音频摘要。
您可以使用 XPATH 或 CSS 选择器来定义 “SpeakableSpecification” 架构类型。对于我的示例,我选择使用 CSS 选择器标识“可说”内容。
cssSelector 属性包含一个 CSS 选择器列表,这些选择器指向网页上应包含在音频摘要中的元素。
当大声朗读内容时,标题 (h1) 提供介绍性上下文或标题,而 .sej-article entrycontent 则以主要正文文本为目标。
作者信息
我将“person”架构用于作者信息,并使用“author”属性将其链接回文章的架构。查看下面的作者信息,我可以看到有许多元素可以提取并用于填充“person”架构属性:
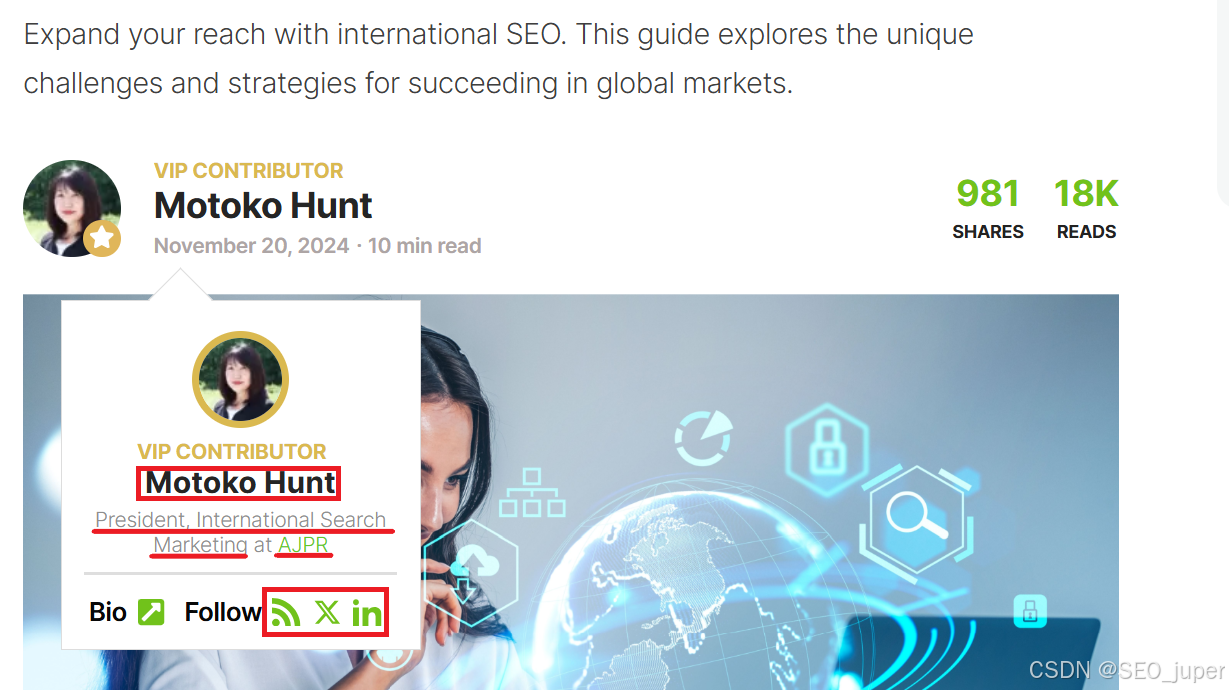
我将提取作者的姓名、个人简介页面 URL、@id、sameAs 社交链接、职称、工作地点和工作地点 URL(如果有)。在 schema 标记中,它如下所示:
"author": {
        "@type": "Person",
        "name": authorName,
        "url": authorUrl,
        "@id": authorId,
        "jobTitle": jobTitle,
        "worksFor": {
            "@type": "Organization",
            "name": worksForName,
            "url": worksForUrl
        },
        "sameAs":sameAsLinks
    },
作者姓名、个人资料 URL 和 ID
authorElement 变体尝试查找具有类 .dark-link 和 .sej-auth-h 的 HTML 元素,该元素应包含作者的信息。
之后,各种变量被初始化为空字符串。如果找到元素,这些元素将存储提取的详细信息。
如果找到 authorElement,则提取 authorName 的文本内容并修剪空格。authorUrl 提取此元素的 href 属性,该属性是指向作者配置文件页面的链接。authorId 是一个构造的标识符,它将 /#person 附加到 authorUrl,从而为结构化数据创建唯一 ID。
代码如下:
// Select the element containing the author information
let authorElement = document.querySelector('.dark-link.sej-auth-h');


// Initialize author details with empty strings
let authorName = "";
let authorUrl = "";
let authorId = "";
let sameAsLinks = "";
let jobTitle = "";       // Initialize job title as an empty string
let worksForName = "";   // Initialize worksFor name as an empty string
let worksForUrl = "";    // Initialize worksFor URL as an empty string


// Check if the author element exists, then extract the name and URL
if (authorElement) {
    authorName = authorElement.textContent.trim(); // Extract and clean up author name
    authorUrl = authorElement.href;                // Extract author URL
    authorId = `${authorUrl}/#person`;             // Construct @id by appending /#person
SameAs 链接
接下来,我将提取作者工具提示中的链接,并将它们作为数组添加到“sameAs”属性中。这些链接的目的是参考作者在网络上的数字足迹,以改进 EEAT 并确定他们是一个真实的实体。
“sameAs”链接提取码如下:
// Extract all social media URLs within the .sej-asocial class for the sameAs array
    sameAsLinks = Array.from(document.querySelectorAll('.sej-asocial li a')).map(link => link.href);
代码查询任何<a>标记 (<li>) 在 .sej-asocial 类中。这些链接代表作者的社交媒体资料。使用 Array.from,它将<a>元素转换为一个 URL 数组中。
职称和组织
为了提取职务、组织名称和 URL,我将选择类为 .sej-auth-dpos 的元素,该元素应包含作者的职务和组织。
具体到职位名称,我将使用以下代码:
// Extract the job title and organization name from
let jobTitleElement = document.querySelector('.sej-auth-dpos');
if (jobTitleElement) {
    let jobText = jobTitleElement.textContent.trim();
    let jobMatch = jobText.match(/^(.*)\s+at\b/);  // Match text before "at"
    if (jobMatch) {
        jobTitle = jobMatch[1].trim();  // Capture the job title part only
    }
如果 jobTitleElement 存在,则代码将捕获其文本内容。
正则表达式 ^(.*)\s+at\b 将单词 “at” 之前的所有内容提取为 jobTitle。这假定职位名称在文本中位于组织名称之前。
对于组织名称和 URL,我使用以下代码:
// Check if there's an <a> tag for the organization name
    let companyElement = jobTitleElement.querySelector('a');
    if (companyElement) {
        // Extract company name and URL if the <a> tag is present
        worksForName = companyElement.textContent.trim();
        worksForUrl = companyElement.href;
    } else {
        // If no <a> tag, extract organization name directly from the span's text after "at"
        let worksForMatch = jobText.match(/\bat\s+(.+)/);  // Match text after "at"
        if (worksForMatch) {
            worksForName = worksForMatch[1].trim();
        }
    }
companyElement 变量检查<a>标记中,假设它可能链接到组织的网站。
如果存在,则 worksForName 和 worksForUrl 将设置为组织的名称和 URL。
如果<a>标签,则回退正则表达式会直接从“at”后面的文本中提取组织名称。
发布者信息
我使用文章的“publisher”属性来引用“organization”架构类型。值得庆幸的是,JSON-LD 代码的 “publisher” 部分是静态的,因为它不需要从页面到页面进行编辑。
该信息是从 SEJ 的真实 “组织” 架构详细信息中收集的,如下所示:
"publisher": {
        "@type": "Organization",
      "@id": "https://www.searchenginejournal.com/#organization",
      "url": "https://www.searchenginejournal.com",
      "sameAs": [
        "https://twitter.com/sejournal",
        "https://www.facebook.com/SearchEngineJournal",
        "https://www.linkedin.com/company/search-engine-journal",
        "https://www.youtube.com/c/searchenginejournal",
        "https://www.reddit.com/user/SearchEngineJournal",
        "https://www.google.com/search?kgmid=/m/011sh7hw",
        "http://www.pinterest.com/sejournal/"
      ],
      "name": "Search Engine Journal",
      "logo": [
        {
          "@type": "ImageObject",
          "@id": "https://www.searchenginejournal.com/#logo",
          "inLanguage": "en-US",
          "url": "https://www.searchenginejournal.com/wp-content/themes/sej/images/schema/compact.png",
          "width": 1000,
          "height": 1000,
          "caption": "Search Engine Journal"
        }
      ],
      "foundingDate": "2003",
      "slogan": "In a world ruled by algorithms, SEJ brings timely, relevant information for SEOs, marketers, and entrepreneurs to optimize and grow their businesses -- and careers.",
      "description": "Search Engine Journal is dedicated to producing the latest news, the best guides and how-tos for the SEO and marketer community.",
      "legalName": "Search Engine Journal",
      "alternateName": "SEJ"
    },
网站 JSON-LD
我使用文章的 “isPartOf” 属性将 “article” 架构连接到 “website” 架构,以实现更好的语义上下文化。代码中的信息大多是静态的:
"isPartOf": {
        "@type": "WebSite",
        "name": "Search Engine Journal",
        "@id": "https://www.searchenginejournal.com/#website",
        "url": "https://www.searchenginejournal.com/",
        "mainEntity": {
            "@id": urlId
        }
    }
我决定将“mainEntity”属性添加到“website”架构中,以将主要内容(文章)显式声明为网页的主要焦点。
为了填充“mainEntity”属性,我使用了之前为网页 URL 创建的相同 urlId。
美化和包装脚本标签
最后一段代码确保 JSON-LD 脚本得到美化——这意味着我们人类更容易阅读:
// Beautify JSON-LD
let beautifiedJsonLd = JSON.stringify(jsonLd, null, 2);
(也就是说,如果您想添加脚本的缩小版本,这更适合生产 - 请删除这行代码)。
现在,我们可以将经过美化和完全填充的 JSON-LD 代码包装在脚本标签中,以便将其复制粘贴到我们网站的 CMS 页面中:
// Manually wrap the JSON-LD with <script> tags
let scriptTagWrappedJsonLd = `<script type="application/ld+json">\n${beautifiedJsonLd}\n</script>`;
将你的 JavaScript 代码片段添加到 Screaming Frog
现在我已经构建了我的脚本,我可以将其添加到 Screaming Frog SEO Spider 中。
打开 SEO Spider 并打开 JavaScript 渲染。从菜单中,转到 配置 > 爬网配置 > 渲染 > JavaScript。
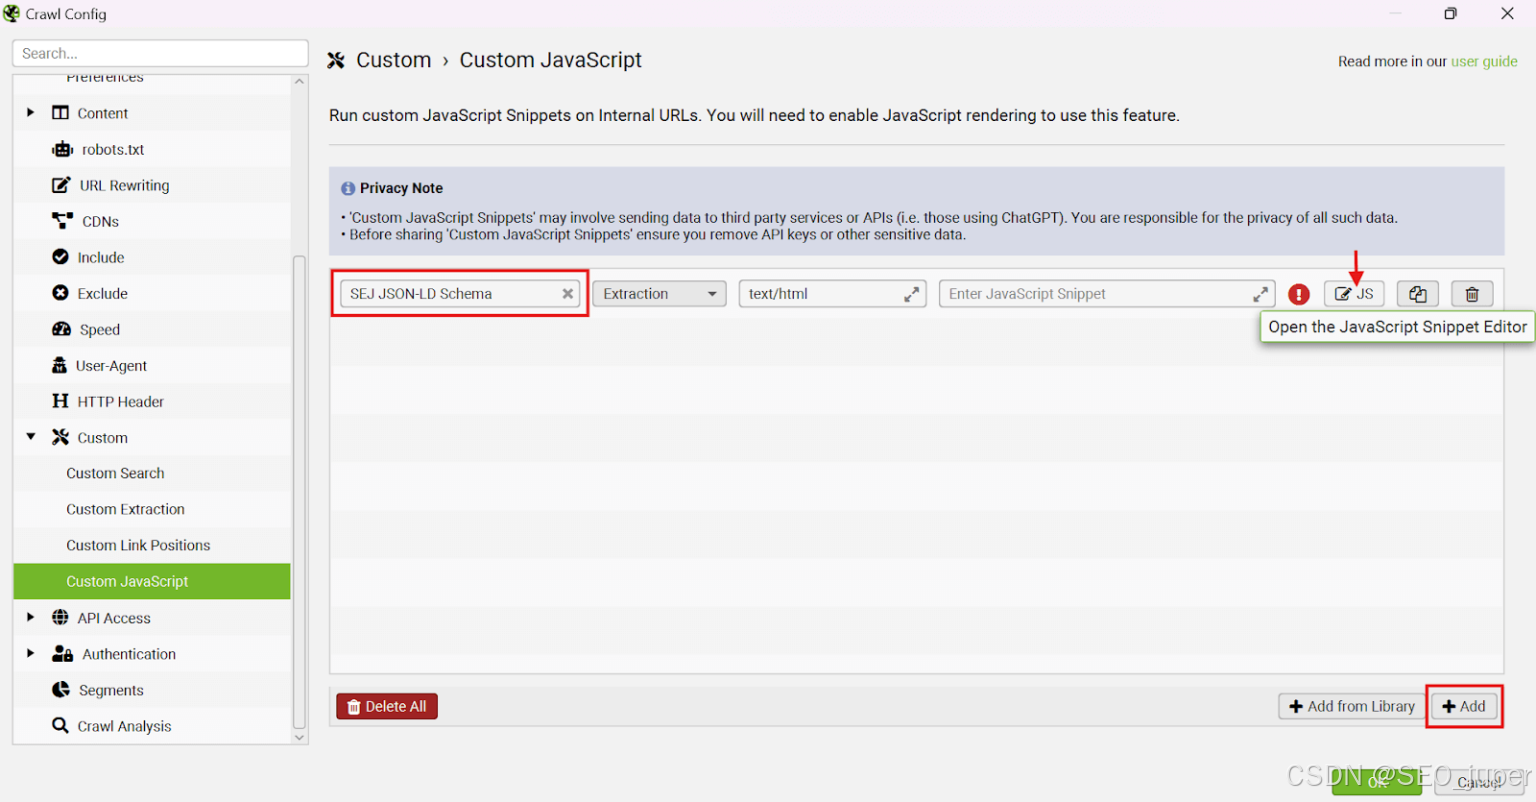
之后,导航到 自定义 JavaScript 部分,可在此处找到:自定义 > >自定义 JavaScript。
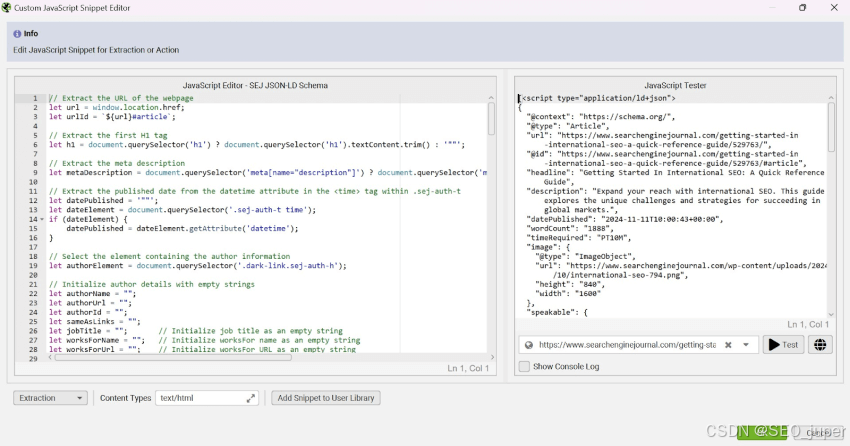
点击 ‘+ Add’ 按钮以插入新的自定义 JavaScript 代码段。为代码段分配您的首选名称。最后,单击“JS”按钮打开 JavaScript 代码段编辑器。
在 JavaScript 代码段编辑器中,将您正在处理的 JavaScript 代码复制粘贴到 JavaScript 编辑器输入框中:
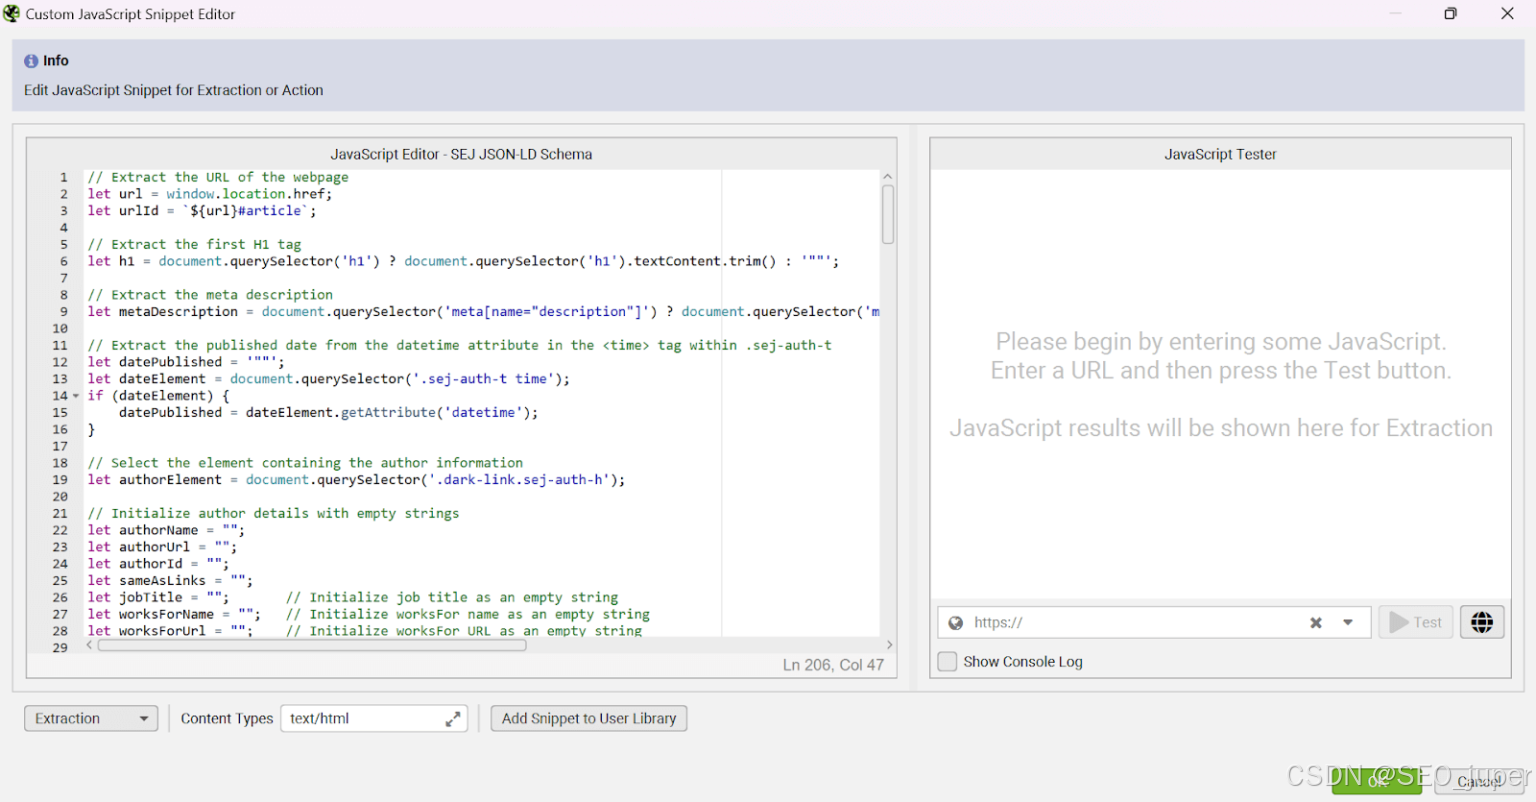
您可以使用 JavaScript Tester 功能来确保脚本正常工作。
将测试 URL 复制粘贴到 URL 输入字段中,然后单击“测试”按钮。测试抓取完成后,您应该会在测试器框中看到 JavaScript 代码段输出:
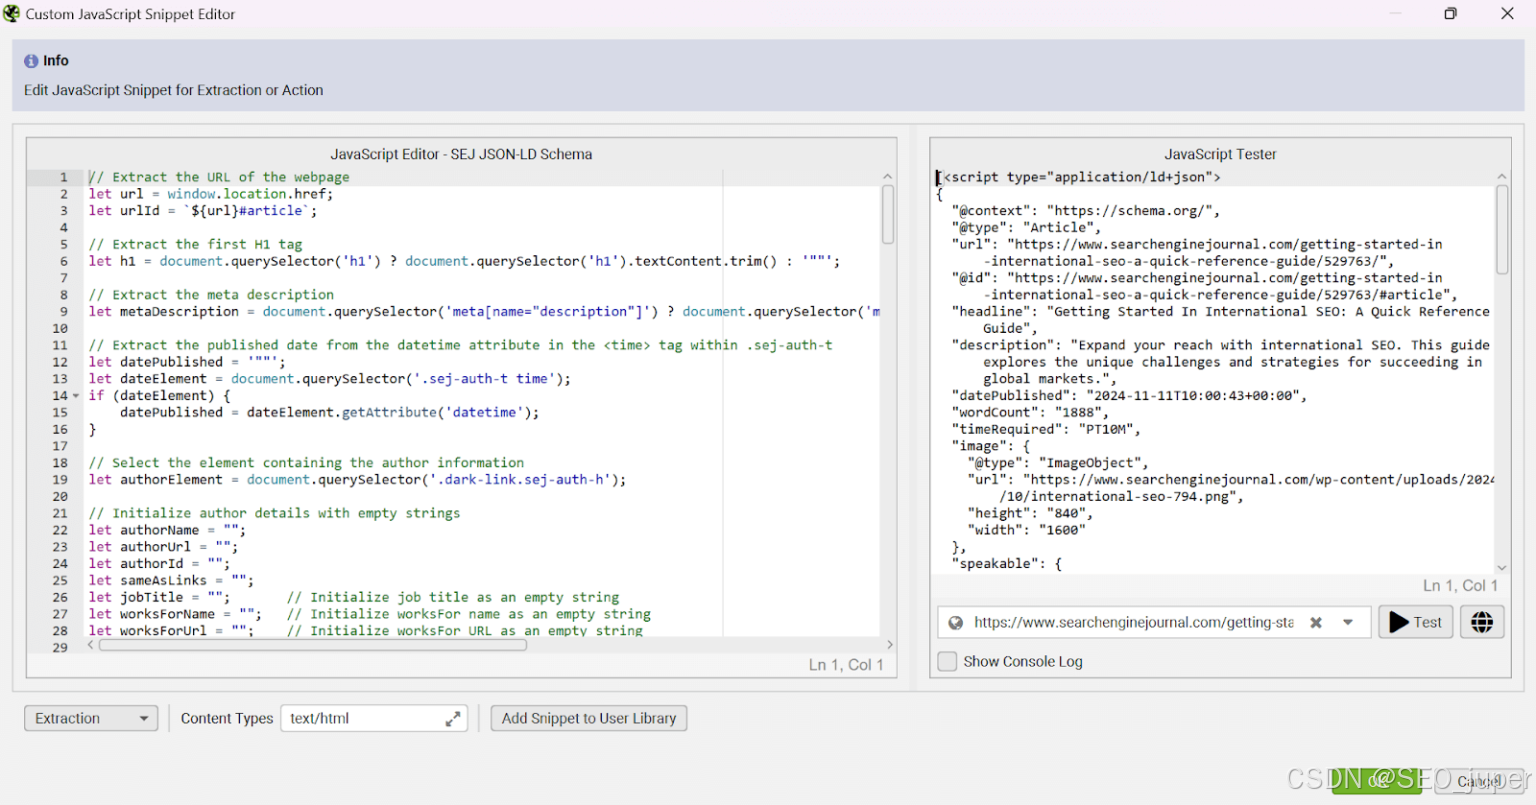
在构建脚本时,我广泛使用了 JavaScript 测试器。测试器功能非常适合通过标记控制台错误来调试问题,从而为您指明正确的方向。如果您遇到任何错误,您可以将它们输入到 LLM 中以重新生成正确的代码或寻求建议。
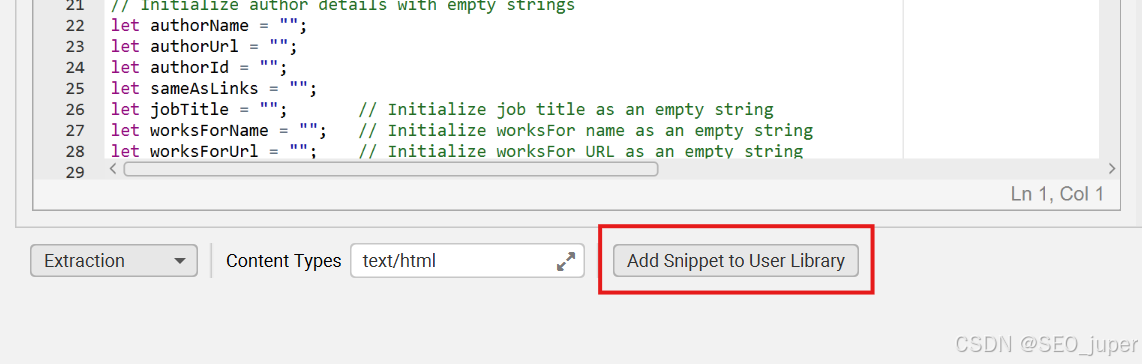
完成脚本并对最终输出感到满意后,您可以执行一个可选步骤,将脚本保存到自定义 JavaScript 代码段库中。单击 ‘Add Snippet to User Library’ 按钮来执行此作:
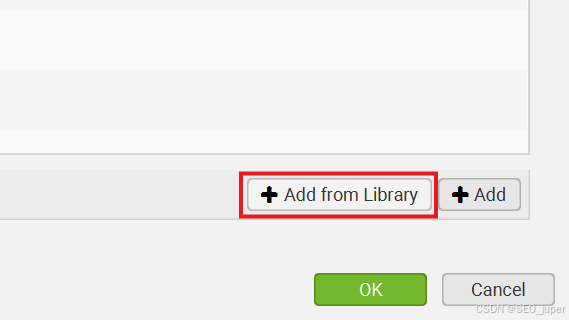
您可以通过单击主“自定义 JavaScript”配置仪表板中的“+ 从库添加”来访问您的私有代码段:
最终 JSON-LD 脚本测试
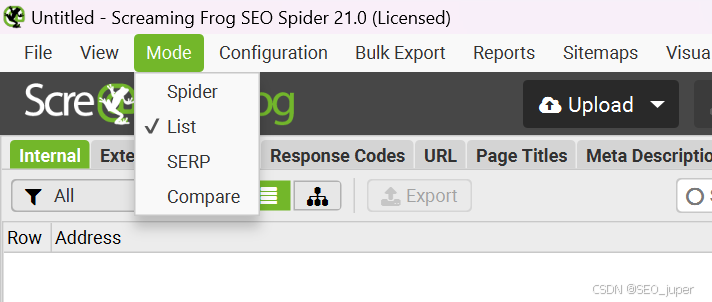
为确保您的 JSON-LD 脚本在所选页面模板中的 URL 中正常工作,我建议您将抓取切换到“列表模式”:列表>模式
现在,您可以选择“上传”按钮,然后选择“手动输入…”选择。
在弹出的输入框中添加 10 个 URL 的示例作为测试,以确保 JSON-LD 输出在所有页面中都是正确的。
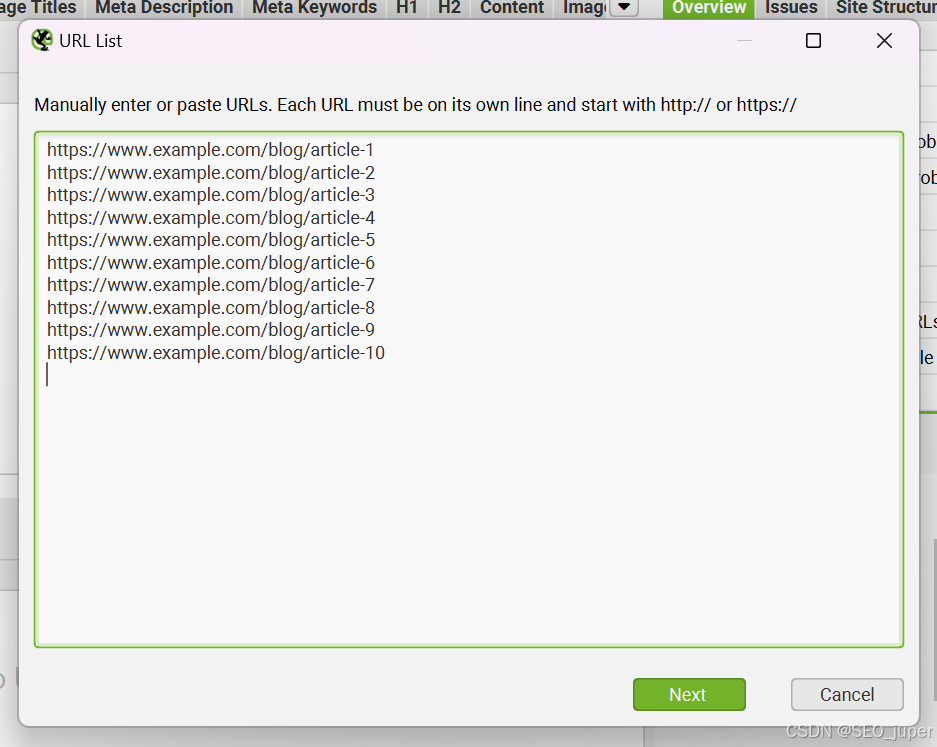
点击 ‘下一步’ 并开始抓取。
使用 Google 和 Schema.org 进行验证
使用架构标记时,始终建议在将架构代码添加到网站之前对其进行验证。我始终建议使用 Google 支持的 Rich Results Test 来验证代码。
此外,我建议通过 Schema.org 的验证器运行代码,尤其是当您的脚本包含不支持的架构类型时。
运行 Crawl 并提取 Schema 标记
这是一切汇集在一起的时候。使用您的完整 URL 列表再次运行“列表模式”爬虫或您网站的标准爬虫爬虫。
抓取完成后,导航到“自定义 JavaScript”选项卡,您将在其中找到 JSON-LD 架构标记脚本,供您复制粘贴到 CMS 中或导出为电子表格。
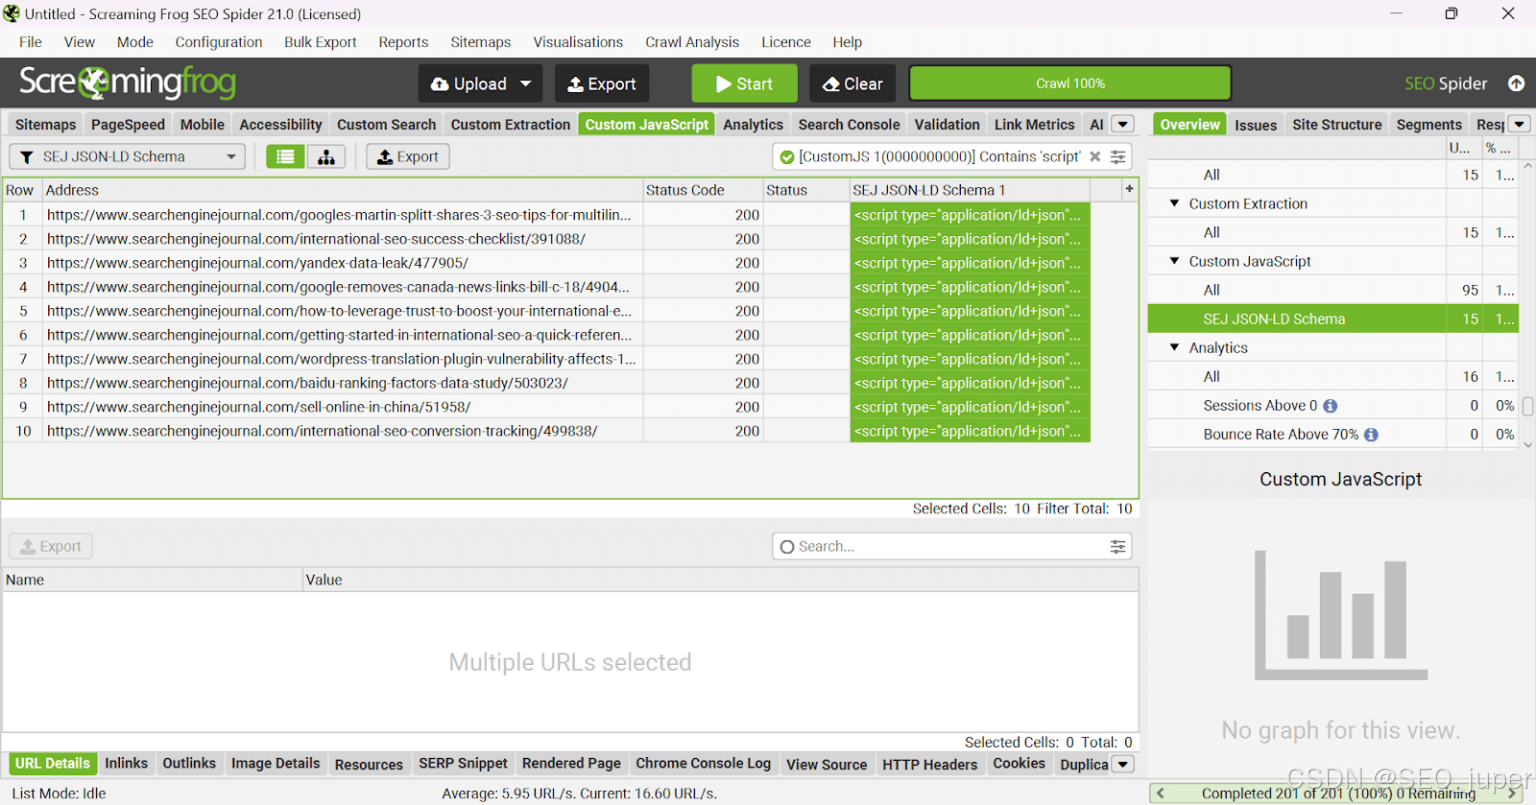
借助 Screaming Frog SEO Spider 的强大功能,我们现在可以大规模生成架构标记脚本。负责任地使用此功能,并随时添加您的反馈。


 被折叠的 条评论
为什么被折叠?
被折叠的 条评论
为什么被折叠?
 到【灌水乐园】发言


