


1、创建爬虫demo
1、在命令行中新建一个scrapy项目
命令:scrapy startproject demo1
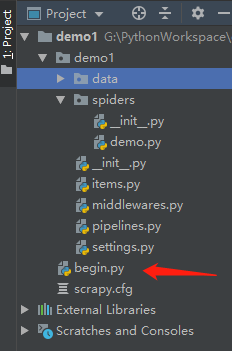
2、打开PyCharm可查看自动生成的文件目录
创建后,咱们看下文件目录:
a. items.py主要是创建爬虫存储的字段
b. middlewares.py是中间件,主要是编写下载中间件、Cookies中间件等
c. pipelines.py用来爬虫后数据的处理(如存储到CSV、存储到数据库等)
d. spiders文件夹存放的是爬虫的脚本
3、新建爬虫文件
命令:scrapy genspider demo “http://www.zhipin.com”
4、新建begin.py用来执行爬虫文件
2、导包
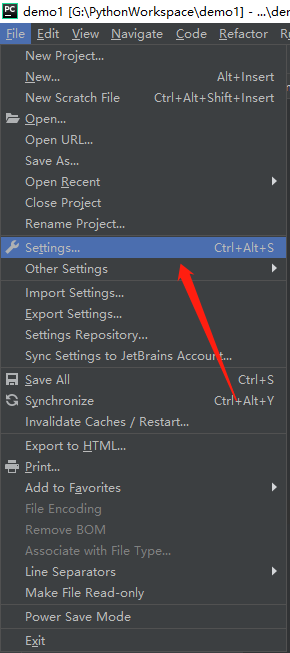
1、File→Settings……
2、点击右边的“+”号

3、在搜索框输入Twisted,点击下面的Install Package

4、同上在搜索框输入Scrapy,点击下面的Install Package

5、有可能出现的问题
由于版本问题,可能在安装Twisted包的时候,会报错。
我们可以在cmd命令行输入python查看自己的python版本

拓展包下载网址:https://www.lfd.uci.edu/~gohlke/pythonlibs/
我们需要自主选择自己python合适版本的拓展包

然后在cmd里面输入路径安装即可

3、编写爬虫脚本
1、items.py编写我们需要爬虫的字段
import scrapy

class Demo1Item(scrapy.Item):
    # define the fields for your item here like:
    # name = scrapy.Field()

    # 公司名字
    company_name = scrapy.Field()
    # 工作地点
    working_place = scrapy.Field()
    # 职位
    job_title = scrapy.Field()
    # 工资
    salary = scrapy.Field()
    # 图标
    icon = scrapy.Field()
    # 链接
    href = scrapy.Field()
2、pipeline.py返回item数据进行操作
import codecs
import json

class Demo1Pipeline(object):
    def __init__(self):
        self.file = codecs.open('demo1/data/demo.json', 'w')

    def process_item(self, item, spider):
        content = json.dumps(dict(item), ensure_ascii=False) + ",\n"
        self.file.write(content)
        return item

    def close_spider(self, spider):
        self.file.close()
3、demo.py脚本
import urllib

import scrapy
from demo1.items import Demo1Item

# BOSS直聘网站爬虫职位

class DemoSpider(scrapy.Spider):
    # 爬虫名, 启动爬虫时需要的参数*必填
    name = 'demo'
    # 爬取域范围,允许爬虫在这个域名下进行爬取(可选)
    # allowed_domains = ['www.zhipin.com']
    # 爬虫需要的url
    start_urls = ['https://www.zhipin.com/c101280600/?query=开发']

    # response会得到爬虫的url
    def parse(self, response):
        node_list = response.xpath("//div[@class='job-primary']")
        # 用来存储所有的item字段
        # items = []

        for node in node_list:
            item = Demo1Item()
            # extract() 将xpath对象转换为Unicode字符串
            item['company_name'] = node.xpath(".//div[@class='info-company']//a/text()").extract_first()
            item['working_place'] = node.xpath(".//div[@class='info-primary']/p/text()").extract_first()
            item['job_title'] = node.xpath(".//div[@class='info-primary']//a/div[@class='job-title']/text()").extract_first()
            item['salary'] = node.xpath(".//div[@class='info-primary']//a/span/text()").extract_first()
            item['href'] = node.xpath(".//div[@class='info-primary']//a/@href").extract_first()
            item['icon'] = node.xpath(".//div[@class='info-publis']//h3//img/@src").extract_first()

            # 将爬取的数据导出到'.txt'文本
            with open('text.txt', 'a', encoding = 'utf-8') as f:
                f.writelines(item['company_name'] + ' \n')
                f.writelines(item['working_place'] + ' \n')
                f.writelines(item['job_title'] + ' \n')
                f.writelines(item['salary'] + ' \n')
                f.writelines(item['icon'] + ' \n')
                f.writelines('https://www.zhipin.com' + item['href'] + ' \n' + ' \n')

            # 将icon路径截取,得到自己需要的部分
            iconpath = item['icon']
            trueIconpath = iconpath[:-40]
            newIconpath = trueIconpath[trueIconpath.rfind('/') + 1 :]

            # 下载图片到本地指定路径位置
            urllib.request.urlretrieve(node.xpath("//div[@class='info-publis']//h3/img/@src").extract_first(), 'G:\\爬虫\\' + newIconpath)

            # 返回提取到的每个item数据给管道处理,同时还会出来继续执行后面的代码
            yield item

        # 输出当前爬虫response得到的url
        print("before:" + response.url)

        # 制定下一页的url传回给scrapy请求
        # 当网页的下一页没有链接时(href=javascipt:;), 结束爬虫
        newurl = 'https://www.zhipin.com' + response.xpath(".//div[@id='main']//div[@class='job-list']//div[@class='page']//a[@class='next']/@href").extract_first()

        yield scrapy.Request(newurl)
爬虫所需要的数据可以根据Google Chrome上的xpath插件进行选择
在此提供作者的xpath下载地址:http://chromecj.com/web-development/2018-01/892/download.html
下载好xpath后是一个crx后缀文件,需要将它改成zip格式再添加到Google Chrome上面的更多工具→扩展程序
成功后的样式:
xpath的打开和关闭快捷键是Ctrl + Shift + X
在网页按住Shift可得到鼠标指定地方的QUERY,然后右边RESULTS可以查看得到的抓取信息
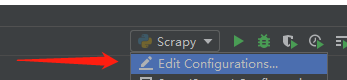
4、执行begin.py脚本
from scrapy import cmdline

cmdline.execute('scrapy crawl demo'.split())
1、进行下面这两个运行配置

5、setting.py文件中的UESR_AGENT需要修改
在网页中按下F12,查看Network,在name列表中选择一个,查看Headers中的user-agent
将这个user-agent复制到setting.py配置文件中,如下图:````


 1114
1114


 被折叠的 条评论
为什么被折叠?
被折叠的 条评论
为什么被折叠?
 到【灌水乐园】发言


