


1. HDFS 客户端准备
(1)准备hadoop 的 安装包 , 我这里用的hadoop-2.7.2 的版本

(2)需要配置的环境变量 有 HADOOP_HOME 和 PATH 变量

(2)配置hadoop 的 HADOOP_HOME 路径
(3)配置PATH路径

2. 创建工程
(1) 创建maven模块我这里创建了 hdfs-core

(2)增加pom依赖
    <dependencies>
        <dependency>
            <groupId>junit</groupId>
            <artifactId>junit</artifactId>
        </dependency>
        <dependency>
            <groupId>org.apache.logging.log4j</groupId>
            <artifactId>log4j-core</artifactId>
        </dependency>
        <dependency>
            <groupId>org.apache.hadoop</groupId>
            <artifactId>hadoop-common</artifactId>
        </dependency>
        <dependency>
            <groupId>org.apache.hadoop</groupId>
            <artifactId>hadoop-client</artifactId>
        </dependency>
        <dependency>
            <groupId>org.apache.hadoop</groupId>
            <artifactId>hadoop-hdfs</artifactId>
        </dependency>

        <dependency>
            <groupId>org.apache.logging.log4j</groupId>
            <artifactId>log4j-slf4j-impl</artifactId>
            <version>2.12.0</version>
        </dependency>
(3) 在 src/main/resources 目录中增加日志配置文件 log4j2.xml
<?xml version="1.0" encoding="UTF-8"?>
<Configuration status="error" strict="true" name="XMLConfig">
    <Appenders>
        <Appender type="Console" name="STDOUT">
            <Layout type="PatternLayout"
                    pattern="[%p] [%d{yyyy-MM-dd HH:mm:ss}][%c{10}]%m%n" />
        </Appender>
    </Appenders>

    <Loggers>
        <!-- 可加性为false -->
        <Logger name="test" level="info" additivity="false">
            <AppenderRef ref="STDOUT" />
        </Logger>

        <!-- root loggerConfig设置 -->
        <Root level="info">
            <AppenderRef ref="STDOUT" />
        </Root>
    </Loggers>
</Configuration>
(4) 增加测试类 HDFSClientTest
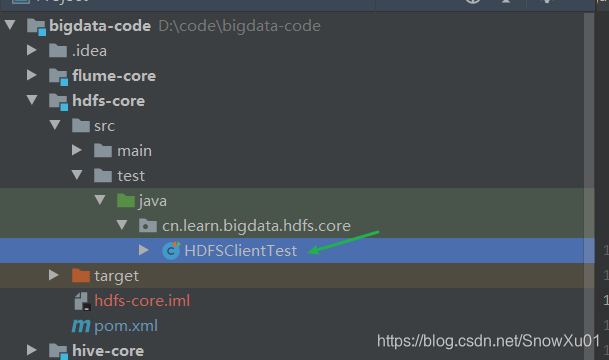
package cn.learn.bigdata.hdfs.core;

/**
 * 测试java客户端连接 hdfs 操作
 */
public class HDFSClientTest {

}
3. HDFS 的 基础API操作
3.1 获取FileSystem对象
方式1
(1)代码
	@Test
	public void getConnection1(){
		// 1 获取文件系统
		Configuration configuration = new Configuration();

		// 需要 VM option 增加hadoop用户名: -DHADOOP_USER_NAME=hadoop
		configuration.set("fs.defaultFS", "hdfs://hadoop181:9000");

		try (FileSystem fileSystem = FileSystem.get(configuration)) {
			System.out.println(fileSystem);
		} catch (IOException e) {
			e.printStackTrace();
		}
	}
(2)测试结果

(3)注意事项
这种方式需要设置VM参数,否则, 操作时候会报错,获取连接不会报错

方式2
(1)代码
	@Test
	public void getConnection2(){
		// 1 获取文件系统
		Configuration configuration = new Configuration();
		// 1. uri 路径可以设置在configuration 也可以通过后买你的URI 设置
		// configuration.set("fs.defaultFS", "hdfs://hadoop181:9000");
		//try (FileSystem fileSystem = FileSystem.get(new URI(""),configuration,"hadoop")) {
		// 2. 如果configuration 没设置uri, 也可以设置到URI上,new URI的优先级比configuration的高
		try (FileSystem fileSystem = FileSystem.get(new URI("hdfs://hadoop185:9000"),configuration,"hadoop")) {
			System.out.println(fileSystem);
		} catch (IOException | URISyntaxException | InterruptedException e) {
			e.printStackTrace();
		}
	}
(2)注意事项
- 连接的uri可以设置在configuration 也可以设置在 new URI上
- new URI上设置的优先级会比configuration上设置的优先级高

3.1 文件目录的创建
(1) 代码
	@Test
	public void mkdir() throws IOException {
		Configuration configuration = new Configuration();
		try(FileSystem fileSystem = FileSystem.get(new URI("hdfs://hadoop181:9000"),
				configuration, "hadoop")){
				fileSystem.mkdirs(new Path("/data/hadoop/java/"));
		} catch (IOException | URISyntaxException | InterruptedException e) {
				e.printStackTrace();
		}
	}
(2)完成后查看

3.2 文件的上传操作
(1)代码
	@Test
	public void copyFromLocalFile() {

		try(FileSystem fileSystem = FileSystem.get(new URI("hdfs://hadoop181:9000"),
				new Configuration(), "hadoop")){

			/** fileSystem 中的文件上传方法 并没有一个 put 的方法, 只有一个 copyFromLocalFile */
			fileSystem.copyFromLocalFile(
					new Path("src/main/resources/log4j2.xml"),
					new Path("/data/hadoop/java/"));

		} catch (IOException | URISyntaxException | InterruptedException e) {
			e.printStackTrace();
		}
	}
(2)完成后查看

3.3 文件下载操作
(1)代码
	@Test
	public void copyToLocalFile() {

		try(FileSystem fileSystem = FileSystem.get(new URI("hdfs://hadoop181:9000"),
				new Configuration(), "hadoop")){
			/*
			 copyToLocalFile 参数说明
						  delSrc :是否删除源文件
						  src: 要下载的文件路径
						  dst :文件下载到哪里
						  useRawLocalFileSystem :是否需要校验
			*/
			fileSystem.copyToLocalFile(
					new Path("/data/hadoop/java/log4j2.xml"),
					new Path("src/main/resources/log4j2.xml.download"));

		} catch (IOException | URISyntaxException | InterruptedException e) {
			e.printStackTrace();
		}
	}
(2)完成效果查看

(3)备注
*.src是校验文件
3.4 修改文件改名
(1)代码
	@Test
	public void renameFile() {

		try(FileSystem fileSystem = FileSystem.get(new URI("hdfs://hadoop181:9000"),
				new Configuration(), "hadoop")){
			fileSystem.rename(
					new Path("/data/hadoop/java/log4j2.xml"),
					new Path("/data/hadoop/java/log4j2_tmp.xml"));

		} catch (IOException | URISyntaxException | InterruptedException e) {
			e.printStackTrace();
		}
	}
(2)效果演示

3.5 移动文件位置
(1)代码
	@Test
	public void removeFile(){
		try(FileSystem fileSystem = FileSystem.get(new URI("hdfs://hadoop181:9000"),new Configuration(),"hadoop")){
			fileSystem.rename(
					new Path("/data/hadoop/java/log4j2_tmp.xml"),
					new Path("/data/hadoop/java/temp/log4j2_tmp.xml"));
		}catch(Exception e){
			e.printStackTrace();
		}
	}
(2)效果

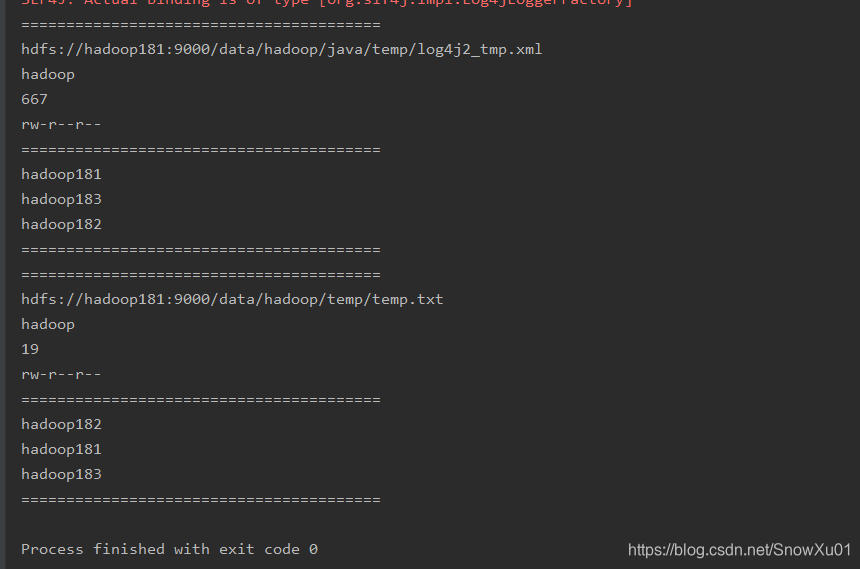
3.6 查看文件详情
(1)代码
@Test
	public void list(){
		try(FileSystem fileSystem = FileSystem.get(new URI("hdfs://hadoop181:9000"),new Configuration(),"hadoop")){
			RemoteIterator<LocatedFileStatus> locatedFileStatusRemoteIterator = fileSystem.listFiles(new Path("/data/hadoop/"), true);

			while (locatedFileStatusRemoteIterator.hasNext()) {
				LocatedFileStatus next = locatedFileStatusRemoteIterator.next();

				Path path = next.getPath();
				String owner = next.getOwner();
				long len = next.getLen();
				FsPermission permission = next.getPermission();
				System.out.println("========================================");
				System.out.println(path);
				System.out.println(owner);
				System.out.println(len);
				System.out.println(permission);
				System.out.println("========================================");


				BlockLocation[] blockLocations = next.getBlockLocations();
				for (BlockLocation blockLocation : blockLocations) {
					for (String host : blockLocation.getHosts()) {
						System.out.println(host);
					}
				}
				System.out.println("========================================");
			}
		}catch(Exception e){
			e.printStackTrace();
		}
	}
(2)效果
3.7 文件和目录的判断
(1)代码
	@Test
	public void fileOrDirector(){
		String path = "/data/hadoop";
		fileOrDirectorRec(path);
	}

	//递归遍历目录
	public void fileOrDirectorRec(String path){
		try(FileSystem fileSystem = FileSystem.get(new URI("hdfs://hadoop183:9000"),new Configuration(),"hadoop")){
			FileStatus[] fileStatuses = fileSystem.listStatus(new Path(path));
			for (FileStatus fileStatus : fileStatuses) {
				if (fileStatus.isDirectory()) {

					// 如果需要判断所有的子目录需要递归
					String dirName = path + "/" + fileStatus.getPath().getName();
					System.out.println(dirName + "是一个目录");
					fileOrDirectorRec(dirName);
				} else if (fileStatus.isFile()) {
					String fileName = path + "/" + fileStatus.getPath().getName();
					System.out.println(fileName + "是一个文件");
				}
			}
		}catch(Exception e){
			e.printStackTrace();
		}
	}
(2)效果

3.8 文件的删除
(1) 代码
	@Test
	public void delete() throws IOException {
		try(FileSystem fileSystem = FileSystem.get(new URI("hdfs://hadoop183:9000"),
				new Configuration(), "hadoop")){
			fileSystem.delete(new Path("/data/hadoop/java/temp"), true);
		} catch (IOException | URISyntaxException | InterruptedException e) {
			e.printStackTrace();
		}
	}
(2)效果

好吧,今天不想写了, 还有很多,基本上都是通过 FileSystem 类可以直接点出来的 ~~~


 196
196


 被折叠的 条评论
为什么被折叠?
被折叠的 条评论
为什么被折叠?
 到【灌水乐园】发言


