


下载完yolov5代码后开始改写代码
1.第一个问题
在使用命令pip install -r requirements.txt时速度太慢,在后面添加了清华源,命令改为
pip install -r requirements.txt -i https://pypi.tuna.tsinghua.edu.cn/simple
速度变快了很多,然而这时出现了新的问题
  ERROR: Command errored out with exit status 1:
   command: 'C:\ProgramData\Anaconda3\envs\pytorch\python.exe' 'C:\ProgramData\Anaconda3\envs\pytorch\lib\site-packages\pip\_vendor\pep517\in_process\_in_process.py' build_wheel 'C:\Users\xg\AppData\Local\Temp\tmpakanlyfi'
       cwd: C:\Users\xg\AppData\Local\Temp\pip-install-yvnqxxa7\pycocotools_c7b375807c964e6981c352dcc155ebbc
  Complete output (14 lines):
  running bdist_wheel
  running build
  running build_py
  creating build
  creating build\lib.win-amd64-cpython-38
  creating build\lib.win-amd64-cpython-38\pycocotools
  copying pycocotools\coco.py -> build\lib.win-amd64-cpython-38\pycocotools
  copying pycocotools\cocoeval.py -> build\lib.win-amd64-cpython-38\pycocotools
  copying pycocotools\mask.py -> build\lib.win-amd64-cpython-38\pycocotools
  copying pycocotools\__init__.py -> build\lib.win-amd64-cpython-38\pycocotools
  running build_ext
  skipping 'pycocotools\_mask.c' Cython extension (up-to-date)
  building 'pycocotools._mask' extension
  error: Microsoft Visual C++ 14.0 or greater is required. Get it with "Microsoft C++ Build Tools": https://visualstudio.microsoft.com/visual-cpp-build-tools/
  ----------------------------------------
  ERROR: Failed building wheel for pycocotools
Failed to build pycocotools
ERROR: Could not build wheels for pycocotools which use PEP 517 and cannot be installed directly
在安装pycocotools时出现错误,根据命令提示去微软官网下载Microsoft C++编译器
打开网址Microsoft C++ Build Tools - Visual Studio

下载生成工具
下载完打开,在单个组件里我找到MSVC v140
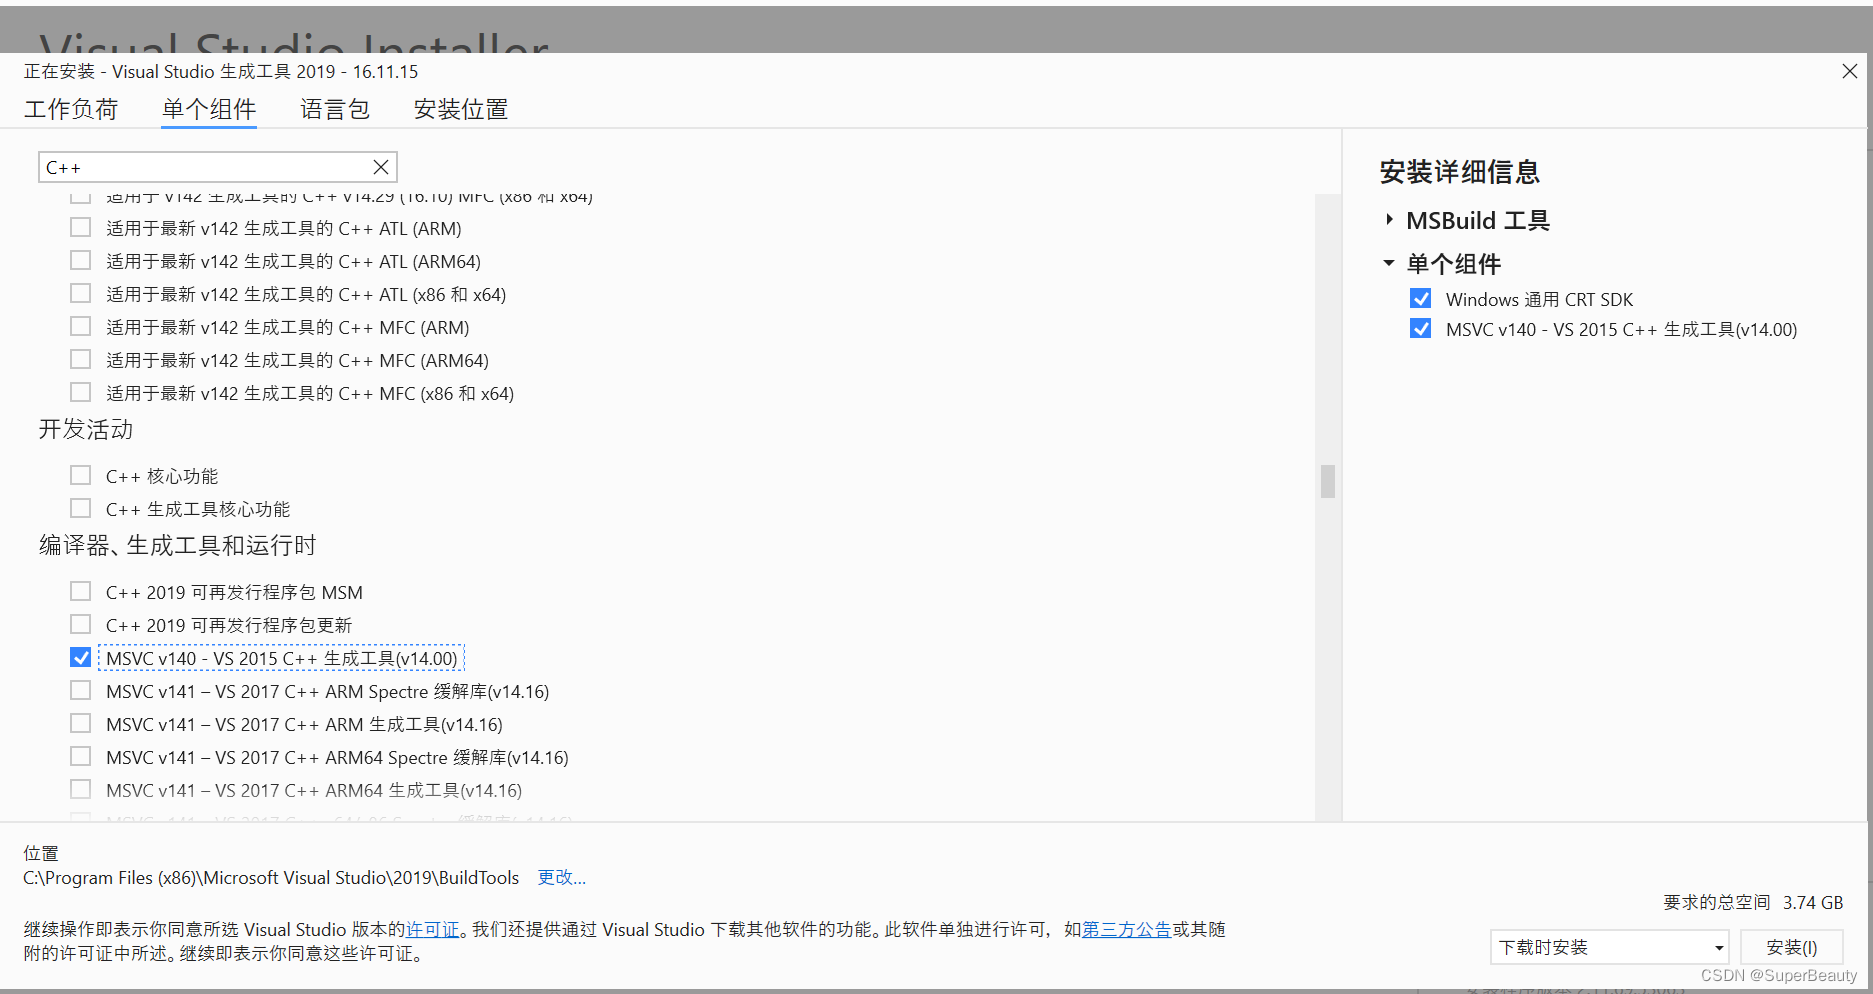
因为要求是14.0以上,我就下一个试试看能不能解决,下太多了占用空间很大,有点本末倒置,就先看看这样能不能解决吧
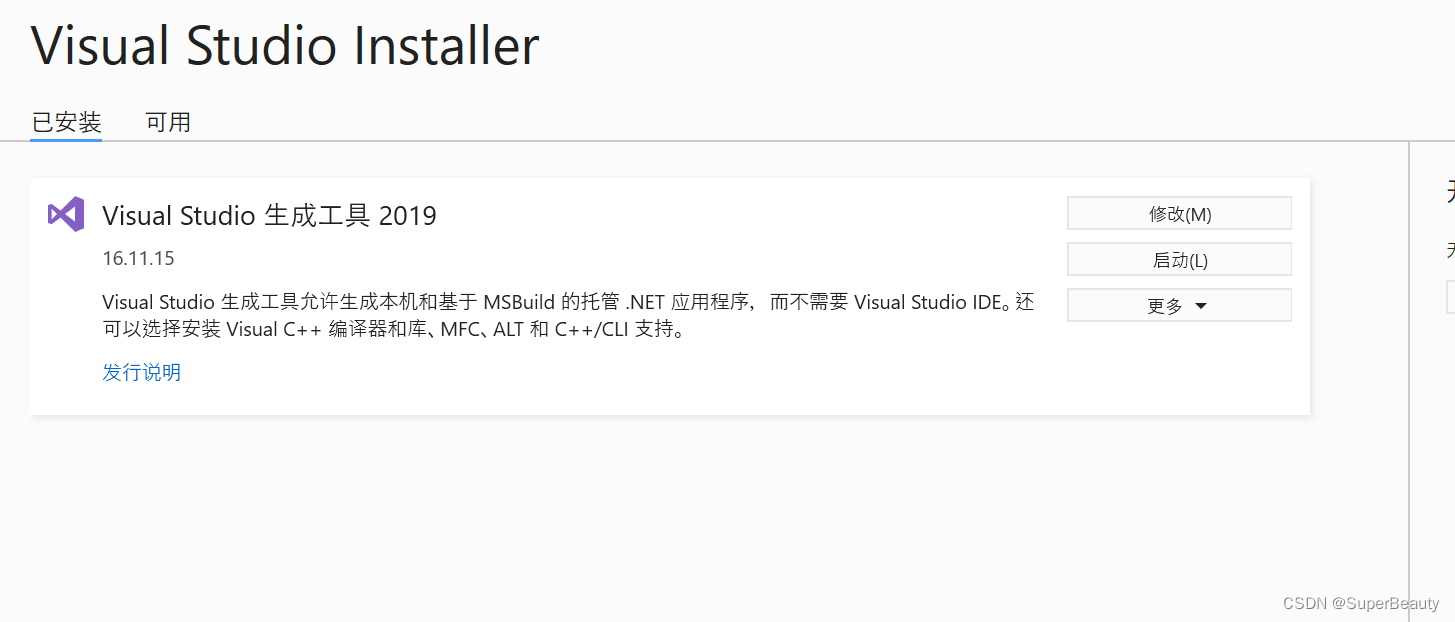
安装完成了,我再试试效果
  ERROR: Command errored out with exit status 1:
   command: 'C:\ProgramData\Anaconda3\envs\pytorch\python.exe' 'C:\ProgramData\Anaconda3\envs\pytorch\lib\site-packages\pip\_vendor\pep517\in_process\_in_process.py' build_wheel 'C:\Users\xg\AppData\Local\Temp\tmp__5_itxj'
       cwd: C:\Users\xg\AppData\Local\Temp\pip-install-5k11dbj1\pycocotools_d869218d17ee4d5b85c6a821f4c0e8ba
  Complete output (24 lines):
  running bdist_wheel
  running build
  running build_py
  creating build
  creating build\lib.win-amd64-cpython-38
  creating build\lib.win-amd64-cpython-38\pycocotools
  copying pycocotools\coco.py -> build\lib.win-amd64-cpython-38\pycocotools
  copying pycocotools\cocoeval.py -> build\lib.win-amd64-cpython-38\pycocotools
  copying pycocotools\mask.py -> build\lib.win-amd64-cpython-38\pycocotools
  copying pycocotools\__init__.py -> build\lib.win-amd64-cpython-38\pycocotools
  running build_ext
  skipping 'pycocotools\_mask.c' Cython extension (up-to-date)
  building 'pycocotools._mask' extension
  creating build\temp.win-amd64-cpython-38
  creating build\temp.win-amd64-cpython-38\Release
  creating build\temp.win-amd64-cpython-38\Release\common
  creating build\temp.win-amd64-cpython-38\Release\pycocotools
  "C:\Program Files (x86)\Microsoft Visual Studio 14.0\VC\BIN\x86_amd64\cl.exe" /c /nologo /O2 /W3 /GL /DNDEBUG /MD -IC:\Users\xg\AppData\Local\Temp\pip-build-env-iuuk8d0d\overlay\Lib\site-packages\numpy\core\include -I./common -IC:\ProgramData\Anaconda3\envs\pytorch\include -IC:\ProgramData\Anaconda3\envs\pytorch\Include "-IC:\Program Files (x86)\Microsoft Visual Studio 14.0\VC\INCLUDE" "-IC:\Program Files (x86)\Microsoft Visual Studio 14.0\VC\ATLMFC\INCLUDE" "-IC:\Program Files (x86)\Windows Kits\10\include\10.0.10240.0\ucrt" /Tc./common/maskApi.c /Fobuild\temp.win-amd64-cpython-38\Release\./common/maskApi.obj
  maskApi.c
  ./common/maskApi.c(135): warning C4101: “xp”: 未引用的局部变量
  "C:\Program Files (x86)\Microsoft Visual Studio 14.0\VC\BIN\x86_amd64\cl.exe" /c /nologo /O2 /W3 /GL /DNDEBUG /MD -IC:\Users\xg\AppData\Local\Temp\pip-build-env-iuuk8d0d\overlay\Lib\site-packages\numpy\core\include -I./common -IC:\ProgramData\Anaconda3\envs\pytorch\include -IC:\ProgramData\Anaconda3\envs\pytorch\Include "-IC:\Program Files (x86)\Microsoft Visual Studio 14.0\VC\INCLUDE" "-IC:\Program Files (x86)\Microsoft Visual Studio 14.0\VC\ATLMFC\INCLUDE" "-IC:\Program Files (x86)\Windows Kits\10\include\10.0.10240.0\ucrt" /Tcpycocotools\_mask.c /Fobuild\temp.win-amd64-cpython-38\Release\pycocotools\_mask.obj
  _mask.c
  c:\programdata\anaconda3\envs\pytorch\include\pyconfig.h(205): fatal error C1083: 无法打开包括文件: “basetsd.h”: No such file or directory
  error: command 'C:\\Program Files (x86)\\Microsoft Visual Studio 14.0\\VC\\BIN\\x86_amd64\\cl.exe' failed with exit code 2
  ----------------------------------------
  ERROR: Failed building wheel for pycocotools
出现了新的问题,网上找了一下解决方法,说是安装C++的桌面开发即可
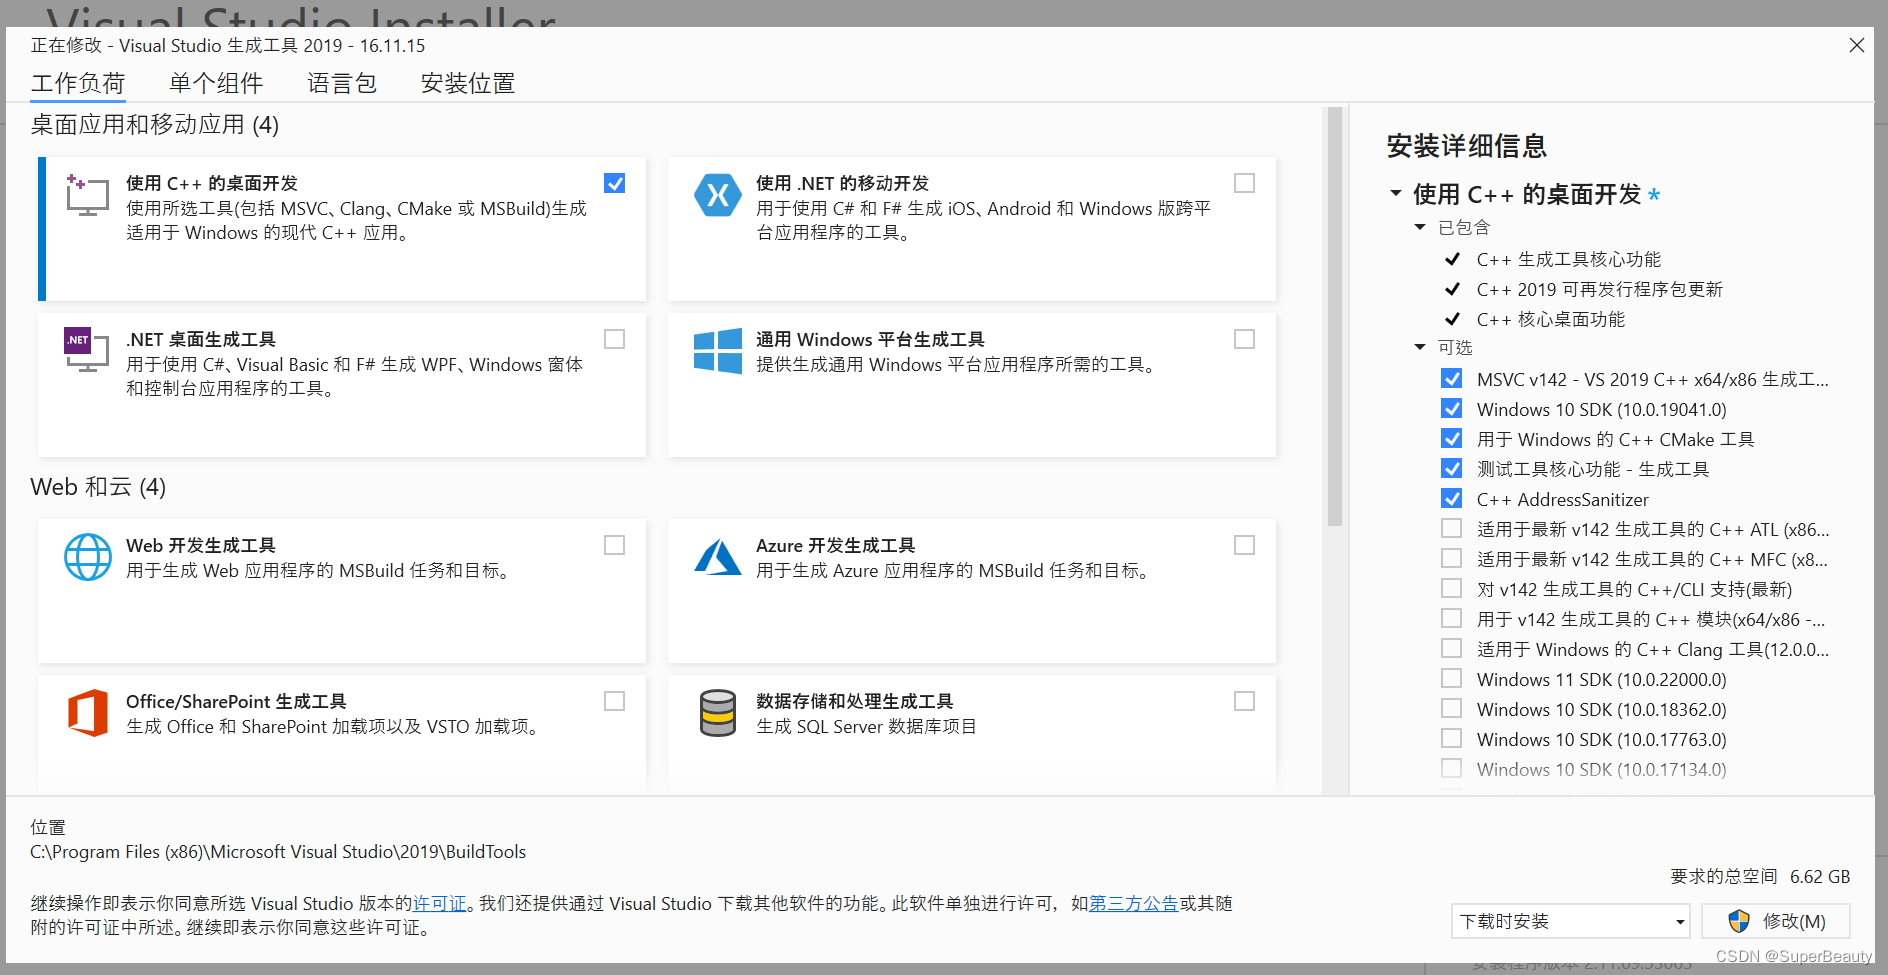
一看6.62G的安装大小,感叹拿笔记本搞开发真是不容易啊,一不留神空间就没了
安装了好半天,终于安装好了,迫不及待的重新pip install一下
Successfully built pycocotools
Installing collected packages: pyasn1, zipp, six, rsa, pyparsing, pyasn1-modules, oauthlib, cachetools, requests-oauthlib, pytz, python-dateutil, packaging, kiwisolver, importlib-metadata, google-auth, fonttools, cycler, werkzeug, tensorboard-plugin-wit, tensorboard-data-server, scipy, protobuf, pandas, matplotlib, markdown, grpcio, google-auth-oauthlib, colorama, absl-py, tqdm, thop, tensorboard, seaborn, PyYAML, pycocotools, opencv-python
Successfully installed PyYAML-6.0 absl-py-1.1.0 cachetools-5.2.0 colorama-0.4.4 cycler-0.11.0 fonttools-4.33.3 google-auth-2.6.6 google-auth-oauthlib-0.4.6 grpcio-1.46.3 importlib-metadata-4.11.4 kiwisolver-1.4.2 markdown-3.3.7 matplotlib-3.5.2 oauthlib-3.2.0 opencv-python-4.5.5.64 packaging-21.3 pandas-1.4.2 protobuf-4.21.1 pyasn1-0.4.8 pyasn1-modules-0.2.8 pycocotools-2.0.4 pyparsing-3.0.9 python-dateutil-2.8.2 pytz-2022.1 requests-oauthlib-1.3.1 rsa-4.8 scipy-1.8.1 seaborn-0.11.2 six-1.16.0 tensorboard-2.9.0 tensorboard-data-server-0.6.1 tensorboard-plugin-wit-1.8.1 thop-0.0.31.post2005241907 tqdm-4.64.0 werkzeug-2.1.2 zipp-3.8.0
看到Successfully built pycocotools的那一刻,总算是松了一口气,这个问题到这就解决了,接下去可以修改代码了!
2.修改完代码run train.py时出现了这个问题
TypeError: Descriptors cannot not be created directly.
If this call came from a _pb2.py file, your generated code is out of date and must be regenerated with protoc >= 3.19.0.
If you cannot immediately regenerate your protos, some other possible workarounds are:
 1. Downgrade the protobuf package to 3.20.x or lower.
 2. Set PROTOCOL_BUFFERS_PYTHON_IMPLEMENTATION=python (but this will use pure-Python parsing and will be much slower).

More information: https://developers.google.com/protocol-buffers/docs/news/2022-05-06#python-updates

Process finished with exit code 1
输入命令卸载现有版本
pip uninstall protobuf
输入命令重新安装
pip install protobuf==3.19.0
结果显示还是同样的错误,找了半天终于找到问题了,原来在pycharm里直接通过命令行卸载重装时修改的是本地base环境里的库,而我现在用的是通过anaconda新建的一个环境,里面的protobuf版本一直是4.21.1,所以自然还是同样的问题,所以到项目对应的环境中重新执行一遍卸载重装命令,再运行
protobuf的问题解决了,但是出现了新的问题,我们接着来看
3.AttributeError: Can't get attribute 'SPPF' on <module 'models.common' from 'D:\\code\\pythonProject\\yolov5-5.0\\models\\common.py'>
原因是common.py使用了最新的模型函数,而我这里用的还是5.0版本的旧文件,自然没有该函数了,直接从最新的文件里将该函数拷过来即可
import warnings


class SPPF(nn.Module):
    # Spatial Pyramid Pooling - Fast (SPPF) layer for YOLOv5 by Glenn Jocher
    def __init__(self, c1, c2, k=5):  # equivalent to SPP(k=(5, 9, 13))
        super().__init__()
        c_ = c1 // 2  # hidden channels
        self.cv1 = Conv(c1, c_, 1, 1)
        self.cv2 = Conv(c_ * 4, c2, 1, 1)
        self.m = nn.MaxPool2d(kernel_size=k, stride=1, padding=k // 2)

    def forward(self, x):
        x = self.cv1(x)
        with warnings.catch_warnings():
            warnings.simplefilter('ignore')  # suppress torch 1.9.0 max_pool2d() warning
            y1 = self.m(x)
            y2 = self.m(y1)
            return self.cv2(torch.cat([x, y1, y2, self.m(y2)], 1))
好了,这个问题也算是解决了,但是这时又出现了新的问题,接着来看
4.OSError: [WinError 1455] 页面文件太小,无法完成操作。
网上查了一下,发现是虚拟内存设置太小的原因,参考彻底解决pycharm中: OSError: [WinError 1455] 页面文件太小,无法完成操作的问题--亲测_Highlight_Jin的博客-CSDN博客_页面文件太小,无法完成操作
设置完成之后,解决了这个问题,训练后结果又出现了新的问题
5.AssertionError: Image Not Found D:\PycharmProjects\yolov5-hat\VOCdevkit\images\train\000000.jpg
这里的图片位置很显然不是我的项目文件位置,肯定有问题,于是想着是不是要先修改路径,但是在全局搜索里怎么都搜不到这个定义的文件位置,到网上搜了一下,发现了问题,原来我偷懒把教程里的训练数据集拷过来了,但是在labels文件下面有两个缓存文件,名字分别为train.cache和val.cache
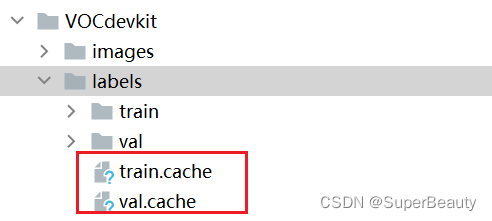
它们里面保存着原来的路径,当训练开始时因为存在原有的缓存文件,就按照里面的路径来了,所以就出现了找不到图片这个问题,删除完两个文件,重新开始训练,这时终于正常了!

6.pycharm里terminal使用的是默认环境,安装库等操作失败
因为我这里用的是anaconda创建的虚拟环境,然而terminal里面用的是默认环境,更改了anaconda的编译器也没用,这也是第2个问题出现的原因,而且这里使用conda activate xxx来切换环境是无效的,因此参考pycharm terminal的使用环境配置,配合Anaconda食用。_西红柿不爱鸡蛋的博客-CSDN博客_pycharm的terminal默认环境
这篇文章将里面的terminal改为ananconda的prompt,就可以正常切换环境了,同理第2个问题就可以解决了

7.TypeError: attempt_load() got an unexpected keyword argument ‘map_location’
错误原因:
最新版本中函数定义修改,故无法正常使用
解决方法:
将 ‘map_location=’ 位置更改为 ‘device=’
参考文章python个人bug修炼手册_typeerror: attempt_load() got an unexpected keywor_上帝不会知道的博客-CSDN博客
8.AttributeError: 'Detections' object has no attribute 'shape'
sct = mss()
    while True:
        sct_img = sct.grab(bounding_box)
        scr_img = np.array(sct_img)
        scr_img = cv2.resize(scr_img, None, fx=0.7, fy=0.7)
        scr_img = model(scr_img)
        info = detection.predict_(scr_img)

def predict_(pic_):
错误原因:
这里函数是想传入一张图片,但是scr_img并不是一张图片,它的输出如下
image 1/1: 420x747 (no detections)
Speed: 4.0ms pre-process, 16.9ms inference, 1.0ms NMS per image at shape (1, 3, 384, 640)
解决方法:
info = detection.predict_(np.array(scr_img.render())[0])这里也贴一下render()对应的代码,在yolo源代码里的model文件夹下的common.py中
    def render(self, labels=True):
        self._run(render=True, labels=labels)  # render results
        return self.ims
    def _run(self, pprint=False, show=False, save=False, crop=False, render=False, labels=True, save_dir=Path('')):
        s, crops = '', []
        for i, (im, pred) in enumerate(zip(self.ims, self.pred)):
            s += f'\nimage {i + 1}/{len(self.pred)}: {im.shape[0]}x{im.shape[1]} '  # string
            if pred.shape[0]:
                for c in pred[:, -1].unique():
                    n = (pred[:, -1] == c).sum()  # detections per class
                    s += f"{n} {self.names[int(c)]}{'s' * (n > 1)}, "  # add to string
                s = s.rstrip(', ')
                if show or save or render or crop:
                    annotator = Annotator(im, example=str(self.names))
                    for *box, conf, cls in reversed(pred):  # xyxy, confidence, class
                        label = f'{self.names[int(cls)]} {conf:.2f}'
                        if crop:
                            file = save_dir / 'crops' / self.names[int(cls)] / self.files[i] if save else None
                            crops.append({
                                'box': box,
                                'conf': conf,
                                'cls': cls,
                                'label': label,
                                'im': save_one_box(box, im, file=file, save=save)})
                        else:  # all others
                            annotator.box_label(box, label if labels else '', color=colors(cls))
                    im = annotator.im
            else:
                s += '(no detections)'

            im = Image.fromarray(im.astype(np.uint8)) if isinstance(im, np.ndarray) else im  # from np
            if show:
                if is_jupyter():
                    from IPython.display import display
                    display(im)
                else:
                    im.show(self.files[i])
            if save:
                f = self.files[i]
                im.save(save_dir / f)  # save
                if i == self.n - 1:
                    LOGGER.info(f"Saved {self.n} image{'s' * (self.n > 1)} to {colorstr('bold', save_dir)}")
            if render:
                self.ims[i] = np.asarray(im)
        if pprint:
            s = s.lstrip('\n')
            return f'{s}\nSpeed: %.1fms pre-process, %.1fms inference, %.1fms NMS per image at shape {self.s}' % self.t
        if crop:
            if save:
                LOGGER.info(f'Saved results to {save_dir}\n')
            return crops
大致的意思就是返回检测的信息,具体的由于我还在学习中,没能一一看懂,等后续空闲时间再好好学习一下!


 823
823


 被折叠的 条评论
为什么被折叠?
被折叠的 条评论
为什么被折叠?
 到【灌水乐园】发言


