


话不多说,直接上才艺,源代码在最后面,有疑问的多去看看这些网站
html教程
css教程
python后端教程
html
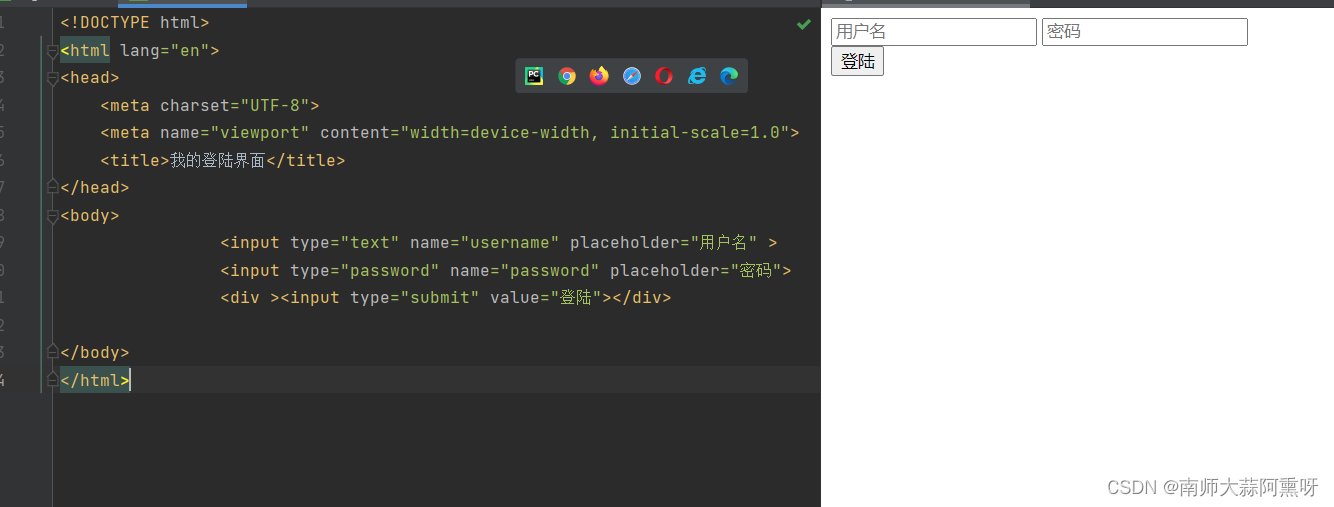
1、新建一个网页
设置屏幕密度为高频,中频,低频自动缩放
<meta name="viewport" content="width=device-width, initial-scale=1.0">

2、编写登录界面基本内容body
                <input type="text" name="username" placeholder="用户名" >
                <input type="password" name="password" placeholder="密码">
                <div ><input type="submit" value="登陆"></div>
css
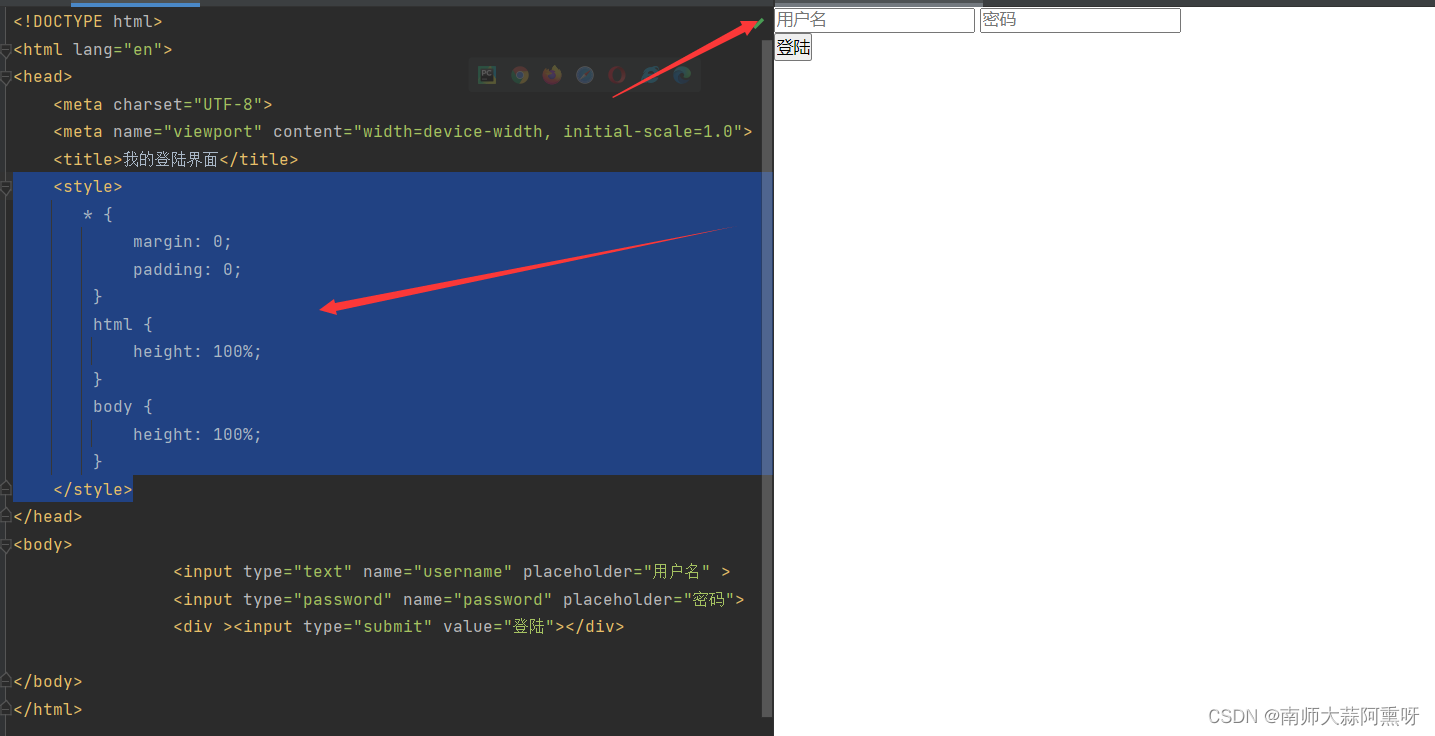
1、建立css初始化位置
    <style>
       * {
            margin: 0;
            padding: 0;
        }
        html {
            height: 100%;
        }
        body {
            height: 100%;
        }
    </style>
仔细观察网页变化和之前的
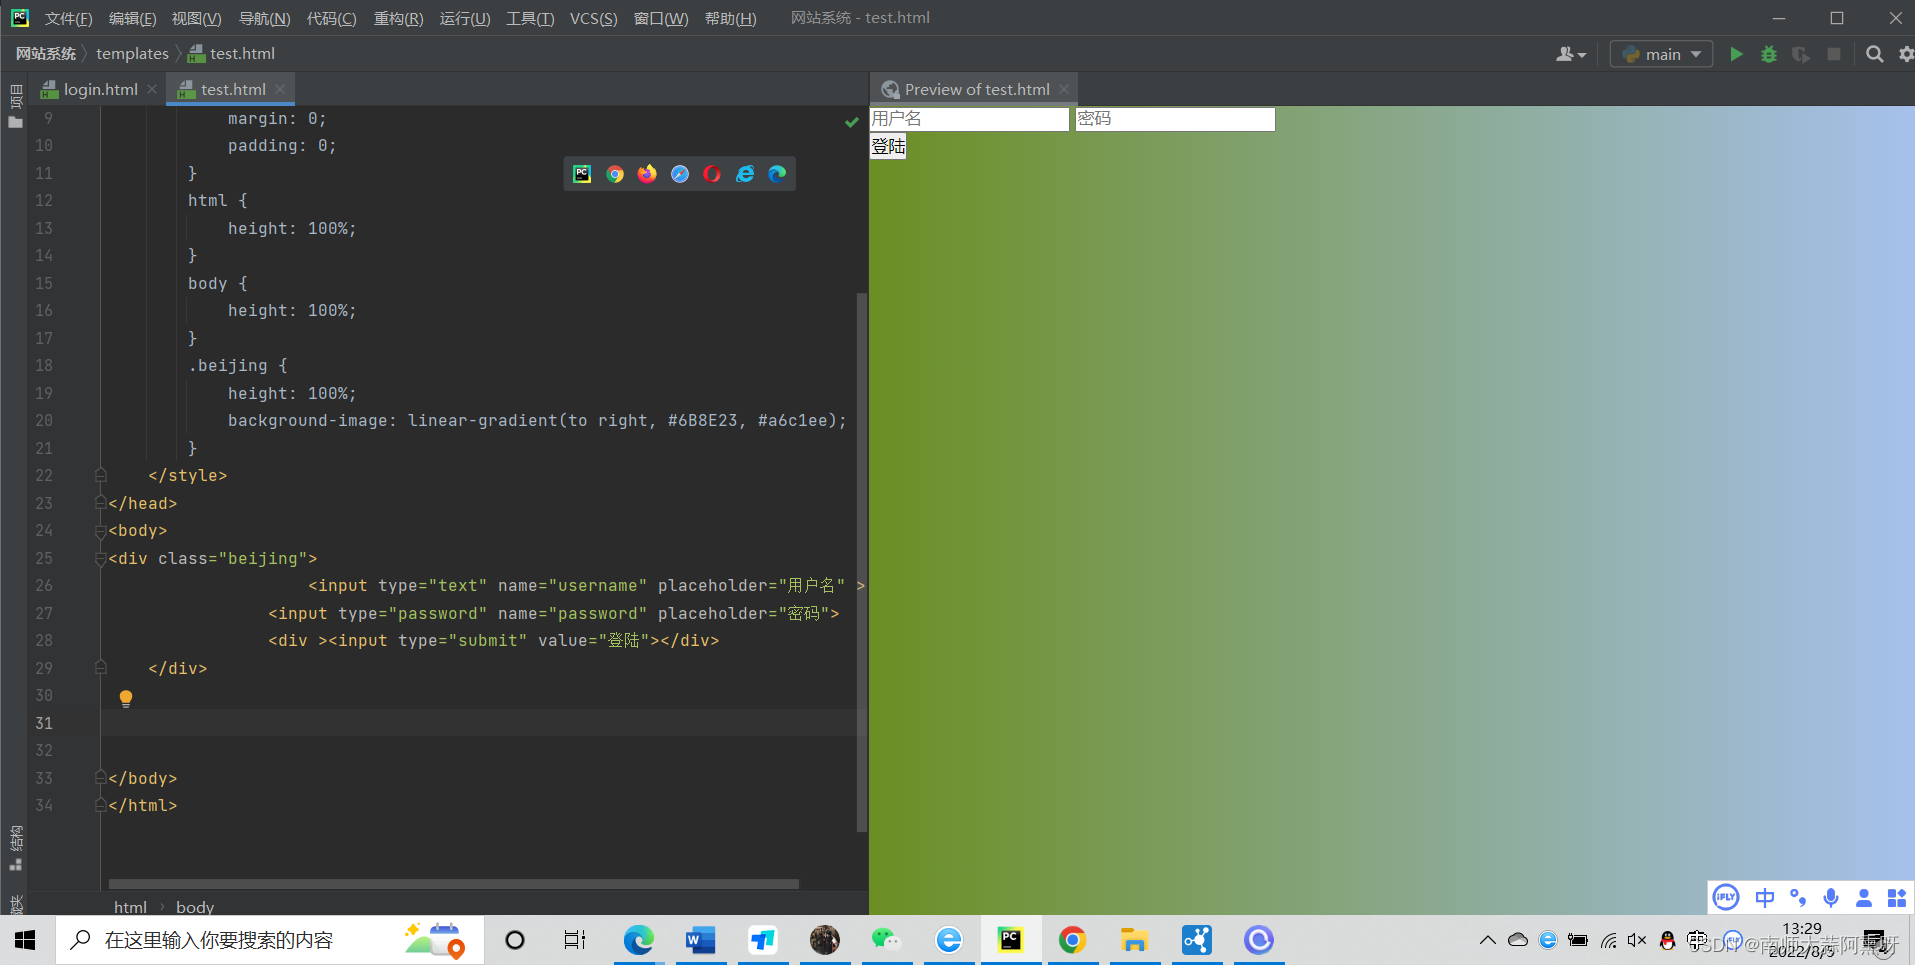
2、建立渐变色背景
.beijing个是这个div的css
background-image 属性为元素设置背景图像
linear-gradient设置渐变色
        .beijing {
            height: 100%;
            background-image: linear-gradient(to right, #6B8E23, #a6c1ee);
        }
<div class="beijing">
    </div>
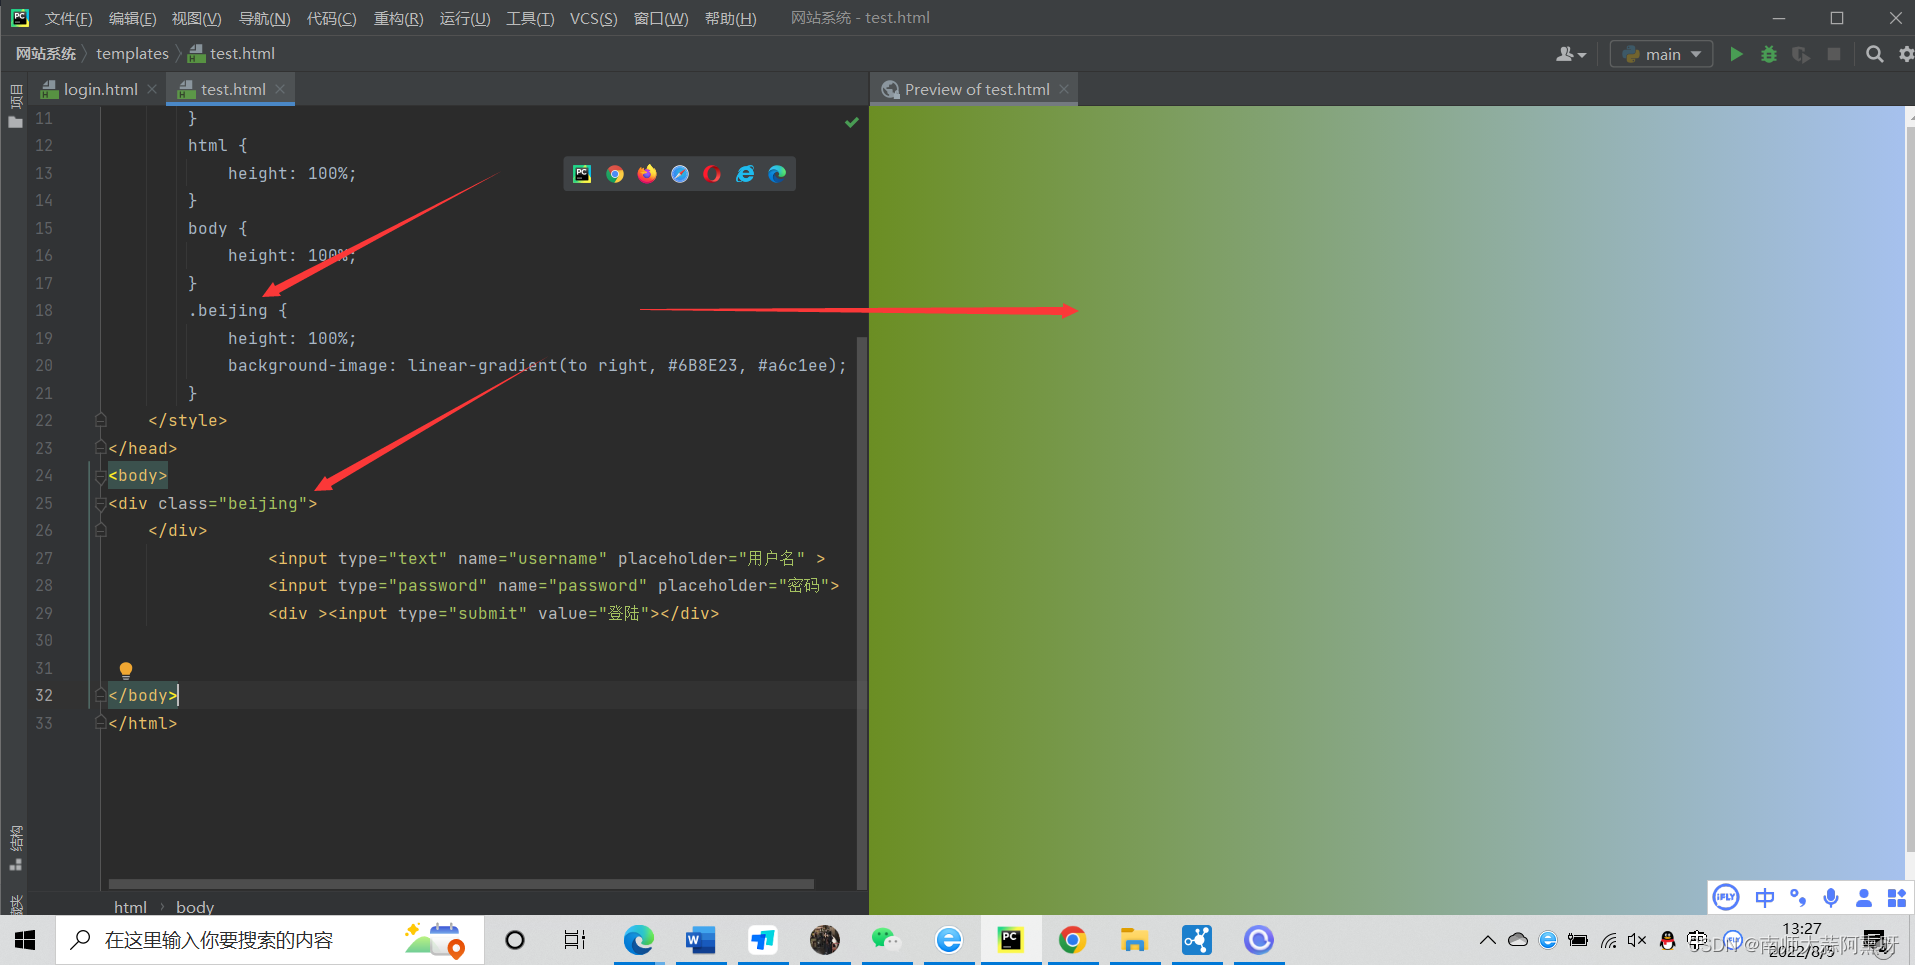
这时候我们发现之前的登陆界面不见了,因为被覆盖了我们把登录界面的代码复制到它的div里面即可
那有的同学说这个颜色好丑,怎么改呢我们回到css里面修改颜色的代码就好啦
这里是参照表格css颜色
再来修改一下登陆的窗口
        .chuangkou {
            background-color: #fff;
            width: 358px;
            height: 588px;
            border-radius: 15px;
            padding: 0 50px;
            position: relative;
            left: 50%;
            top: 50%;
            transform: translate(-50%, -50%);
        }
<div class="chuangkou"></div>
这个css没什么好讲的就是简单的一些位置定义了一下形状颜色为白色,其实真正去设计的话是有工具去生成的这里先不讨论这个有兴趣的去搜一下figma这个软件
这里也是老规矩把我们的那几个扔进这个div
接下来我们开始对这几个属性编写css
登录界面标题头部
.header {
    font-size: 38px;
    font-weight: bold;
    text-align: center;
    line-height: 200px;
}
<div class="header">登陆界面</div>

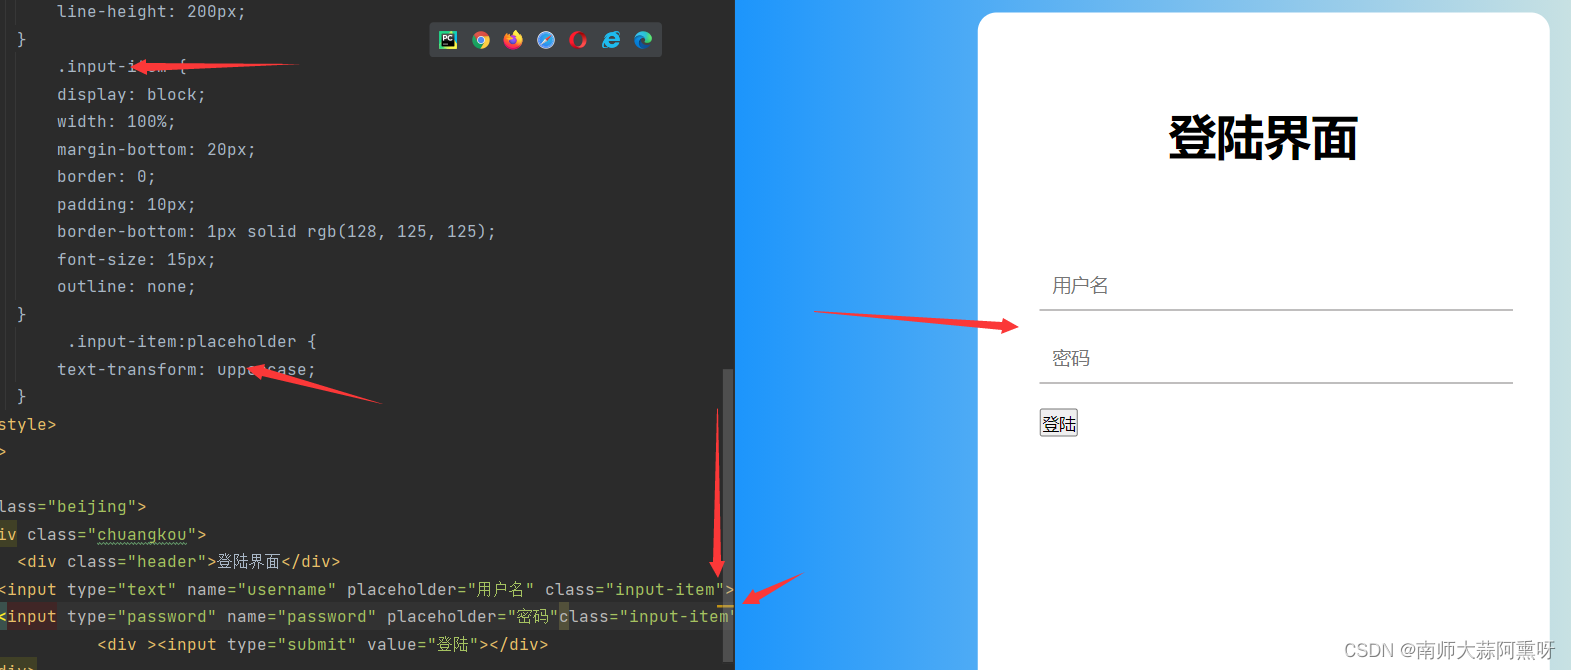
用户名密码
样式
            .input-item {
            display: block;
            width: 100%;
            margin-bottom: 20px;
            border: 0;
            padding: 10px;
            border-bottom: 1px solid rgb(128, 125, 125);
            font-size: 15px;
            outline: none;
        }
添加text-transform 属性控制文本的大小写。
             .input-item:placeholder {
            text-transform: uppercase;
        }
                <input type="text" name="username" placeholder="用户名" class="input-item">
                <input type="password" name="password" placeholder="密码"class="input-item">
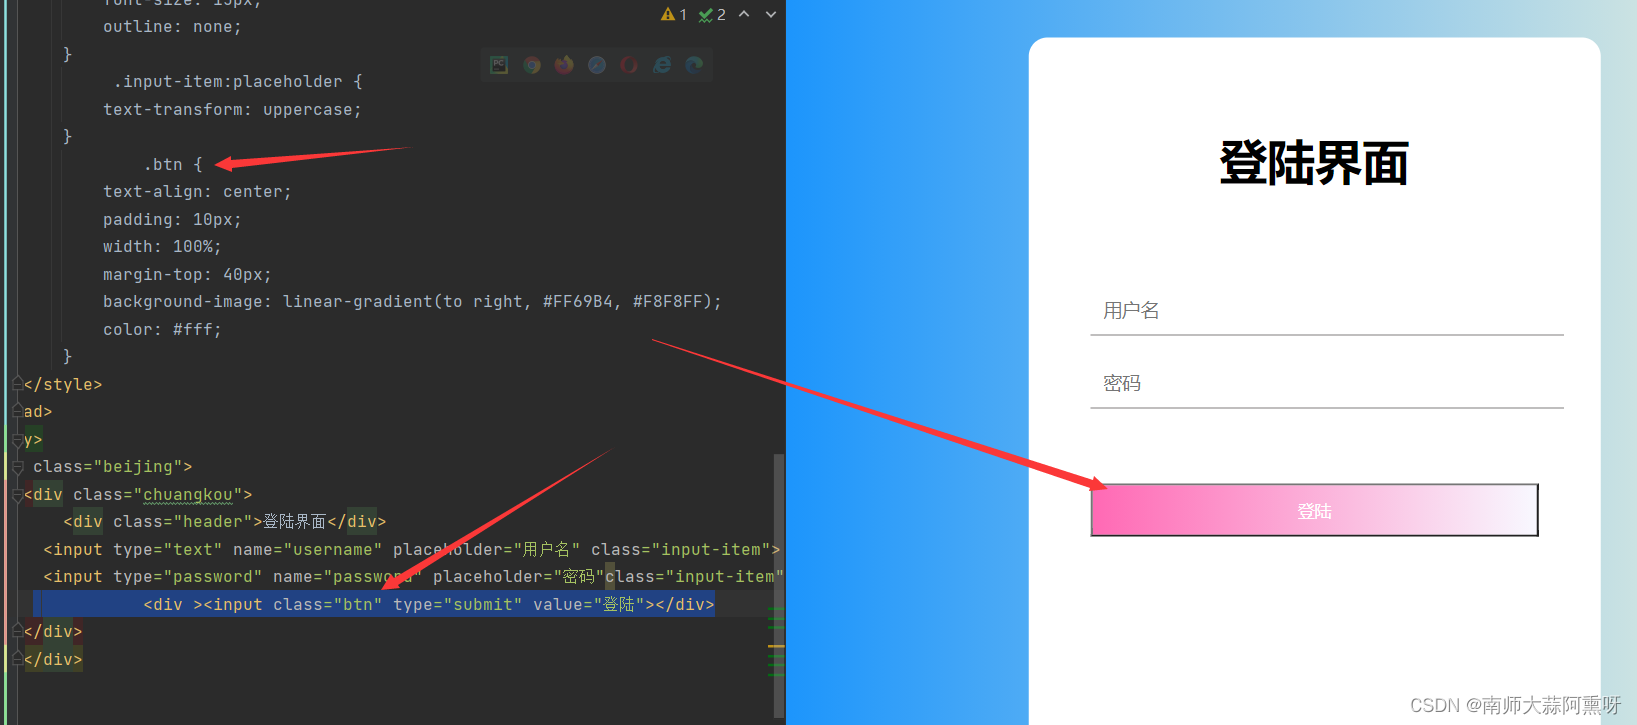
登陆按钮
        .btn {
            text-align: center;
            padding: 10px;
            width: 100%;
            margin-top: 40px;
            background-image: linear-gradient(to right, #FF69B4, #F8F8FF);
            color: #fff;
        }
<div ><input class="btn" type="submit" value="登陆"></div>
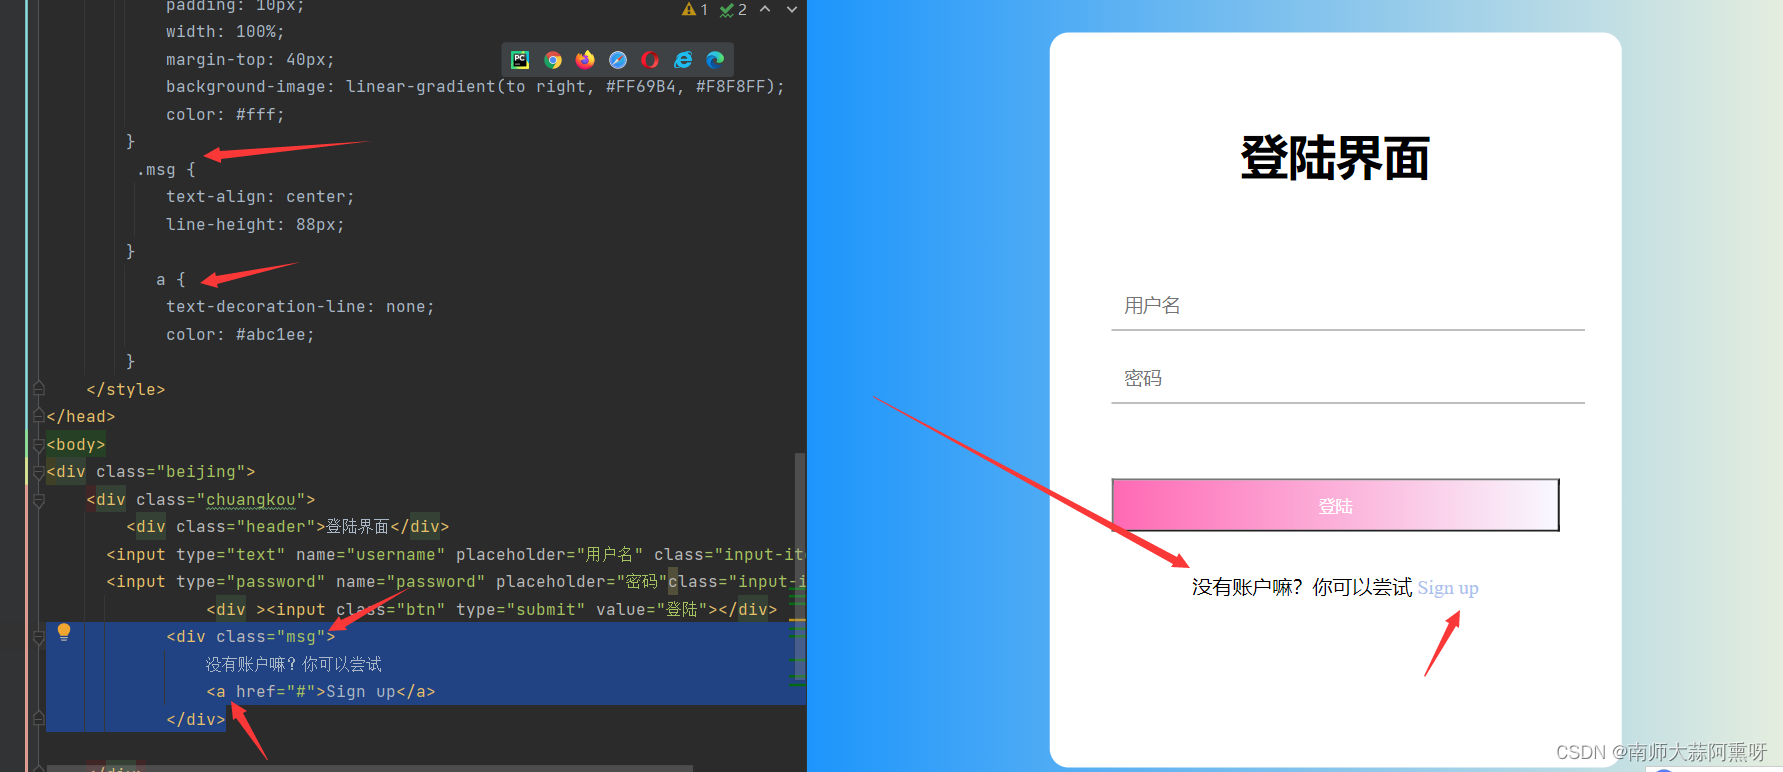
添加一个注册链接
.msg {
    text-align: center;
    line-height: 88px;
}
   a {
    text-decoration-line: none;
    color: #abc1ee;
}
            <div class="msg">
                没有账户嘛?你可以尝试
                <a href="#">Sign up</a>
            </div>
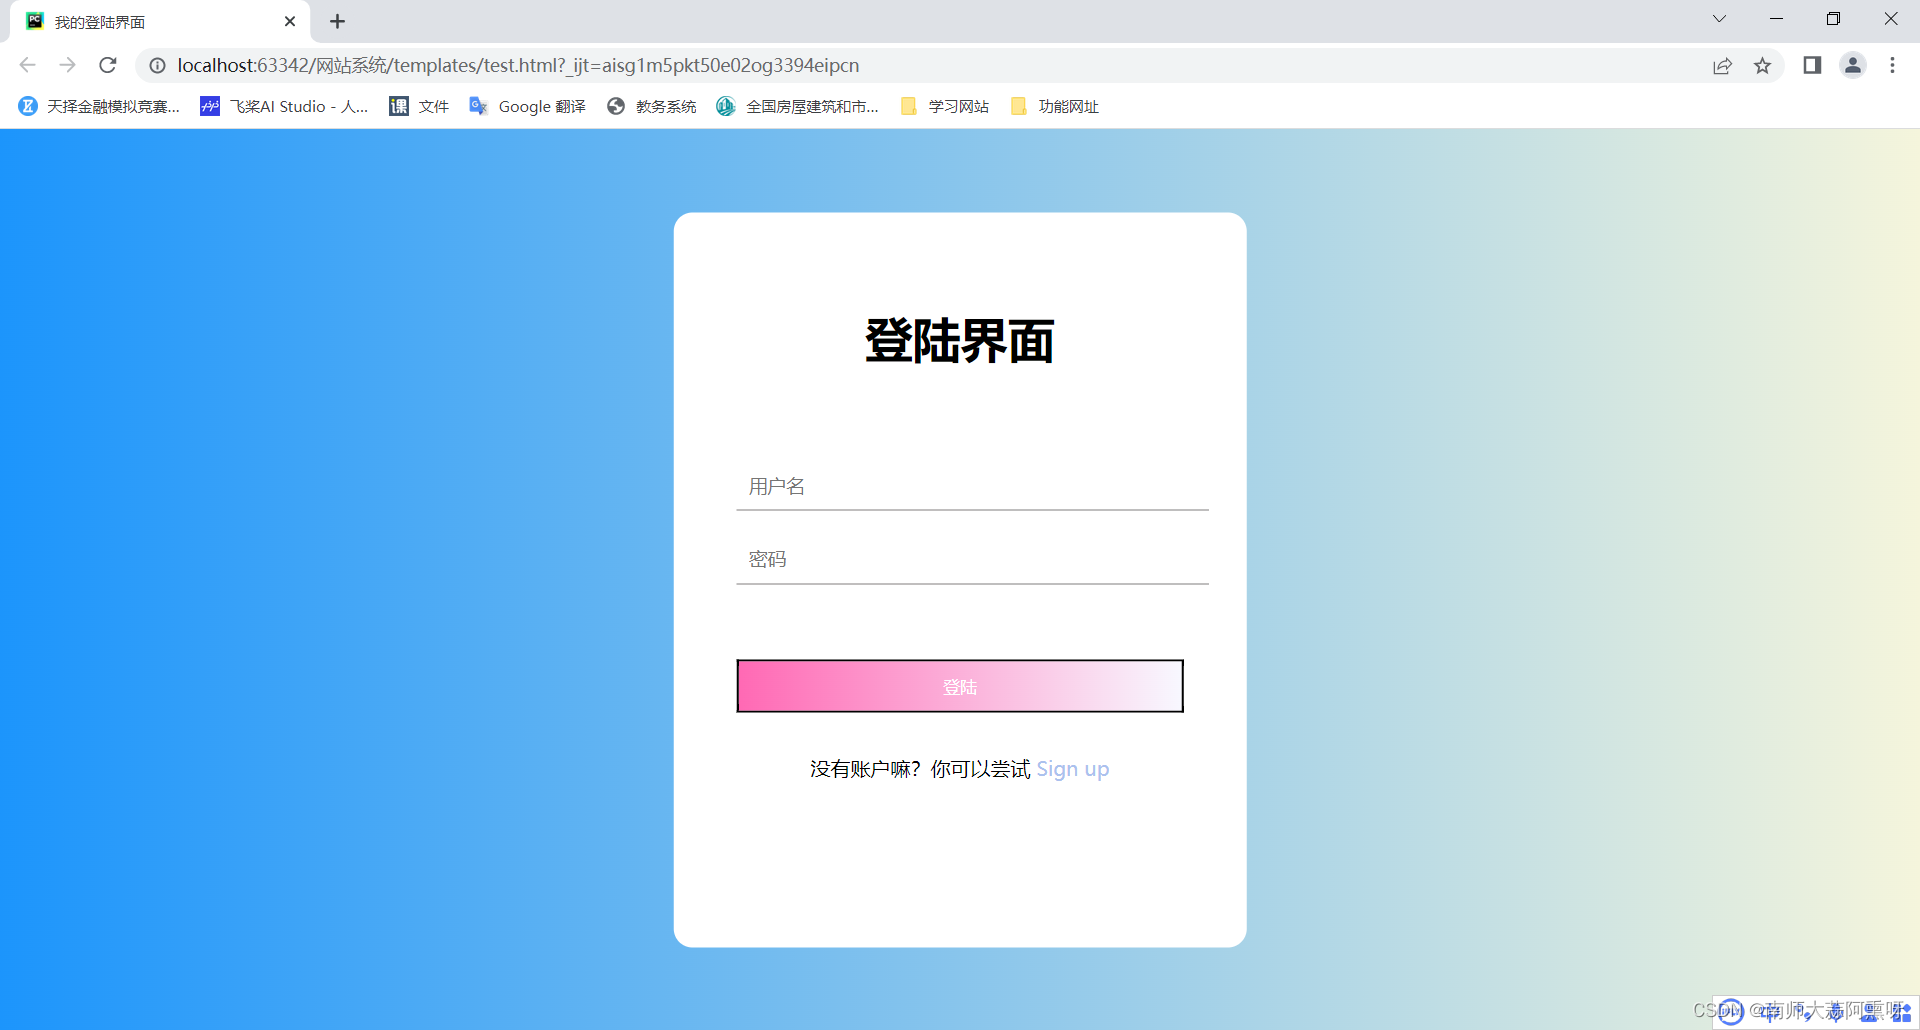
完整代码
<!DOCTYPE html>
<html lang="en">
<head>
    <meta charset="UTF-8">
    <meta name="viewport" content="width=device-width, initial-scale=1.0">
    <title>我的登陆界面</title>
    <style>
       * {
            margin: 0;
            padding: 0;
        }
        html {
            height: 100%;
        }
        body {
            height: 100%;
        }
        .beijing {
            height: 100%;
            background-image: linear-gradient(to right, #1C95Fc, #F5F5DC);
        }
        .chuangkou {
            background-color: #fff;
            width: 358px;
            height: 588px;
            border-radius: 15px;
            padding: 0 50px;
            position: relative;
            left: 50%;
            top: 50%;
            transform: translate(-50%, -50%);
        }
        .header {
            font-size: 38px;
            font-weight: bold;
            text-align: center;
            line-height: 200px;
        }
            .input-item {
            display: block;
            width: 100%;
            margin-bottom: 20px;
            border: 0;
            padding: 10px;
            border-bottom: 1px solid rgb(128, 125, 125);
            font-size: 15px;
            outline: none;
        }
             .input-item:placeholder {
            text-transform: uppercase;
        }
                .btn {
            text-align: center;
            padding: 10px;
            width: 100%;
            margin-top: 40px;
            background-image: linear-gradient(to right, #FF69B4, #F8F8FF);
            color: #fff;
        }
         .msg {
            text-align: center;
            line-height: 88px;
        }
           a {
            text-decoration-line: none;
            color: #abc1ee;
        }
    </style>
</head>
<body>
<div class="beijing">
    <div class="chuangkou">
        <div class="header">登陆界面</div>
      <input type="text" name="username" placeholder="用户名" class="input-item">
      <input type="password" name="password" placeholder="密码"class="input-item">
                <div ><input class="btn" type="submit" value="登陆"></div>
            <div class="msg">
                没有账户嘛?你可以尝试
                <a href="#">Sign up</a>
            </div>

    </div>
    </div>


</body>
</html>


 3万+
3万+


 被折叠的 条评论
为什么被折叠?
被折叠的 条评论
为什么被折叠?
 到【灌水乐园】发言


