


💥💥✈️✈️欢迎阅读本文章❤️❤️💥💥
🏆本篇文章阅读大约耗时5分钟。
⛳️motto:不积跬步、无以千里
📋📋📋本文目录如下:🎁🎁🎁
目录


前言
小伙伴们大家好,上篇文章本地模拟了下 TraceId 日志链路追踪,可以记录每个请求的全部日志,根据对应的 traceId 可以快速查出该次请求的所有记录,文章链接如下:
【日志链路】⭐️SpringBoot 整合 TraceId 日志链路追踪!
平时在使用一些网站的时候,经常需要二次认证,常见的有二次验证码认证,比如 MFA 多因素认证 ,本地来模拟下集成谷歌 TOTP 工具实现 MFA 的二次认证(一切从简)

本地模拟是基于 SpringBoot 实现,整体比较简单,如下:

集成
1、引入依赖
版本可以自行选择
        <dependency>
            <groupId>com.warrenstrange</groupId>
            <artifactId>googleauth</artifactId>
            <version>1.5.0</version>
        </dependency>
2、Totp 工具类
简单看下这个工具类,声明了由 Spring 管理,使用的时候 可以通过注入的方式使用
创建了谷歌提供工具的实例,并且提供了三个方法,简要使用如下
先使用 getCredentialsKey 方法获取一个凭证对象,通过这个对象可以获取凭证秘钥;接着使用 generateOtpAuthUrl 方法(要注意下 systemName 参数是用户在认证工具上绑定后显示的系统名称)获取生成的二维码图片链接;
校验验证码的时候,需要使用用户绑定的时候产生的凭证秘钥+验证码进行验证(所以绑定的时候,注意保存当前用户的凭证秘钥,每个用户的秘钥是唯一的)
import com.warrenstrange.googleauth.GoogleAuthenticator;
import com.warrenstrange.googleauth.GoogleAuthenticatorKey;
import com.warrenstrange.googleauth.GoogleAuthenticatorQRGenerator;
import org.springframework.stereotype.Component;

/**
 *
 * @author benbenhuang
 * @date 2025/4/26 13:38
 */
@Component
public class TotpUtil {

    private final GoogleAuthenticator gAuth = new GoogleAuthenticator();

    /**
     *
     * @param secret 生成二维码链接时使用的GoogleAuthenticatorKey对象的secret值
     * @param code 输入的验证码
     * @return boolean
     */
    public boolean verifyCode(String secret, String code) {
        try {
            int intCode = Integer.parseInt(code);
            return gAuth.authorize(secret, intCode);
        } catch (Exception e) {
            return false;
        }
    }

    public GoogleAuthenticatorKey getCredentialsKey(){
        return gAuth.createCredentials();
    }
    /**
     *
     * @param systemName app上显示绑定的系统名称
     * @param userNameOrEmail 用户绑定的账户邮箱
     * @param key 生成二维码链接绑定的 key
     * @return 生成的二维码链接
     */
    public String generateOtpAuthUrl(String systemName, String userNameOrEmail, GoogleAuthenticatorKey key){
        // 生成二维码 URL
        return GoogleAuthenticatorQRGenerator.getOtpAuthURL(systemName, userNameOrEmail, key);
    }
}
测试
注:可以先在手机上下载个类似 Authenticator 工具,用于获取验证码, app图标是这样的
import com.warrenstrange.googleauth.GoogleAuthenticatorKey;
import org.example.test.totp.TotpUtil;
import org.springframework.beans.factory.annotation.Autowired;
import org.springframework.web.bind.annotation.PostMapping;
import org.springframework.web.bind.annotation.RequestMapping;
import org.springframework.web.bind.annotation.RequestParam;
import org.springframework.web.bind.annotation.RestController;
import java.util.HashMap;
import java.util.Map;
/**
* @author benbenhuang
* @date 2025年04月26日 13:10
*/
@RestController
@RequestMapping("/mfa")
public class TotpController {
@Autowired
private TotpUtil totpUtil;
private Map<String,String> secretKey = new HashMap<>();
private final String systemName = "test-benbenhuang";
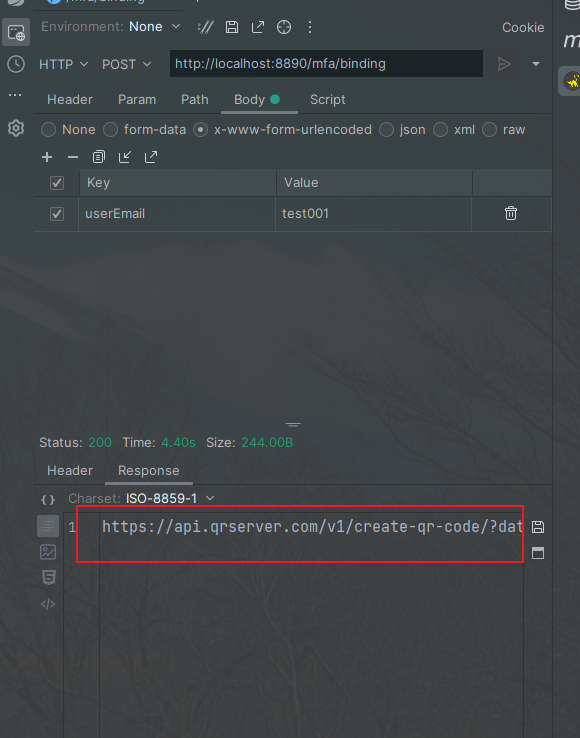
@PostMapping("/binding")
public String bindingMfa(@RequestParam("userEmail") String email){
GoogleAuthenticatorKey credentialsKey = totpUtil.getCredentialsKey();
String picLink = totpUtil.generateOtpAuthUrl(systemName, email, credentialsKey);
secretKey.put(email,credentialsKey.getKey());
return picLink;
}
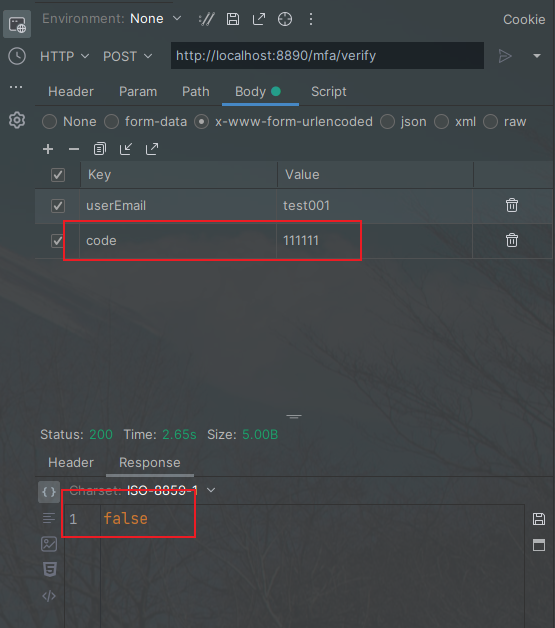
@PostMapping("verify")
public Boolean verifyCode(@RequestParam("userEmail") String email, @RequestParam("code")String code){
String userSecretKey = secretKey.get(email);
boolean result = totpUtil.verifyCode(userSecretKey, code);
return result;
}
}测试比较简单,两个方法,一个绑定用户,一个校验验证码;这里用户的凭证秘钥简单的放在了一个集合里面,但是 实际使用的时候,最好将秘钥落库 ,别搞丢了
1、绑定
先看第一个方法,传入用户邮箱,会进行绑定,生成二维码链接,保存用户的秘钥凭证,测试下:
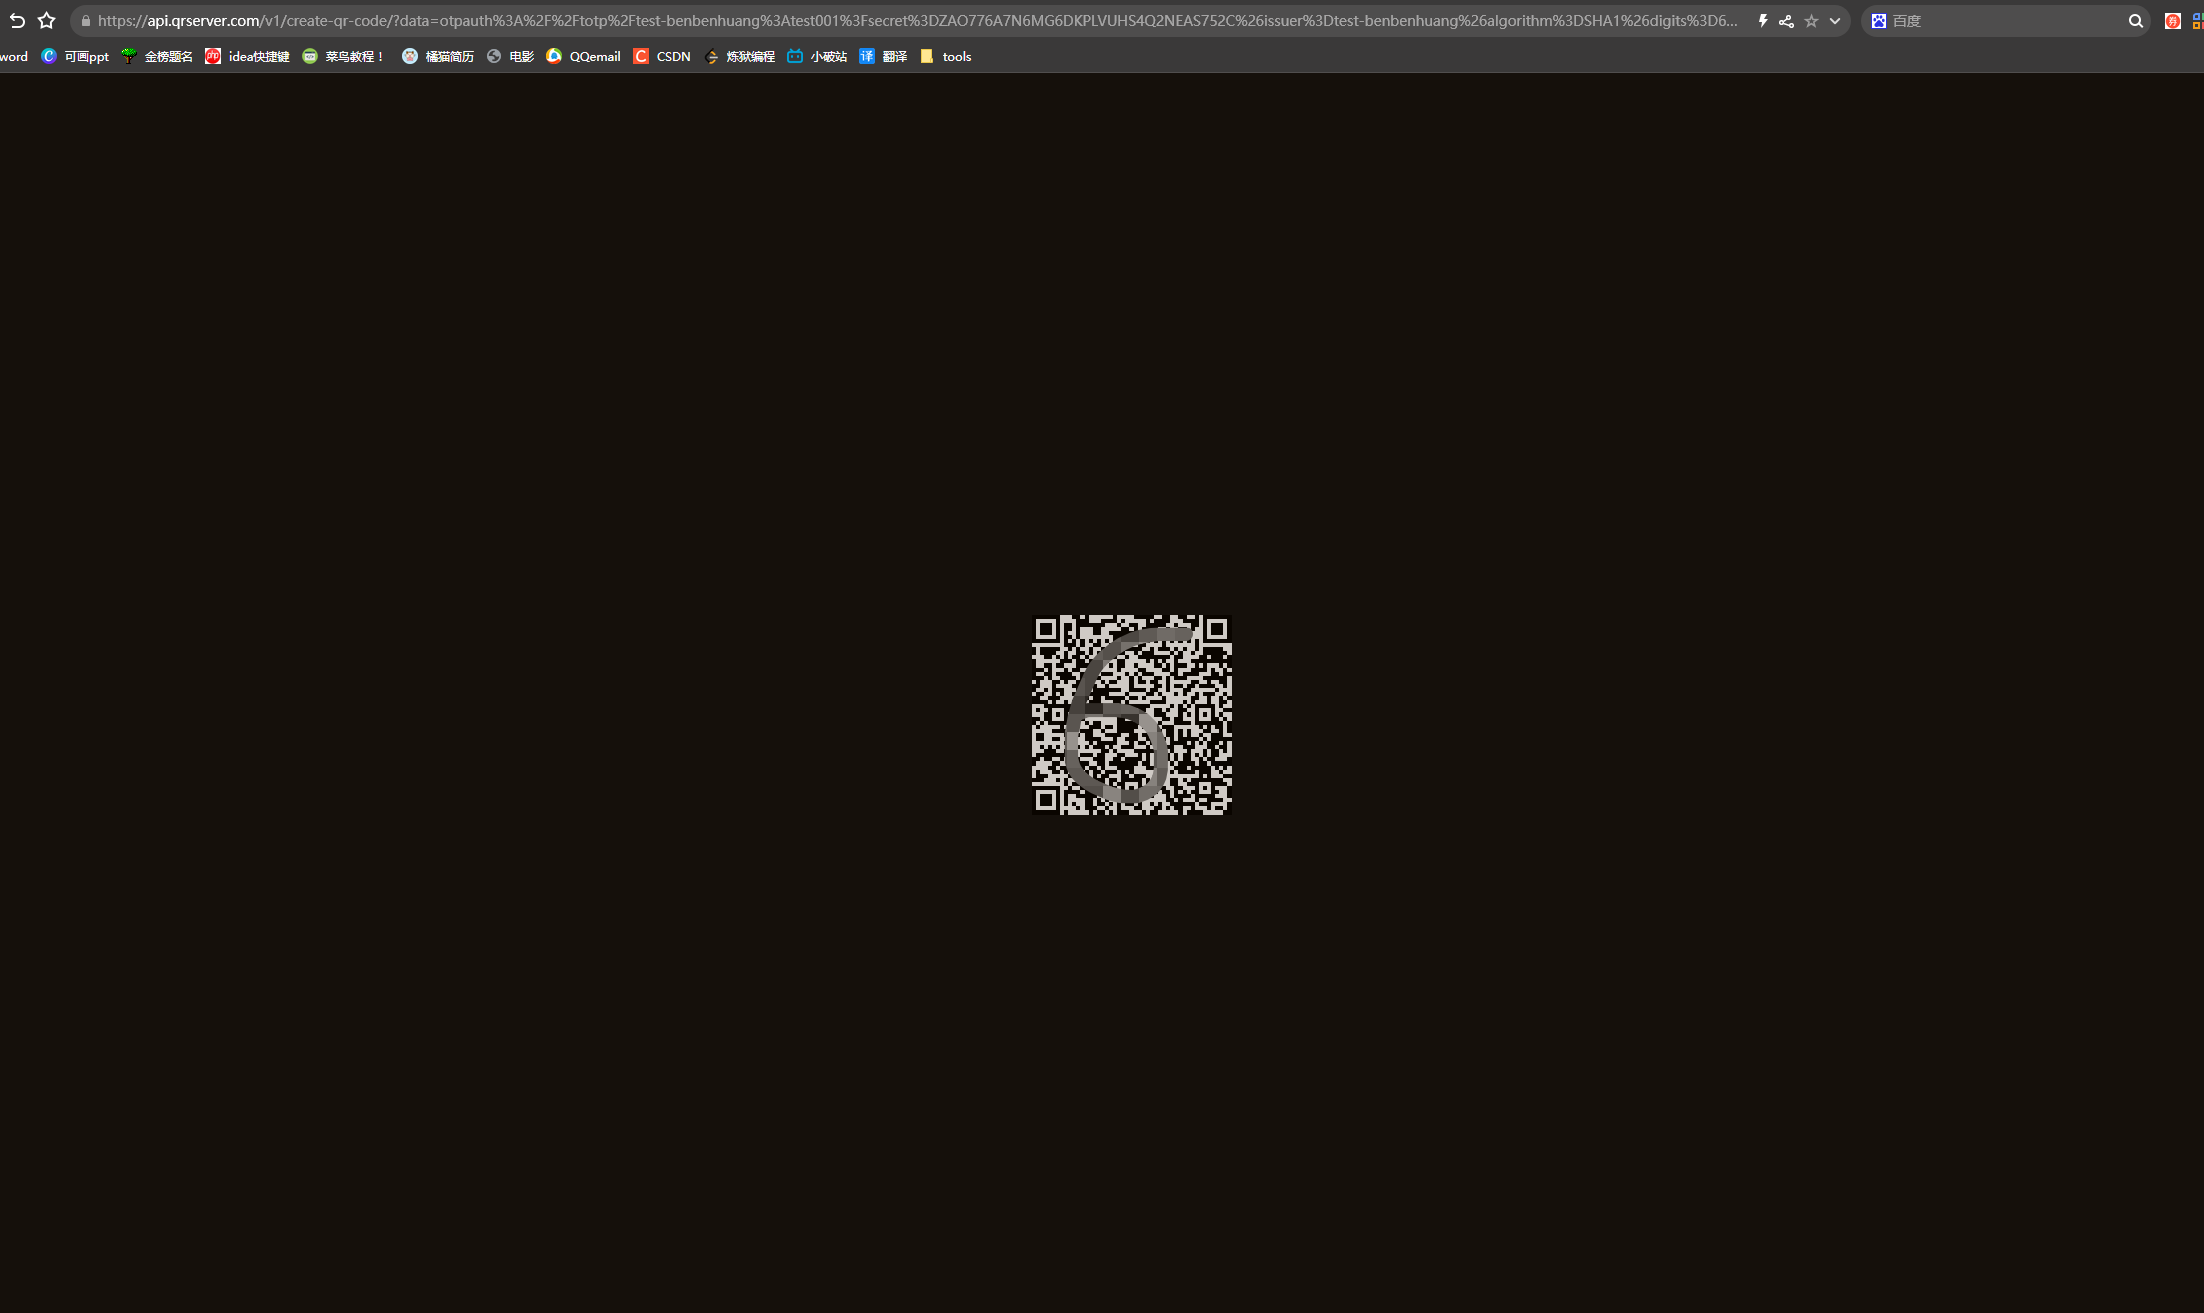
将生成的二维码链接在浏览器打开,即可扫描绑定,绑定后的页面如下;上方显示的是自定义的 systemName 下方是用户账号,点击进去就可以获取验证码了
注:在浏览器上打开二维码链接,扫描起来比较难识别,需要将扫描框贴近,对准

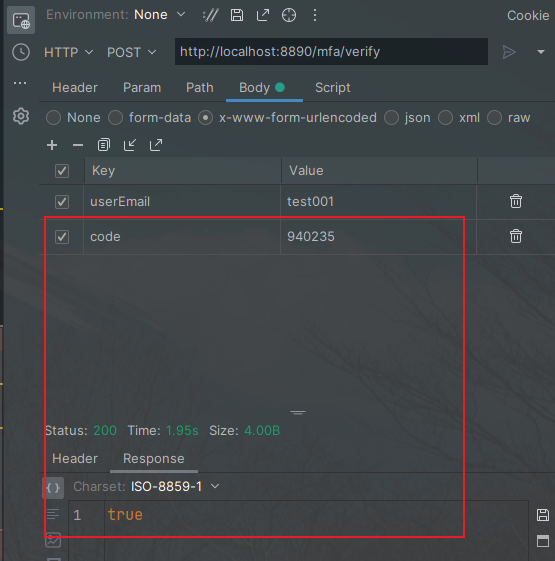
2、校验验证码
先根据用户邮箱获取存储的用户凭证秘钥,根据秘钥校验验证码是否正确
先随便填个验证码,校验不通过,使用 auth 工具上提供的验证码再试下,校验通过没问题
![]()
章末
以上就是谷歌totp 的简单使用了,但是还有几个问题需要研究下
1、生成的二维码没有绑定限制,也就是使用多个设备都可以扫描并绑定这个账户,并且获取验证码
2、怎么定义用户是否绑定了设备,因为扫描二维码绑定这一步谷歌是不会跟使用系统产生交互的;或许可以将用户第一次验证码校验通过后作为已经绑定的条件...
文章到这里就结束了~

往期推荐 > > >
【接口负载】✈️整合 Resilience4j 指定接口负载,避免过载
【SpringBoot】⭐️整合 Redis 实现百万级数据实时排序


 313
313

 被折叠的 条评论
为什么被折叠?
被折叠的 条评论
为什么被折叠?
 到【灌水乐园】发言


