


学习目标:
1.结构体的定义与基本语法
2.结构体数组
3.结构体指针
4.结构体嵌套
5.结构体做函数参数
6.结构体中const使用场景-防止无操作
学习内容:
1.结构体的定义与基本语法
结构体属于用户自定义的数据类型,允许用户存放不同的数据类型。
一个结构体一般分为两步:
- 定义结构体
语法:struct 结构体名{结构体成员列表} - 创建变量
- 创建变量方法1:
struct 结构体名 变量名 - 创建变量方法2:
struct 结构体名 变量名={成员1,成员2,……} - 创建变量方法3:
定义结构体时顺便创建变量
- 创建变量方法1:
代码演示
//定义结构体
struct Student
{
string name;
int age;
}
//创建方法1
struct Student s;
s.name = "Jcak";
s.age = 18;
//创建方法2
struct Student s = {"Jack",18}
struct Student
{
string name;
int age;
}s;//直接在结构体后面注明
2.结构体数组
语法: struc 结构体名 数组名[元素个数]={{},{},{},……}
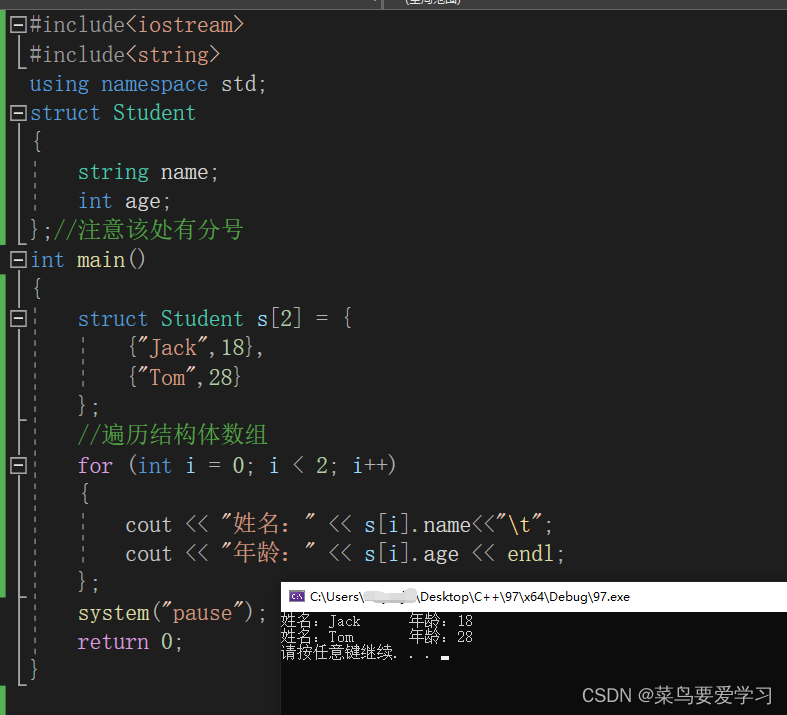
#include<iostream>
#include<string>
using namespace std;
struct Student
{
	string name;
	int age;
};//注意该处有分号
int main()
{
	struct Student s[2] = {
		{"Jack",18},
		{"Tom",28}
	};
	//遍历结构体数组
	for (int i = 0; i < 2; i++)
	{
		cout << "姓名:" << s[i].name<<"\t";
		cout << "年龄:" << s[i].age << endl;
	};
	system("pause");
	return 0;
}
3.结构体指针
利用指针来访问结构体中的成员
利用操作符->来访问结构体属性
struct Student
{
string name;
int age;};
//创建结构体变量
struct Student s = {"Jack", 18};
//通过指针指向结构体变量
struct student *p = &s;
//通过指针来访问结构体变量中的数据
p->name;//姓名
p->age;//年龄
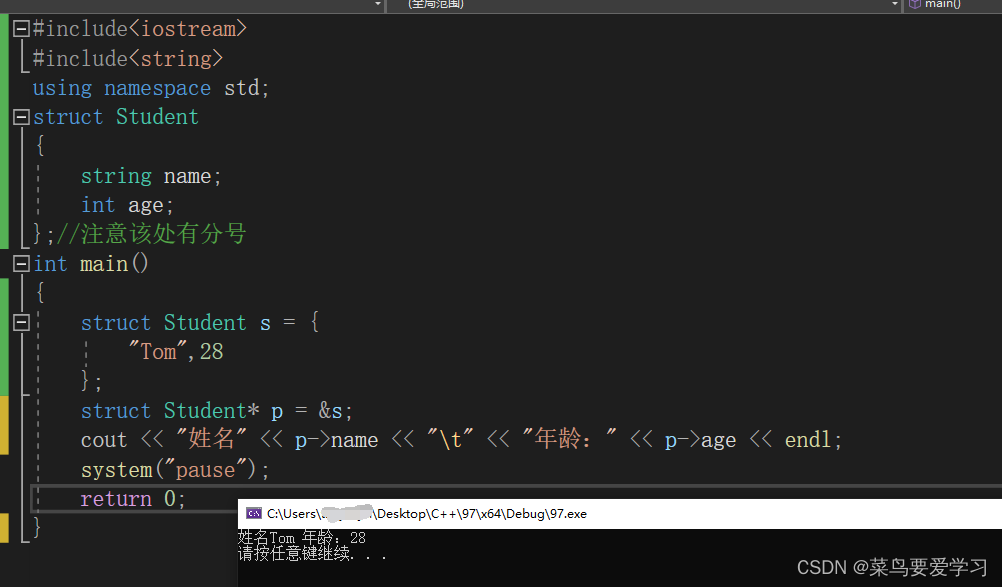
#include<iostream>
#include<string>
using namespace std;
struct Student
{
	string name;
	int age;
};//注意该处有分号
int main()
{
	struct Student s = {
		"Tom",28
	};
	struct Student* p = &s;
	cout << "姓名" << p->name << "\t" << "年龄:" << p->age << endl;
	system("pause");
	return 0;
}
4.结构体嵌套
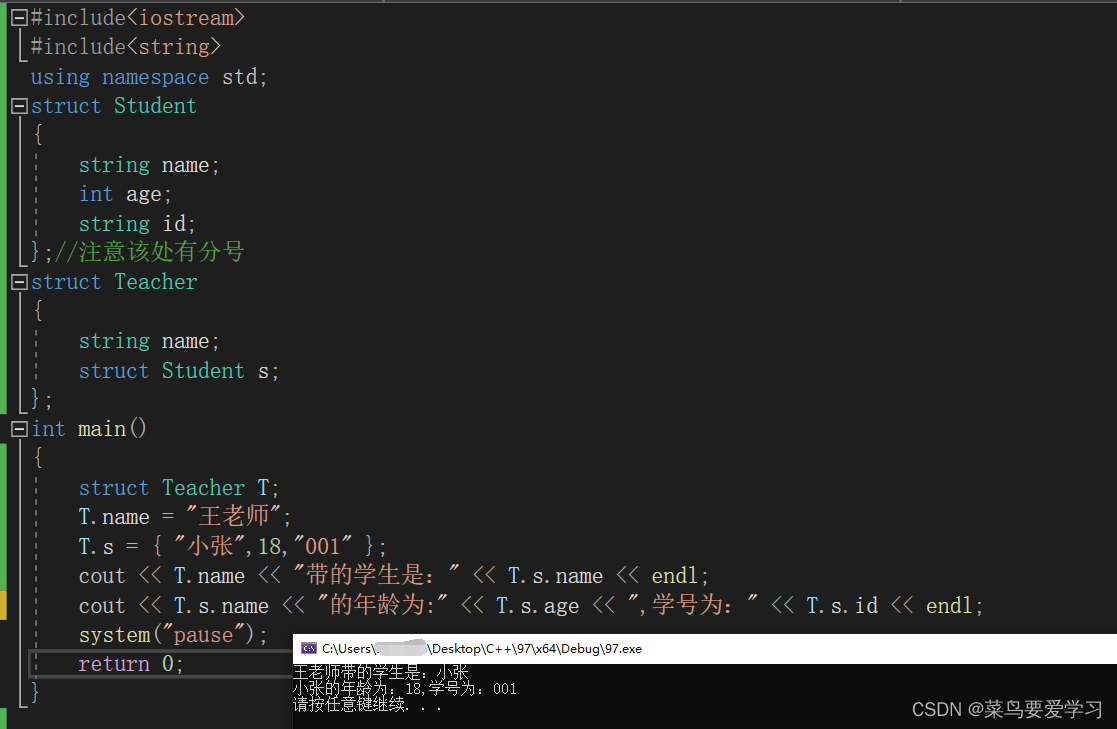
结构体嵌套就是一个结构体作为另一个结构体的成员。
案例描述:定义一个老师(姓名)的结构体,在老师这个结构体中包含着学生这个结构体(姓名,年龄,学号)。
#include<iostream>
#include<string>
using namespace std;
struct Student
{
	string name;
	int age;
	string id;
};//注意该处有分号
struct Teacher
{
	string name;
	struct Student s;
};
int main()
{
	struct Teacher T;
	T.name = "王老师";
	T.s = { "小张",18,"001" };
	cout << T.name << "带的学生是:" << T.s.name << endl;
	cout << T.s.name << "的年龄为:" << T.s.age << ",学号为:" << T.s.id << endl;
	system("pause");
	return 0;
}
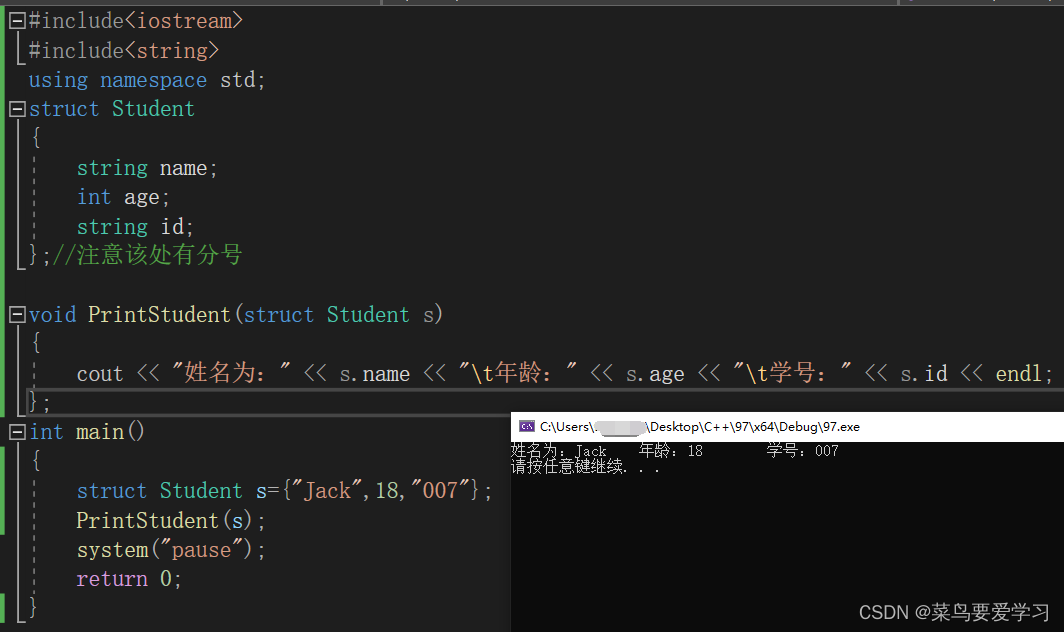
5.结构体做函数参数
将结构体作为参数向函数中传递,主要有值传递和地址传递。
值传递
#include<iostream>
#include<string>
using namespace std;
struct Student
{
	string name;
	int age;
	string id;
};//注意该处有分号

void PrintStudent(struct Student s)
{
	cout << "姓名为:" << s.name << "\t年龄:" << s.age << "\t学号:" << s.id << endl;
};
int main()
{
	struct Student s={"Jack",18,"007"};
	PrintStudent(s);
	system("pause");
	return 0;
}
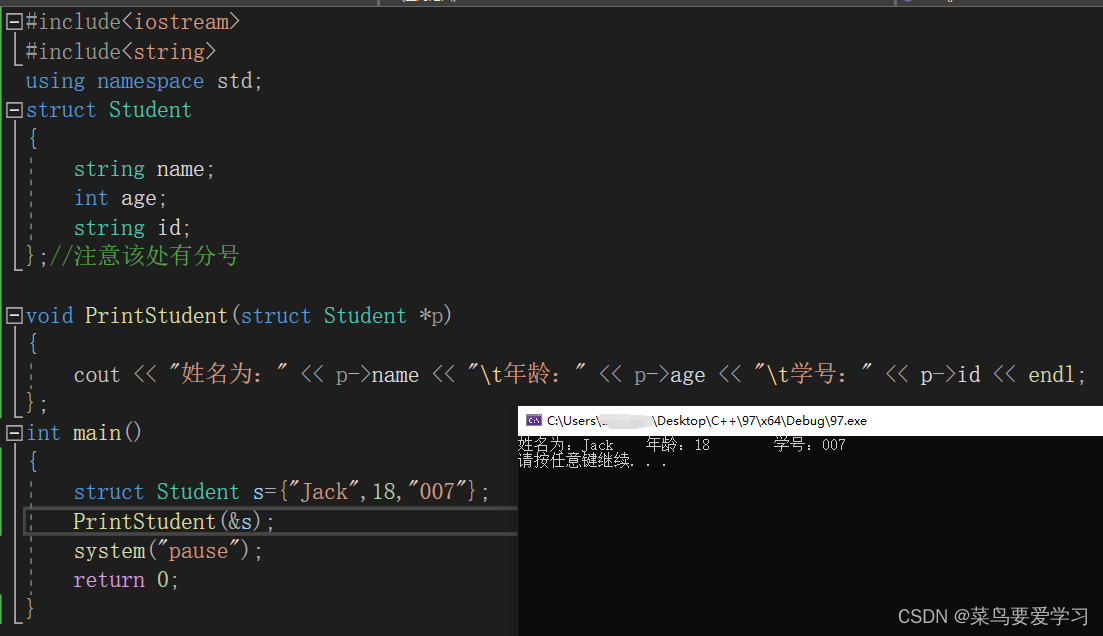
地址传递(传入地址,用指针接收)
#include<iostream>
#include<string>
using namespace std;
struct Student
{
	string name;
	int age;
	string id;
};//注意该处有分号

void PrintStudent(struct Student *p)
{
	cout << "姓名为:" << p->name << "\t年龄:" << p->age << "\t学号:" << p->id << endl;
};
int main()
{
	struct Student s={"Jack",18,"007"};
	PrintStudent(&s);
	system("pause");
	return 0;
}
6.结构体中const使用场景-防止无操作
地址传递可以节省内存空间,使用const来防止误操作,以免形参的改变影响实参变化
在传值中,传入的是地址,用指针来接收,在接收前加上一个const,使其不能进行赋值操作。
#include<iostream>
#include<string>
using namespace std;
struct Student
{
	string name;
	int age;
	string id;
};//注意该处有分号
void PrintStudent(const struct Student *p)
{
	//p->age = 15;//加入const后,在对其赋值,程序会报错!!!
	cout << "姓名为:" << p->name << "\t年龄:" << p->age << "\t学号:" << p->id << endl;
};
int main()
{
	struct Student s={"Jack",18,"007"};
	PrintStudent(&s);
	system("pause");
	return 0;
}


 1万+
1万+


 被折叠的 条评论
为什么被折叠?
被折叠的 条评论
为什么被折叠?
 到【灌水乐园】发言


