


文章目录
- C++常用工具
- linux 平台:
- Ubuntu desktop
- 创建用户
- 常用工具:
- 设置en_us.UTF-8
- build-essential
- ~~ToolChain ppa~~
- ~~ia32-libs~~
- ubuntu使用最新的sqlite3命令行工具
- linux命令行设置时区
- linux修改swap大小
- linux允许生成core dump文件
- gdb载入core
- gcovr生成code coverage结果
- linux查看执行当前命令所使用的shell
- 查找某个命令或文件位于哪个包package
- 大陆地区使用snap下载速度慢
- Ubuntu设置snap安装软件时使用proxy
- 安装oh-my-zsh
- nodejs设置镜像源
- kdevelop配置和编译cmake项目出错
- KUbuntu20,zsh安装snap软件的bug
- apt源指定架构
- apt-get签名问题
- 大陆地区ubuntu ppa下载速度慢
- ppa源
- `ubuntu-drivers`命令
- `update-alternatives`命令
- `date`命令
- 运行qt安装包跳过登录界面
- `rsync`替代`cp`命令
- `rsync`同步两个文件夹
- `rsync`使用IdentityFile认证来同步文件夹
- `ssh_config`客户端config
- `ssh`使用rsa key进行免密码登录
- ssh进行端口转发
- Windows10上 ssh客户端使用pem文件时报错权限太open
- `git submodule`检出不完整情况
- `git commit`指定author
- `git commit --amend`修改日期
- Git for Windows的git bash里中文显示
- git保存账号密码
- git报错 `fatal: detected dubious ownership in repository`
- 关于linux的配置文件dotFile
- Ubuntu/Fedora上安装rime和双拼
- ubuntu上配置jdk
- ubuntu 18.04+安装winehq6+版本
- 让终端里走sock5代 理
- bash
- GCC
- CMake
- vscode extension源url
- vscode/vscodium/windsurf最小设置
- anaconda
- python requirements.txt
- `pip` error
- Manjaro
- Fedora desktop
- tar
- docker pull使用proxy
- 修改docker的存储位置
- docker修改pull时的并行下载数
- docker容器作为ssh server
- ssh客户端直接进入另一台主机上的docker容器里
- 对linux server进行X11转发
- Ubuntu挂载第二个硬盘
- 在Ubuntu上安装Windows字体
- 读写代码:
- 浏览阅读代码
- doxygen
- scitools understand 6.1在Ubuntu上运行不起来
- scitools understand 关于C++头文件的配置
- pdf2htmlEX用法
- visual studio
- intellij idea家
- android studio控制台中文乱码
- android emulator长按power键功能选择
- vscode 一些扩展包
- sublime text 3
- Atom 1.32-
- geany 插件:
- emacs
- eclipse
- ubuntu14.04.4 with samba4.3.9
- Linux版VMware运行时出现could not open /dev/vmmon:????????.”的错误
- Linux版本VMware出现"No 3d support is available from the host"或"Hardware graphics acceleration is not available"错误
- Linux (Ubuntu/Mint等) Hybrid Graphics配置尽量使用独立显卡
- Linux Docker容器内部,opencv-python的导入问题
- ida pro常用配置:
- ida free在Ubuntu上运行不起来
- AppImage在Ubuntu上运行不起来
- Windows平台:
- USB安装盘安装Windows7过程,报错`缺少所需的CD/DVD驱动器设备驱动程序`
- 重装window10自带的app
- win7休眠
- Win10任务管理器显示的磁盘使用率100%问题
- Cygwin
- VMware® Workstation ~~12~~ 15 Pro
- VMware® Workstation 15优化设置
- win7的svchost.exe(netsvcs)占用内存过高
- Matlab的license问题
- Mathematica修改默认输出风格
- notepad++
- Source Insight 4.0.0120
- Source Insight 4配置
- Beyond compare 4试用时间
- Windows10卸载wps office
- 删除WPS遗留的qingnse64XXX.dll
- shadowsocks:IE属性LAN自动配置脚本设置
- 命令CMD窗口支持UTF-8编码:
- Mac平台
- NVIDIA
- 通用
To do a great and important work, two things are necessary: a definite plan, and not quite enough time.
Now is no time to think of what you do not have.Think of what you can do with what there is.现在不是去想缺少什么的时候。该想一想凭现有的东西你能做什么。
千里之堤, 溃于蚁穴。这个原理可以用在打破Blank Page Syndrome之类的事情上.
C++常用工具
- cmake https://cmake.org/
- autotools
- remake http://bashdb.sourceforge.net/remake/
- bashdb http://bashdb.sourceforge.net/
- Bear https://github.com/rizsotto/Bear
- gdb https://www.gnu.org/software/gdb/
- ELF Dissector https://kde.org/applications/en/development/org.kde.elf-dissector
- valgrind http://valgrind.org/
- KCachegrind https://kde.org/applications/en/development/org.kde.kcachegrind https://kcachegrind.github.io/
- Massif-Visualizer https://kde.org/applications/en/development/org.kde.massif-visualizer
- Heaptrack https://kde.org/applications/en/development/org.kde.heaptrack
- gcov
- gcovr: https://github.com/gcovr/gcovr
- linuxtools-gcov: http://download.eclipse.org/linuxtools/
- GCoverage4CLion: https://github.com/zero9178/GCoverage4CLion
- gprof2dot + xdot : https://github.com/jrfonseca/gprof2dot , https://github.com/jrfonseca/xdot.py
- howto: https://github.com/blackfaced/blackfaced.github.io/wiki/Profiling-on-Linux-use-Valgrind-and-Gprof2Dot
linux 平台:
Ubuntu desktop
创建用户
See: https://manpages.ubuntu.com/manpages/jammy/en/man8/adduser.8.html
// 创建新用户并加入到已有group
sudo adduser newxxx --ingroup existedgroup

// 或:创建新用户并对其创建新group
sudo adduser newxxx

// 添加已存在用户到sudo
sudo adduser newxxx sudo
# 创建用户 alice,并指定主组为 xxxgroup
sudo adduser --ingroup existedgroup alice

# 验证用户信息
id alice

# 将用户加入附加组(可选)
sudo usermod -aG sudo alice
常用工具:
apt-get install:
build-essential
binutils
vim (vim-nox)
tree
autoconf, automake, libtool
git gitk
unar
openssh-server openssh-client
ibus-sunpinyin// 同时记得在language support里install语言并设置输入法,在settings - region&language添加input sources
fcitx fcitx-sunpinyin // gnome对fcitx支持不力
python3-distutils , python3-dev , python3-all-dev
default-jdk
zsh // ohmyzsh
filezilla
other可选:
open-vm-tools open-vm-tools-desktop //vmware虚拟机工具
bash-completion
openssh-server openssh-client
tmux
aptitude
vim (另外的vim-gtk或vim-tiny是有+lua支持的,若不需要+lua或需要但vim本身已支持则可以不用安装)
gedit-plugins (ubuntu版本)
screenfetch
python-is-python3 // ubuntu20版本上
default-jdk (使用openjdk)
gcc, g++, gdb, make,cgdb, ddd
autoconf, automake, libtool
cmake // 可以使用snap安装指定版本
ninja-build
graphviz
doxygen, doxygen-gui
ctags(即exuberant-ctags), cscope
fizsh (或 yash)
ripgrep
fd-find
pcre2-utils (包含了pcre2grep工具)
inotify-tools
ttf-wqy-microhei (文泉驿微米黑)
meld, nautilus-compare
zip, unzip
unar //解压工具
valgrind, cppcheck, shellcheck
enca (和 enconv 操作文件编码格式)
samba
net-tools (在ubuntu 17+上使用ifconfig等)
p7zip p7zip-full p7zip-rar(推荐使用unar)
flameshot // 可使用snap安装
snap安装:
sublime-text
vscode
ubuntu-make
chromium
audacity // 音频处理,类似于Adobe audition
Miniconda安装注意:
不要使用sh运行,使用相应的shell运行,例如bash ...或zsh ...。
设置en_us.UTF-8
如果命令locale显示为非*.UTF-8比如posix,则可以这样解决:
// 查看
$ locale
$ locale -a

// 安装
$ apt-get install language-pack-en-base
$ locale-gen
$ #dpkg-reconfigure locales


// 临时修改,在终端里:
$ export LANG=en_US.UTF-8

// 永久修改
$ update-locale LANG=en_US.UTF-8
或者
$ localectl set-locale LANG=en_US.UTF-8
选择合适的项目。
然后退出并重进终端环境即可。
build-essential
安装软件从源码build/make前检查依赖性:
sudo apt-get install build-essential
sudo apt-get -s build-dep <package>
ToolChain ppa
https://wiki.ubuntu.com/ToolChain
https://launchpad.net/~ubuntu-toolchain-r/+archive/ubuntu/ppa
ia32-libs
ubuntu14+ 或 debian上: ia32-libs被替代
sudo apt-get install ia32-libs

......
However the following packages replace it:
  lib32ncurses5 lib32z1
则使用:
lib32z1 lib32ncurses5 lib32bz2-1.0 (不同ubuntu可能会不同库名称,以apt-get提示的为准)
见 http://askubuntu.com/questions/107230/what-happened-to-the-ia32-libs-package
ubuntu使用最新的sqlite3命令行工具
Ubuntu使用apt install sqlite3安装的包,版本有些旧。可以使用conda提供的包:
conda install -c conda-forge sqlite
详情见 https://anaconda.org/conda-forge/sqlite
linux命令行设置时区
使用 timedatectl 相关选项。
linux修改swap大小
https://bogdancornianu.com/change-swap-size-in-ubuntu/
### 观察swap使用情况
$ htop

### 修改swap大小
$ sudo swapoff -a  # 停止swap的所有进程
$ sudo dd if=/dev/zero of=/swapfile bs=1G count=8
$ sudo chmod 600 /swapfile
$ sudo mkswap /swapfile
$ sudo swapon /swapfile

### 检查结果
$ cat /etc/fstab
/swapfile none swap sw 0 0
$ grep SwapTotal /proc/meminfo
linux允许生成core dump文件
打开ulimit的core设置:
$ ulimit -a
$ ulimit -S -c unlimited
如果仍然不能生成core dump文件,则查看并设置:
$ cat /proc/sys/kernel/core_pattern
$
$ echo "core.%e.%p.%s" > /proc/sys/kernel/core_pattern
$ 或 sudo bash -c 'echo "core.%e.%p.%s" > /proc/sys/kernel/core_pattern'
参考: https://manpages.ubuntu.com/manpages/jammy/man5/core.5.html
测试程序:
//编译:  g++ -std=c++14 main.cpp -o main

#include <iostream>
int main()
{
    char *s = "hi";
    *(s+1) = 'a';
    return 0;
}
gdb载入core
例子:
gdb program core

gdb -c core --args program arg1 arg2 ...
gcovr生成code coverage结果
以cmake项目为例。
添加编译选项:
add_compile_options(--coverage -g -O0)
add_link_options(--coverage -g -O0)
运行程序,生成*.gcda文件。
然后使用 gcovr 生成coverage结果。
例如 目录结构如下:
~/testing/ tree -L 1
.
├── build/
├── CMakeLists.txt
└── main.cpp
gcovr命令行格式 gcovr -r 项目目录 当前编译目录 [其他选项]
mkdir -p build/coverage_result
cd build/coverage_result

gcovr -r ../.. ..
或
gcovr -r ../.. .. --html-details coverage.html
打开coverage.html
linux查看执行当前命令所使用的shell
注意:echo $SHELL并不一定是执行当前命令所用的shell。
准确方法是:
echo $0
或
ps -p $$
参考 https://www.cyberciti.biz/tips/how-do-i-find-out-what-shell-im-using.html
查找某个命令或文件位于哪个包package
dpkg -S `文件名`
例如,查找apt-add-repository这个命令来源于哪个包:
$ dpkg -S apt-add-repository
software-properties-common: /usr/bin/apt-add-repository
software-properties-common: /usr/share/man/man1/apt-add-repository.1.gz
来自于software-properties-common这个包。
大陆地区使用snap下载速度慢
安装下属包后即可解决:
sudo snap install snap-store-proxy
sudo snap install snap-store-proxy-client --edge
参考:https://askubuntu.com/a/1287132
Ubuntu设置snap安装软件时使用proxy
方法一:
https://snapcraft.io/docs/system-options#heading–proxy
snap set system proxy.http="http://<proxy_addr>:<proxy_port>"
snap set system proxy.https="http://<proxy_addr>:<proxy_port>"
方法二:
需要配置snapd服务。
在终端里,先确保相关环境变量(http_proxy, https_proxy)已经正确设置,然后在当前终端里重启snapd服务即可:
export HTTP_PROXY=...
sudo systemctl restart snapd  # 配置snapd服务
sudo snap install ...
安装oh-my-zsh
使用镜像 https://gitee.com/mirrors/ohmyzsh
REMOTE=https://gitee.com/mirrors/ohmyzsh.git sh install.sh --unattended
nodejs设置镜像源
npm config set registry https://registry.npm.taobao.org
npm config set ELECTRON_MIRROR=https://npm.taobao.org/mirrors/electron/
kdevelop配置和编译cmake项目出错
kdevelop + Ubuntu
- 配置出错:
-- Check for working C compiler: /usr/bin/cc
-- Check for working C compiler: /usr/bin/cc - broken
CMake Error at /usr/local/cmake-3.27.5-linux-x86_64/share/cmake-3.27/Modules/CMakeTestCCompiler.cmake:67 (message):
  The C compiler

    "/usr/bin/cc"

  is not able to compile a simple test program.

  It fails with the following output:

    Change Dir: '/home/z/testing/cxxcoverage/cxxcov/build/CMakeFiles/CMakeScratch/TryCompile-IYpPWJ'

    Run Build Command(s): /usr/local/bin/ninja -v cmTC_0070d
    [1/2] /usr/bin/cc    -o CMakeFiles/cmTC_0070d.dir/testCCompiler.c.o -c /home/z/testing/cxxcoverage/cxxcov/build/CMakeFiles/CMakeScratch/TryCompile-IYpPWJ/testCCompiler.c
    [2/2] : && /usr/bin/cc   CMakeFiles/cmTC_0070d.dir/testCCompiler.c.o -o cmTC_0070d   && :
    FAILED: cmTC_0070d
    : && /usr/bin/cc   CMakeFiles/cmTC_0070d.dir/testCCompiler.c.o -o cmTC_0070d   && :
    /usr/bin/ld: /lib/x86_64-linux-gnu/libc.so.6: version `GLIBC_2.33' not found (required by /snap/kdevelop/69/usr/lib/x86_64-linux-gnu/libctf.so.0)
    /usr/bin/ld: /lib/x86_64-linux-gnu/libc.so.6: version `GLIBC_2.33' not found (required by /snap/kdevelop/69/usr/lib/x86_64-linux-gnu/libbfd-2.38-system.so)
    /usr/bin/ld: /lib/x86_64-linux-gnu/libc.so.6: version `GLIBC_2.34' not found (required by /snap/kdevelop/69/usr/lib/x86_64-linux-gnu/libbfd-2.38-system.so)
    collect2: error: ld returned 1 exit status
    ninja: build stopped: subcommand failed.
解决方法:
通过打印观察 message("LD_LIBRARY_PATH=$ENV{LD_LIBRARY_PATH}.") 发现LD_LIBRARY_PATH的值被kdevelop修改了。
解决方法就是重新设置环境变量 LD_LIBRARY_PATH
步骤:
从kdevelop菜单 project - open configuration,

新建一个profile,设置环境变量LD_LIBRARY_PATH=""或其他需要的值。使用这个新的profile。
- 编译出错:
在上一步cmake配置成功。但接着用kdevelop编译项目又失败报错:
[3/3] Linking CXX executable main
FAILED: main
: && /usr/bin/c++ -g --coverage -g -O0 CMakeFiles/main.dir/func.cpp.o CMakeFiles/main.dir/main.cpp.o -o main   && :
/usr/bin/ld: /lib/x86_64-linux-gnu/libc.so.6: version `GLIBC_2.33' not found (required by /snap/kdevelop/69/usr/lib/x86_64-linux-gnu/libctf.so.0)
/usr/bin/ld: /lib/x86_64-linux-gnu/libc.so.6: version `GLIBC_2.33' not found (required by /snap/kdevelop/69/usr/lib/x86_64-linux-gnu/libbfd-2.38-system.so)
/usr/bin/ld: /lib/x86_64-linux-gnu/libc.so.6: version `GLIBC_2.34' not found (required by /snap/kdevelop/69/usr/lib/x86_64-linux-gnu/libbfd-2.38-system.so)
collect2: error: ld returned 1 exit status
ninja: build stopped: subcommand failed.
解决方法:未知。
KUbuntu20,zsh安装snap软件的bug
kubuntu下zsh利用snap安装软件后,snap list能够看到软件列表,但是所安装软件在命令行不识别的问题。解决方法是:把/snap/bin加入PATH变量。
- 标准做法是:
source /etc/profile.d/apps-bin-path.sh或通过更上层的source /etc/profile - 简单做法是:直接Add “
/snap/bin” path to/etc/environmentfile.
说明:
使用bash没有该问题。
原理说明:
查看/etc/profile.d/apps-bin-path.sh文件,里面判断若/snap/bin目录存在且不为空,会添加到PATH环境变量中。
但是snap未安装任何软件的情况下,/snap/目录下没有/snap/bin文件夹,所以此时/snap/bin未被添加到PATH中。
而zsh或fish没有source到/etc/profile,所以出现了上述问题。
在/etc/profile里有
...

if [ -d /etc/profile.d ]; then
  for i in /etc/profile.d/*.sh; do
    if [ -r $i ]; then
      . $i
    fi
  done
  unset i
fi
apt源指定架构
自定义apt源, 只使用某种架构.
文件:/etc/apt/sources.list.d/name.list
内容格式是: deb [arch=amd64,i386] http_url xxx xxx
例如只使用amd64架构:
deb [arch=amd64] https://mirrors.tuna.tsinghua.edu.cn/llvm-apt/focal/ llvm-toolchain-focal main
apt-get签名问题
问题:
apt update

W: GPG error: https://developer.download.nvidia.com/compute/cuda/repos/ubuntu1804/x86_64  InRelease: The following signatures couldn't be verified because the public key is not available: NO_PUBKEY A4B469963BF863CC
E: The repository 'https://developer.download.nvidia.com/compute/cuda/repos/ubuntu1804/x86_64  InRelease' is not signed.
N: Updating from such a repository can't be done securely, and is therefore disabled by default.
N: See apt-secure(8) manpage for repository creation and user configuration details.
解决方法 一: 参考 https://askubuntu.com/a/732987
apt --allow-insecure-repositories update
或者:
apt --allow-unauthenticated --allow-insecure-repositories update

W: GPG error: https://developer.download.nvidia.com/compute/cuda/repos/ubuntu1804/x86_64  InRelease: The following signatures couldn't be verified because the public key is not available: NO_PUBKEY A4B469963BF863CC
W: The repository 'https://developer.download.nvidia.com/compute/cuda/repos/ubuntu1804/x86_64  InRelease' is not signed.
N: Data from such a repository can't be authenticated and is therefore potentially dangerous to use.
N: See apt-secure(8) manpage for repository creation and user configuration details.
从Error变成Warning了。
解决方法 二: 参考 https://askubuntu.com/a/1050824
在sources.list或相应文件里
deb [trusted=yes] http://xxx
大陆地区ubuntu ppa下载速度慢
可以使用ustc的反向代理:
ppa.launchpad.net launchpad.proxy.ustclug.org
注意http还是https。
见 https://mirrors.ustc.edu.cn
ppa源
add-apt-repository 添加ppa,打开: https://launchpad.net/ 搜索例如:
geany
wine
toolchain
然后 sudo apt-get update 即可.
其他方法: sources.list 源: 例如 https://repogen.simplylinux.ch/
一些有用的ppa
- emacs: https://launchpad.net/~ubuntu-elisp/+archive/ubuntu/ppa
- git: https://launchpad.net/~git-core/+archive/ubuntu/ppa
- python/deadsnakes: https://launchpad.net/~deadsnakes/+archive/ubuntu/ppa
- ninja-build: https://launchpad.net/~ubuntu-support-team/+archive/ubuntu/ninja
ubuntu-drivers命令
https://help.ubuntu.com/community/NvidiaDriversInstallation
update-alternatives命令
http://manpages.ubuntu.com/manpages/focal/en/man1/update-alternatives.1.html
https://documentation.suse.com/sles/15-SP3/html/SLES-all/cha-update-alternative.html
https://linuxhint.com/update_alternatives_ubuntu/
https://wiki.debian.org/DebianAlternatives
https://codeyarns.com/2015/02/26/how-to-switch-gcc-version-using-update-alternatives/
常用:
--get-selections或者ls /etc/alternatives/--install--display和--query--config
date命令
建议使用date -R显式地打印时区数值。
想输出特定时区的日期:( TZ=UTC-8 date -R ) 输出+8时区的日期。
运行qt安装包跳过登录界面
问题:
运行qt安装包 ./qt-opensource-linux-x64-xxx.run 显示账号登录界面。
原因:
2020年对使用qt二进制安装,要求qt账户。 Installation of Qt binaries will require a Qt Account .
见 https://www.qt.io/blog/qt-offering-changes-2020
解决方法:
方法一:
电脑断网,然后再启动安装包。
方法二:
把电脑时间改成手动设置模式,然后调到早于2020年,比如调到2019年,然后再启动安装包。这样账号登录界面会出现 跳过 按钮。安装完后再把电脑时间恢复。
参考 https://stackoverflow.com/a/73154268
rsync替代cp命令
https://manpages.ubuntu.com/manpages/jammy/man1/rsync.1.html
rsync -ahv --progress sourceDirectory destinationDirectory
rsync同步两个文件夹
需求:把folder同步到另一个位置/datadisk/backup/folder
rsync -cRPav folder user@12.34.56.78:/datadisk/backup
-c: 基于checksum。 skip based on checksum, not mod-time & size-R: 保留目录结构
其他可能的选项:
--delete: delete extraneous files from dest dirs-P: same as--partial --progress-a: archive mode. 慎用,保留信息过多,建议用-rlpD-z: 传输过程中进行压缩-h: output numbers in a human-readable format-v: verbose
rsync使用IdentityFile认证来同步文件夹
利用-e选项:
rsync -rlptDvzh -e 'ssh -i ~/.ssh/dev.pem' myProject root@xx.xx.xx.xx:/root/works/
建议最好先用 ssh -i ~/.ssh/dev.pem root@xx.xx.xx.xx试一下能否连接成功。如果dev.pem权限太open,则chmod 600 ~/.ssh/dev.pem改一下权限。
ssh_config客户端config
https://www.cyberciti.biz/faq/create-ssh-config-file-on-linux-unix/
https://manpages.ubuntu.com/manpages/jammy/man5/ssh_config.5.html
~/.ssh/config文件:
Host aliyun_1
  HostName 12.34.56.78
  Port 4242
  User root
  ForwardAgent yes

Host aliyun_2
  HostName 12.34.56.79
  User root
  IdentityFile C:\xxx\xxx\file.pem
  ForwardAgent yes
ssh使用rsa key进行免密码登录
参考:
https://wiki.archlinux.org/title/SSH_keys
https://unix.stackexchange.com/a/4491
ssh client --> ssh server.
在ssh client上:
ssh-keygen
ssh-copy-id (-i ~/.ssh/id_rsa.pub) username@remote-server1.org
ssh-copy-id (-i ~/.ssh/id_rsa.pub) username@remote-server2.org
这样在ssh到远程server的时候,一旦第一次登陆过之后,以后就不会再要求输入登录密码了.
如果后续登录远程server时仍然要求输入密码,则检查远程server的HOME目录的权限,把组写权限去掉即可:
chmod g-w HOMEDIR
chmod o-w HOMEDIR
ssh进行端口转发
通过SSH转发访问远程服务器上的TensorBoard,可以使用本地端口转发。
在远程服务器上启动TensorBoard(默认端口6006):
tensorboard --logdir=/path/to/logs --port=6006
在本地机器上设置一个SSH隧道到远程服务器:
ssh -L 8000:localhost:6006 your_username@your_server
将本地的8000端口转发到远程服务器的localhost:6006。因此,当访问本地的localhost:8000时,实际上是在访问远程服务器上的localhost:6006上的TensorBoard
最后,在本地浏览器中访问http://localhost:8000,就能看到TensorBoard界面。
总结:
# server
tensorboard --logdir path/to/logs

# local
ssh -L 6006:localhost:6006 xxx@192.168.1.100
Windows10上 ssh客户端使用pem文件时报错权限太open
报错:
C:\>ssh ubuntu@192.168.0.1 -i file.pem
@@@@@@@@@@@@@@@@@@@@@@@@@@@@@@@@@@@@@@@@@@@@@@@@@@@@@@@@@@@
@         WARNING: UNPROTECTED PRIVATE KEY FILE!          @
@@@@@@@@@@@@@@@@@@@@@@@@@@@@@@@@@@@@@@@@@@@@@@@@@@@@@@@@@@@
Permissions for 'file.pem' are too open.
It is required that your private key files are NOT accessible by others.
This private key will be ignored.
Load key "file.pem": bad permissions
ubuntu@192.168.0.1: Permission denied (publickey).
解决方法一:
参考 https://github.com/microsoft/vscode-remote-release/issues/1619#issuecomment-541973989
把pem文件放在 %USERPROFILE% 路径下即可。
如 %USERPROFILE% 是 C:\Users\xxx,把pem文件放在其下面,例如放在 C:\Users\winte\.ssh 里。
解决方法二:
- 备份原pem文件。
- 修改pem的可访问用户,如下:

- 高级:禁用继承
- 把当前用户添加到主体里
- 删除除了当前用户外的所有其他主体,如下结果:

OK。
git submodule检出不完整情况
一个git仓库里面使用了submodule. 正常情况下使用update就能检出所有子模块.
git clone xxx
git submodule update --init --recursive
但有时候如果在子模块clone过程中出现失败的情况下, 可能会出现子模块信息注册不完整, 从而导致子模块检出不完整的情况.
此时的解决方法是,先deinit子模块,然后重新init子模块并update:
git submodule deinit --all
git submodule sync --recursive
git submodule update --init --recursive
这样就能解决问题.
git commit指定author
git commit --author='YourName <you@example.com>'
git commit --amend修改日期
Git tracks two dates in commits: author date and commit date.

一,查看author日期和commit日期:
git log --pretty=fuller
二,修改最近commit的相关日期,例如:
GIT_COMMITTER_DATE="2020-10-10T10:00:08" git commit --amend --no-edit --date="2020-09-09T10:00:08"
注意使用了--date而没有使用GIT_AUTHOR_DATE。
GIT_AUTHOR_DATE或--date: author日期GIT_COMMITTER_DATE:commit时间
三,修改更旧commit的时间
使用git rebase -i xxx,把需要改时间的commit从pick改为edit,保存。然后就进入了rebase过程中,在对应commit上使用上述amend句修改日期,改完后进行git rebase --continue。
参考:
https://git-scm.com/docs/git-commit#_date_formats
https://learn.microsoft.com/en-us/azure/devops/repos/git/git-dates?view=azure-devops
Git for Windows的git bash里中文显示
问题:中文被显示为八进制数字形式
解决:
git config --global core.quotepath false
问题:中文乱码
解决:Options->Text->Locale改为zh_CN,Character set改为UTF-8

git保存账号密码
参考:
https://git-scm.com/docs/gitcredentials/2.39.0#_avoiding_repetition
https://git-scm.com/docs/git-credential-cache/2.39.0
git config --global credential.helper cache
git报错 fatal: detected dubious ownership in repository
https://confluence.atlassian.com/bbkb/git-command-returns-fatal-error-about-the-repository-being-owned-by-someone-else-1167744132.html
解决方法:
git config --global --add safe.directory "*"  # For the current user and all repositories
git config --system --add safe.directory "*"  # For all users and all repositories
关于linux的配置文件dotFile
https://wiki.debian.org/DotFiles
Ubuntu/Fedora上安装rime和双拼
参考: https://github.com/rime/home/wiki/RimeWithIBus
# Ubuntu
sudo apt-get install ibus-rime
sudo apt-get install librime-data-double-pinyin

# Fedora
sudo dnf install ibus-rime
Ubuntu系统设置 - 区域和语言 - 添加Rime输入法,
然后创建并编辑配置文件 vim .config/ibus/rime/default.custom.yaml ,输入:
patch:
  schema_list:
    - schema: luna_pinyin          # 朙月拼音
    - schema: double_pinyin        # 自然碼雙拼

  menu/page_size: 9
重启ibus服务: ibus-daemon -drx
ubuntu上配置jdk
参考资料:
http://docs.oracle.com/cd/E19182-01/820-7851/inst_cli_jdk_javahome_t/
https://docs.oracle.com/javase/tutorial/essential/environment/paths.html
https://help.ubuntu.com/community/EnvironmentVariables
例如,可以在ubuntu的~/.profile(推荐) 或 bash shell的 ~/.bashrc中:
#JAVA_HOME=<jdk-install-dir>
export JAVA_HOME=/opt/java/jdk1.8.0_66
export PATH=$JAVA_HOME/bin:$PATH
#export CLASSPATH=.:$JAVA_HOME/lib/dt.jar:$JAVA_HOME/lib/tools.jar
注意,添加PATH时,一个小技巧是将$PATH放在新添加的后面,这样在PATH中就能抢先找到自己设定的路径,从而覆盖相同程序已设定的PATH(若已安装相同程序的其他版本时)。
然后注销系统,重新登录。或source一下也可以。
ubuntu 18.04+安装winehq6+版本
以Ubuntu 18.04为例,按照winehq官网说明添加ppa之后进行apt-get install的时候,会报依赖错误:

$ sudo apt-get install --install-recommends winehq-stable

The following packages have unmet dependencies:
 winehq-stable : Depends: wine-stable (= 6.0.1~bionic-1)
E: Unable to correct problems, you have held broken packages.
问题原因是没有找到合适的faudio库版本。
解决方法是给apt-get提供相应的libfaudio0库。
方法一,使用ppa提供的:(推荐)
sudo add-apt-repository ppa:cybermax-dexter/sdl2-backport
sudo apt-get update
方法二,使用opensuse提供的:
wget -q https://download.opensuse.org/repositories/Emulators:/Wine:/Debian/xUbuntu_18.04/Release.key -O Release.key -O- | sudo apt-key add -
sudo apt-add-repository 'deb https://download.opensuse.org/repositories/Emulators:/Wine:/Debian/xUbuntu_18.04/ ./'
sudo apt-get update
然后再继续按照winehq官网方法apt-get安装。
安装完成后,测试:
wine64 notepad
可选:安装wine的辅助工具winetricks
sudo apt install winetricks
让终端里走sock5代 理
$ export http_proxy="socks5://127.0.0.1:1080"
$ export https_proxy="socks5://127.0.0.1:1080"

// 或者直接设置all_proxy:
$ export all_proxy="socks5://127.0.0.1:1080"
参考 https://wiki.archlinux.org/index.php/Proxy_server
终端设置代理
export HTTP_PROXY=http://127.0.0.1:7890; export HTTPS_PROXY=http://127.0.0.1:7890; export ALL_PROXY=socks5://127.0.0.1:7890
让sudo也使用终端里普通export的代理
visudo 找到 Defaults env_reset 行,后面追加一行:
Defaults env_reset
Defaults env_keep = "http_proxy https_proxy ftp_proxy"
bash
# Add following lines to ~/.bashrc

# Up/Down key get matching history on inputing
if [[ $- == *i* ]]; then
    bind '"\e[A": history-search-backward'
    bind '"\e[B": history-search-forward'
fi
参考: http://stackoverflow.com/questions/1030182/how-do-i-change-bash-history-completion-to-complete-whats-already-on-the-line
bash 添加git的分支显示:
参考: https://git-scm.com/book/en/v2/Git-in-Other-Environments-Git-in-Bash
GCC
在C++代码里查看当前编译器版本
参考: https://gcc.gnu.org/onlinedocs/cpp/Common-Predefined-Macros.html
  cout << __VERSION__ << endl;
  cout << __GNUC__ << "." << __GNUC_MINOR__ << "." << __GNUC_PATCHLEVEL__ << endl;
CMake
cmake使用ninja编译:
cmake.exe -DCMAKE_BUILD_TYPE=Debug "-DCMAKE_MAKE_PROGRAM=C:/Program Files/ninja/win/x64/ninja.exe" -DCMAKE_EXPORT_COMPILE_COMMANDS=ON -G Ninja -S D:\working\code -B D:\working\code\cmake-build-debug

cmake.exe --build D:\working\code\cmake-build-debug --target all -j 8
vscode extension源url
vscodium / windsurf 使用microsoft vscode的extension源
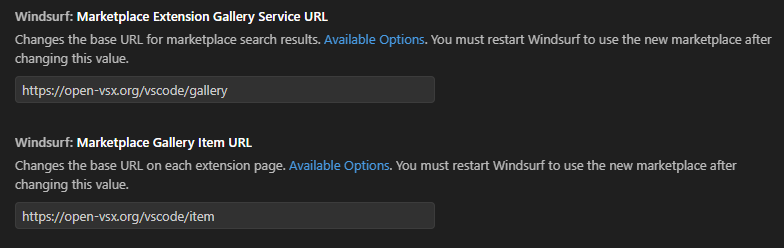
open-vsx源:
https://open-vsx.org/vscode/gallery
https://open-vsx.org/vscode/item
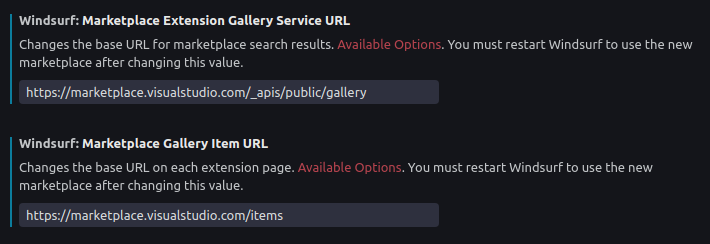
Microsoft extension源:
https://marketplace.visualstudio.com/_apis/public/gallery
https://marketplace.visualstudio.com/items
vscode/vscodium/windsurf最小设置
最小修改:
{
    "security.workspace.trust.enabled": false,
    "window.title": "${rootName}${separator}${profileName}${separator}${appName}${separator}${activeEditorMedium}${dirty}",
    "workbench.tree.indent": 16,
    "workbench.tree.renderIndentGuides": "always",
    "editor.minimap.showSlider": "always",
    "files.insertFinalNewline": true,
    "telemetry.telemetryLevel": "off",
    "workbench.iconTheme": "material-icon-theme"

    "windsurf.marketplaceExtensionGalleryServiceURL": "https://marketplace.visualstudio.com/_apis/public/gallery",
    "windsurf.marketplaceGalleryItemURL": "https://marketplace.visualstudio.com/items",
}
anaconda
运行 anaconda-navigator 或 spyder 发生 segmentation fault 问题。
解决:
conda install anaconda
conda install anaconda-navigator
conda install spyder
conda install pyopengl
(建议再update上述包,一般就可以解决)

实在不行就:
conda update --all
python requirements.txt
pip freeze > requirements.txtpipreqshttps://github.com/bndr/pipreqs (推荐)
pip error
pip install ... 出现警告:
WARNING: There was an error checking the latest version of pip.
解决方法:删除selfcheck文件夹即可。
见 https://stackoverflow.com/a/77298703 和 https://stackoverflow.com/a/77298334
Manjaro
VMware窗口最大化后,Manjaro没有全屏显示。
查看并重新启动 vmtoolsd.service 服务:
systemctl status vmtoolsd.service
Fedora desktop
proxy
当使用 代 理时, 在系统setting里面设置完proxy后, 在terminal中,
普通用户下可以访问网络,但sudo不能访问网络:
$ sudo dnf repolist
Error: Failed to synchronize cache for repo ‘fedora’ from …
解决:
vi /etc/dnf/dnf.conf

添加行:
proxy=http://<my_proxy>:<port>
另外,除了 代 理外,也推荐加上:
fastestmirror=True
tar
将目录 abc/ 打包,排除其中的out目录和所有.git目录:
tar cfz abc.tar.gz abc/ --exclude={abc/out/*,*/.git/*}
docker pull使用proxy
一般来说,常见的Linux命令行工具会根据http_proxy和https_proxy环境变量来使用proxy,但是docker pull并不使用这个环境变量。
docker pull 的代理需要单独配置。即:创建docker自己使用的配置文件,在里面填写相应proxy配置,然后重启docker服务。注意这是持久性修改。然后可以使用docker info查看相应信息。
https://docs.docker.com/engine/reference/commandline/pull/#proxy-configuration
https://docs.docker.com/config/daemon/systemd/#httphttps-proxy

修改docker的存储位置
参考:
https://www.guguweb.com/2019/02/07/how-to-move-docker-data-directory-to-another-location-on-ubuntu/
https://docs.docker.com/engine/reference/commandline/dockerd/#run-multiple-daemons 里对--data-root的解释。
docker默认的存储位置是 /var/lib/docker,我们可以通过以下命令查看:
$ sudo docker info

...
Docker Root Dir: /var/lib/docker
...
下面通过配置data-root来修改存储位置:
//停止docker服务
sudo service docker stop
sudo service docker status

//修改data-root位置
vim /etc/docker/daemon.json
##按照json语法添加行  "data-root": "/path/for/your/docker_files"

//拷贝旧数据到新位置
sudo rsync -av /var/lib/docker/ /path/for/your/docker_files
//备份旧数据,其实可以直接删除了
sudo mv /var/lib/docker /var/lib/docker.old

//启动docker服务
sudo service docker start

//验证docker是否正常
//docker正常,删除旧数据
sudo rm -rf /var/lib/docker.old
docker修改pull时的并行下载数
执行docker pull命令时,默认同时下载3个层。如果image比较大,在网络不好的状况下,很容易出现下载失败。
可以修改dockerd的配置限制下载数量,持久化方式是:在daemon.json里添加"max-concurrent-downloads"项,比如直接设置为1。然后重启docker服务。
docker容器作为ssh server
以ubuntu20为例:
- 拉取image:
$ docker pull ubuntu:20.04
- 创建并运行container,包括暴露端口、挂载目录等
(注意置:-P,-u 0选项)
$ #docker container run -t -i -P -u 0 --hostname="ubt20" --name="ubt20" -v ${HOME}:/host_home ubuntu:20.04
$ docker container run -t -i --name="ubt20" -v ${HOME}:/host_home ubuntu:20.04
- 可选:在container里,修改apt源为阿里的源
$ cat /etc/apt/sources.list
$ sed -i.orig "s/archive.ubuntu.com/mirrors.aliyun.com/g" /etc/apt/sources.list
$ apt update
- 可选:把ubuntu恢复到便于交互的模式
$ unminimize
- 安装ssh服务,并做相应配置:
注意:设置root可登录和端口号等,不同版本的openssh_server可能在sshd_config、ssh_config其中的一个或两个配置文件中,以实际版本为准。
$ passwd root  # 设置密码
$
$ apt install openssh-server
$ sed -i 's/#*PermitRootLogin prohibit-password/PermitRootLogin yes/g' /etc/ssh/sshd_config
$ sed -i 's@session\s*required\s*pam_loginuid.so@session optional pam_loginuid.so@g' /etc/pam.d/sshd  #若必要时再修改此行
$
$ service ssh status/restart  #查看sshd状态并启动
$
$ hostname -I  # 在容器内查看当前ip
- 在宿主机用ssh连入容器:
$ ssh root@container_ip
$ ...
- 若容器关闭后再开启,记得查看sshd的状态
$ exit  # 从容器内退出,容器关闭

$ docker container start -a -i ubt20  # 宿主机命令行,重新开启并进入容器
$ service ssh status  # 容器内,查看sshd状态
ssh客户端直接进入另一台主机上的docker容器里
场景:
- A主机上启动的docker容器,docker容器内已经运行ssh server服务
- 从B主机运行ssh客户端命令,直接ssh进入A主机上的那个docker容器内(不是ssh进A主机本身,而是直接ssh进A主机上的docker容器内)
方法一:
原理:
docker容器使用默认的network模式时,使用端口转发,将外面的某端口转发到容器内的22端口。
过程:
- 在A主机上启动docker容器
$ docker container run -t -i -p 50022:22 ubuntu:20.04
- 在docker容器里,设置root密码,安装
openssh-server,并允许ssh用root登入。并启动ssh服务。
$ apt install openssh-server
$ sed -i 's/#*PermitRootLogin prohibit-password/PermitRootLogin yes/g' /etc/ssh/sshd_config
$ sed -i 's@session\s*required\s*pam_loginuid.so@session optional pam_loginuid.so@g' /etc/pam.d/sshd  #若必要时再修改此行
$
$ passwd  #设置用户密码
$ service ssh status/restart  #查看sshd状态并启动
- 在另一台机器B上用ssh客户端连进上述docker容器
$ ssh -p 50022 root@x.x.x.x # ssh客户端 连接远程机器ip和映射端口
方法二:
原理:
参考 https://docs.docker.com/network/host/
利用docker容器在host网络模式时,与主机共用网络栈。(此时即使对docker容器设置端口映射也会被忽略)。容器内的ssh服务使用与主机不冲突的端口号。
过程:
- 在A主机上启动docker容器,使用host网络模式
$ docker container run -t -i --network host ubuntu:20.04 #可在此基础上添加其他需要的命令选项
- 在docker容器里,设置root密码,安装
openssh-server,并允许ssh用root登入,且注意修改ssh服务端口号(不要和外面主机的冲突)。最后service ssh restart启动ssh服务。
$ # 在容器里:设置root密码,安装openssh-server,并使能ssh用root登入等
$ apt install openssh-server
$ sed -i 's/#*PermitRootLogin prohibit-password/PermitRootLogin yes/g' /etc/ssh/sshd_config
$ sed -i 's@session\s*required\s*pam_loginuid.so@session optional pam_loginuid.so@g' /etc/pam.d/sshd  #若必要时再修改此行

$ # 记得在 /etc/ssh/sshd_config 文件里修改端口号
Port 50022  # 修改端口号。默认是22,为避免与外面主机端口号冲突,这里改成另外的数字

$ passwd
$ service ssh restart  #启动服务
- 在另一台机器B上用ssh客户端连进上述docker容器
# docker容器在host网络模式下,与主机共用同一个ip地址

$ ssh -p 50022 root@x.x.x.x  # ssh客户端 连接远程机器ip和docker容器的ssh服务端口号
对linux server进行X11转发
需求:
ssh连到linux server里,比如docker container里,运行带gui的程序。把程序通过x11转发到ssh client。
软件:
- ssh client: MobaXterm支持x11转发
- docker container: ubuntu
方法:
- 首先,docker container里面运行ssh server,允许ssh连入。方法参照上面。
- 然后修改
/etc/ssh/ssh_config
ForwardX11 yes
- 安装x11相应的包
apt install xorg

export DISPLAY="localhost:0.0"  #如果ssh client在宿主机上
或
export DISPLAY="192.168.1.36:0.0"  #如果ssh client在局域网另一台机器上
Ubuntu挂载第二个硬盘
参考文档:
https://help.ubuntu.com/community/InstallingANewHardDrive
https://help.ubuntu.com/community/Fstab
https://en.wikipedia.org/wiki/Fstab
https://askubuntu.com/questions/113733/how-to-mount-a-ntfs-partition-in-etc-fstab
操作环境:
- Ubuntu20.04LTS,主硬盘是500G固态硬盘。
- 第二个待挂载硬盘是2T普通磁盘,已被Windows10系统格式化成NTFS格式,并已经被划分为3个区,且上面已存有数据。
主要操作步骤就是修改 /etc/fstab 文件:
- 由于该磁盘已经被格式化,所以这里跳过格式化分区步骤。
- 使用
sudo fdisk -l查看硬盘信息,使用sudo blkid命令查看分区的UUID,使用id查看uid/gid - 手动创建想要的挂载点 例如
$HOME/mnt/xxx - 参考
/etc/fstab的注释,按照fstab的格式,针对ntfs书写配置。sudo vim /etc/fstab:
# /dev/sda2  /media/z/disksda2  ntfs  defaults  0  2
UUID=3E42F23942F1F58D  /home/z/mnt/disksda2  ntfs  defaults,rw,umask=000,dmask=002,fmask=113,uid=1000,gid=1000,windows_names  0  2
# /dev/sda3  /media/z/disksda3  ntfs  defaults  0  2
UUID=64B8FDF8B8FDC916  /home/z/mnt/disksda3  ntfs  defaults,rw,umask=000,dmask=002,fmask=113,uid=1000,gid=1000,windows_names  0  2
# /dev/sda4  /media/z/disksda4  ntfs  defaults  0  2
UUID=ACFC03DCFC03A026  /home/z/mnt/disksda4  ntfs  defaults,rw,umask=000,dmask=002,fmask=113,uid=1000,gid=1000,windows_names  0  2
- 保存,重启系统
mount查看挂载详情。df -lh查看文件系统状态
在Ubuntu上安装Windows字体
sudo apt install ttf-mscorefonts-installer
读写代码:
- GNU GLOBAL
- opengrok+tomcat
- cscope -Rbq(k)v
Linux命令行查找文本内容,例如:
$ cd /usr/include/

// 方法1:当前目录下,(推荐使用egrep命令;而egrep已不再使用,建议使用'grep -E'代替。注意egrep和grep的区别。)
// -r递归,-n显示所在行,-e使用正则表达式,-i忽略大小写
$ grep -r -n -e "typedef.*uint32_t"
或
$ grep -Erin "typedef.*uint32_t"

// 方法2:过滤指定类型文件
$ find ./ -iname "*.h" | xargs grep -e "typedef.*uint32_t"

// 如果要高亮所查找内容,在grep加上选项:
$ find ./ -iname "*.h" | xargs grep --color=auto -e "typedef.*uint32_t"
cscope & ctags:
find . -name "*.h" > cscope.files
find . -name "*.cpp" >> cscope.files
...

cscope -Rbq(k)v
ctags -R --c++-kinds=+p(x) --fields=+aiKSz --extra=+q -L ./cscope.files

ctags -R --languages=c,c++ --c++-kinds=+px --fields=+aiKSz --extra=+q
atom editor
emacs
sublime text
scitools understand
cppcheck — 语法等
splint
flawfinder — 检查bug
**valgrind ** — 内存泄漏
浏览阅读代码
- eclipse oxygen3 (更准确)
- doxygen
- source insight 4
- opengrok (搜索)
doxygen
参考:
http://www.cnblogs.com/tianzhijiexian/p/4392924.html
https://mcuoneclipse.com/2012/06/25/5-best-eclipse-plugins-1-eclox-with-doxygen-graphviz-and-mscgen/
ubuntu安装doxygen
sudo apt install doxygen
sudo apt install graphviz  # 提供dot
为了能够转换显示LaTeX公式,需要安装相关工具:
sudo apt install texlive-latex-base texlive-binaries
doxygen使用clang和compile_commands.json
sudo apt install clang libclang-dev
然后在Doxyfile里:
- (可选)指定源代码列表
INPUT - 勾选
CLANG_ASSISTED_PARSING=YES - 填入compile_commands.json所在的路径,
CLANG_DATABASE_PATH = cmake-build-debug
scitools understand 6.1在Ubuntu上运行不起来
在Ubuntu20.04LTS上,启动understand,出现core dumped:
./understand
qt.qpa.plugin: Could not load the Qt platform plugin "xcb" in "" even though it was found.
This application failed to start because no Qt platform plugin could be initialized. Reinstalling the application may fix this problem.

Available platform plugins are: xcb.

[1]    14556 abort (core dumped)  ./understand
解决方法:
sudo apt install libxcb-xinerama0
scitools understand 关于C++头文件的配置
Configure Project里,在Strict分析模式下,C++的Include选项可以把Search for include files among project files勾掉,以完全尊重compile_commands.json内容。
如下:

pdf2htmlEX用法
pdf2htmlEX Quick Start
某第三方集成试用并收费
从pdf2htmlEX下载预编译二进制文件:
// ubuntu shell:
sudo apt install ttfautohint

pdf2htmlEX --process-outline=0 --external-hint-tool=ttfautohint --dpi=200 --zoom=1.5 pdf/test.pdf
visual studio
下载安装包:
vs_Enterprise.exe --layout D:\setup_softwares\vs2022\vs2022ent --add Microsoft.VisualStudio.Workload.NativeDesktop --includeRecommended --includeOptional --lang en-US
一些扩展
- viasfora
- Trailing Whitespace Visualizer
Format document on Save- Visual Assist
Visual Assist过期的处理方法
参考 https://github.com/vogeljo/reset-vassistx
- 删除
%temp%文件夹里的1489AFE4.TMP文件 - 删除注册表里的
HKEY_CURRENT_USER\SOFTWARE\Licenses
intellij idea家
一些扩展
Rainbow Brackets- Csense - Kotlin Checked Exceptions
- TabNine
- CamelCase
String ManipulationCode Iris- Color Highlighter
- Python External Documentation
License server查找
参考: https://51.ruyo.net/17780.html
使用shodan.io搜索网络上的server。
https://www.shodan.io/search?query=Location%3A+https%3A%2F%2Faccount.jetbrains.com%2Ffls-auth
ja-netfilter.jar注册
https://jetbra.in/s
使用 jetbra.zip 帮助注册,详情见其readme
修改vmoptions配置:
// java从11升级到了17,所以需要额外加上这两句:
--add-opens=java.base/jdk.internal.org.objectweb.asm=ALL-UNNAMED
--add-opens=java.base/jdk.internal.org.objectweb.asm.tree=ALL-UNNAMED
// 指定路径
-javaagent:C:/programs/jetbra/ja-netfilter.jar=jetbrains
Jebrains ReSharper Ultimate注册
https://zhile.io/jetbrains-resharper-license-html
如果License server 已被加入黑名单,可以这么操作:
- 添加:0.0.0.0 account.jetbrains.com到%SYSTEMROOT%\System32\drivers\etc\hosts文件。
- 删除文件:%APPDATA%\JetBrains\bl。
- 以上步骤,缺一不可!
然后再应用license server。
CLion高亮当前标识符失败
2024.2版本开始把 CLion Nova 设为默认,导致光标下当前标识符高亮显示有问题。
CLion Nova: Color for “Identifier under caret (write)” doesn’t work
解决方法:在Settings - Advanced Settings 把CLion Nova关掉。
CLion 文件太复杂不能分析的问题
clion抱怨: The file is too complex to perform the context-sensitive data-flow analysis
尝试解决的方法是:
- 连续多次按shift键,在Actions里输入
Registry...打开配置 - 找到
cidr.inspection.dfa.timeout.in.sec从默认5秒修改为更长时间(比如500秒).
参考: https://youtrack.jetbrains.com/issue/CPP-17623
semantic highlighting
https://blog.jetbrains.com/pycharm/2017/01/make-sense-of-your-variables-at-a-glance-with-semantic-highlighting/
reset 试用时间(更新: 已过时)
方法一,删除注册相关配置文件:
ubuntu, jetbrain 2020.2.5 (pycharm, clion)成功。
注意:不要让软件检查更新!通过在Settings里把Automatically check updates选项取消,不让软件自动检查更新,且在软件使用过程中也不要手动检查更新。
$ rm -fv ~/.config/JetBrains/PyCharm2020.2/eval/PyCharm202.evaluation.key
$ rm -rfv ~/.java/.userPrefs/jetbrains/clion
$ 删除~/.config/JetBrains/PyCharm2020.2/options/other.xml文件里所有evlsprt的行
$
$ rm -fv ~/.config/JetBrains/CLion2020.2/eval/CLion202.evaluation.key
$ rm -rfv ~/.java/.userPrefs/jetbrains/pycharm
$ 删除~/.config/JetBrains/CLion2020.2/options/other.xml文件里所有evlsprt的行
方法二,使用第三方工具:
zhile IDE Eval Reset
Pycharm调试远程代码
场景:代码在服务器上,py运行环境在服务器上。使用本地Pycharm利用远程py环境调试远程代码。
方法:
1, 本地新建一个空project
2, 配置Deployment来使用ssh

注意,
Connection选项卡:Root Path填写远程project所在的路径,client-server通信编码尽量使用UTF-8编码。如果出现问题可以尝试不勾选Visible only for this project试试。
Mapping选项卡:Deployment path填写 / (即相对于前面的Root Path)。
3, 配置Python interpreter
File-Settings打开设置


选择远程机器上的环境。
4, 把远程代码下载到本地:Tools - Deployment - Download from … 等待代码同步完成。
代码会下载到本地的空文件夹里,在下载到本地的工程目录里的代码上设端点以调试。
5, 如果远程代码或环境有变化,需要:把代码变动Download或Sync到本地,重新索引更新一下环境。
同步代码到本地:

手动选择一下环境,使重新索引环境:

参考:
https://blog.csdn.net/weixin_36338224/article/details/109378082
https://blog.csdn.net/fengbao24/article/details/125515542
android studio控制台中文乱码
参考:https://blog.csdn.net/zhangjianming2018/article/details/122866101
修改编码为utf-8:

打开Android studio - Help - Edit Custom VM Options,
追加:-Dfile.encoding=UTF-8

保存配置后,重新reload、sync项目。重启Android studio,然后 clean & rebuild project。

如果仍然乱码,再重启一次Android studio。就可以解决控制台中文乱码问题。
android emulator长按power键功能选择
安卓emulator,长按power键弹出助手,而非关机重启功能。改回:
Settings->System->Gestures -> Press and hold power button -> Hold for assistant 勾掉
vscode 一些扩展包
- Error Lens
- ColorMate: Semantic Highlighter
- IntelliCode
- Tabnine
- Material Icon Theme
- Remote - SSH
- copy
- Prettier - Code formatter
- Semantic Rainbow
C++相关:
- CMake Tools
python相关:
- autopep8
- Black formatter
- autoDocstring
其他:
Highlight counter
C/C++ snippets
python snippets (是frhtylcn.pythonsnippets)
autoconf
Makefiles supports for VSCode
shellman
vscode-proto3
markdownlint
hexdump for VSCode (十六进制显示文件)
DupChecker
Text Marker (Highlighter)
sublime text 3
一些扩展包:
Package Control
ConvertToUTF8 —— 解决中文乱码
TrailingSpaces
CTags
Cscope
Autotools / CMakeEditor
C Improved / Autotools / Makefile Improved / CMake / ShellScriptImproved
INI
JSON Key-Value
Indent XML
C++ Snippets
EasyClangComplete —— Clang自动补全,见 https://packagecontrol.io/packages/EasyClangComplete
ClangAutoComplete —— Clang自动补全,见 https://packagecontrol.io/packages/ClangAutoComplete
BracketHighlighter —— 括号匹配高亮
WordHighlight
DocBlockr —— 用/**补全doc格式注释
Pretty JSON —— 格式化json工具
SublimeAStyleFormatter —— astyle
AlignTab —— 对齐(Alignment)代码整洁风格
Twilightcyanide Colorscheme / Monokai Extended —— color scheme
Material Nil ------ Theme
AllAutocomplete ——搜索所有打开的文件来自动完成
Terminal —— 打开终端在当前目录(windows上是powershell)
AceJump ——类似EasyMotion跳转
Function Name Display ——在状态栏显示当前的类和函数名
SFTP
SideBarEnhancements
Sublime Bookmarks ------ (by bollu)
SublimeLinter / SublimeLinter-cppcheck / SublimeLinter-shellcheck
MarkdownEditing
sublime text 3 的一些自定义配置:
{
	"always_show_minimap_viewport": true,
	"theme": "Material-Nil.sublime-theme",
	"material_nil_highlight_modified_tabs": true,
	// "color_scheme": "Packages/Monokai Extended/Monokai Extended.tmTheme",
	"draw_minimap_border": true,
	"ensure_newline_at_eof_on_save": true,
	"font_face": "DejaVu Sans Mono",
	"font_size": 10,
	"highlight_modified_tabs": true,
	"ignored_packages":
	[
		"Makefile",
		"Vintage"
	],
	"show_encoding": true,
	"show_line_endings": true,
	// "tab_size": 8,
	"trim_trailing_white_space_on_save": true
}
SublimeText可以自定义配色方案:
https://tmtheme-editor.herokuapp.com/
http://ethanschoonover.com/solarized
例如基于 Monokai 方案,可以进行自定义,然后下载下来。在
SublimeText菜单:Preferences - Browse Packages…
在打开的目录下新建文件夹,将下载下来的配色方案放入其中。然后打开SublimeText在Color Scheme中选择自己的配色方案即可。
Atom 1.32-
安装或更新:
双击deb包利用Ubuntu Software Center,或 sudo dpkg --install atom-amd64.deb
apm install 扩展包:
file-icons
symbols-tree-nav
highlight-selected或selection-highlight
minimap
language-cpp14
language-autotools
language-cmake
language-log
autocomplete-clang (使用clang)
atom-cscope
atom-gtags (使用GNU GLOBAL)
docblockr
terminal-plus
linter 和 linter-gcc
atom-beautify 代码格式化(依赖:sudo apt-get install uncrustify)
markdown-preview-plus
markdown-table-editor
markdown-toc
apmrc配置
atom及apm访问网络失败,例如Request for package information failed: tunneling socket could not be established, cause=connect EIN问题:
解决方法是:
修改 ~/.atom/.apmrc成:
http-proxy=http://user:password@proxyhost:port
https-proxy=http://user:password@proxyhost:port
#proxy=http://user:password@proxyhost:port
strict-ssl=false
在无特殊情况下 http:// 不要省略.
参考: https://github.com/npm/npm/issues/2472#issuecomment-6129507
uncrustify的配置使用:
在 ~/ 下新建 .uncrustify 目录,将 这个示例配置文件 放到下面,改名为例如uncrustify.cfg
(详细见官网 http://uncrustify.sourceforge.net ) ,然后在atom的atom-beautify包设置里面指定uncrustify.cfg路径。
这是我的uncrustify配置文件的自定义修改diff示例:
--- /home/z/.uncrustify/linux.cfg.txt	2016-01-31 01:53:34.258570000 +0800
+++ /home/z/.uncrustify/uncrustify.cfg	2016-02-04 02:33:36.918244627 +0800
@@ -2,9 +2,9 @@
 # uncrustify config file for the linux kernel
 #

-indent_with_tabs	= 2		# 1=indent to level only, 2=indent with tabs
-input_tab_size		= 8		# original tab size
-output_tab_size		= 8		# new tab size
+indent_with_tabs	= 0		# 0=spaces only,1=indent to level only, 2=indent with tabs
+input_tab_size		= 4		# original tab size
+output_tab_size		= 4		# new tab size
 indent_columns		= output_tab_size

 indent_label		= 1		# pos: absolute col, neg: relative column
@@ -14,19 +14,19 @@
 # inter-symbol newlines
 #

-nl_enum_brace		= remove	# "enum {" vs "enum \n {"
-nl_union_brace		= remove	# "union {" vs "union \n {"
-nl_struct_brace		= remove	# "struct {" vs "struct \n {"
-nl_do_brace 		= remove	# "do {" vs "do \n {"
-nl_if_brace 		= remove	# "if () {" vs "if () \n {"
-nl_for_brace 		= remove	# "for () {" vs "for () \n {"
-nl_else_brace 		= remove	# "else {" vs "else \n {"
-nl_while_brace 		= remove	# "while () {" vs "while () \n {"
-nl_switch_brace 	= remove	# "switch () {" vs "switch () \n {"
+nl_enum_brace		= add	# "enum {" vs "enum \n {"
+nl_union_brace		= add	# "union {" vs "union \n {"
+nl_struct_brace		= add	# "struct {" vs "struct \n {"
+nl_do_brace 		= add	# "do {" vs "do \n {"
+nl_if_brace 		= add	# "if () {" vs "if () \n {"
+nl_for_brace 		= add	# "for () {" vs "for () \n {"
+nl_else_brace 		= add	# "else {" vs "else \n {"
+nl_while_brace 		= add	# "while () {" vs "while () \n {"
+nl_switch_brace 	= add	# "switch () {" vs "switch () \n {"
 nl_brace_while		= remove	# "} while" vs "} \n while" - cuddle while
-nl_brace_else		= remove	# "} else" vs "} \n else" - cuddle else
+nl_brace_else		= add	# "} else" vs "} \n else" - cuddle else
 nl_func_var_def_blk	= 1
-nl_fcall_brace		= remove	# "list_for_each() {" vs "list_for_each()\n{"
+nl_fcall_brace		= add	# "list_for_each() {" vs "list_for_each()\n{"
 nl_fdef_brace		= add		# "int foo() {" vs "int foo()\n{"
 # nl_after_return		= TRUE;
 # nl_before_case	= 1
@@ -37,10 +37,10 @@
 #

 mod_paren_on_return	= remove	# "return 1;" vs "return (1);"
-mod_full_brace_if	= remove	# "if (a) a--;" vs "if (a) { a--; }"
-mod_full_brace_for	= remove	# "for () a--;" vs "for () { a--; }"
-mod_full_brace_do	= remove	# "do a--; while ();" vs "do { a--; } while ();"
-mod_full_brace_while	= remove	# "while (a) a--;" vs "while (a) { a--; }"
+mod_full_brace_if	= add	# "if (a) a--;" vs "if (a) { a--; }"
+mod_full_brace_for	= add	# "for () a--;" vs "for () { a--; }"
+mod_full_brace_do	= add	# "do a--; while ();" vs "do { a--; } while ();"
+mod_full_brace_while	= add	# "while (a) a--;" vs "while (a) { a--; }"
 mod_full_brace_nl	= 3		# don't remove if more than 3 newlines
geany 插件:
- Automark
- Overview
- TreeBrowser
emacs
安装
Ubuntu为例:
- emacs
- emacs-goodies-el 一些有用的工具
配置
添加package仓库,参考: https://www.emacswiki.org/emacs/ELPA
一点基本配置:
;; display filepath in the title
(setq frame-title-format
      '((:eval (if (buffer-file-name)
                   (abbreviate-file-name (buffer-file-name))
                   "%b"))))

;; no backup file~
(setq make-backup-files nil)
;; show line number
(global-linum-mode t)
eclipse
eclipse国内mirror: https://lug.ustc.edu.cn/wiki/mirrors/help/eclipse
即使设置proxy仍上不去网更新插件的问题
如果不设置proxy就上不去网,或者设置了proxy仍然上不去网去更新插件(Install New Software)的时候.试试:
只把http和https设置proxy,而socks不设置proxy.
或者只http设置proxy, 而https和socks都不设置proxy.
参考: http://stackoverflow.com/a/17480032
eclipse cdt使用compile_commands.json
当前项目 — Properties — C/C++ General — Preprocessor Include Paths Macros etc — Providers选项卡,
勾选 Compilation Database Parser,并Move Up到第一位置。建议同时勾选Exclude files not in the Compilation Database。然后点击Apply。最后Apply and Close。
提示:如果解析不生效:
- 由于旧版CDT的bug,compile_commands.json里使用command,而不要使用arguments。
- 看Build parser对应的 Compiler command pattern,核对一下compile_commands.json里command是否符合pattern。
各种icon的含义
以eclipse neon版本为例:
- JDT的: http://help.eclipse.org/neon/topic/org.eclipse.jdt.doc.user/reference/ref-icons.htm
- CDT的: http://help.eclipse.org/neon/topic/org.eclipse.cdt.doc.user/reference/cdt_o_views.htm
eclipse(mars,neon2-) @ubuntu14.04+上的卡顿问题
注: 卡顿问题在neon3及以上的版本已解决,使用 eclipse.ini 默认配置即可,无须再去修改.
用鼠标滚轮滚动eclipse的editor浏览代码时,会出现卡顿不流畅现象. 原因是gtk3或java版本的问题.
- java: 建议使用jdk1.8+
- gtk: eclipse默认使用gtk3. 打开eclipse目录下的eclipse.ini文件在
--launcher.appendVmargs的前面加上命令让eclipse使用gtk2:
--launcher.GTK_version
2
--launcher.appendVmargs
参考: https://coffeeorientedprogramming.com/2014/10/27/how-to-tell-if-you-are-running-eclipse-on-gtk2-or-on-gtk3/
http://stackoverflow.com/a/25153671
eclipse调试C语言时的printf问题
用eclipse调试c语言时,printf在控制台没有打印出来,原因: 这是一个bug,打印被缓冲了,所以没有显示在控制台.
解决方法workaround是: 在main()函数开始第一句加上setbuf(stdout, NULL);即:
int main(int argc, char const *argv[])
{
	setbuf(stdout, NULL);
	...
}
这样就可以了。
eclipse 支持C++11
注:在eclipse oxygen 3中已经默认__cplusplus=201402L
- Properties - C/C++General - Path and Symbols - Symbols tab 添加
__cplusplus=201103L - Properties - C/C++General - Preprocessor Include Paths, Macros etc - Providers tab - xxx Compiler Settings 添加
-std=c++11, 参考 https://stackoverflow.com/a/39140203
eclipse插件plugin
括号突出显示
Bracketeer :https://marketplace.eclipse.org/content/bracketeer-cc-cdt
eclox
https://anb0s.github.io/eclox/
Linux Tools
http://www.eclipse.org/linuxtools/
eclipse 导入浏览 linux kernel 源码
https://wiki.eclipse.org/HowTo_use_the_CDT_to_navigate_Linux_kernel_source
ubuntu14.04.4 with samba4.3.9
ubuntu中使用samba,但用Windows去访问时,出错:
无法访问。您可能没有权限使用网络资源,请与这台服务器的管理员联系以查明您是否有访问权限。
指定的网络名不再可用。
解决方法是:
ubuntu更新安装 libtalloc 库
然后 sudo service smbd restart
出现问题,建议去 /var/log/samba/log.{计算机名} (其中计算机名是你的windows主机名称)下面查看出错log.
参考: http://blog.chinaunix.net/uid-27057175-id-5747280.html
注:此问题在ubuntu14.04.5版本上已经解决.
另外: Windows删除远程连接缓存的命令是,
net use * /delete
Linux版VMware运行时出现could not open /dev/vmmon:???.”的错误
重启机器,进BIOS,把“security boot”改成“disable”即可。
参考:https://blog.csdn.net/weixin_40894428/article/details/84843199
Linux版本VMware出现"No 3d support is available from the host"或"Hardware graphics acceleration is not available"错误
- 先确保Host机器的显卡驱动安装正常。检查方法是:
$ glxinfo | grep -i Direct

// 输出:
direct rendering: Yes
    ......
看到direct rendering: Yes就是OK的。
- 然后打开
~/.vmware/preferences文件,在文件最后加入一行:
mks.gl.allowBlacklistedDrivers = "TRUE"
重新启动VMware Workstation即可了。
Linux (Ubuntu/Mint等) Hybrid Graphics配置尽量使用独立显卡
什么是 Hybrid Graphics, 见 https://help.ubuntu.com/community/HybridGraphics
注意上面链接里所说的修改使用独立显卡的方法好像不起效,仅供参考。
查看显卡活动状态:
$ sudo cat /sys/kernel/debug/vgaswitcheroo/switch
在 AMD raedon独显 和 intel集显 的混合显卡时,貌似独显总是DynOff,除非在命令行启动应用时显式指定DRI_PRIME=1,比如
$ glxheads

$ DRI_PRIME=1 glxheads
要想让DRI_PRIME=1在系统级别起效,可以把DRI_PRIME=1放到系统级别的环境变量里,例如/etc/environment .
关于环境变量见:
https://help.ubuntu.com/community/EnvironmentVariables
https://wiki.debian.org/EnvironmentVariables
注:据说须使用开源显卡驱动时才能使用 DRI_PRIME=1
Linux Docker容器内部,opencv-python的导入问题
问题:docker环境,安装opencv-python后,在python代码里import cv2时,报错
File “…/site-packages/cv2/
__init__.py”, line 5, in<module>
from .cv2 import *
ImportError: libGL.so.1: cannot open shared object file: No such file or directory
- 正确的解决方法是,对于像server、docker等headless环境,应使用
opencv-python-headless包.
见 https://github.com/opencv/opencv-python 或 https://pypi.org/project/opencv-python-headless/ 里的说明。
pip install opencv-python-headless

这样就可以了。
- 其他解决方法,虽然可行,但不推荐:
apt search libgl
apt install libgl-dev
ida pro常用配置:
参考 https://www.hex-rays.com/products/decompiler/manual/config.shtml
配置文件:cfg/hexrays.cfg
BLOCK_INDENT  4
RIGHT_MARGIN  ...

HEXOPTIONS = 0x833FF  // 单行语句也加花括号: HEXOPTIONS + HO_KEEP_CURLIES = 0x831FF + 0x000200 = 0x833FF
ida free在Ubuntu上运行不起来
linux版本:
./ida64

报错 Could not load the Qt platform plugin "xcb" in "" even though it was found.
参考这里,解决方法:
sudo apt install 'libxcb-*-dev' libx11-xcb-dev libglu1-mesa-dev libxrender-dev libxi-dev libxkbcommon-dev libxkbcommon-x11-dev
AppImage在Ubuntu上运行不起来
AppImage格式的二进制文件,在Ubuntu上运行不起来,报错缺少fuse库:
dlopen(): error loading libfuse.so.2
解决方法:
就是安装libfuse2,或者直接安装libfuse-dev库也行。
sudo apt install libfuse-dev
Windows平台:
USB安装盘安装Windows7过程,报错缺少所需的CD/DVD驱动器设备驱动程序
使用USB安装盘安装Windows7的过程中,报错,无法开始安装:

原因是由于原生Windows7不支持USB3.0,所以解决方法有两种:
- 把U盘插到USB2.0的端口上。
- 或者在制作系统盘的时候,将USB3.0的驱动写入到U盘镜像当中。
方法1最简单。但有些电脑已没有USB2.0端口,那么就需要用方法2。
方法2参考 https://www.gigabyte.com/Support/Consumer/FAQ/3459
到 https://www.gigabyte.com/Support/Utility 搜索 Installation 或 Windows USB Installation Tool ,然后下载最新版本( 截止目前是 B18.0213.1版 )即可。

下载完成后,解压并运行工具:


等待完成。然后再用该USB启动盘引导启动,可以正常安装Windows7。
重装window10自带的app
例如, windows10应用商店, 如果不小心被卸载了, 可以通过以下方法重新安装.
以管理员身份运行 Windows PowerShell
# 查看
Get-AppxPackage -AllUsers

# 查看安装位置
Get-AppxPackage -AllUsers| Foreach {echo $($_.InstallLocation)}

# 安装windows10应用商店
# 将$($_.InstallLocation)更换成在上步骤中得到的对应Microsoft.WindowsStore的值
# 否则,将会安装所有应用
Get-AppxPackage -AllUsers| Foreach {Add-AppxPackage -DisableDevelopmentMode -Register "$($_.InstallLocation)\AppXManifest.xml"}
win7休眠
vmware里的windows7在计算机静置一段时间后会自动挂起。
其实自动挂起并不是虚拟机的原因,而是虚拟机内系统的自动休眠功能引起的。
- 打开 “控制面板\硬件和声音\电源选项” ,修改休眠时间。
Win10任务管理器显示的磁盘使用率100%问题
https://support.microsoft.com/en-us/help/3083595/task-manager-might-show-100-disk-utilization-on-windows-10-devices-with-message-signaled-interrupt-msi-mode-enabled
http://www.dell.com/support/article/us/en/19/SLN298828/EN
Cygwin
- bash-completion
- gcc / g++ / make
- gdb
- astyle
- vim
- tree
VMware® Workstation 12 15 Pro
http://partnerweb.vmware.com/GOSIG/Ubuntu_16_04_LTS.html
https://help.ubuntu.com/community/VMware/Tools
open-vm-tools is the recommended method of installing VMware tools on Ubuntu. Packages are available in the main repository since 14.04.
新安装客户机例如Ubuntu18.04.5等后,不必像以前那样安装vmware自带的VMware Tools,推荐使用ubuntu的包(sudo apt-get install …):
- open-vm-tools
- open-vm-tools-desktop
如果要使用共享文件夹(vmhgfs), 需要再安装vmware自带的那个VMware toools:
然后再重新安装自带的VMware Tools(这个才能有vmhgfs-fuse工具)
参考VMware support for Open VM Tools (2073803)
与主机进行文件共享
vmware-hgfsclientvmhgfs-fuse: 用--help查看用法
在Linux guest里mount共享的文件夹:
/usr/bin/vmhgfs-fuse .host:/ /home/user1/shares -o subtype=vmhgfs-fuse,allow_other
如果未成功,则根据提示修改一下fuse配置文件。
参考 https://docs.vmware.com/en/VMware-Workstation-Pro/15.0/com.vmware.ws.using.doc/GUID-AB5C80FE-9B8A-4899-8186-3DB8201B1758.html
VMware® Workstation 15优化设置
https://baijiahao.baidu.com/s?id=1651439365340078167
win7的svchost.exe(netsvcs)占用内存过高
用任务管理器-性能 发现内存占用过高(开机就能内存占用到三四G),点击其中的’资源管理器’打开,发现是svchost.exe(netsvcs)占用内存过高,甚至其单独占到一两G以上.
回到任务管理器-进程-显示所有用户的进程,找到占内存过高的那个svchost.exe,在其上面右键-转到服务,应该会发现其中有一项是Windows Update.如果不需要系统更新,就可以把这项服务关掉.
在任务管理器-服务-右下角的服务,打开服务配置,找到Windows Update,把它停止,并设置为手动启动或禁用.
参考: http://jingyan.baidu.com/article/e52e36154d3bf040c70c515b.html
Matlab的license问题
安装完matlab后,虽然在gui窗口已经指定了许可证license.lic文件了,但许可证仍未起效。
解决方法:
- 关闭matlab。
- 把crack的
libmwlmgrimpl.dll放到指定目录下覆盖官方文件(一般是C:\Program Files\MATLAB\R2022b\bin\win64\matlab_startup_plugins\lmgrimpl\libmwlmgrimpl.dll) - 在matlab的安装目录下新建
licenses目录,并把license.lic文件放在里面:C:\Program Files\MATLAB\R2022b\licenses\license.lic
启动matlab。
Mathematica修改默认输出风格
把输出风格从默认StandardForm修改成TraditionalForm
- Edit ▶ Preferences ▶ Advanced ▶ Open Option Inspector
- Cell Options ▶ New Cell Defaults ▶ CommonDefaultFormatTypes
- “Output” ▶ Change StandardForm to TraditionalForm
参考:https://mathematica.stackexchange.com/a/154222
notepad++
插件:
nppAStyle: https://github.com/ywx/NppAStyle
nppRegEx Helper: http://nppregexhelper.sourceforge.net/
Source Insight 4.0.0120
import argparse

"""
官方source insight Version 4.0.0120版本:
https://s3-us-west-2.amazonaws.com/assets.sourceinsight.com/download/v4/release/sourceinsight40120-setup.exe
"""

AUTHOR_TAG = "[Po->] "
PATCH_OFFSET = 0x1159F0
PATCH_VALUES = b'\xB8\x01\x00\x00\x00\xC3'
PATCH_FILE_PATH = r'C:\Users\Po\Desktop\sourceinsight4_test.exe'


def debug_info(msg, *args, **kwargs):
    print(AUTHOR_TAG+msg, *args, **kwargs)


def patch_si4(si4_path):
    """
    https://zhuanlan.zhihu.com/p/363734933
    直接Patch掉了激活界面及与服务器交互的激活线程
    """
    debug_info("Begin patch file...")
    with open(si4_path, "r+b") as f:
        f.seek(PATCH_OFFSET, 0)
        f.write(PATCH_VALUES)
        f.close()
        debug_info("Patch success!")


if __name__ == "__main__":
    parser = argparse.ArgumentParser()
    parser.add_argument('-f', '--si4file', metavar="<si4's abs path>")
    args = parser.parse_args()

    if args.si4file:
        si4_path = args.si4file
    else:
        exit("Please specify sourceinsight4.exe's absolute path!")

    patch_si4(si4_path)
Source Insight 4配置
Custom Commands:
- UltraEdit
"C:\Program Files\UltraEdit\uedit64.exe" %f/%l - SublimeText
- Atom
"C:\Users\yourname\AppData\Local\atom\app-1.14.3\atom.exe" %f:%l
Beyond compare 4试用时间
官方Windows安装包, 在安装的时候选择便携portable方式。
建议在安装完成后,在安装目录下先用git保存一个初始版本。
如果试用快要过期了, 则:
删除%APPDATA%\Scooter Software文件夹.
删除注册表: 把所有 HKEY_*** - SOFTWARE – Scooter Software 都删除.
可选地,在安装目录下,git clean -fdx恢复初始版本。
Windows10卸载wps office
如果无法卸载wps,可以使用 Revo Uninstaller
删除WPS遗留的qingnse64XXX.dll
删除WPS所在的Kingsoft文件夹时,报qingnse***.dll在资源管理器中打开,无法删除。
原因:qingnse64XXX.dll被wps注入到了文件管理器explorer…exe里了,所以被占用无法删除。
解决方法:
杀掉explorer.exe进程,然后用powershell(最好用管理员模式)命令行Remove-Item xxx删除上述文件。
具体方法见:
https://blog.csdn.net/u011643463/article/details/86515271
https://blog.csdn.net/u010921682/article/details/119824834 方法三
shadowsocks:IE属性LAN自动配置脚本设置
格式: http://127.0.0.1:1080/pac?t=年月日+时分秒+三或四位数
日期时间即启动ss的时刻。例如:
http://127.0.0.1:1080/pac?t=20160820111933959
http://127.0.0.1:1080/pac?t=201506011137581224
命令CMD窗口支持UTF-8编码:
- 运行CMD
- 输入chcp,回车查看当前编码,一般返回结果:[活动的代码页: 936]说明当前为简体中文GB2312编码。
- 输入chcp 65001,回车。其中65001是utf-8的代码页编号。
- 设置窗体属性,在“字体”标签页下的字体选择"Lucida Console"。
OK
Mac平台
更换brew镜像源
参考阿里云mirror和tuna mirror的配置方法,使用tuna mirror:
- https://developer.aliyun.com/mirror/homebrew
- https://mirrors.tuna.tsinghua.edu.cn/help/homebrew/
- https://mirrors.tuna.tsinghua.edu.cn/help/homebrew-bottles/
步骤:
- 更改brew源和core、cask等的源
brew update -v- 并在对应shell rc文件(.bashrc或.zshrc)里配置
HOMEBREW_BOTTLE_DOMAIN环境变量
NVIDIA
Architectures
https://www.nvidia.com/en-us/technologies/
GPU Compute Capability
https://developer.nvidia.com/cuda-gpus
通用
浏览器扩展
- adblock plus
- raindrop.io
- Hypothesis
- 沙拉查词
- ImTranslator
- Sourcegraph
- Dualsub - YouTube™ 双字幕
Tampermonkey- SkipTo Landmarks & Headings
google chrome浏览器扩展
Mouse Tooltip Translator- HTML Heading Highlighter
MultiHighlight- Raindrop.io
- Screen Shader
- Smart TOC
- YouTube™ dual subtitles
- 沉浸式翻译
- New Bing Anywhere
firefox浏览器扩展
- heading tag settings/markup
Bing美国url
Bing搜索:
https://www.bing.com/?cc=us&mkt=en-US&safeSearch=Off
https://www.bing.com/?cc=us&mkt=en-US&safeSearch=Off&setlang=en
https://www.bing.com/?cc=us&mkt=en-US&safeSearch=Off&setlang=en&ensearch=1
Bing Chat:
https://www.bing.com/search?q=Bing+AI&showconv=1&cc=US&mkt=en-US&safeSearch=Off&setlang=en

https://www.bing.com/chat?q=Microsoft+Copilot&cc=US&mkt=en-US&safeSearch=Off&setlang=en
修改css实现div等固定
很多文档是通过sphinx生成的,而有的生成的文件目录TOC会随着页面scroll而移出当前视野,给文档阅读带来一些不方便。
可以F12打开chrome检查工具,通过修改css来实现当前页面的临时改变。
例子1: beautiful soup4 文档
找到目录所在的位置即sphinxsidebarwrapper,添加style=设置position: fixed及其他样式:
<div class="sphinxsidebarwrapper" style="position: fixed; overflow-y: scroll; top: 0; bottom: 0; right: 0;">
例子2: Python doc 文档
找到目录所在的位置即sphinxsidebarwrapper,由于在页面scroll的时候,style里的top会动态改变,所以这里添加position: relative:
<div class="sphinxsidebarwrapper" style="position: relative; ...">
获取YouTube字幕文件
https://www.youtube.com/api/timedtext?v=......
参考 https://github.com/ableplayer/ableplayer/issues/251


 1万+
1万+

 被折叠的 条评论
为什么被折叠?
被折叠的 条评论
为什么被折叠?
 到【灌水乐园】发言


