


Vue.Js
今日内容
- Vue的概述
- Vue的快速入门
- Vue的语法
- 插值表达式
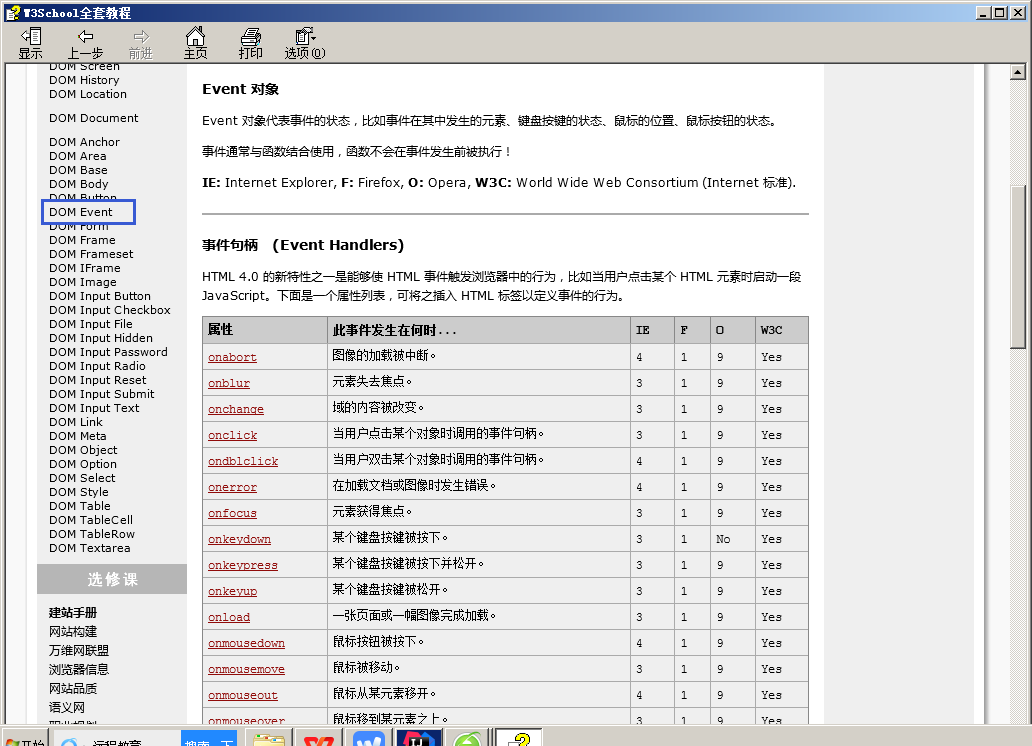
- 事件的绑定
- 数据的显示
- 逻辑判断和循环输出
- Vue的生命周期
- 8个生命周期的执行点
- 4个基本的
- 4个特殊的
- axios的ajax异步请求
- 和JQuery的ajax比较相似
- 综合案例
- 实现用户的查询列表和更新操作
资料说明
- vue的中文手册
- vuejs.pdf讲义
- 源码:案例的素材
- vue的demo:练习的知识点
一、Vue的快速入门
1、vue概述和MVVM说明
Vue.js是一个构建数据驱动的 web 界面的渐进式框架。通过尽可能简单的 API 实现响应的数据绑
定和组合的视图组件
之前的传统js代码就能 实现数据绑定等
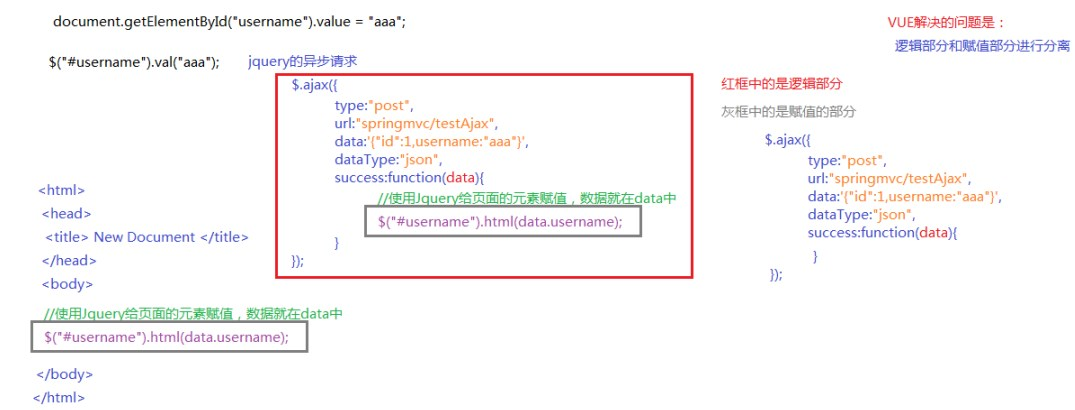
- 为什么使用vue呢--->MVVM模式
MVVM是Model-View-ViewModel的简写。它本质上就是MVC 的改进版。MVVM 就是将其中的View 的状态和行为
抽象化,让我们将视图 UI 和业务逻辑分开
- 例子:JQuery的异步请求
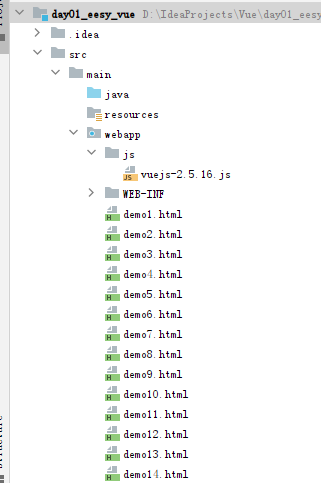
2、vue入门案例的前期准备
3、vue的入门案例
<wiz_code_mirror>
24
1
<!DOCTYPE html>
2
<html>
3
<head>
4
<meta charset="utf-8" />
5
<title>快速入门</title>
6
<script src="js/vuejs-2.5.16.js"></script>
7
</head>
8
<body>
9
<div id="app">
10
{{message}} <!--表示vue的插值表达式,将data中定义的数据显示到此处-->
11
</div>
12
</body>
13
<script>
14
//view model
15
//创建Vue对象
16
new Vue({
17
el:"#app",//由vue接管id为app的区域
18
data:{
19
message:"Hello Vue! EESY" //注意:此处不要加分号
20
}
21
})
22
</script>
23
</html>
二、Vue的语法
1、vue的插值表达式{{插值}}
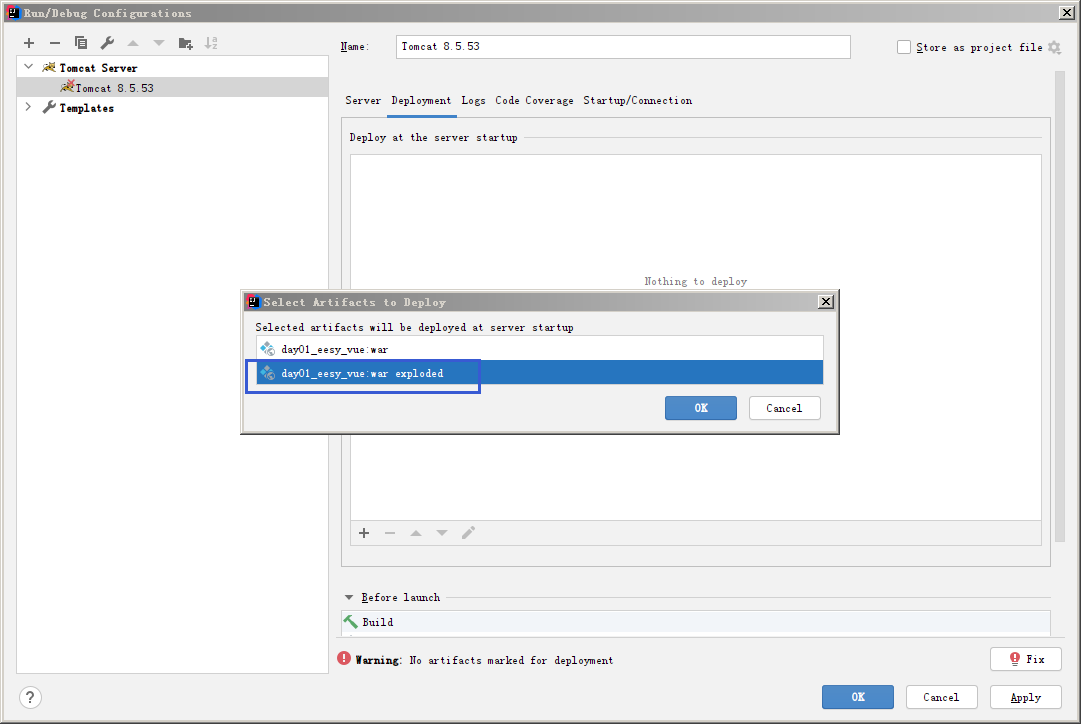
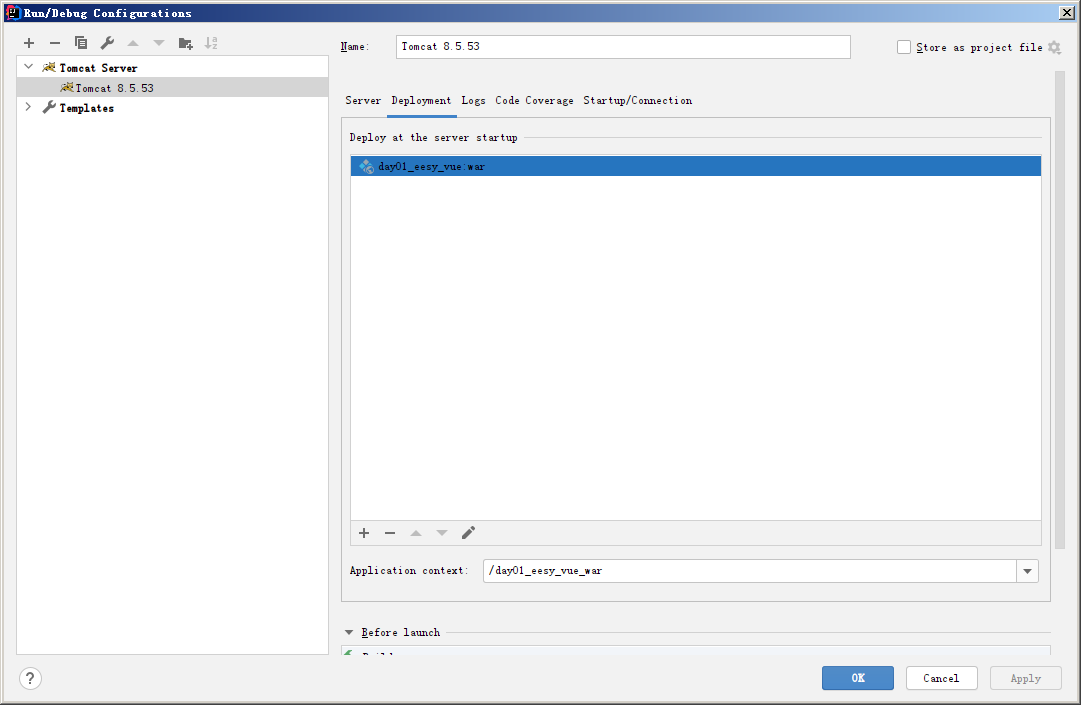
项目无需重启选择第二个
<wiz_code_mirror>
37
1
<!DOCTYPE html>
2
<html>
3
<head>
4
<meta charset="utf-8" />
5
<title>快速入门</title>
6
<script src="js/vuejs-2.5.16.js"></script>
7
</head>
8
<body>
9
<div id="app">
10
{{message}} <!--表示vue的插值表达式,将data中定义的数据显示到此处-->
11
<!--三元运算符-->
12
{{ true ? "OK" : "NO" }}
13
<!--数学运算-->
14
{{number*3.14}}
15
<!--插值表达式不支持变量的声明
16
{{var a = 1;}}
17
-->
18
<!--不支持if语句或代码块
19
{{if(a = 10){}}
20
-->
21
22
23
</div>
24
</body>
25
<script>
26
//view model
27
//创建Vue对象
28
new Vue({
29
el:"#app",//由vue接管id为app的区域
30
data:{
31
message:"Hello Vue! EESY", //注意:此处不要加分号,多个数据用逗号分隔
32
number:100
33
}
34
})
35
</script>
36
</html>
2、vue的v-on绑定点击事件(系统指令)
<wiz_code_mirror>
29
1
<!DOCTYPE html>
2
<html xmlns:v-on="http://www.w3.org/1999/xhtml">
3
<head>
4
<meta charset="utf-8" />
5
<title>v-on:click</title>
6
<script src="js/vuejs-2.5.16.js"></script>
7
</head>
8
<body>
9
<div id="app">
10
{{message}}
11
<button v-on:click="fun1('Vue v-on')">vue的onclick</button>
12
</div>
13
</body>
14
<script>
15
//view model
16
new Vue({
17
el:"#app",
18
data:{
19
message:"Hello Vue!"
20
},
21
methods:{
22
fun1:function (msg){
23
alert("hello");
24
this.message = msg;
25
}
26
}
27
})
28
</script>
29
</html>
3、vue的v-on键盘事件和阻止事件默认行为
传统js的方式
<wiz_code_mirror>
x
1
<!DOCTYPE html>
2
<html xmlns:v-on="http://www.w3.org/1999/xhtml">
3
4
<head>
5
<meta charset="utf-8" />
6
<title>v-on:keydown</title>
7
<script src="js/vuejs-2.5.16.js"></script>
8
</head>
9
10
<body>
11
<div id="app">
12
Vue:<input type="text" v-on:keydown="fun($event)">
13
<hr>
14
传统JS:<input type="text" onkeydown="showKeyCode()">
15
</div>
16
</body>
17
<script>
18
//view model
19
new Vue({
20
el:"#app",
21
methods:{
22
/* $event 是Vue中的事件对象,和我们传统js的event对象相同 */
23
fun:function (event) {
24
if (keyCode < 48 || keyCode > 57){
25
//不让键盘的按键起作用
26
//preventDefault() 通知浏览器不要执行与事件关联的默认动作。
27
event.preventDefault();
28
}
29
}
30
}
31
})
32
//定义方法,传统js的键盘按下时间
33
function showKeyCode(){
34
//alert("hahah")
35
//event对象、document对象和windows对象是一样的,可以不用定义直接使用
36
var keyCode = event.keyCode;
37
//alert(keyCode);
38
/*if (event.keyCode == 13){
39
alert("你按的是回车");
40
//可以限定只能输入数字,不能输入其他字符
41
}*/
42
if (keyCode < 48 || keyCode > 57){
43
//不让键盘的按键起作用
44
//preventDefault() 通知浏览器不要执行与事件关联的默认动作。
45
event.preventDefault();
46
}
47
}
48
</script>
49
50
</html>
4、vue的v-on鼠标移动事件和阻止事件传播
stopPropagation() :终止事件在传播过程的捕获、目标处理或起泡阶段进一步传播。调用该方法后,该节点上处理该事件的处理程序将被调用,事件不再被分派到其他节点。
<wiz_code_mirror>
58
1
<!DOCTYPE html>
2
<html xmlns:v-on="http://www.w3.org/1999/xhtml">
3
4
<head>
5
<meta charset="utf-8" />
6
<title>v-on:mouseover</title>
7
<style>
8
#div {
9
background-color: red;
10
width:300px;
11
height:300px;
12
}
13
</style>
14
<script src="js/vuejs-2.5.16.js"></script>
15
</head>
16
17
<body>
18
<div id="app">
19
<div @mouseover="fun1" id="div">
20
<textarea @mouseover="fun2($event)">这是一个文件域</textarea>
21
</div>
22
<!--<div v-on:mouseover="fun1" id="div">
23
<textarea v-on:mouseover="fun2($event)">这是一个文件域</textarea>
24
</div>-->
25
26
<!--<div onmouseover="divmouseover()" id="div">
27
<textarea onmouseover="textareamouseover()">这是一个文件域</textarea>
28
</div>-->
29
</div>
30
</body>
31
<script>
32
//view model
33
/**
34
* @事件名称 就是v-on:事件名称的简写方式
35
*/
36
new Vue({
37
el:"#app",
38
methods:{
39
fun1:function (){
40
alert("鼠标悬停在div上");
41
},
42
fun2:function () {
43
alert("鼠标悬停在textarea上了");
44
event.stopPropagation();
45
}
46
}
47
})
48
//传统的js方式
49
function divmouseover(){
50
alert("鼠标移动到了div上");
51
}
52
function textareamouseover() {
53
alert("鼠标移动到了textarea上");
54
event.stopPropagation();
55
}
56
</script>
57
</html>
5、vue中的事件修饰符
Vue.js 为 v-on 提供了事件修饰符来处理 DOM 事件细节,如:event.preventDefault() 或 event.stopPropagation()。
<wiz_code_mirror>
55
1
<!DOCTYPE html>
2
<html xmlns:v-on="http://www.w3.org/1999/xhtml">
3
4
<head>
5
<meta charset="utf-8" />
6
<title>v-on:事件修饰符</title>
7
<style>
8
#div {
9
background-color: red;
10
width:300px;
11
height:300px;
12
}
13
</style>
14
<script src="js/vuejs-2.5.16.js"></script>
15
</head>
16
17
<body>
18
<div id="app">
19
<form v-on:submit.prevent action="http://www.baidu.com" method="post">
20
<input type="submit" value="提交">
21
</form>
22
<!--表单验证-->
23
<!--<form action="http://www.baidu.com" method="post" onsubmit="return checkForm()">
24
<input type="submit" value="提交">
25
</form>-->
26
<hr>
27
<div @mouseover="fun1" id="div">
28
<textarea @mouseover.stop="fun2($event)">这是一个文件域</textarea>
29
</div>
30
</div>
31
</body>
32
<script>
33
//view model
34
new Vue({
35
el:"#app",
36
methods:{
37
fun1:function (){
38
alert("鼠标悬停在div上");
39
},
40
fun2:function () {
41
alert("鼠标悬停在textarea上了");
42
}
43
}
44
});
45
//传统js方式
46
function checkForm(){
47
alert(1);
48
//表单验证必须有一个明确的boolean类型返回值
49
//在应用验证方法时,必须加上return 方法名
50
return false;
51
}
52
</script>
53
</html>
6、vue中v-text和v-html以及v-bind的使用
<wiz_code_mirror>
35
1
<!DOCTYPE html>
2
<html>
3
4
<head>
5
<meta charset="utf-8" />
6
<title>v-on:按键修饰符</title>
7
8
<script src="js/vuejs-2.5.16.js"></script>
9
</head>
10
11
<body>
12
<div id="app">
13
<div v-text="message"></div>
14
<div v-html="message"></div>
15
16
<!--<div id="div1"></div>
17
<div id="div2"></div>-->
18
</div>
19
</body>
20
<script>
21
//view model
22
new Vue({
23
el:"#app",
24
data:{
25
message:"<h1>hello,Vue</h1>"
26
}
27
})
28
//传统js的innerText和innerHtml
29
window.onload = function () {
30
document.getElementById("div1").innerHTML="<h1>hello</h1>";
31
document.getElementById("div2").innerText="<h1>hello</h1>";
32
}
33
</script>
34
35
</html>
v-bind绑定操作
<wiz_code_mirror>
34
1
<!DOCTYPE html>
2
<html xmlns:v-bind="http://www.w3.org/1999/xhtml">
3
4
<head>
5
<meta charset="utf-8" />
6
<title>v-model</title>
7
<script src="js/vuejs-2.5.16.js"></script>
8
<!--<style type="text/css">
9
10
</style>-->
11
</head>
12
13
<body>
14
<div id="app">
15
<font size="5" v-bind:color="ys1">传智播客</font>
16
<font size="5" :color="ys2">黑马程序员</font>
17
</div>
18
</body>
19
<script>
20
//view model
21
//v-bind绑定操作
22
//插值表达式不能用于html标签的属性取值
23
//要想给html标签的属性设置变量的值,需要使用v-bind
24
//v-bind也可以简写,即只写:
25
new Vue({
26
el:"#app",
27
data:{
28
ys1:"red",
29
ys2:"green"
30
}
31
})
32
</script>
33
34
</html>
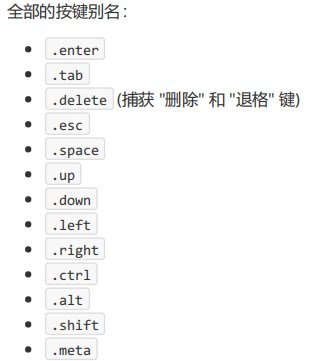
7、vue中的按键修饰符
<wiz_code_mirror>
x
1
<!DOCTYPE html>
2
<html xmlns:v-on="http://www.w3.org/1999/xhtml">
3
4
<head>
5
<meta charset="utf-8" />
6
<title>v-on:按键修饰符</title>
7
8
<script src="js/vuejs-2.5.16.js"></script>
9
</head>
10
11
<body>
12
<div id="app">
13
Vue:<input type="text" v-on:keydown.enter="fun1()">
14
</div>
15
</body>
16
<script>
17
//view model
18
new Vue({
19
el:"#app",
20
methods:{
21
fun1:function (){
22
alert("按下的是回车")
23
}
24
}
25
})
26
</script>
27
28
</html>
8、vue中的v-for的使用
遍历数组
<wiz_code_mirror>
24
1
<!DOCTYPE html>
2
<html>
3
<head>
4
<meta charset="utf-8" />
5
<title>v-for遍历数组</title>
6
<script src="js/vuejs-2.5.16.js"></script>
7
</head>
8
<body>
9
<div id="app">
10
<ul>
11
<li v-for="(item,index) in arr ">{{item}}={{index}}</li>
12
</ul>
13
</div>
14
</body>
15
<script>
16
//view model
17
new Vue({
18
el:"#app",
19
data:{
20
arr:[1,2,3,4,5]
21
}
22
})
23
</script>
24
</html>
遍历json格式的数据
<wiz_code_mirror>
30
1
<!DOCTYPE html>
2
<html>
3
<head>
4
<meta charset="utf-8" />
5
<title>v-for遍历对象</title>
6
<script src="js/vuejs-2.5.16.js"></script>
7
</head>
8
<body>
9
<div id="app">
10
<ul>
11
<li v-for="(key,value) in product ">{{value}}==={{key}}</li>
12
</ul>
13
</div>
14
</body>
15
<script>
16
//view model
17
new Vue({
18
el:"#app",
19
data:{
20
/*json格式的数据*/
21
product:{
22
id:1,
23
name:"笔记本电脑",
24
price:5000
25
}
26
}
27
})
28
</script>
29
</html>
json类型的数组
<wiz_code_mirror>
44
1
<!DOCTYPE html>
2
<html>
3
4
<head>
5
<meta charset="utf-8" />
6
<title>v-for遍历对象</title>
7
<script src="js/vuejs-2.5.16.js"></script>
8
</head>
9
10
<body>
11
<div id="app">
12
<table border="1">
13
<tr>
14
<td>序号号</td>
15
<td>编号</td>
16
<td>名称</td>
17
<td>价格</td>
18
</tr>
19
<tr v-for="(product,index) in products">
20
<td>{{index}}</td>
21
<td>{{product.id}}</td>
22
<td>{{product.name}}</td>
23
<td>{{product.price}}</td>
24
</tr>
25
</table>
26
</div>
27
</body>
28
<script>
29
//view model
30
new Vue({
31
el:"#app",
32
data:{
33
/*json格式的数据*/
34
products:[
35
{ id:1, name:"笔记本电脑", price:5000 },
36
{ id:2, name:"冲牙器", price:399 },
37
{ id:3, name:"剃须刀", price:199 }
38
]
39
40
}
41
})
42
</script>
43
44
</html>
9、vue中的v-model的使用(取vue中的值)
<wiz_code_mirror>
29
1
<!DOCTYPE html>
2
<html>
3
<head>
4
<meta charset="utf-8" />
5
<title>v-model</title>
6
<script src="js/vuejs-2.5.16.js"></script>
7
</head>
8
<body>
9
<div id="app">
10
<form action="" method="post">
11
用户名:<input type="text" name="username" v-model="user.username"><br>
12
密码:<input type="text" name="password" v-model="user.password">
13
</form>
14
</div>
15
</body>
16
<script>
17
//view model
18
new Vue({
19
el:"#app",
20
data:{
21
user:{
22
username:"test",
23
password:"1234"
24
}
25
}
26
})
27
</script>
28
</html>
29
10、vue中的v-show和v-if的使用
用于控制是否显示
v-if是根据表达式的值来决定是否渲染元素
v-show是根据表达式的值来切换元素的display css属性
<wiz_code_mirror>
30
1
<!DOCTYPE html>
2
<html>
3
<head>
4
<meta charset="utf-8" />
5
<title>v-if与v-show</title>
6
<script src="js/vuejs-2.5.16.js"></script>
7
</head>
8
<body>
9
<div id="app">
10
<span v-if="flag">传智播客</span>
11
<span v-show="flag">itcast</span>
12
<button @click="toggle">切换</button>
13
</div>
14
</body>
15
<script>
16
//view model
17
new Vue({
18
el:"#app",
19
data:{
20
flag:false
21
},
22
methods:{
23
toggle:function (){
24
this.flag = !this.flag;
25
}
26
}
27
})
28
</script>
29
</html>
11、vue的生命周期介绍
<wiz_code_mirror>
67
1
<!DOCTYPE html>
2
<html>
3
4
<head>
5
<meta charset="utf-8" />
6
<title>vuejs生命周期</title>
7
<script src="js/vuejs-2.5.16.js"></script>
8
</head>
9
10
<body>
11
<div id="app">
12
{{message}}
13
</div>
14
</body>
15
<script>
16
var vm = new Vue({
17
el: "#app",
18
data: {
19
message: 'hello world'
20
},
21
beforeCreate: function() {
22
console.log(this);
23
showData('创建vue实例前', this);
24
},
25
created: function() {
26
showData('创建vue实例后', this);
27
},
28
beforeMount: function() {
29
showData('挂载到dom前', this);
30
},
31
/*挂载*/
32
mounted: function() {
33
showData('挂载到dom后', this);
34
},
35
beforeUpdate: function() {
36
showData('数据变化更新前', this);
37
},
38
updated: function() {
39
showData('数据变化更新后', this);
40
},
41
beforeDestroy: function() {
42
vm.test = "3333";
43
showData('vue实例销毁前', this);
44
},
45
destroyed: function() {
46
showData('vue实例销毁后', this);
47
}
48
});
49
50
function realDom() {
51
console.log('真实dom结构:' + document.getElementById('app').innerHTML);
52
}
53
54
function showData(process, obj) {
55
console.log(process);
56
console.log('data 数据:' + obj.message)
57
console.log('挂载的对象:')
58
console.log(obj.$el)
59
realDom();
60
console.log('------------------')
61
console.log('------------------')
62
}
63
//vm.message = "good...";
64
vm.$destroy();
65
</script>
66
67
</html>
12、vue的ajax以及案例的介绍
vue-resource是Vue.js的插件提供了使用XMLHttpRequest或JSONP进行Web请求和处理响应的服务。 当vue更新
到2.0之后,作者就宣告不再对vue-resource更新,而是推荐的axios
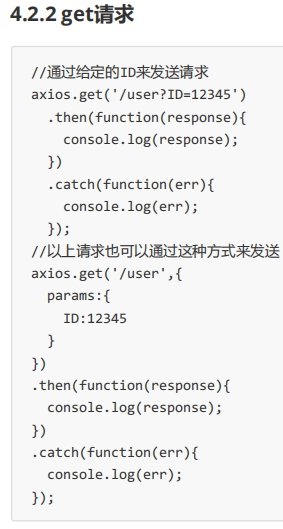
Axios 是一个基于 promise 的 HTTP 库,可以用在浏览器和 node.js 中
可以使用script引用:
<script src="https://unpkg.com/axios/dist/axios.min.js"></script>


三、案例
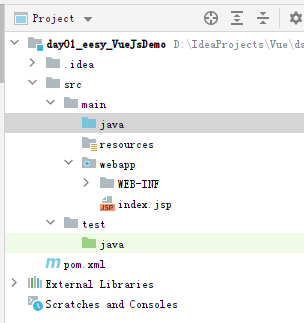
1、创建数据库和工程

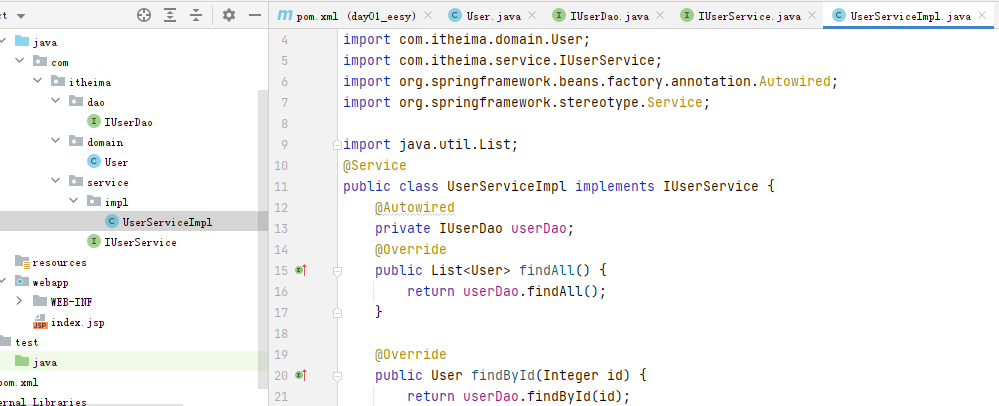
2、编写实体类持久层和业务层代码
需求:完成用户的查询和修改功能
3、导入spring配置文件并编写测试类测试
<wiz_code_mirror>
42
1
package com.itheima.test;
2
3
import com.itheima.domain.User;
4
import com.itheima.service.IUserService;
5
import org.junit.Test;
6
import org.junit.runner.RunWith;
7
import org.springframework.beans.factory.annotation.Autowired;
8
import org.springframework.test.context.ContextConfiguration;
9
import org.springframework.test.context.junit4.SpringJUnit4ClassRunner;
10
11
import java.util.List;
12
13
/**
14
* 用户的业务层测试
15
*/
16
@RunWith(SpringJUnit4ClassRunner.class)
17
@ContextConfiguration(locations = "classpath:applicationContext.xml")
18
public class UserTest {
19
@Autowired
20
private IUserService userService;
21
22
@Test
23
public void testFindAll(){
24
List<User> users = userService.findAll();
25
System.out.println(users);
26
}
27
@Test
28
public void testFindOne(){
29
User user = userService.findById(2);
30
System.out.println(user);
31
}
32
@Test
33
public void testUpdate(){
34
User user = userService.findById(5);
35
System.out.println("修改之前的用户"+user);
36
user.setAge(55);
37
userService.updateUser(user);
38
User user1 = userService.findById(5);
39
System.out.println(user1);
40
}
41
}
4、导入springmvc的配置并编写控制器代码

<wiz_code_mirror>
42
1
package com.itheima.web.controller;
2
import com.itheima.domain.User;
3
import com.itheima.service.IUserService;
4
import org.springframework.beans.factory.annotation.Autowired;
5
import org.springframework.stereotype.Controller;
6
import org.springframework.web.bind.annotation.RequestMapping;
7
import org.springframework.web.bind.annotation.ResponseBody;
8
import java.util.List;
9
@Controller
10
@RequestMapping("/user")
11
@ResponseBody
12
public class UserController {
13
@Autowired
14
private IUserService service;
15
/**
16
* 查询所有,浏览器解析不了
17
* @return
18
*/
19
@RequestMapping("/findAll")
20
public List<User> findAll(){
21
return service.findAll();
22
}
23
/**
24
* 根据id查询
25
* @param id
26
* @return
27
*/
28
@RequestMapping("/findById")
29
public User findById(Integer id){
30
return service.findById(id);
31
}
32
@RequestMapping("/updateUser")
33
public void updateUser(User user){
34
service.updateUser(user);
35
}
36
}
5、修改页面中引入资源的路径并让vue接管div
ctrl+shift+del,清除cookies
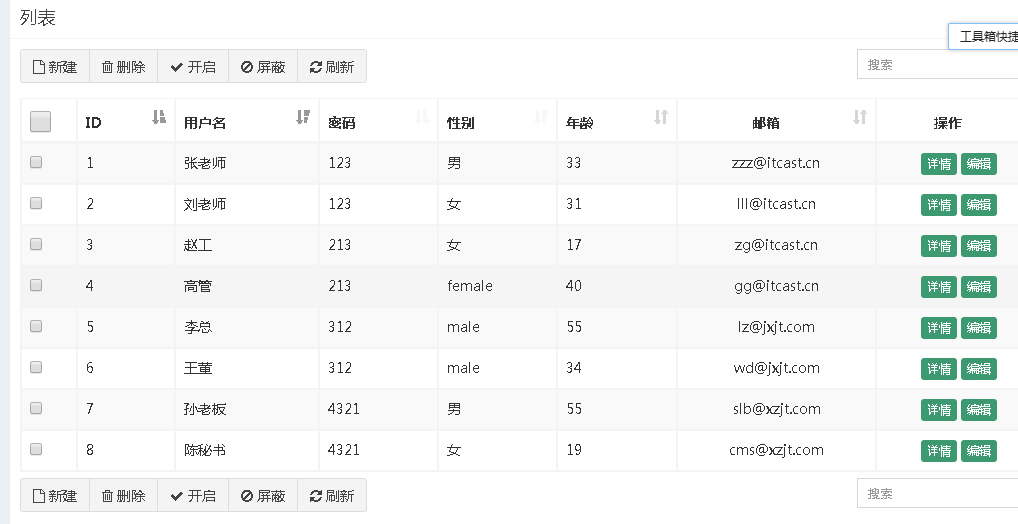
6、编写vuejs代码实现查询所有并分析解决遇到的问题
<wiz_code_mirror>
45
1
new Vue({
2
el:"#app",
3
data:{
4
user:{
5
id:"",
6
username:"",
7
password:"",
8
sex:"",
9
age:"",
10
email:""
11
},
12
userList:[]
13
},
14
methods:{
15
findAll:function (){
16
//在当前方法中定义一个变量,表名是Vue对象
17
var _this = this;
18
// Make a request for a user with a given ID
19
axios.get('/day01_eesy_VueJsDemo/user/findAll.do')
20
.then(function (response) {
21
//axios中的this表示是 axios中的对象
22
_this.userList = response.data;//响应数据给userList赋值
23
// handle success
24
console.log(response);
25
})
26
.catch(function (error) {
27
// handle error
28
console.log(error);
29
})
30
.then(function () {
31
// always executed
32
});
33
34
},
35
findById:function (userid){
36
37
},
38
update:function (user){
39
40
}
41
},
42
created:function (){ //表示当页面加载时,触发请求,查询所有
43
this.findAll();
44
}
45
})
7、编写根据Id查询和更新方法并解决更新时遇到的问题


 487
487

 被折叠的 条评论
为什么被折叠?
被折叠的 条评论
为什么被折叠?
 到【灌水乐园】发言


