


演示地址:万维组态
1、新增左侧图元模块
1.1、添加菜单
编辑 Sidebar.js 文件,打开 Sidebar.js 文件,找到 Sidebar.prototype.categoryMenus 属性;

以控制组件栏目为例,在中添加如下实体
Sidebar.prototype.categoryMenus = [
    {
        id: 4,
        name: '控制组件',
        defaultSrc: mxUtils.staticImg('/rcscada/menu/ic_menu_control_default.svg'),
        checkedSrc: mxUtils.staticImg('/rcscada/menu/ic_menu_control_check.svg'),
        checked: false,
        funcNames: ['addCustomStateImagePalette'],
    },
]
在上面代码中,我们增加了一个
控制组件实体,name为菜单名字,defaultSrc为默认图标, checkedSrc为选中图标,funcNames为添加子分组的方法名字;注意 funcNames 是一个方法名数组,意味着可以定义多个分组, funcNames 中的方法是定义在 Sidebar.prototype 属性上的 如上面的 addCustomStateImagePalette 则是Sidebar.prototype.addCustomStateImagePalette方法;由于静态图元太多会导致Sidebar.js文件非常的大,会出现编译卡顿问题, 所以我们把 Sidebar.js 拆分, 比如我们在CustomExpands.jsaddCustomStateImagePalette方法,然后在 Sidebar.js 文件中引入 CustomExpands.js,import {CustomExpands} from './sidebar/CustomExpands';就可以避免 Sidebar.js 文件大的问题; addCustomStateImagePalette 方法也能挂载到 Sidebar.prototype 上;
1.2、添加分组
编辑 CustomExpands.js 文件,打开 CustomExpands.js 文件,在 CustomExpands.js中找到 Sidebar.prototype.addCustomStateImagePalette 方法的定义如下:
Sidebar.prototype.addCustomStateImagePalette= function () {
    const fns = [];
    let closeImg = `/rcscada/images/usr/switch/1.svg`;
    let openImg = `/rcscada/images/usr/switch/2.svg`;
    let s = `shape=mxgraph.rc.mxRc_stateSwitch;readonly=1;rcDprop=openCloseValues;igDprop=commonStrokeColor;openStateImg=${openImg};closeStateImg=${closeImg};html=1;shadow=0;dashed=0;strokeWidth=1;stateValue=0;title=切换开关;opacity=100;fillColor=none;${mxConstants.STYLE_VERTICAL_LABEL_POSITION}=bottom;${mxConstants.STYLE_VERTICAL_ALIGN}=top;`;
    fns.push(this.createVertexTemplateEntry(s, 150, 150, '', '切换开关', true, '', '', mxUtils.staticImg(closeImg), ''));
    let defaultImg = `/rcscada/images/usr/light/1.png`;
    s = `shape=mxgraph.rc.mxRc_stateImage;readonly=1;igDprop=commonStrokeColor;rcSprop=defaultImg;rcDprop=stateImageValues;defaultImg=${defaultImg};stateImage=;html=1;shadow=0;dashed=0;strokeWidth=1;stateValue=0;title=状态图片1;opacity=100;fillColor=none;${mxConstants.STYLE_VERTICAL_LABEL_POSITION}=bottom;${mxConstants.STYLE_VERTICAL_ALIGN}=top;`;
    fns.push(this.createVertexTemplateEntry(s, 150, 150, '', '状态图片', true, '', '', mxUtils.staticImg(defaultImg), ''));
    defaultImg = `/rcscada/menu/ic_menu_text.svg`;
    s = 'text;rcDprop=stateTextValues;readonly=1;html=1;strokeColor=none;fillColor=none;align=center;verticalAlign=middle;whiteSpace=wrap;rounded=0;';
    fns.push(this.createVertexTemplateEntry(s, 200, 100, '文字', '状态文字', true, '', '', mxUtils.staticImg(defaultImg), ''));
    s = 'text;rcDprop=textOutputValues;html=1;strokeColor=#000000;fillColor=#FFFFFF;align=center;verticalAlign=middle;whiteSpace=wrap;rounded=2;';
    fns.push(this.createVertexTemplateEntry(s, 200, 100, '文字', '变量文本', true, '', '', mxUtils.staticImg(defaultImg), ''));

    defaultImg = `/rcscada/menu/ic_menu_pip_flow.gif`;
    fns.push(this.createEdgeTemplateEntry(
        'endArrow=none;html=1;endArrow=none;endFill=0;enableFlow=1;strokeWidth=10;strokeColor=#28E8D8;pipWidth=13;pipDash=10;strokeBgColor=#312727;flowDirection=1;',
        200, 200, '', '流动条', null, null, null, true, mxUtils.staticImg(defaultImg), ''));

    defaultImg = `/rcscada/menu/ic_menu_trough.svg`;//troughMinScale=0;troughMaxScale=100;
    s = `shape=mxgraph.rc.mxRc_squareTrough;igDprop=commonStrokeColor;rcDprop=troughLiquidProgressValues;rcSprop=troughMinScale,troughMaxScale,troughBorderWidth,troughBorderRadius,troughBorderColor,troughBackgroundColor,troughLiquidColor;troughMinScale=0;troughMaxScale=100;troughBorderWidth=5;troughBorderRadius=5;troughBorderColor=#000000;troughBackgroundColor=#FFFFFF;troughLiquidColor=#00AAFF;html=1;shadow=0;dashed=0;strokeWidth=1;stateValue=0;title=水槽;opacity=100;fillColor=none;${mxConstants.STYLE_VERTICAL_LABEL_POSITION}=bottom;${mxConstants.STYLE_VERTICAL_ALIGN}=top;`;
    fns.push(this.createVertexTemplateEntry(s, 200, 200, '', '液体容器', true, '', '', mxUtils.staticImg(defaultImg), ''));

    //readonly == 1 时 showFontStyle 是否显示字体设置面板 1 显示 默认不显示
    defaultImg = `/rcscada/menu/ic_menu_shuzi_time.svg`;
        s = `shape=mxgraph.rc.mxRc_shu_zi_time;rcDprop=shuziTimeValues;showFontStyle=1;readonly=1;timeFormat=0;igDprop=commonStrokeColor;rcSprop=timeFormat;html=1;shadow=0;dashed=0;strokeWidth=1;stateValue=0;title=数字日期;opacity=100;fillColor=none;${mxConstants.STYLE_VERTICAL_LABEL_POSITION}=bottom;${mxConstants.STYLE_VERTICAL_ALIGN}=middle;`;
    fns.push(this.createVertexTemplateEntry(s, 180, 180, '', '数字日期', true, '', '', mxUtils.staticImg(defaultImg), ''));

    defaultImg = `/rcscada/menu/ic_menu_video_play.svg`;
    s = `shape=mxgraph.rc.mxRc_video_play;rcDprop=videoPlayerValues;readonly=1;igDprop=commonStrokeColor,commonFontColor;html=1;shadow=0;dashed=0;strokeWidth=0;title=点播直播;opacity=100;fillColor=none;${mxConstants.STYLE_VERTICAL_LABEL_POSITION}=bottom;${mxConstants.STYLE_VERTICAL_ALIGN}=top;`;
    fns.push(this.createVertexTemplateEntry(s, 200, 120, '', '点播/直播', true, '', '', mxUtils.staticImg(defaultImg), ''));

    defaultImg = `/rcscada/menu/ic_menu_thermometer.png`;
    s = `shape=mxgraph.rc.mxRc_thermometer;readonly=1;rcDprop=scaleValValues;rcSprop=showScale,bgFillColor1,bgFillColor2,minScale,maxScale,smallUnitScale,bigUnitScale,scaleValDuration,scaleTransX,scaleFontSize,scaleColor,scaleFontColor;scaleTransX=0.0;scaleColor=#528CFF;bgFillColor1=#F8D7D1;bgFillColor2=#FF5D3C;igDprop=commonStrokeColor,commonFontColor;html=1;shadow=0;dashed=0;showScale=1;scaleValDuration=1.0;minScale=0;maxScale=100;smallUnitScale=2;bigUnitScale=20;strokeWidth=1;strokeColor=#528CFF;fontColor=#528CFF;fontSize=12;title=温度计;opacity=100;fillColor=none;aspect=fixed;${mxConstants.STYLE_VERTICAL_LABEL_POSITION}=bottom;${mxConstants.STYLE_VERTICAL_ALIGN}=top;`;
    fns.push(this.createVertexTemplateEntry(s, 120, 200, '', '温度计', true, '', '', mxUtils.staticImg(defaultImg), ''));

    defaultImg = `/rcscada/menu/ic_menu_rcgauge1.png`;
    s = `shape=mxgraph.rc.mxRc_gauge1;readonly=1;rcDprop=scaleValValues;rcSprop=showScale,bgFillColor1,bgFillColor2,minScale,maxScale,smallUnitScale,bigUnitScale,scaleValDuration,scaleTransX,scaleFontSize,scaleColor,scaleFontColor;perimeterSpacing=40;scaleTransX=0.0;scaleColor=#528CFF;bgFillColor1=#F8D7D1;bgFillColor2=#FF5D3C;igDprop=commonStrokeColor,commonFontColor;html=1;shadow=0;dashed=0;showScale=1;scaleValDuration=1.0;minScale=0;maxScale=100;smallUnitScale=2;bigUnitScale=20;strokeWidth=1;strokeColor=#528CFF;fontColor=#528CFF;fontSize=12;title=计量器;opacity=100;fillColor=none;${mxConstants.STYLE_VERTICAL_LABEL_POSITION}=bottom;${mxConstants.STYLE_VERTICAL_ALIGN}=top;`;
    fns.push(this.createVertexTemplateEntry(s, 150, 200, '', '计量器', true, '', '', mxUtils.staticImg(defaultImg), ''));

    defaultImg = `/rcscada/menu/ic_menu_htmlInput.png`;
    s = `shape=mxgraph.rc.mxRc_htmlInput;showFontStyle=1;placeholderText=请输入;readonly=1;rcDprop=htmlTextInputDefaultValues;igDprop=commonStrokeColor,commonFontColor;html=1;shadow=0;dashed=0;strokeWidth=1;strokeColor=#528CFF;fontColor=#333;fontSize=12;title=文本域;fillColor=none;${mxConstants.STYLE_VERTICAL_LABEL_POSITION}=bottom;${mxConstants.STYLE_VERTICAL_ALIGN}=top;`;
    fns.push(this.createVertexTemplateEntry(s, 200, 60, '', '文本框', true, '', '', mxUtils.staticImg(defaultImg), ''));

    defaultImg = `/rcscada/menu/ic_menu_htmlTextArea.png`;
    s = `shape=mxgraph.rc.mxRc_htmlTextarea;showFontStyle=1;placeholderText=请输入;textareaRows=4;readonly=1;rcDprop=htmlTextareaDefaultValues;igDprop=commonStrokeColor,commonFontColor;html=1;shadow=0;dashed=0;strokeWidth=1;strokeColor=#528CFF;fontColor=#333;fontSize=12;title=文本域;fillColor=none;${mxConstants.STYLE_VERTICAL_LABEL_POSITION}=bottom;${mxConstants.STYLE_VERTICAL_ALIGN}=top;`;
    fns.push(this.createVertexTemplateEntry(s, 300, 120, '', '文本域', true, '', '', mxUtils.staticImg(defaultImg), ''));
    this.addPaletteFunctions('mxRc_stateSwitch', '变量控制', true, fns);
};
在上面代码中, 我们定义了一个分组,名为 变量控制, const fns = [];中存放的就是我们的静态图元;
2、定义静态图元
在上面步骤中我们已经添加好了分组,接下俩就是在分组中添加图元了;

2.1、添加图元
新增分组时使用了 addPaletteFunctions方法:
Sidebar.prototype.addPaletteFunctions = function (id, title, expanded, fns) {
    this.addPalette(id, title, expanded, mxUtils.bind(this, function (content) {
        for (var i = 0; i < fns.length; i++) {
            content.appendChild(fns[i](content));
        }
    }));
};addPaletteFunctions方法接受四个参数: id, title, expanded, fns; 其中 fns中存放的就是我们要添加的图元;
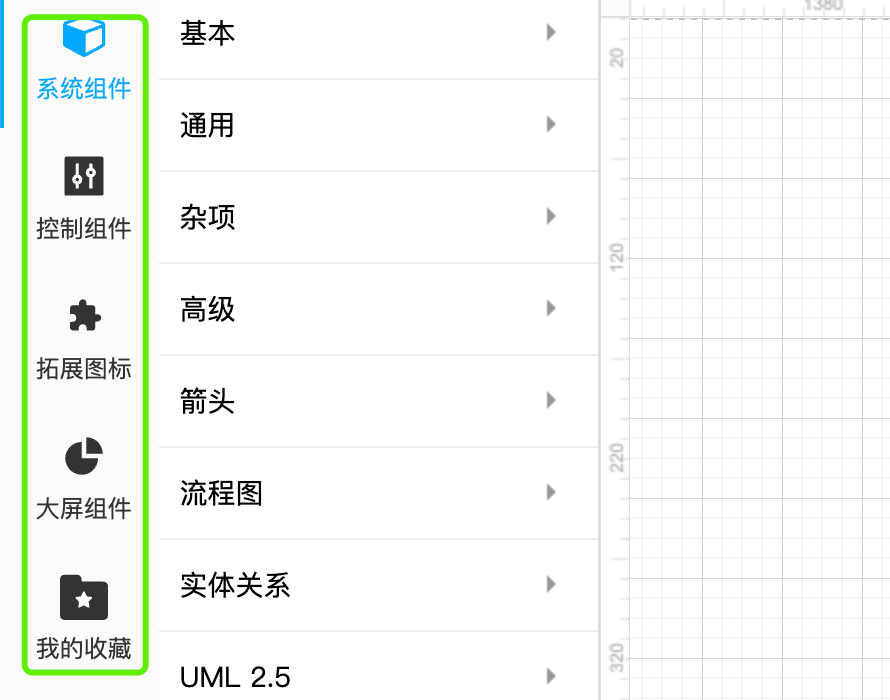
以上图为例我们新增一个开关图元,代码如下:
let closeImg = `/rcscada/images/usr/switch/1.svg`;
let openImg = `/rcscada/images/usr/switch/2.svg`;
let s = `shape=mxgraph.rc.mxRc_stateSwitch;readonly=1;rcDprop=openCloseValues;igDprop=commonStrokeColor;openStateImg=${openImg};closeStateImg=${closeImg};html=1;shadow=0;dashed=0;strokeWidth=1;stateValue=0;title=切换开关;opacity=100;fillColor=none;${mxConstants.STYLE_VERTICAL_LABEL_POSITION}=bottom;${mxConstants.STYLE_VERTICAL_ALIGN}=top;`;
fns.push(this.createVertexTemplateEntry(s, 150, 150, '', '切换开关', true, '', '', mxUtils.staticImg(closeImg), ''));
其中 let s中定义了图元的style样式,150, 150是图元初始化宽高,'切换开关'是图元名称; let s的 shape属性指定了图元的渲染类;
2.2、图元渲染类
像上面 开关图元的渲染类就是 mxRc_stateSwitch.js,那么为什么是mxRc_stateSwitch.js 类呢?
其实在mxRc_stateSwitch.js中,我们定义了如下 SHAPE_NAME
mxRc_stateSwitch.prototype.cst = {
    SHAPE_NAME: 'mxgraph.rc.mxRc_stateSwitch',
};
然后在 ShapesExpands.js 文件中,我们注册了 shape=mxgraph.rc.mxRc_stateSwitch的图元的渲染类就是 [mxRc_stateSwitch.js]类;
mxCellRenderer.registerShape(mxRc_stateSwitch.prototype.cst.SHAPE_NAME, mxRc_stateSwitch);注意:
ShapesExpands.js就是注册图元渲染类的地方,所有自定义图元都在这里注册;
2.3、图元渲染回调方法 在渲染类中后有一个属性方法 paintVertexShape
比如上面 mxRc_stateSwitch.js中的 mxRc_stateSwitch.prototype.paintVertexShape = function (c, x, y, w, h)
我们就可以在这个方法中执行自己的逻辑,详细请参考已有注册类;
如需了解更多关于万维组态,请添加微信:


 329
329


 被折叠的 条评论
为什么被折叠?
被折叠的 条评论
为什么被折叠?
 到【灌水乐园】发言


