


 本文介绍了Android中AlertDialog的创建和使用,包括设置图标、标题、消息、自定义布局以及按钮监听。同时,详细讲解了PopupWindow的常见方法,如setContentView、showAsDropDown、setFocusable等,并展示了如何设置动画、触摸事件以及关闭弹窗。文中提供了实例代码展示如何弹出和定位PopupWindow。
一.AlertDialog
1.实现方式
| AlertDialog . Builder builder = new AlertDialog . Builder ( context ); | 构建 Dialog 的各种参数 |
| Builder . setlcon ( int iconld ); | 添加 ICON |
| Builder . setTitle ( CharSequence title ); | 添加标题 |
| Builder . setMessage ( CharSequence message ); | 添加消息 |
| Builder . setView ( View view ); | 设置自定义布局 |
| Builder . create (); | 创建 Dialog |
| Builder . show (); | 显示对话框 |
| setPositiveButton | 确定按钮 |
| setNegativeButton | 取消按钮 |
| setNeutralButton | 中间按钮 |
1.1注意细节写法
public void leoClick(View view) {
AlertDialog.Builder builder = new AlertDialog.Builder(this);
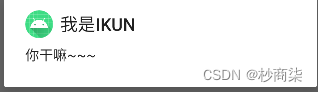
builder.setIcon(R.mipmap.ic_launcher)
.setTitle("我是IKUN")
.setMessage("你干嘛~~~")
.create()
.show();
}后两项create和show必须放后面前三项可以任意调换位置,
create返回的是AlertDialog show在AlertDialog 中
在activity_main.xml中写下:
   <Button
        android:text="坤坤集合"
        android:onClick="leoClick"
        android:layout_width="wrap_content"
        android:layout_height="wrap_content"/>
显示效果如图:
1.2设置下部三个按钮
.setPositiveButton("确定", new DialogInterface.OnClickListener() {
                    @Override
                    public void onClick(DialogInterface dialog, int which) {

                    }
                })
                .setNegativeButton("取消", new DialogInterface.OnClickListener() {
                    @Override
                    public void onClick(DialogInterface dialog, int which) {

                    }
                })
                .setNeutralButton("中间", new DialogInterface.OnClickListener() {
                    @Override
                    public void onClick(DialogInterface dialog, int which) {

                    }
                })
效果如图所示:
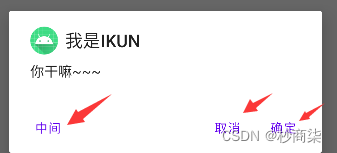
排布根据不同的型号,是不同的
1,3自定义布局设置.setView(dialogView)样式
View dialogView = getLayoutInflater().inflate(R.layout.dialog_view, null);.setView(dialogView)
<LinearLayout
    xmlns:android="http://schemas.android.com/apk/res/android"
    android:layout_height="match_parent"
    android:layout_width="match_parent"
    android:orientation="horizontal">

    <ImageView
        android:src="@mipmap/ic_launcher"
        android:layout_width="wrap_content"
        android:layout_height="wrap_content"/>
    <TextView
        android:text="你干嘛~~鸡你太美"
        android:layout_width="wrap_content"
        android:layout_height="wrap_content"/>
</LinearLayout>
设置后效果如下:

二.控件PopupWindow
1.常用方法
| 1. setContentView ( View contentView ): | 设置 PopupWindow 显示的 View |
| 2. showAsDropDown ( View anchor ): | 相对某个控件的位置(正左下方),无偏移 |
| 3.showAsDropDown( View anchor , int xoff , int yoff ): | 相对某个控件的位置,有偏移 |
| 4. setFocusable ( boolean focusable ) | 设置是否获取焦点 |
| 5. setBackgroundDrawable ( Drawable background ) | 设置背景 |
| 6. dismiss () | 关闭弹窗 |
| 7. setAnimationStyle ( int animationStyle ) | 设置加载动画 |
| 8. setTouchable ( boolean touchable ) | 设置触摸使能 |
| 9. setOutsideTouchable ( boolean touchable ) | 设置 PopupWindow 外面的触摸使能 |
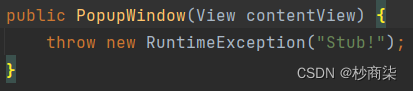
2.popupWindow中提供很多简便构造方法
无参构造

一个参数的contentView
两个参数的宽和高width,height

三个参数的 宽,高width,height 和contentView

四个参数宽,高width,height ,contentView和focusable

一般都是用三参或者四参的
完整代码:
<Button
android:text="弹出PopupWindow"
android:onClick="leoClick"
android:layout_width="wrap_content"
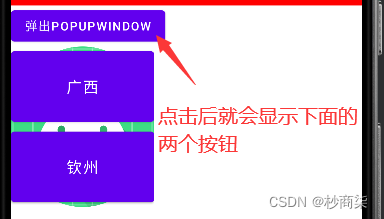
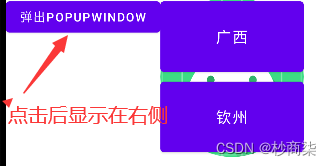
android:layout_height="wrap_content"/>2.1contentView就是弹窗显示布局

此处写300是可以的,但是为了让popupWindow刚好包裹住popupView,一般通过以下方式

完整代码:
public void leoClick(View view) {
                View popupView = getLayoutInflater().inflate(R.layout.popup_view, null);

                PopupWindow popupWindow = new PopupWindow(popupView, ViewGroup.LayoutParams.WRAP_CONTENT,
                        ViewGroup.LayoutParams.WRAP_CONTENT);
                popupWindow.showAsDropDown(view);
            }
<?xml version="1.0" encoding="utf-8"?>
<LinearLayout xmlns:android="http://schemas.android.com/apk/res/android"
android:layout_height="match_parent"
android:layout_width="match_parent"
android:background="@mipmap/ic_launcher"
android:orientation="vertical">
<Button
android:id="@+id/btn1"
android:layout_width="168dp"
android:layout_height="94dp"
android:padding="5dp"
android:text="广西"
android:textSize="18sp" />
<Button
android:id="@+id/btn2"
android:layout_width="168dp"
android:layout_height="94dp"
android:padding="5dp"
android:text="钦州"
android:textSize="18sp" />
</LinearLayout>
效果如图:
也可以对两个按钮进行偏移
3.showAsDropDown构造方法
一个参数

三个参数,其中xoff,yoff表示向x,y轴偏移

实例如下:
popupWindow.showAsDropDown(view,100,100);
也可以使用如下方法:
popupWindow.showAsDropDown(view,view.getWidth(),-view.getHeight());
设置偏移效果如下:
3.1实现点击空白处,退出popupwindow
使用上述:
| 4. setFocusable ( boolean focusable ) | 设置是否获取焦点 |


 2045
2045

 被折叠的 条评论
为什么被折叠?
被折叠的 条评论
为什么被折叠?
 到【灌水乐园】发言


