


OpenTK简单点说就是用C#封装的OpenGL,我用C#比较多,所以就选这个探索学习下。图形这一块语言并不是很重要,很多都是数学计算吧。
这边需要用到的库:OpenTK.dll,OpenTK.GLControl。我会上传到资源里面,如果有需要可以下载。
1.创建个Windows应用程序,把GLControl加入
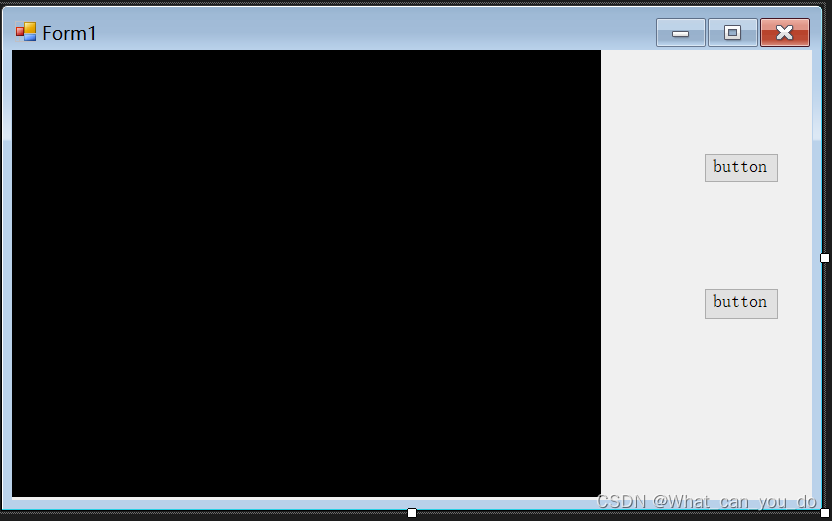
这个黑色的大框框就是GLControl,OpenTK里封装的,也就是个容器画布。
2.代码部分
2.1 准备工作
由于需要做鼠标旋转放大操作,我们需要构建一个Camera操作类,主要就是计算这个视角变换后的矩阵的。如果这里有不明白的朋友,可以补充下视景体相关的知识。
Camera类代码如下:
    public class Camera
    {
        // Those vectors are directions pointing outwards from the camera to define how it rotated
        private Vector3 _front = -Vector3.UnitX;

        private Vector3 _up = Vector3.UnitZ;

        private Vector3 _right = Vector3.UnitY;


        // The field of view of the camera (radians)
        private float _fov = MathHelper.PiOver4;

        public Camera(Vector3 position, float aspectRatio)
        {
            Position = position;
            AspectRatio = aspectRatio;
            _front = Vector3.Normalize(-Position);
            _right = Vector3.Normalize(Vector3.Cross(_front, _up));
            _up = Vector3.Normalize(Vector3.Cross(_right, _front));
        }

        // The position of the camera
        public Vector3 Position { get; set; }

        // This is simply the aspect ratio of the viewport, used for the projection matrix
        public float AspectRatio { private get; set; }

        public Vector3 Front => _front;

        public Vector3 Up => _up;

        public Vector3 Right => _right;

        public float Fov
        {
            get => MathHelper.RadiansToDegrees(_fov);
            set
            {
                var angle = Clamp(value, 1f, 45f);
                _fov = MathHelper.DegreesToRadians(angle);
            }
        }

        // Get the view matrix using the amazing LookAt function described more in depth on the web tutorials
        public Matrix4 GetViewMatrix()
        {
            return Matrix4.LookAt(Position, Position + _front, _up);
        }

        // Get the projection matrix using the same method we have used up until this point
        public Matrix4 GetProjectionMatrix()
        {
            return Matrix4.CreatePerspectiveFieldOfView(_fov, AspectRatio, 0.01f, 100f);
        }


        public void PitchView(float X_Angle, float Y_Angle)
        {
            Matrix4 RotateMatrix = Matrix4.CreateFromAxisAngle(_up, X_Angle);
            Position = Vector3.Transform(Position, RotateMatrix);
            _front = Vector3.Normalize(-Position);

            _right = Vector3.Normalize(Vector3.Cross(_front, _up));

            RotateMatrix = Matrix4.CreateFromAxisAngle(_right, Y_Angle);
            Position = Vector3.Transform(Position, RotateMatrix);
            _front = Vector3.Normalize(-Position);

            _up = Vector3.Normalize(Vector3.Cross(_right, _front));

        }

        float Clamp(float val, float min, float max)
        {
            return val > max ? max : val < min ? min : val;
        }
    }
再是绑定一些GLControl的绘制,鼠标操作事件:
            glControl1.Paint += new PaintEventHandler(glControl_Paint);

            glControl1.MouseDown += new MouseEventHandler(glControl_MouseDown);
            glControl1.MouseMove += new MouseEventHandler(glControl_MouseMove);
            glControl1.MouseUp += new MouseEventHandler(glControl_MouseUp);
            glControl1.MouseWheel += new MouseEventHandler(glControl_MouseWheel);
2.2 实现步骤
2.2.1 在应用程序加载时需要对背景颜色设置,窗体参数传入,以及Camera位置的设定
GL.ClearColor(0.5f, 0.5f, 0.5f, 0.7f); //背景颜色设置为灰色

int w = this.glControl1.Width;
int h = this.glControl1.Height;
GL.Viewport(0, 0, w, h);  //窗体尺寸设置

camera = new Camera(new Vector3(3, 0, -1), (float)this.glControl1.Width / (float)this.glControl1.Height);  //相机位置设置
2.2.2 绘制
在glControl1_Paint事件中去做绘制,每次通过刷新glControl控件可更新绘制。
            GL.Clear(
                    ClearBufferMask.ColorBufferBit |
                    ClearBufferMask.DepthBufferBit |
                    ClearBufferMask.StencilBufferBit);

            GL.MatrixMode(MatrixMode.Modelview);
            GL.LoadIdentity();

            Matrix4 ViewMatrix = camera.GetViewMatrix();
            GL.LoadMatrix(ref ViewMatrix);

            GL.MatrixMode(MatrixMode.Projection);
            Matrix4 ProjMatrix = camera.GetProjectionMatrix();
            GL.LoadMatrix(ref ProjMatrix);

            DrawCube(Color.Orange, new Vector3d(0, 0, 0), new Vector3d(2, 2, 2));

            glControl1.SwapBuffers();
此处用的是我自己写的一个绘制立方体的函数,需要可附上代码:
        void DrawCube(Color color, Vector3d refMarker, Vector3d size)
        {
            List<Vector3d> points = new List<Vector3d>(); //points

            //back points (anti-clockwise)
            points.Add(refMarker);
            points.Add(new Vector3d(points[0].X + size.X, points[0].Y, points[0].Z));
            points.Add(new Vector3d(points[0].X + size.X, points[0].Y + size.Y, points[0].Z));
            points.Add(new Vector3d(points[0].X, points[0].Y + size.Y, points[0].Z));

            //front points (anti-clockwise)
            points.Add(new Vector3d(points[0].X, points[0].Y, points[0].Z + size.Z));
            points.Add(new Vector3d(points[1].X, points[1].Y, points[1].Z + size.Z));
            points.Add(new Vector3d(points[2].X, points[2].Y, points[2].Z + size.Z));
            points.Add(new Vector3d(points[3].X, points[3].Y, points[3].Z + size.Z));

            //sequency
            int[] seqs = {
                             0, 1, 2, 3, //back side
                             7, 6, 5, 4, //front side
                             0, 3, 7, 4, //left side
                             5, 6, 2, 1, //right side
                             0, 4, 5, 1, //bottom side
                             2, 3, 7, 6  //tope side
                         };


            GL.ShadeModel(ShadingModel.Smooth);

            GL.Color3(color);
            GL.Begin(BeginMode.Quads);
            foreach (int seq in seqs)
            {
                GL.Vertex3(points[seq]);
            }
            GL.End();

            GL.Color3(Color.GreenYellow);
            GL.Begin(BeginMode.LineStrip);
            foreach (int seq in seqs)
            {
                GL.Vertex3(points[seq]);
            }
            GL.End();

        }
2.2.3 鼠标操作
2.2.3.1 旋转
用一个全局变量记录鼠标位置 Point MousePos = new Point(); MouseDown中只做记录位置。
MouseMove中实现代码:
            if (e.Button == MouseButtons.Right)
            {
                var deltaX = e.X - MousePos.X;
                var deltaY = e.Y - MousePos.Y;
                MousePos.X = e.X;
                MousePos.Y = e.Y;

                camera.PitchView((float)(-2 * Math.PI * deltaX / glControl1.Width), (float)(-2 * Math.PI * deltaY / glControl1.Height));

                this.glControl1.Invalidate();
            }
2.2.3.2 放大缩小
主要是在MouseWheel中通过设置相机位置实现的:
camera.Position += e.Delta / Math.Abs(e.Delta) * camera.Front / camera.Front.Length;
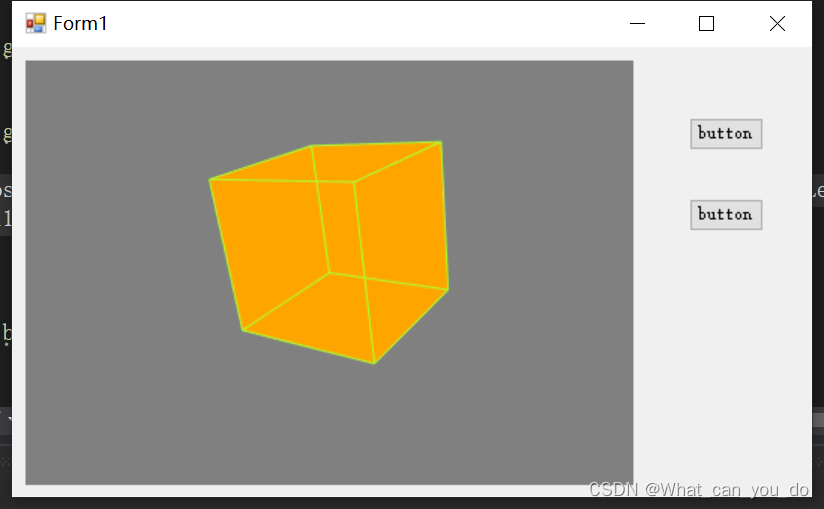
glControl1.Invalidate();3. 效果
4.结尾
希望更多爱好图形的朋友来交流,指教,我们相互学习,共同进步!


 1476
1476

 被折叠的 条评论
为什么被折叠?
被折叠的 条评论
为什么被折叠?
 到【灌水乐园】发言


