


FCN代码简单实现
import torch
import torch.nn as nn
import torch.nn.functional as F

class FCN(nn.Module):
    def __init__(self, num_classes):
        super(FCN, self).__init__()
        # 卷积层和池化层
        self.conv1 = nn.Conv2d(3, 64, kernel_size=3, padding=1)
        self.conv2 = nn.Conv2d(64, 128, kernel_size=3, padding=1)
        self.pool = nn.MaxPool2d(2, 2)

        # 反卷积层
        self.deconv1 = nn.ConvTranspose2d(128, 64, kernel_size=2, stride=2)
        self.deconv2 = nn.ConvTranspose2d(64, num_classes, kernel_size=2, stride=2)

        # 跳跃连接
        self.skip_conv = nn.Conv2d(64, num_classes, kernel_size=1)

    def forward(self, x):
        # 下采样路径
        x1 = F.relu(self.conv1(x))  # 第一个卷积层
        x = self.pool(x1)           # 池化层
        x2 = F.relu(self.conv2(x))  # 第二个卷积层
        x = self.pool(x2)           # 池化层

        # 上采样路径
        x = F.relu(self.deconv1(x)) # 第一个反卷积层
        x = self.deconv2(x)         # 第二个反卷积层

        # 跳跃连接
        x1_skip = self.skip_conv(x1) # 跳跃连接
        x = x + x1_skip              # 结合跳跃连接

        return x

# 示例用法
model = FCN(num_classes=21)  # 假设有 21 个类别
input = torch.randn(1, 3, 224, 224)  # 输入示例
output = model(input)
print(output.shape)  # 输出形状
跳跃连接
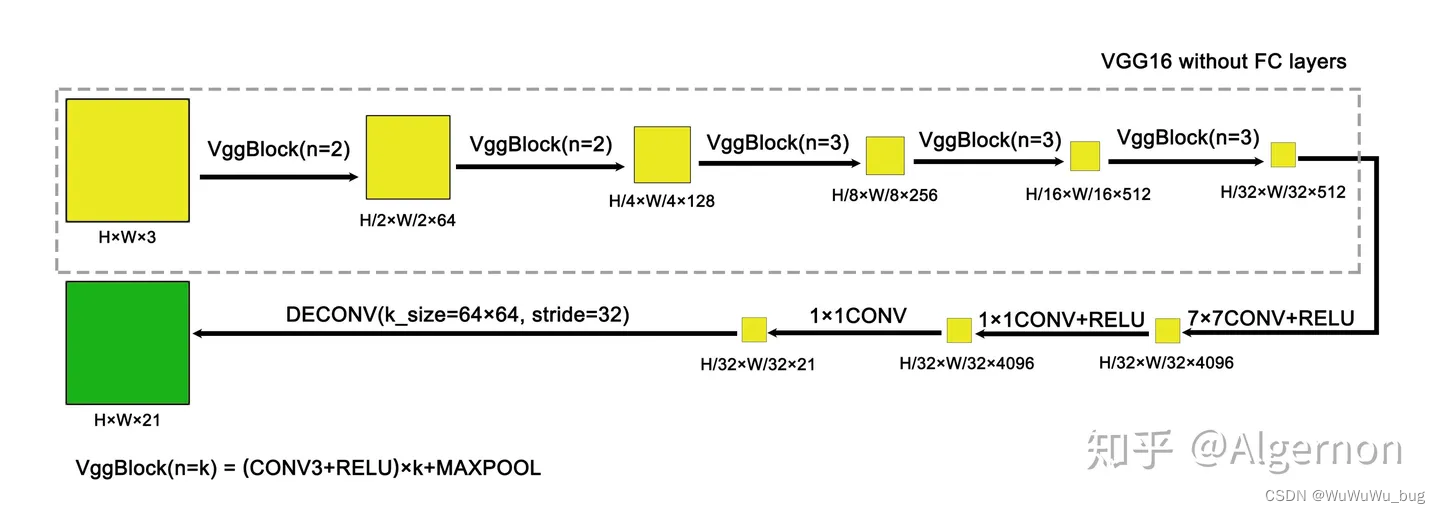
先看一下FCN-32s的结构,很简单的一条路径下来,但在反卷积的时候精读信息难免过于粗糙
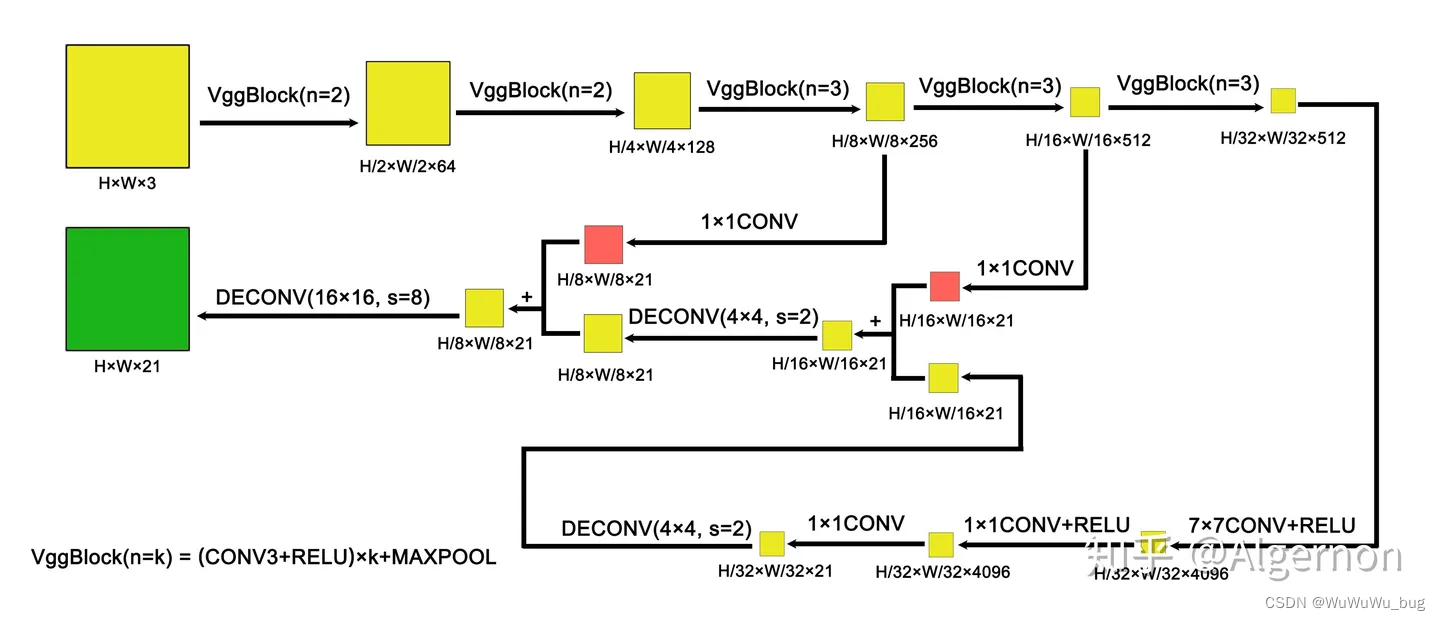
为了提高反卷积图像的精确度,加入了跳跃连接,通过与卷积层的参数运算,提高了分割图像的精度,如下面FCN-8s:


 2万+
2万+


 被折叠的 条评论
为什么被折叠?
被折叠的 条评论
为什么被折叠?
 到【灌水乐园】发言


