


学习目标:
- 使用 XHbuilder 编辑器 uniapp开发 app 中使用手机本相机可直接拍摄照片进行上传,也可以选择相册进行上传
学习内容:
相关内容
- 上传图片
- 上传时调用的相关方法
- 配置的相关模块
- 需要配置的相关权限
知识小结:
总结:
- 1、上传图片
<view class="uni-form-item">
					<view class="title">主图</view>
					<view class="content">
						<view class="grid col-4 grid-square flex-sub">
							<view class="bg-img" v-for="(item,index) in imageList" :key="index" @tap="ViewMainImage" :data-url="baseUrl + imageList[index].url">
							 <image :src="baseUrl + item.url" mode="aspectFill"></image>
								<view class="cu-tag bg-red" @tap.stop="DelMainImg" :data-index="index">
									<text class='cuIcon-close'></text>
								</view>
							</view>
							<view class="solids" @tap="ChooseMainImage" v-if="imageList.length<1">
								<text class='cuIcon-camera'></text>
							</view>
						</view>
					</view>
				</view>
- 2、调用的方法
     //选择图片
	ChooseMainImage() {
			uni.chooseImage({
				count: 10, //默认9
				sizeType: ['original', 'compressed'],  //可以指定是原图还是压缩图,默认二者都有
				sourceType: ['album','camera'],   //从相册选择,也可以使用相机直接拍照上传
				success: (res) => {

					var imagePathArr =res.tempFilePaths

					uni.showToast({
						title: '上传进度:0/' + imagePathArr.length,
						icon: 'none',
						mask: false
					});

					var remoteIndexStart = this.imageList.length - imagePathArr.length
					var promiseWorkList = []
					var keyname = (this.fileKeyName ? this.fileKeyName : 'file')
					var completeImages = 0
					for (let i = 0; i < imagePathArr.length; i++) {

						promiseWorkList.push(new Promise((resolve, reject) => {
							let header = {"Mema-Token":this.$api.config.header["Mema-Token"]};
							let remoteUrlIndex = remoteIndexStart + i;

							uni.uploadFile({
								url: this.imageServerUrl,
								// methods: 'POST',
								// fileType: 'image',
								header: header,
								formData: this.uploadDataMain,
								filePath: imagePathArr[i],
								name: keyname,
								success: function(res) {

									if (res.statusCode === 200) {
										var jsonData = JSON.parse(res.data);

										if(jsonData.code == 0){

											completeImages++
											uni.showToast({
												title: '上传进度:' + completeImages + '/' + imagePathArr.length,
												icon: 'none',
												mask: false,
												duration: 500
											});
											resolve(jsonData.data)
										}else{
											uni.showToast({
												icon: 'none',
												position: 'bottom',
												title: jsonData.msg
											});
										}
									} else {
										reject('fail to upload image:' + remoteUrlIndex)
									}
								},
								fail: function(res) {
									reject('fail to upload image:' + remoteUrlIndex)
								}
							})
						}))
					}
					Promise.all(promiseWorkList).then((result) => {
						for (let i = 0; i < result.length; i++) {
							// result[i].url = this.$api.config.baseUrl + result[i].url
							this.imageList.push(result[i])
						}

					})
				}
			});
		},
	//查看主图
	ViewMainImage(e) {
		var images = [];
		for (let i = 0; i < this.imageList.length; i++) {
			images.push(this.$api.config.baseUrl + this.imageList[i].url)
		}
		uni.previewImage({
			urls: images,
			current: e.currentTarget.dataset.url
		});
	},
	//删除主图
	DelMainImg(e) {
		var imgObj = this.imageList[e.currentTarget.dataset.index]
		uni.showModal({
			title: '删除图片',
			content: '确定要删除吗?',
			cancelText: '再看看',
			confirmText: '确认删除',
			success: res => {
				if (res.confirm) {
					this.pic=""
					this.imageList = []
				}
			}
		})
	},
-
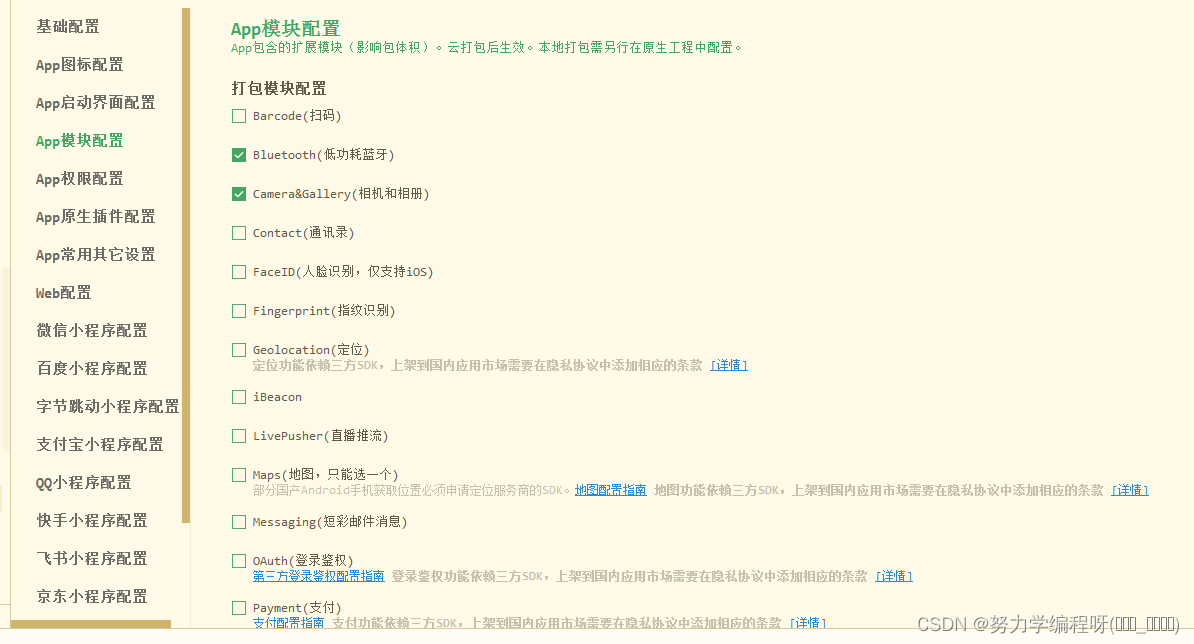
3、APP 模块配置
在 app 模块配置中 ,需勾选 Camera & Gallery(相机和相册) 模块配置
-
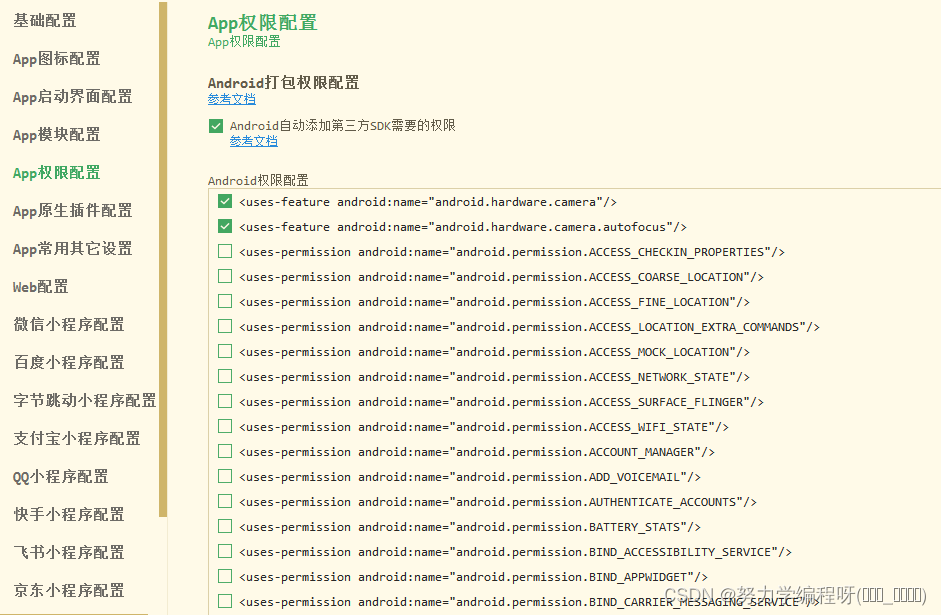
4、App 权限配置
使用 uni-app 相机拍摄照片 需开启相应的权限配置
1、开启相机权限
(1) <uses-feature android:name=“android.hardware.camera” />
(2) <uses-feature android:name=“android.hardware.camera.autofocus” />
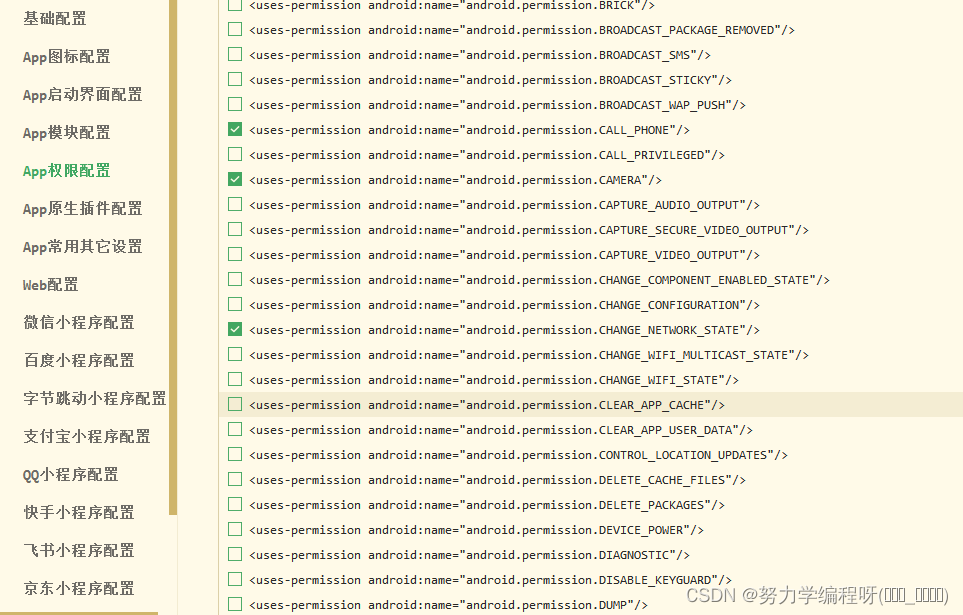
2、 开启闪光灯权限
<uses-permission android:name=“android.permission.FLASHLIGHT”/>
3、开启摄像头权限
<uses-permission android:name=“android.permission.CAMERA” />
在配置勾选框中,勾选相对应的权限配置


 3412
3412


 被折叠的 条评论
为什么被折叠?
被折叠的 条评论
为什么被折叠?
 到【灌水乐园】发言


