


导语
前文讲述了全路径检索的例子,本文即为简单检索
简单检索
GET是相当简单–你可以得到你想要的文档信息。让我们尝试一些更高级一点,像一个简单的搜索!
我们第一搜索搜索可能会是最简单的。我们将搜索所有员工,这个请求如下所示:
GET /megacorp/employee/_search你可以看到,我们仍然使用索引megacorp和类型employee,但是我们使用_search节点去替换了具体化的文档ID。响应包括所有三个文档信息内容在hits数组。默认情况下,搜索将返回前十的结果。
{
   "took":      6,
   "timed_out": false,
   "_shards": { ... },
   "hits": {
      "total":      3,
      "max_score":  1,
      "hits": [
         {
            "_index":         "megacorp",
            "_type":          "employee",
            "_id":            "3",
            "_score":         1,
            "_source": {
               "first_name":  "Douglas",
               "last_name":   "Fir",
               "age":         35,
               "about":       "I like to build cabinets",
               "interests": [ "forestry" ]
            }
         },
         {
            "_index":         "megacorp",
            "_type":          "employee",
            "_id":            "1",
            "_score":         1,
            "_source": {
               "first_name":  "John",
               "last_name":   "Smith",
               "age":         25,
               "about":       "I love to go rock climbing",
               "interests": [ "sports", "music" ]
            }
         },
         {
            "_index":         "megacorp",
            "_type":          "employee",
            "_id":            "2",
            "_score":         1,
            "_source": {
               "first_name":  "Jane",
               "last_name":   "Smith",
               "age":         32,
               "about":       "I like to collect rock albums",
               "interests": [ "music" ]
            }
         }
      ]
   }
}
请注意:
响应信息不仅告诉我们哪些文档匹配,但也包括整个文档本身:我们需要的所有信息,都是为了展示搜索结果给用户。
实践一
在sence中,输入如下的curl请求代码
curl -XGET "http://localhost:9200/megacorp/employee/_search"结果如图所示:
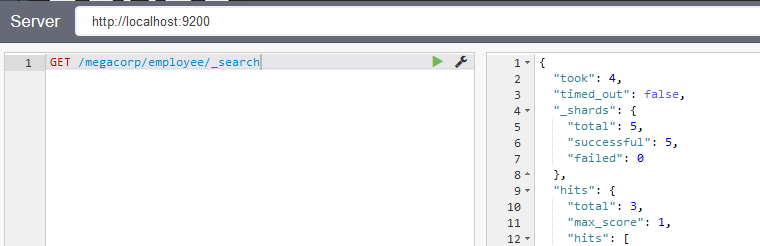
完整返回信息如下:
{
  "took": 4,
  "timed_out": false,
  "_shards": {
    "total": 5,
    "successful": 5,
    "failed": 0
  },
  "hits": {
    "total": 3,
    "max_score": 1,
    "hits": [
      {
        "_index": "megacorp",
        "_type": "employee",
        "_id": "2",
        "_score": 1,
        "_source": {
          "first_name": "Jane",
          "last_name": "Smith",
          "age": 32,
          "about": "I like to collect rock albums",
          "interests": [
            "music"
          ]
        }
      },
      {
        "_index": "megacorp",
        "_type": "employee",
        "_id": "1",
        "_score": 1,
        "_source": {
          "first_name": "John",
          "last_name": "Smith",
          "age": 25,
          "about": "I love to go rock climbing",
          "interests": [
            "sports",
            "music"
          ]
        }
      },
      {
        "_index": "megacorp",
        "_type": "employee",
        "_id": "3",
        "_score": 1,
        "_source": {
          "first_name": "Douglas",
          "last_name": "Fir",
          "age": 35,
          "about": "I like to build cabinets",
          "interests": [
            "forestry"
          ]
        }
      }
    ]
  }
}
接下来,让我们试着寻找他们的姓为“史密斯”的员工。要做到这一点,我们将使用一个轻量级的搜索方法,从命令行很容易使用。这种方法通常被称为一个查询字符串搜索,因为我们通过搜索URL查询字符串参数:
GET /megacorp/employee/_search?q=last_name:Smith我们同样使用_search节点的路径,我们添加查询本身q =参数(要查询的参数)。结果显示所有史密斯回来:
{
   ...
   "hits": {
      "total":      2,
      "max_score":  0.30685282,
      "hits": [
         {
            ...
            "_source": {
               "first_name":  "John",
               "last_name":   "Smith",
               "age":         25,
               "about":       "I love to go rock climbing",
               "interests": [ "sports", "music" ]
            }
         },
         {
            ...
            "_source": {
               "first_name":  "Jane",
               "last_name":   "Smith",
               "age":         32,
               "about":       "I like to collect rock albums",
               "interests": [ "music" ]
            }
         }
      ]
   }
}
实例二
在sence中,输入如下的curl请求代码:
curl -XGET "http://localhost:9200/megacorp/employee/_search?q=last_name:Smith"结果如图所示:
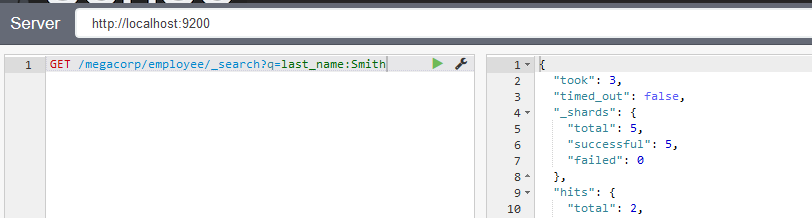
完整返回信息如下:
{
  "took": 3,
  "timed_out": false,
  "_shards": {
    "total": 5,
    "successful": 5,
    "failed": 0
  },
  "hits": {
    "total": 2,
    "max_score": 0.30685282,
    "hits": [
      {
        "_index": "megacorp",
        "_type": "employee",
        "_id": "2",
        "_score": 0.30685282,
        "_source": {
          "first_name": "Jane",
          "last_name": "Smith",
          "age": 32,
          "about": "I like to collect rock albums",
          "interests": [
            "music"
          ]
        }
      },
      {
        "_index": "megacorp",
        "_type": "employee",
        "_id": "1",
        "_score": 0.30685282,
        "_source": {
          "first_name": "John",
          "last_name": "Smith",
          "age": 25,
          "about": "I love to go rock climbing",
          "interests": [
            "sports",
            "music"
          ]
        }
      }
    ]
  }
}
总结
本文讲诉了简单检索的两个例子,希望各位可以看得懂。


 561
561

 被折叠的 条评论
为什么被折叠?
被折叠的 条评论
为什么被折叠?
 到【灌水乐园】发言


