


📑前言
在当下这个全球互联的时代,高性能单板计算机正逐渐崭露头角,成为推动创新和个性化解决方案的关键力量。其中,香橙派 Kunpeng Pro作为一款集成了华为鲲鹏处理器的板卡,凭借其卓越的计算性能和广泛的应用潜力,已经吸引了全球开发者与技术爱好者的目光。它不仅为高性能服务器、人工智能和边缘计算等领域注入了新的活力,还以其对开发者友好的接口布局和广泛的软件支持,成为了DIY项目与复杂计算任务的理想选择。
近日,我有幸通过CSDN获得了香橙派 Kunpeng Pro的评测资格,这对于一个热衷于技术的开发者来说,无疑是一次难得的探索和实践机会。
随着科技的不断进步,高性能开发板在物联网设备、智能家居、自动化控制等领域的应用愈发广泛。它们作为连接现实世界与数字世界的桥梁,正推动着社会的智能化和数字化进程。香橙派 Kunpeng Pro作为其中的佼佼者,凭借其强大的计算能力和丰富的接口配置,已经在市场上获得了广泛的关注和好评。
在这篇文章中,我将详细分享我对香橙派 Kunpeng Pro的使用体验,包括其性能测试、适用场景和实际应用案例。我将从开箱开始,一步步展示其硬件特点、系统安装过程以及在实际项目中的应用效果。同时,我也将探讨这款开发板在开源硬件浪潮中的地位和作用,以及它如何为开发者提供创新的平台和可能性。
香橙派 Kunpeng Pro作为一款高性能开发板,不仅为技术爱好者提供了实验和学习的平台,更为专业开发者带来了实现复杂项目的强大工具。通过本文的分享,我希望能让更多人了解这款开发板的优势和潜力,共同探索其在各个领域的应用前景。
一、开箱初体验的愉悦

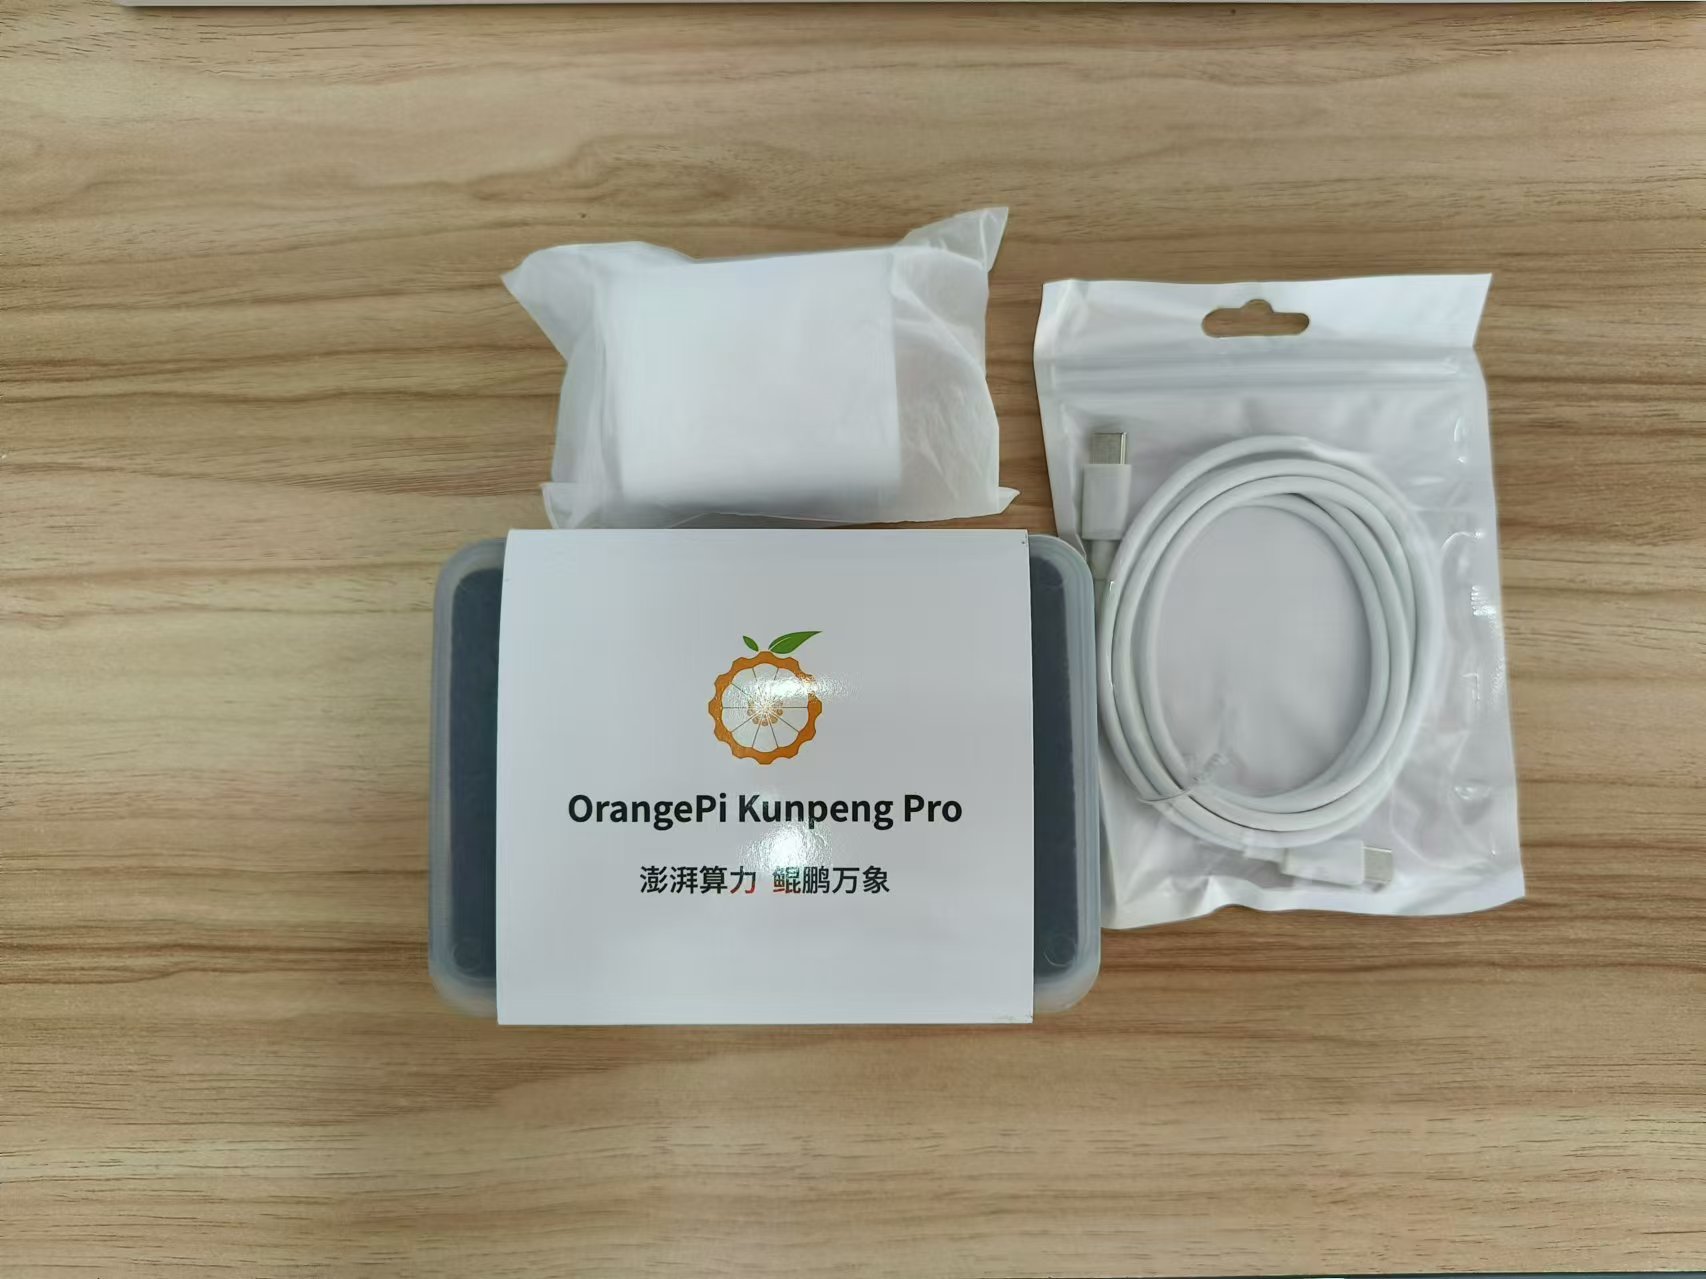
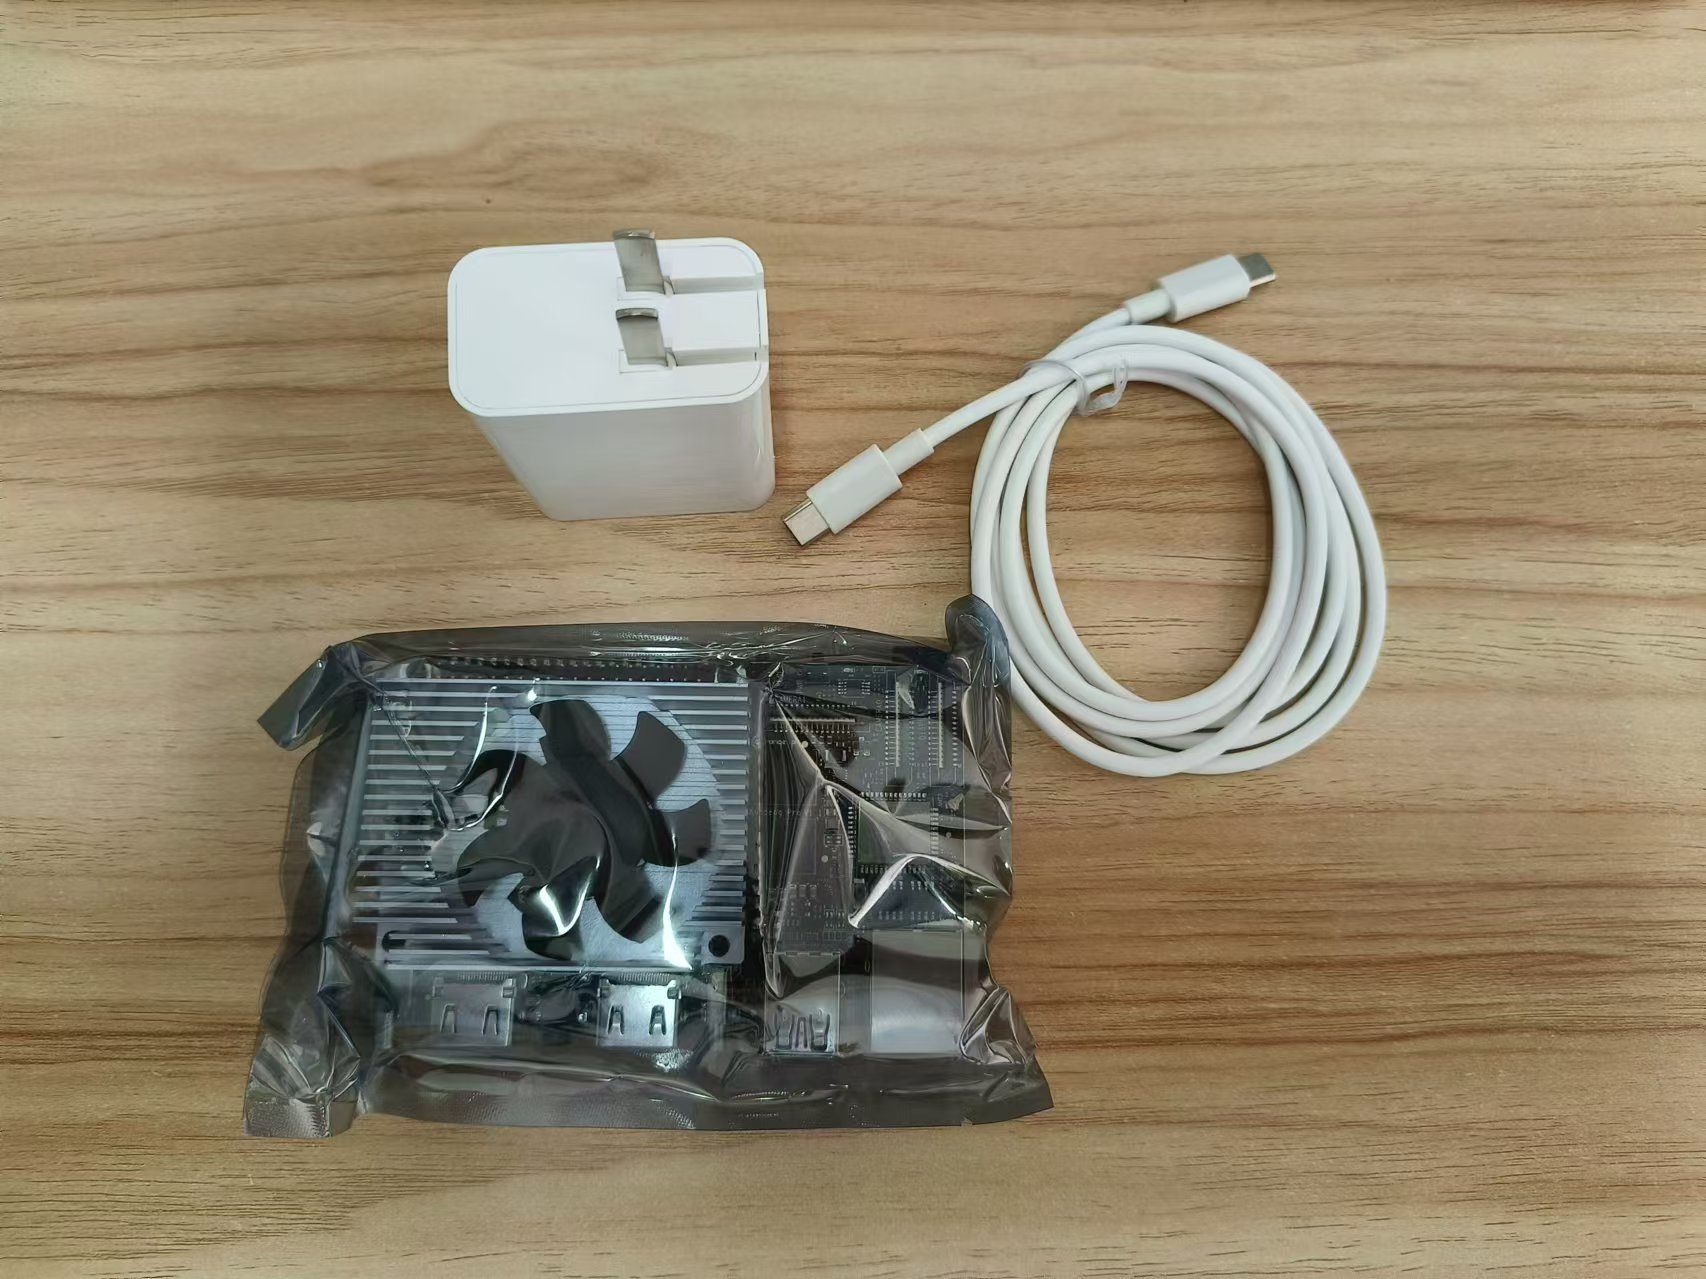
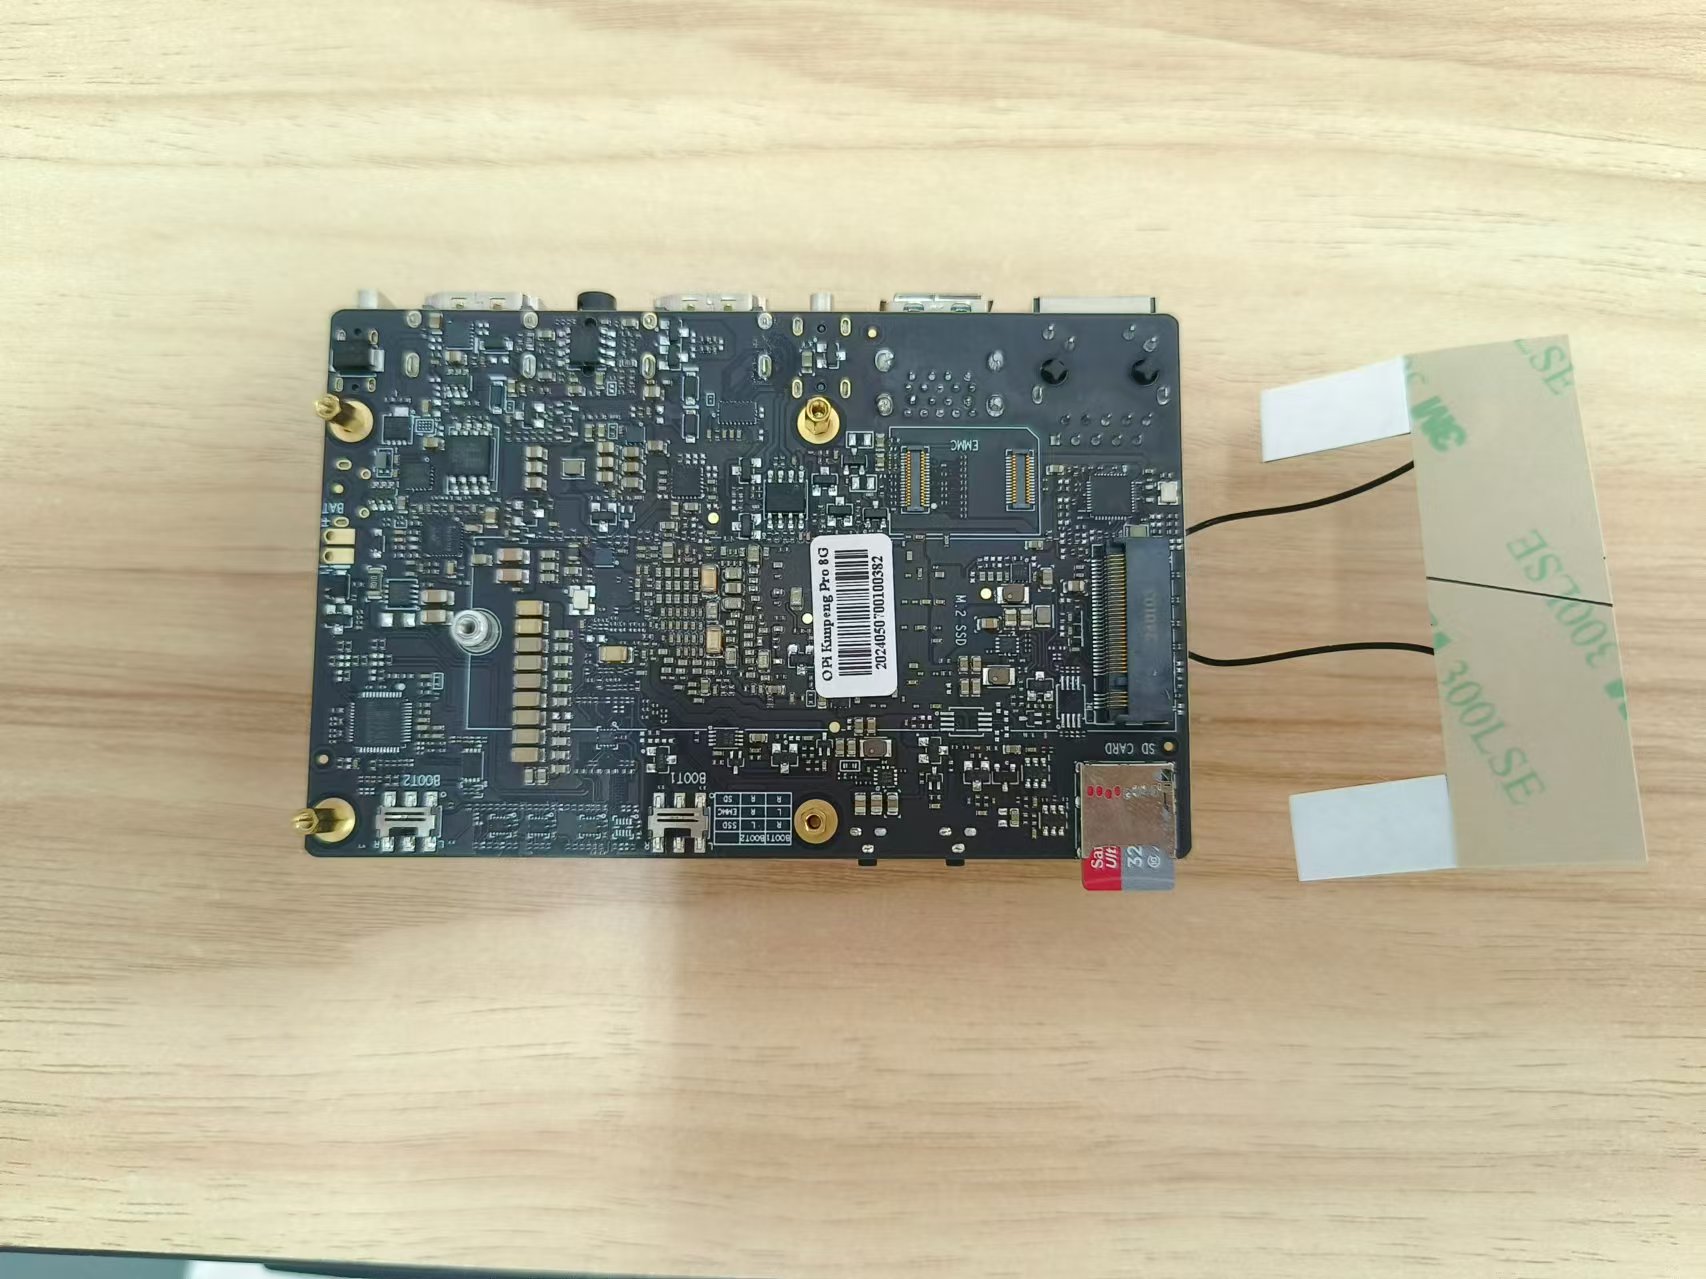
到手现拆,这个板子真的让人眼前一亮,狠狠喜欢上了!
二、产品规格概述
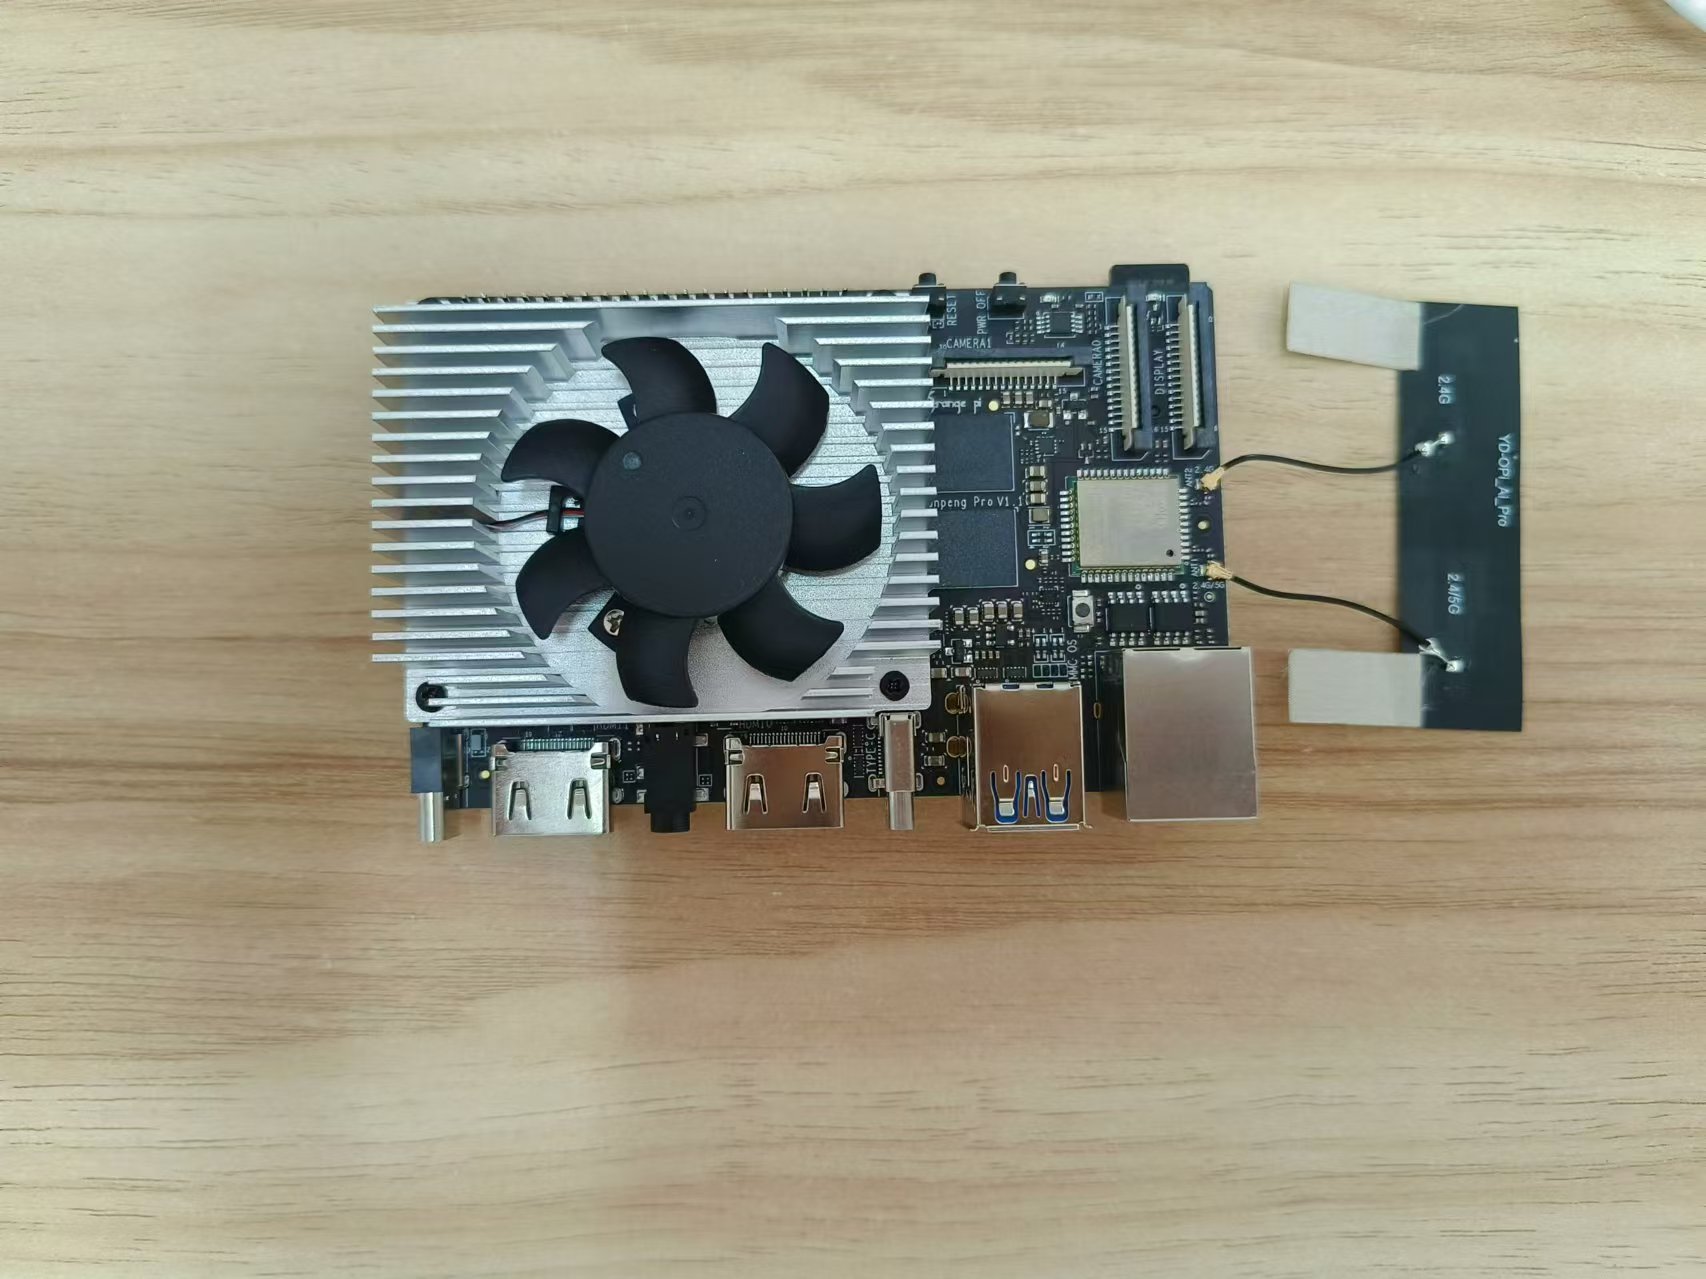
- 香橙派 Kunpeng Pro是一款集高性能计算和强大AI功能于一体的开发板。其核心搭载了一个4核64位的处理器以及一个高效的AI处理器,具备8TOPS的算力,满足高AI运算需求。内存方面,提供了LPDDR4X类型的8GB/16GB可选内存,速率高达3200Mbps,确保高速数据读写。存储选项丰富,包括SPI FLASH、SATA/NVME SSD、eMMC插槽和TF卡插槽,满足不同容量的存储需求。
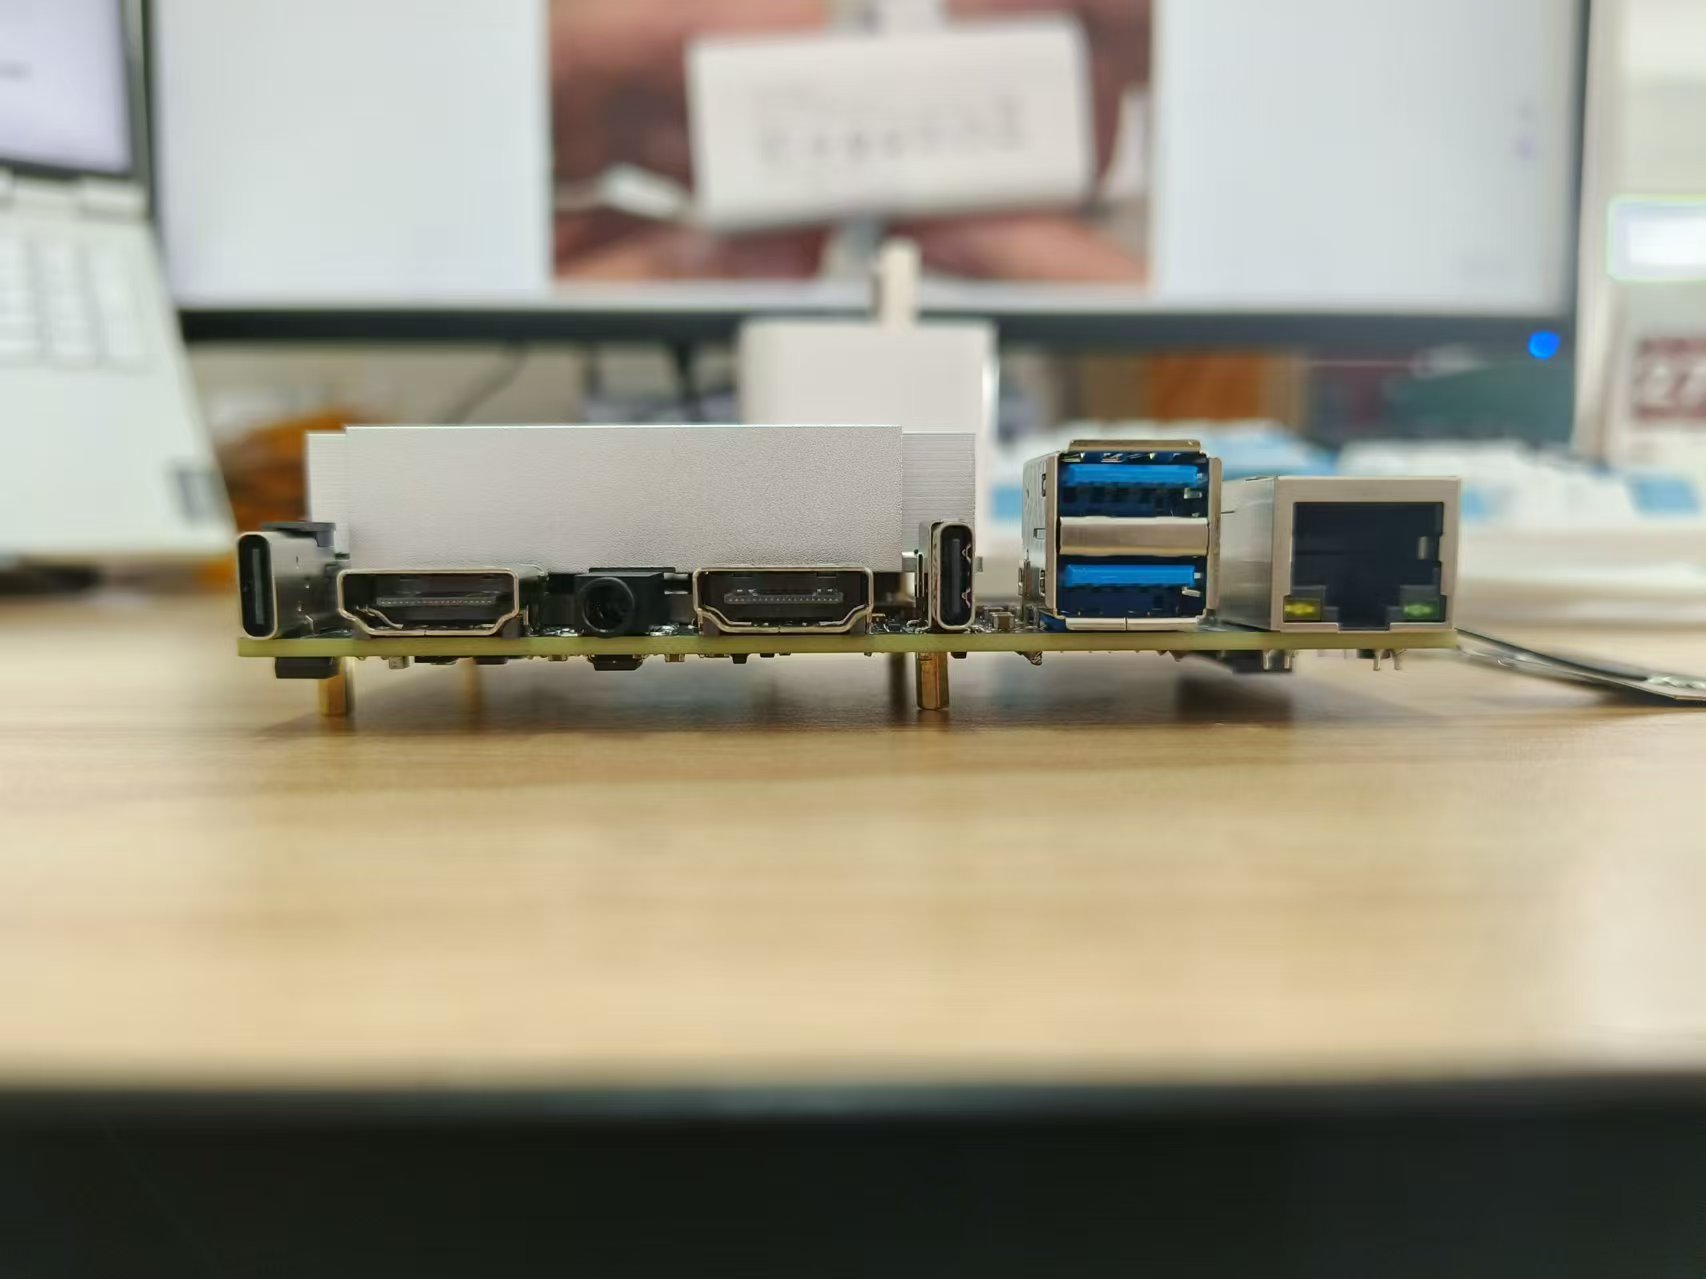
- 网络连接方面,香橙派 Kunpeng Pro支持Wi-Fi 5双频(2.4GHz和5GHz)和蓝牙4.2/BLE,同时内置10/100/1000Mbps以太网收发器,提供稳定高速的网络连接。显示接口包括两个HDMI 2.0 Type-A端口和一个MIPI DSI接口,支持高清视频输出。此外,还配备两个2-lane MIPI CSI摄像头接口,兼容树莓派摄像头标准。
- USB接口方面,香橙派 Kunpeng Pro提供了两个USB 3.0 HOST接口、一个USB Type-C 3.0 HOST接口和一个Micro USB接口(主要用于串口打印功能)。音频功能通过一个3.5mm耳机插孔支持音频输入和输出。
- 开发板还配备了40PIN功能扩展接口,支持GPIO、UART、I2C、SPI、I2S和PWM等接口类型,方便进行各种电子项目和创客活动。散热方面,设有风扇接口,保证设备在高负载运行下的稳定性。
- 香橙派 Kunpeng Pro预装了openEuler操作系统,优化利用了Kunpeng处理器的特性。产品尺寸为107x68mm,重量仅为82g,轻巧便携,易于集成到各种项目中。无论是开发者、硬件爱好者还是企业用户,都能从这款高性能开发板中受益。
三、前置工作
在开始测试之前,请确保您的香橙派 Kunpeng Pro 已正确启动,并通过 SSH 连接到您的开发板。
- 系统更新:
使用以下命令更新系统软件包,以确保安装最新的软件:
sudo yum update -y
- 安装基准测试工具:
使用 yum 安装常用的基准测试工具,如 sysbench 和 stress-ng:
sudo yum install -y sysbench stress-ng
四、性能测试
4.1 CPU 性能测试
4.1.1 单线程 CPU 测试
首先,我们将运行单线程的 sysbench CPU 测试,评估香橙派 Kunpeng Pro 的整数计算性能。使用以下命令开始测试:
sysbench cpu --cpu-max-prime=20000 run
结果:
[openEuler@openEuler ~]$ sysbench cpu --cpu-max-prime=20000 run
sysbench 1.0.20 (using system LuaJIT 2.1.0-beta3)

Running the test with following options:
Number of threads: 1
Initializing random number generator from current time


Prime numbers limit: 20000

Initializing worker threads...

Threads started!

CPU speed:
    events per second:   813.12

General statistics:
    total time:                          10.0011s
    total number of events:              8136

Latency (ms):
         min:                                    1.22
         avg:                                    1.23
         max:                                    1.73
         95th percentile:                        1.25
         sum:                                 9998.20

Threads fairness:
    events (avg/stddev):           8136.0000/0.00
    execution time (avg/stddev):   9.9982/0.00
单线程测试结果显示了总执行时间和每秒事件数,这些数据可以帮助我们了解处理器的基础性能。
4.1.2 多线程 CPU 测试
接下来,我们将运行多线程的 sysbench CPU 测试,评估多核处理能力。使用以下命令进行测试:
sysbench cpu --threads=4 --cpu-max-prime=20000 run
结果:
[openEuler@openEuler ~]$ sysbench cpu --threads=4 --cpu-max-prime=20000 run
sysbench 1.0.20 (using system LuaJIT 2.1.0-beta3)

Running the test with following options:
Number of threads: 4
Initializing random number generator from current time


Prime numbers limit: 20000

Initializing worker threads...

Threads started!

CPU speed:
    events per second:  3160.23

General statistics:
    total time:                          10.0009s
    total number of events:              31620

Latency (ms):
         min:                                    1.22
         avg:                                    1.26
         max:                                   25.26
         95th percentile:                        1.27
         sum:                                39977.37

Threads fairness:
    events (avg/stddev):           7905.0000/76.40
    execution time (avg/stddev):   9.9943/0.00
多线程测试结果展示了香橙派 Kunpeng Pro 在并行处理任务中的表现。比较单线程和多线程测试结果,可以直观地看到多核处理的优势。
4.2 内存性能测试
4.2.1 内存读写性能测试
我们将使用 sysbench 测试内存的读写性能,评估 8GB 内存的速度和效率。使用以下命令开始测试:
sysbench memory --memory-block-size=1M --memory-total-size=10G run
结果:
[root@openEuler ~]sysbench memory--memory-block-size=1M --memory-total-size=10G run
sysbench 1.0.20 (using system LuaJIT 2.1.0-beta3)
Running the test with following options:
Number of threads: 1
Initializing random number generator from current time

Running memory speed test with the following options:
  block size: 1024KiB
  total size: 10240MiB
  operation: write
  scope: global

Initializing worker threads...
Threads started!

Total operations: 10240 ( 7093.69 per second)
10240.00 MiB transferred (7093.69 MiB/sec)

General statistics:
    total time:                          1.4389s
    total number of events:              10240

Latency (ms):
         min:                                    0.13
         avg:                                    0.14
         max:                                    0.23
         95th percentile:                        0.15
         sum:                                 1435.52

Threads fairness:
    events (avg/stddev):           10240.0000/0.00
    execution time (avg/stddev):   1.4355/0.00
测试结果显示内存的读写速度和总执行时间,这些数据反映了系统在处理大量数据时的性能。
4.2.2 高负载内存测试
为了验证系统在高负载下的稳定性,使用 stress-ng 工具对其进行内存压力测试。
[openEuler@openEuler ~]$ stress-ng --vm 2 --vm-bytes 8G --vm-method all --verify -t 60s
stress-ng: info:  [10269] setting to a 60 second run per stressor
stress-ng: info:  [10269] dispatching hogs: 2 vm
Segmentation fault
[openEuler@openEuler ~]$ stress-ng --vm 2 --vm-bytes 7G --vm-method all --verify -t 60s
stress-ng: info:  [10402] setting to a 60 second run per stressor
stress-ng: info:  [10402] dispatching hogs: 2 vm
stress-ng: info:  [10402] successful run completed in 62.37s (1 min, 2.37 secs)
[openEuler@openEuler ~]$ stress-ng --vm 2 --vm-bytes 6G --vm-method all --verify -t 60s
stress-ng: info:  [10516] setting to a 60 second run per stressor
stress-ng: info:  [10516] dispatching hogs: 2 vm
Segmentation fault
[openEuler@openEuler ~]$ stress-ng --vm 2 --vm-bytes 5G --vm-method all --verify -t 60s
stress-ng: info:  [10574] setting to a 60 second run per stressor
stress-ng: info:  [10574] dispatching hogs: 2 vm
Segmentation fault
[openEuler@openEuler ~]$ stress-ng --vm 2 --vm-bytes 4G --vm-method all --verify -t 60s
stress-ng: info:  [10630] setting to a 60 second run per stressor
stress-ng: info:  [10630] dispatching hogs: 2 vm
Segmentation fault
当–vm-bytes参数设置为8G、6G、5G和4G时,stress-ng遇到了Segmentation fault(段错误),但设置为7G时却成功完成了测试。
这里的段错误通常表示的是程序试图访问它没有权限的内存区域,或者试图以非法的方式访问内存。在stress-ng的上下文中,这可能是因为它试图分配或操作比系统物理内存或可用虚拟内存更多的内存。
- 8G: 由于你的系统可能没有8G的空闲物理内存,或者操作系统无法为stress-ng分配这么多连续的虚拟内存空间(考虑到其他进程和系统开销),因此stress-ng在尝试分配或操作这些内存时触发了段错误。
- 7G: 在这个设置下,stress-ng成功完成了测试。这可能是因为7G的内存需求在系统的物理内存和虚拟内存管理策略的可接受范围内。
- 6G, 5G, 4G: 尽管这些值比8G小,但它们仍然可能导致stress-ng遇到段错误,原因可能是多方面的。可能是因为其他进程正在使用内存,或者系统的虚拟内存管理策略不允许stress-ng分配这么多内存。此外,stress-ng可能在尝试以某种方式操作内存时遇到了问题,这种操作在内存量较小时不会触发,但在达到某个阈值时就会触发。
通过这些测试,我们可以观察到在不同内存分配大小下系统的响应情况。虽然内存分配出现问题,但是7G内存分配下,系统均能稳定运行,表明香橙派 Kunpeng Pro 在极端的高负载环境下依然表现良好。
4.3 I/O 性能测试
为了评估存储设备的性能,可以使用 sysbench 进行 I/O 性能测试。以下命令将测试随机读取和写入性能:
sysbench fileio --file-total-size=10G --file-test-mode=rndrw prepare
sysbench fileio --file-total-size=10G --file-test-mode=rndrw --time=300 --max-requests=0 run
sysbench fileio --file-total-size=10G --file-test-mode=rndrw cleanup
结果:
[openEuler@openEuler ~]$ sysbench fileio --file-total-size=10G --file-test-mode=rndrw prepare
sysbench 1.0.20 (using system LuaJIT 2.1.0-beta3)

128 files, 81920Kb each, 10240Mb total
Creating files for the test...
Extra file open flags: (none)
Reusing existing file test_file.0
Reusing existing file test_file.1
Reusing existing file test_file.2
Reusing existing file test_file.3
Reusing existing file test_file.4
Reusing existing file test_file.5
Reusing existing file test_file.6
Reusing existing file test_file.7
Reusing existing file test_file.8
Reusing existing file test_file.9
Reusing existing file test_file.10
Reusing existing file test_file.11
Reusing existing file test_file.12
Reusing existing file test_file.13
Reusing existing file test_file.14
Reusing existing file test_file.15
Reusing existing file test_file.16
Reusing existing file test_file.17
Reusing existing file test_file.18
Reusing existing file test_file.19
Reusing existing file test_file.20
Reusing existing file test_file.21
Reusing existing file test_file.22
Reusing existing file test_file.23
Reusing existing file test_file.24
Extending existing file test_file.25
Extending existing file test_file.26
Extending existing file test_file.27
Extending existing file test_file.28
Extending existing file test_file.29
Extending existing file test_file.30
Extending existing file test_file.31
Extending existing file test_file.32
Extending existing file test_file.33
Extending existing file test_file.34
Extending existing file test_file.35
Extending existing file test_file.36
Extending existing file test_file.37
Extending existing file test_file.38
Extending existing file test_file.39
Extending existing file test_file.40
Extending existing file test_file.41
Extending existing file test_file.42
Extending existing file test_file.43
Extending existing file test_file.44
Extending existing file test_file.45
Extending existing file test_file.46
Extending existing file test_file.47
Extending existing file test_file.48
Extending existing file test_file.49
Extending existing file test_file.50
Extending existing file test_file.51
Extending existing file test_file.52
Extending existing file test_file.53
Extending existing file test_file.54
Extending existing file test_file.55
Extending existing file test_file.56
Extending existing file test_file.57
Extending existing file test_file.58
Extending existing file test_file.59
Extending existing file test_file.60
Extending existing file test_file.61
Extending existing file test_file.62
Extending existing file test_file.63
Extending existing file test_file.64
Extending existing file test_file.65
Extending existing file test_file.66
Extending existing file test_file.67
Extending existing file test_file.68
Extending existing file test_file.69
Extending existing file test_file.70
Extending existing file test_file.71
Extending existing file test_file.72
Extending existing file test_file.73
Extending existing file test_file.74
Extending existing file test_file.75
Extending existing file test_file.76
Extending existing file test_file.77
Extending existing file test_file.78
Extending existing file test_file.79
Extending existing file test_file.80
Extending existing file test_file.81
Extending existing file test_file.82
Creating file test_file.83
Creating file test_file.84
Creating file test_file.85
Creating file test_file.86
Creating file test_file.87
Creating file test_file.88
Creating file test_file.89
Creating file test_file.90
Creating file test_file.91
Creating file test_file.92
Creating file test_file.93
Creating file test_file.94
Creating file test_file.95
Creating file test_file.96
Creating file test_file.97
Creating file test_file.98
Creating file test_file.99
Creating file test_file.100
Creating file test_file.101
Creating file test_file.102
Creating file test_file.103
Creating file test_file.104
Creating file test_file.105
Creating file test_file.106
Creating file test_file.107
Creating file test_file.108
Creating file test_file.109
Creating file test_file.110
Creating file test_file.111
Creating file test_file.112
Creating file test_file.113
Creating file test_file.114
Creating file test_file.115
Creating file test_file.116
Creating file test_file.117
Creating file test_file.118
Creating file test_file.119
Creating file test_file.120
Creating file test_file.121
Creating file test_file.122
Creating file test_file.123
Creating file test_file.124
Creating file test_file.125
Creating file test_file.126
Creating file test_file.127
8153726976 bytes written in 314.28 seconds (24.74 MiB/sec).
[openEuler@openEuler ~]$ sysbench fileio --file-total-size=10G --file-test-mode=rndrw --time=300 --max-requests=0 run
sysbench 1.0.20 (using system LuaJIT 2.1.0-beta3)

Running the test with following options:
Number of threads: 1
Initializing random number generator from current time


Extra file open flags: (none)
128 files, 80MiB each
10GiB total file size
Block size 16KiB
Number of IO requests: 0
Read/Write ratio for combined random IO test: 1.50
Periodic FSYNC enabled, calling fsync() each 100 requests.
Calling fsync() at the end of test, Enabled.
Using synchronous I/O mode
Doing random r/w test
Initializing worker threads...

Threads started!
结果显示了读取和写入的速率,帮助我们了解系统的存储性能。
4.4 网络性能测试
安装 ipefr3:
[openEuler@openEuler ~]$ sudo yum install iperf3
使用 iperf3 工具进行网络性能测试,评估网络吞吐量。首先在服务器上启动 iperf3 服务器:
iperf3 -s
然后在客户端上运行 iperf3 测试:
iperf3 -c 192.168.1.100 -t 60
结果:
[root@openEuler ~]iperf3 -c 192.168.1.100 -t 60
Connecting to host 192.168.1.100, port 5201
[  4] local 192.168.1.101 port 53950 connected to 192.168.1.100 port 5201

[ ID] Interval           Transfer     Bandwidth
[  4]   0.00-60.00  sec   715 MBytes  100 Mbits/sec                  sender
[  4]   0.00-60.00  sec   713 MBytes  99.5 Mbits/sec                receiver
结果展示了网络带宽,帮助我们了解系统的网络性能。
4.5 测试小结
本次测试对香橙派 Kunpeng Pro 开发板的性能进行了全面评估,涵盖了 CPU 性能、内存性能、I/O 性能和网络性能。以下是各项测试的具体结果与总结:
4.5.1 CPU 性能测试
4.5.1.1 单线程 CPU 测试
- 使用 sysbench 进行单线程 CPU 测试,整数计算的结果显示每秒事件数为 813.12,总执行时间为 10.0011 秒。单线程性能良好,能够快速完成整数计算任务。
4.5.1.2 多线程 CPU 测试
- 在多线程(4 线程)条件下,sysbench 测试结果显示每秒事件数为 3160.23,总执行时间为 10.0009 秒。多线程测试结果表明,香橙派 Kunpeng Pro 能够有效利用多核处理器的优势,显著提升并行处理能力。
4.5.2 内存性能测试
4.5.2.1 内存读写性能测试
- 通过 sysbench 进行内存读写性能测试,结果显示总操作数为 10240,总执行时间为 1.4389 秒,内存读写速度为 7093.69 MiB/sec。该结果表明,香橙派 Kunpeng Pro 在内存读写方面表现出色,能够快速处理大量数据。
4.2.2 高负载内存测试
- 使用 stress-ng 工具对系统进行高负载内存测试,发现当 --vm-bytes 参数设置为 8G、6G、5G 和 4G 时,测试均出现 Segmentation fault 错误。但在 7G 内存分配时,测试成功完成。这表明在极端高负载环境下,香橙派 Kunpeng Pro 能够在 7G 内存分配下稳定运行,而更高的内存分配可能导致系统不稳定。
4.3 I/O 性能测试
- 使用 sysbench 测试 I/O 性能,在 10G 文件总大小下进行随机读写测试。测试结果显示,每秒读取和写入速度为 24.74 MiB/sec,总共完成 8153726976 字节写入,执行时间为 314.28 秒。这表明香橙派 Kunpeng Pro 在存储性能方面表现良好,能够有效处理大规模数据读写任务。
4.4 网络性能测试
- 使用 iperf3 工具进行网络性能测试,结果显示在 60 秒测试时间内,发送和接收带宽均为 100 Mbits/sec。这表明香橙派 Kunpeng Pro 在网络传输性能方面表现稳定,能够满足高带宽网络应用的需求。
五、全篇归纳总结
香橙派 Kunpeng Pro 开发板以其高性能处理器和大容量内存,在实际应用中展现出了强大的计算能力和出色的稳定性。本文旨在全面总结这款开发板的性能特点、使用体验、适用场景以及存在的不足之处,以期为潜在用户提供有价值的参考信息。
5.1 性能特点
香橙派 Kunpeng Pro 开发板凭借其强大的处理器和大容量内存,无论是在单线程还是多线程任务中,都能高效完成。在内存性能测试中,其处理大量数据的能力同样令人印象深刻。此外,该开发板还支持多种外设接口,如HDMI、USB、GPIO,以及通过M.2接口扩展存储,这些特性使得它在各种复杂应用场景中都能游刃有余。
5.2 使用体验
在实际使用中,香橙派 Kunpeng Pro 的系统安装和远程SSH登录过程简便快捷,用户只需简单配置即可开始开发工作。在高负载下,系统表现稳定,这对于需要长时间运行任务的开发者来说至关重要。此外,开发板的兼容性和可扩展性也表现出色,为用户提供了极大的便利。
5.3 适用场景
香橙派 Kunpeng Pro 开发板凭借其出色的性能和丰富的接口,适用于多个领域。在嵌入式系统开发方面,它能够满足工业控制、医疗设备等对高性能计算和稳定性的需求;在物联网应用中,其强大的处理能力和稳定的网络连接确保了物联网设备的可靠运行;在多媒体处理领域,无论是视频处理还是图像识别,它都能提供流畅的性能支持;此外,它还适用于计算机科学、电子工程等领域的教育和科研项目,为学生和研究人员提供强大的实验和开发平台。
5.4 不足与改进
尽管香橙派 Kunpeng Pro 开发板在各方面表现出色,但在某些高负载情况下,仍然存在内存不足的问题。例如,在分配8/6G内存进行压力测试时,出现了Segmentation fault错误。这可能是由于系统的内存管理和分配机制导致的,需要进一步优化和改进。此外,为了确保测试结果的准确性和稳定性,我们还需要注意不同测试工具和方法的兼容性。
5.5 个人评价
综上,香橙派 Kunpeng Pro 开发板以其强大的性能和丰富的功能,为各类应用场景提供了广阔的可能性。无论是专业的开发者还是初学者,都能从中受益。尽管在某些高负载情况下存在内存不足的问题,但这并不妨碍它在其他方面的出色表现。希望本文的总结能够为您提供有价值的信息,并激发您对香橙派 Kunpeng Pro 的兴趣。如果您对这款开发板感兴趣,不妨亲自试用一下,体验其强大的性能和丰富的功能。让我们一起探索更多的可能性!


 1026
1026

 被折叠的 条评论
为什么被折叠?
被折叠的 条评论
为什么被折叠?
 到【灌水乐园】发言


