


目录
一、项目简介
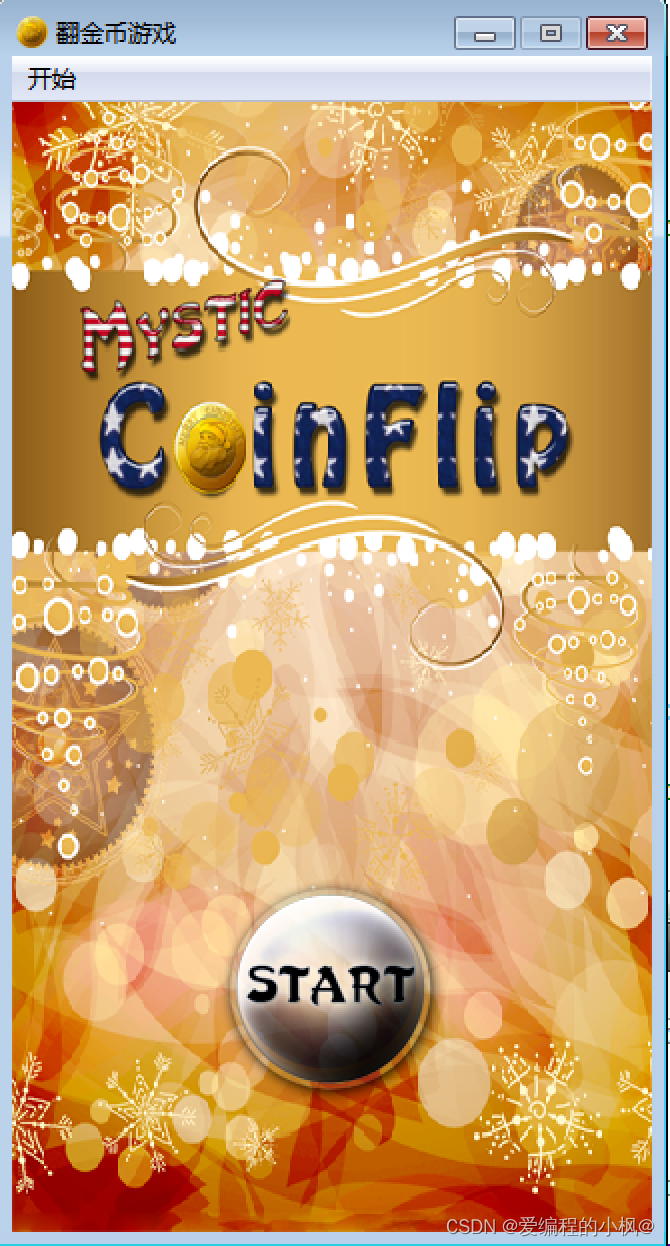
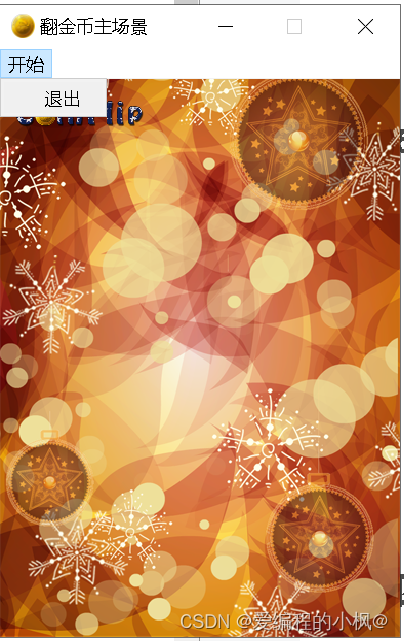
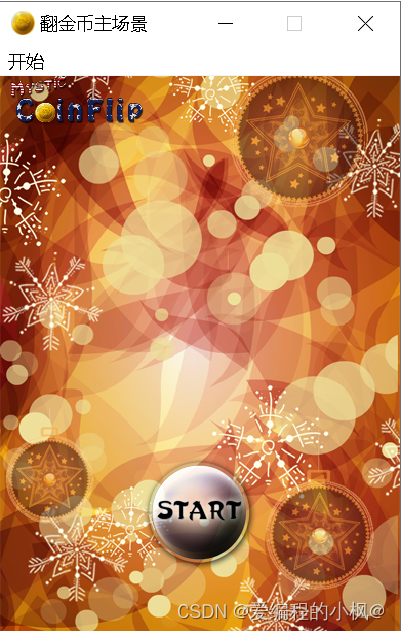
翻金币项目是一款经典的益智类游戏,我们需要将金币都翻成同色,才视为胜利。首先,开始界面如下:
点击start按钮,进入下层界面,选择关卡:
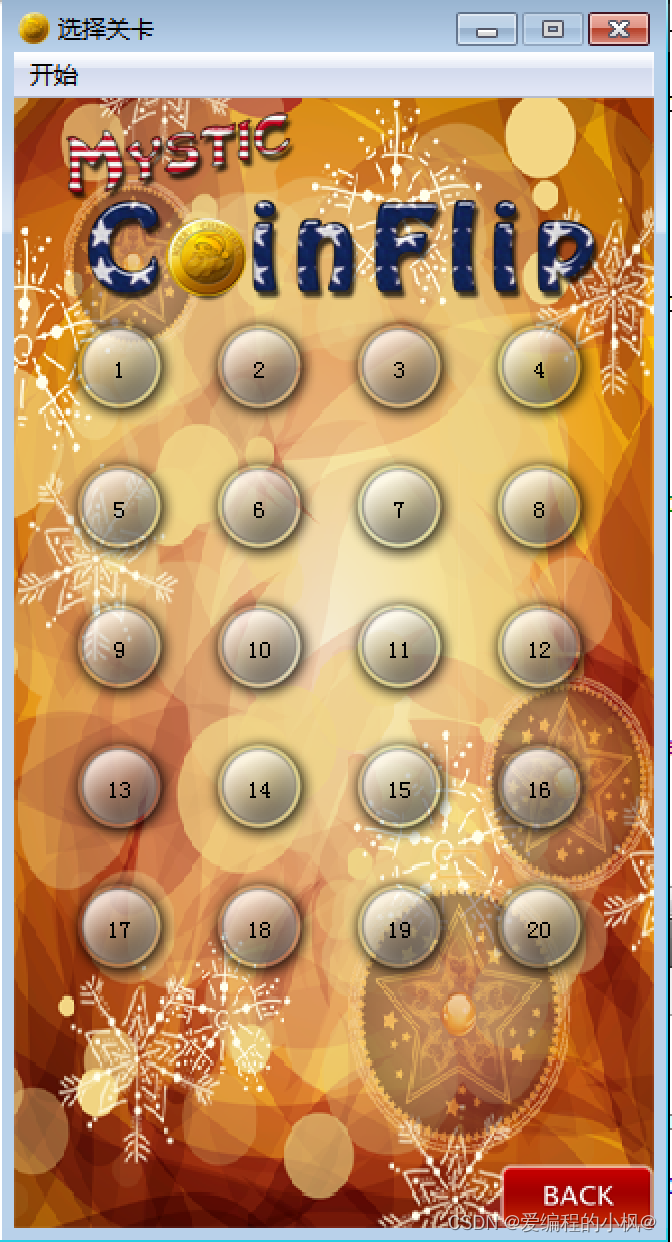
在这里我们设立了20个关卡供玩家选择,假设我们点击了第1关,界面如下:
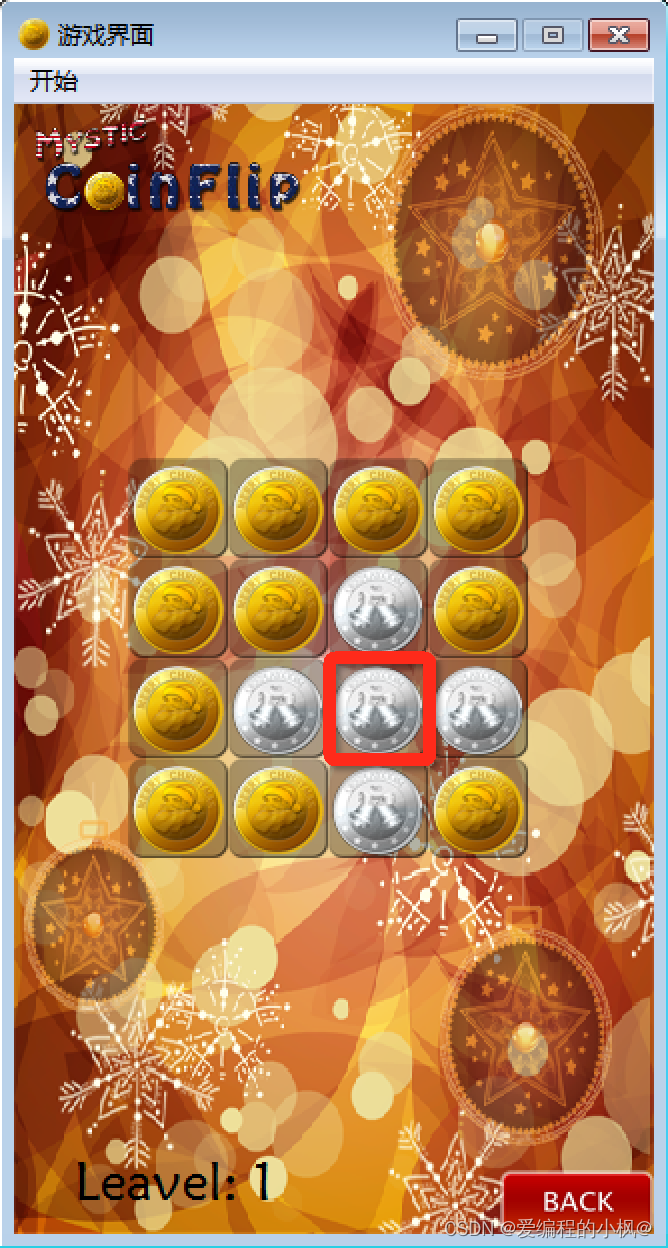
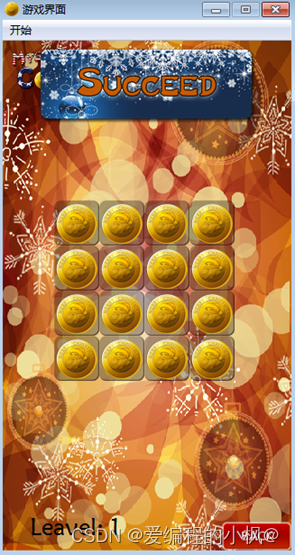
如果想要赢取胜利,我们需要点击上图中红色方框选取的区域,翻动其上下左右的金币,然后当所有金币都变为金色,视为胜利,胜利界面如下:
二、创建项目
打开Qt-Creator,创建项目:注意名称不要包含空格和回车,路径不要有中文
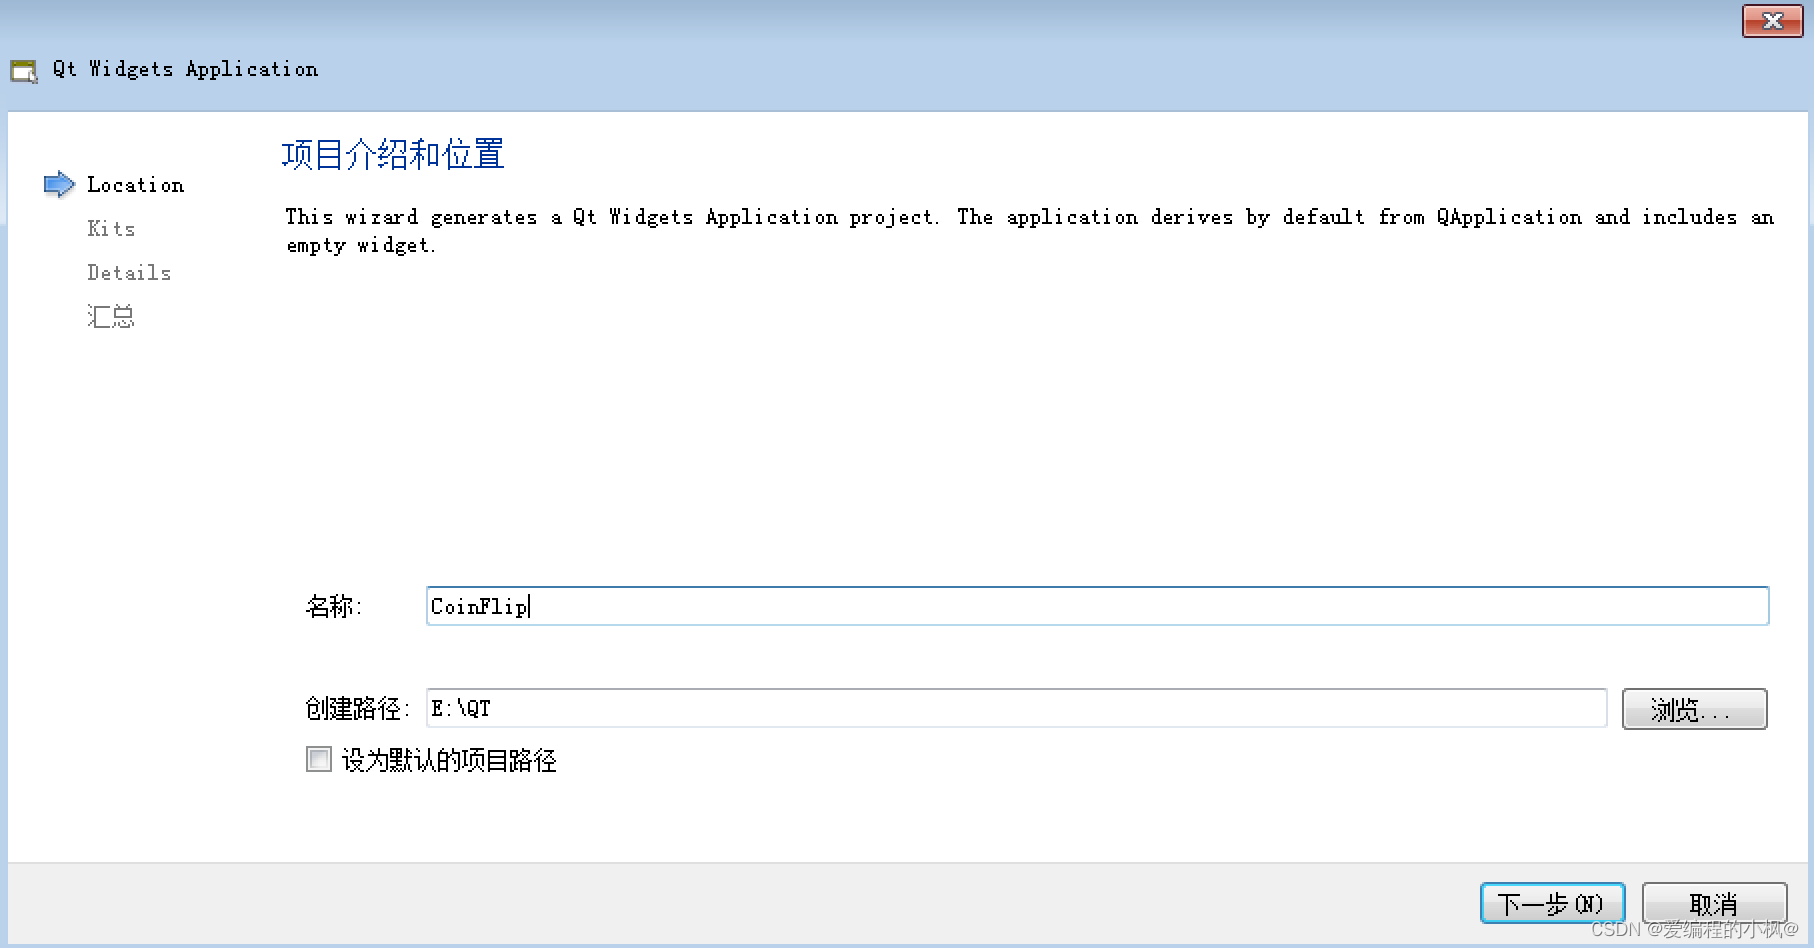
类信息中,选择基类为QMainWindow,类名称为 MainScene,代表着主场景。

点击完成,创建出项目:
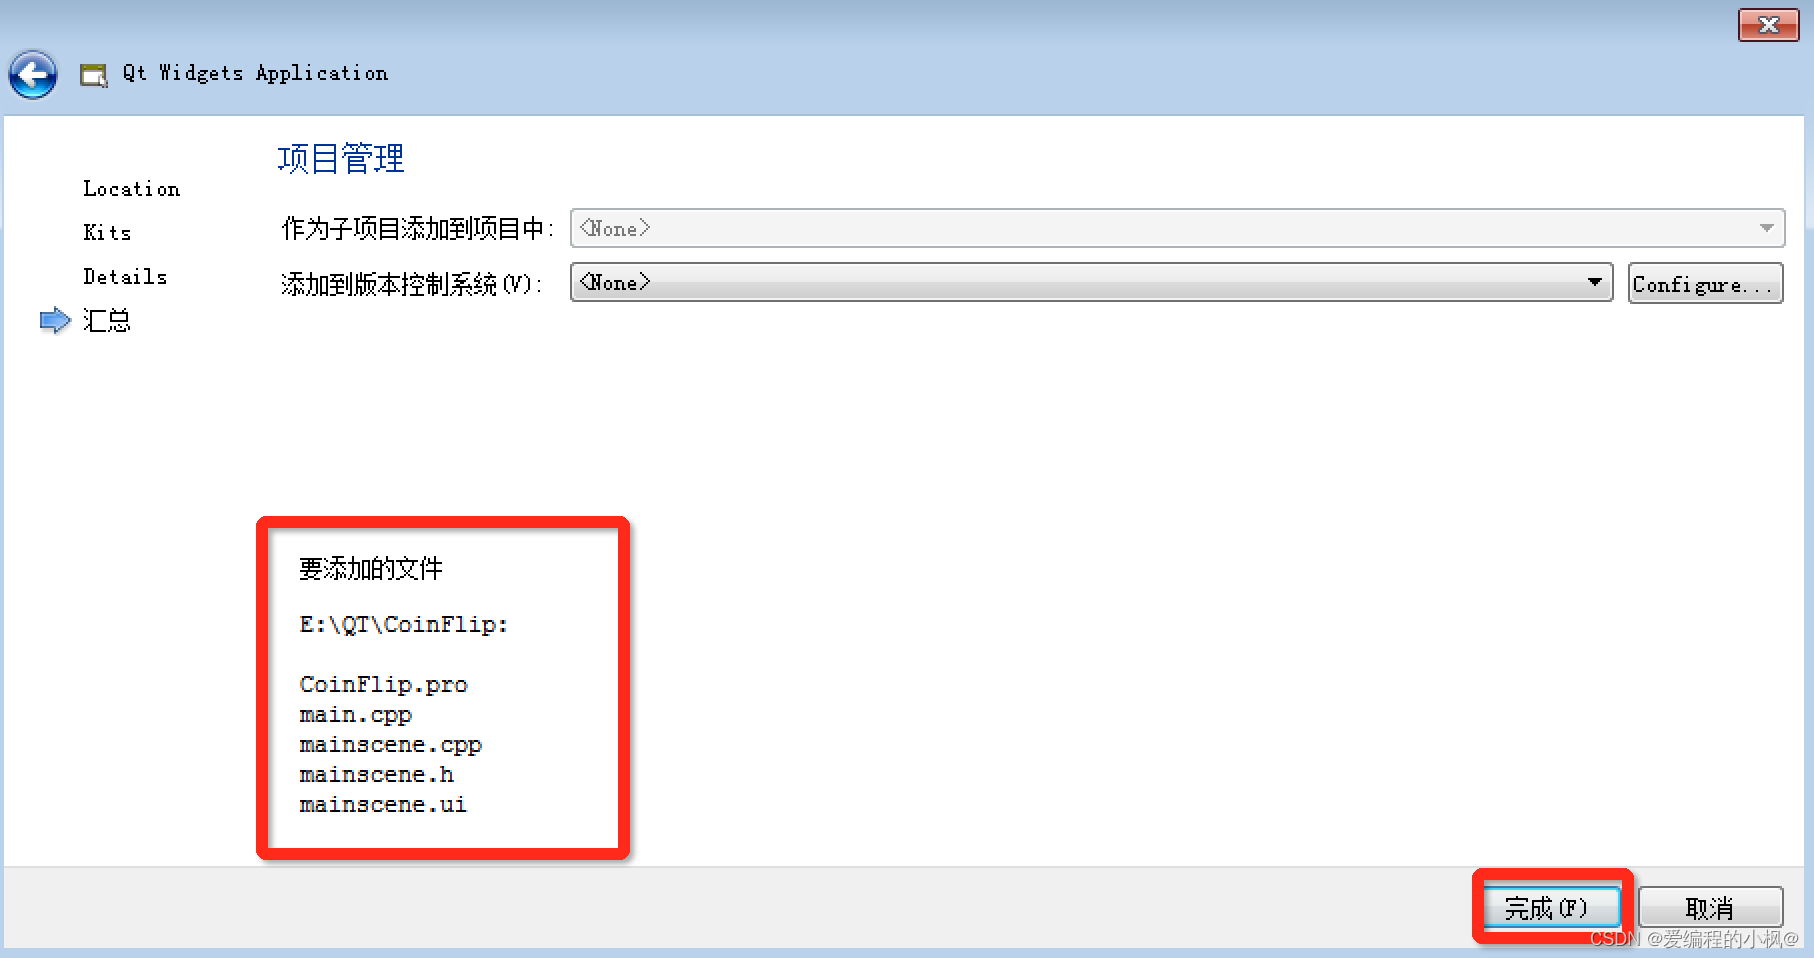
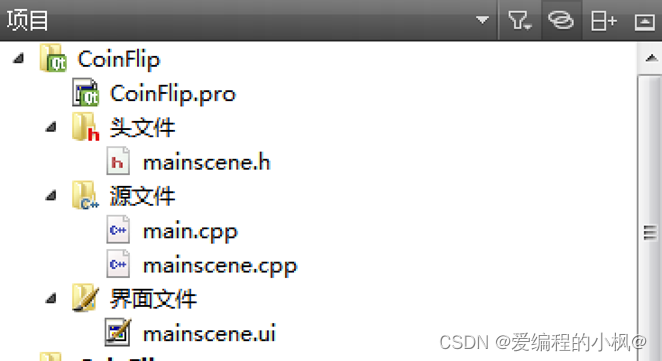
创建的项目结构如下:
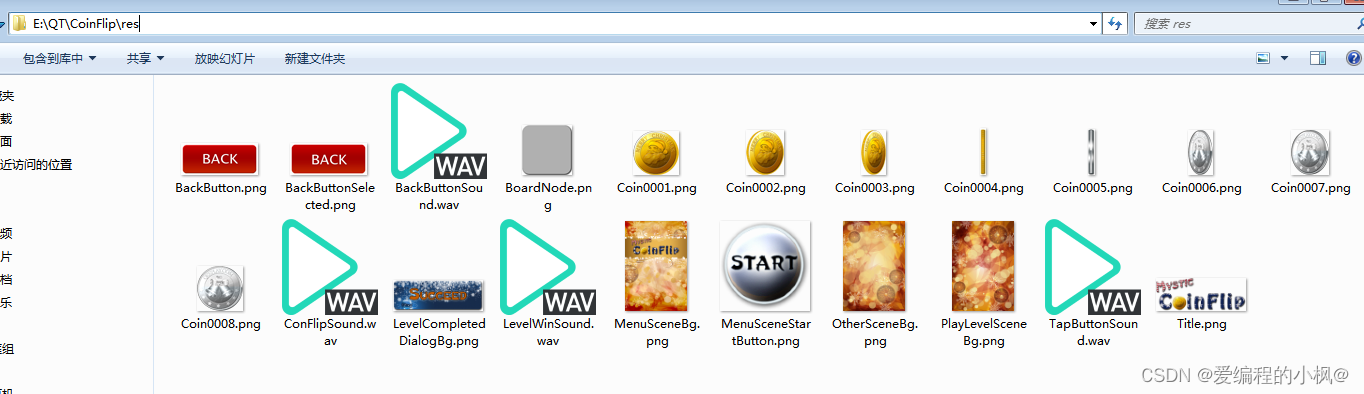
添加资源文件
资源文件链接
提取码:1234![]() https://pan.baidu.com/s/1NdkqDTFepLlpGp1SJFD44Q?pwd=1234
https://pan.baidu.com/s/1NdkqDTFepLlpGp1SJFD44Q?pwd=1234
将资源添加到当前项目下
 然后创建.qrc文件
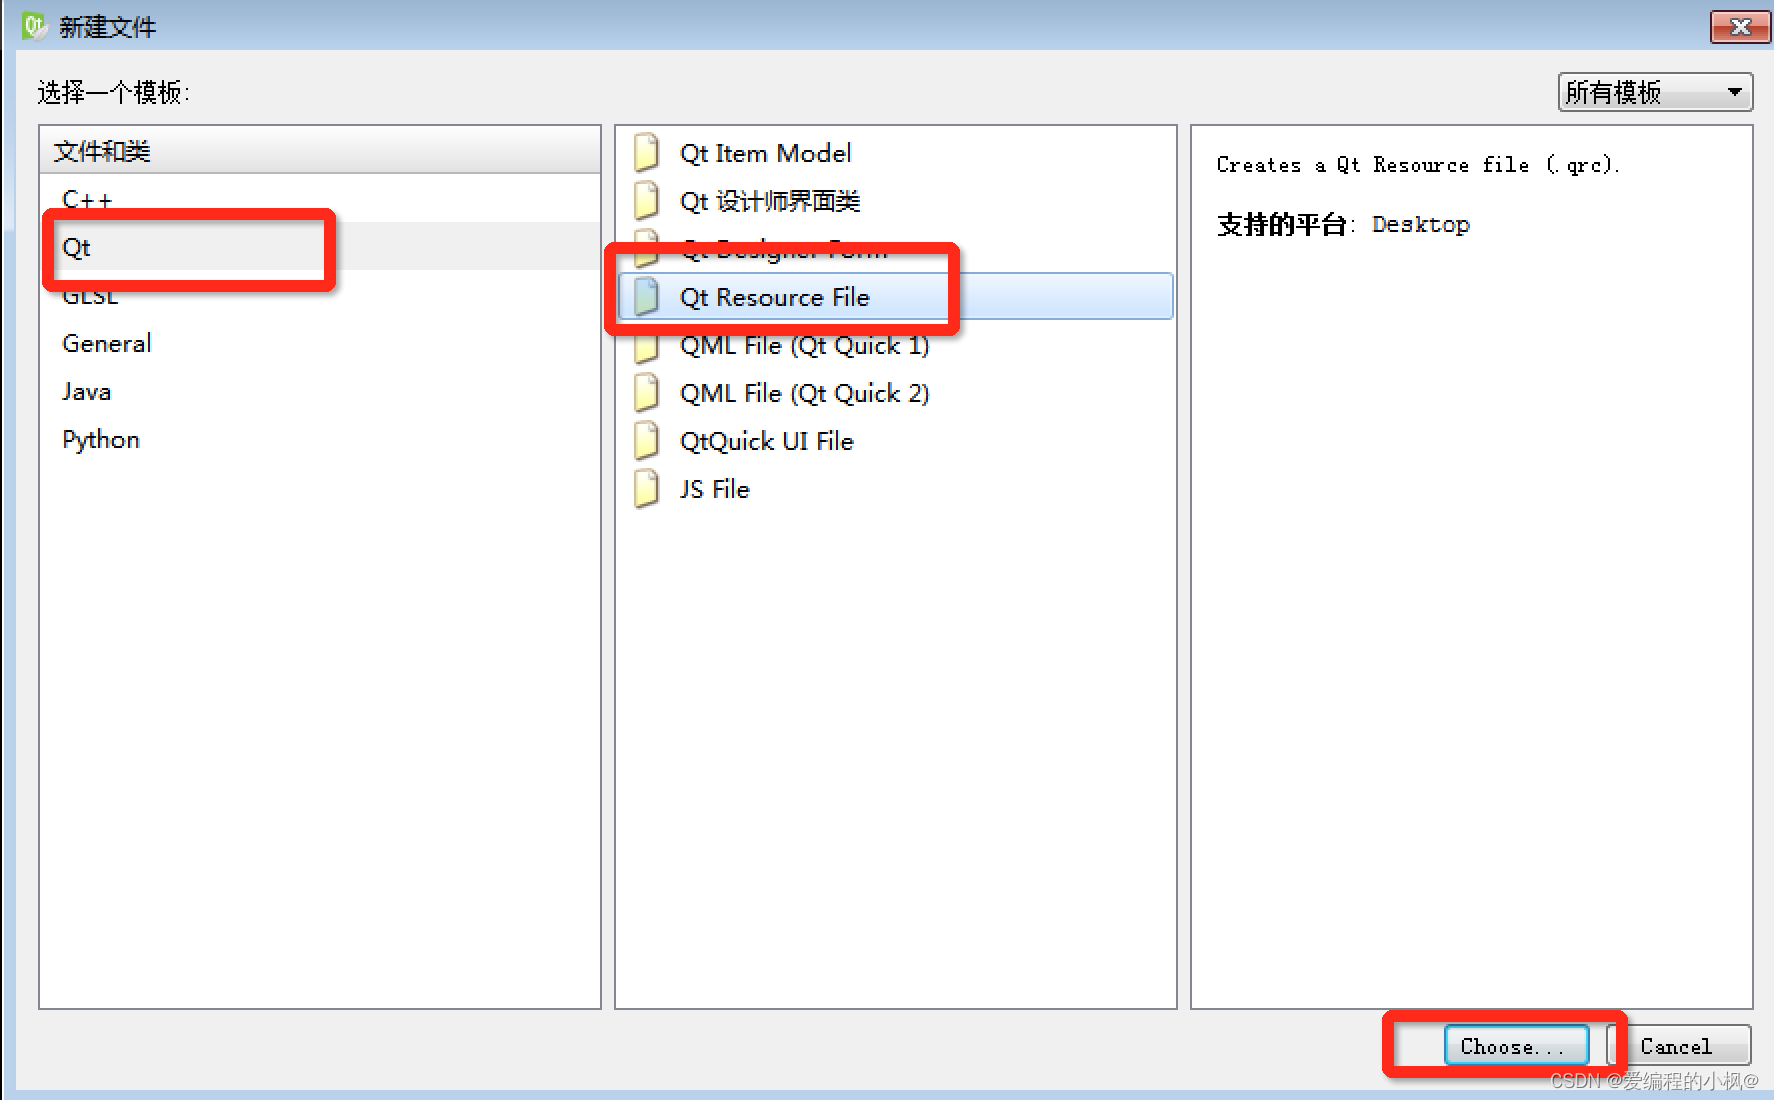
进入编辑模式,添加前缀 “/” ,添加文件
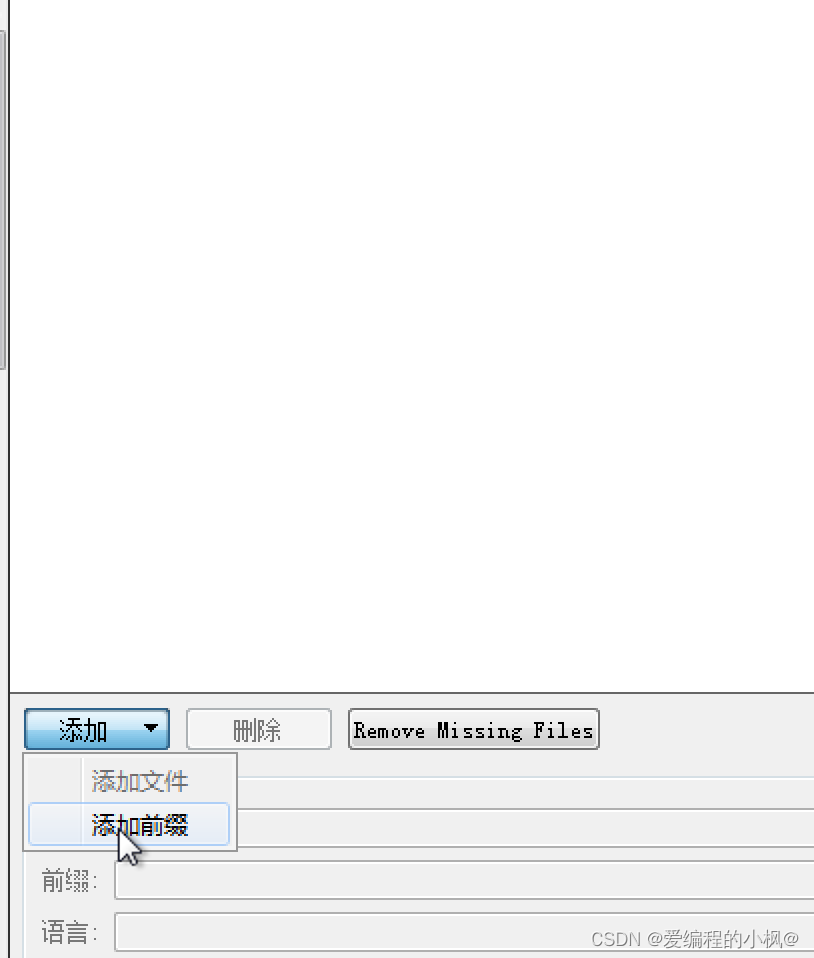

将所有资源文件进行添加
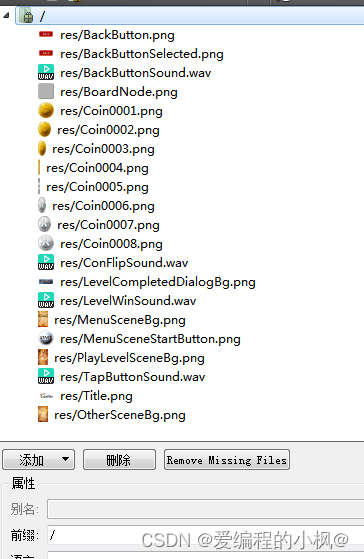
至此将所有需要的资源添加到了本项目中。
三、项目基本配置
准备工作
点击mainscene.ui文件,设计其菜单栏如下:

设计“退出”菜单项,objectName为 actionQuit, text 为 退出;
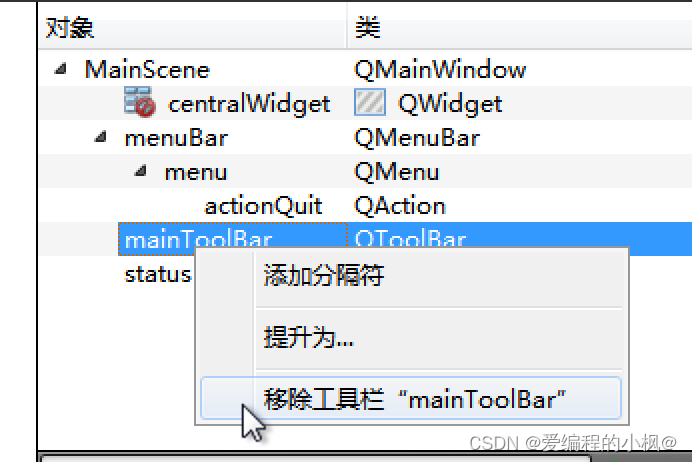
移除自带的工具栏与状态栏
回到MainScene.cpp文件,进入构造函数中,进行场景的基本配置,代码如下:
1.设置背景图标
setWindowTitle("翻金币主场景");2.设置固定大小
setFixedSize(400,588);
3.设置背景和图标
    //设置图标
    setWindowIcon(QIcon(":/res/Coin0001.png"));
重写MainScene的PaintEvent事件,并添加一下代码,绘制背景图片
void MainScene::paintEvent(QPaintEvent *)
{
    QPainter painter(this);
    QPixmap pix;
    pix.load(":/res/PlayLevelSceneBg.png");
    painter.drawPixmap(0,0,this->width(),this->height(),pix);

    //画背景上的图标
    pix.load(":/res/Title.png");
    pix = pix.scaled(pix.width()*0.5,pix.height()*0.5);
    painter.drawPixmap(10,30,pix);


}
4.创建开始菜单项目
    //创建菜单栏
    QMenuBar * bar = menuBar();
    setMenuBar(bar);
    //创建开始菜单项
    QMenu * startMenu = bar->addMenu("开始");
5.退出按钮
    //创建退出 菜单项
    QAction * quitAction = startMenu->addAction("退出");

    //点击退出 实现退出游戏
    connect(quitAction,&QAction::triggered,[=](){
        this->close();
    });
运行结果
四、创建开始按钮
1.封装自定义按钮 MyPushButton
开始按钮点击后有弹跳效果,这个效果是我们利用自定义控件实现的(QPushButton不会自带这类特效),我们可以自己封装出一个按钮控件,来实现这些效果。
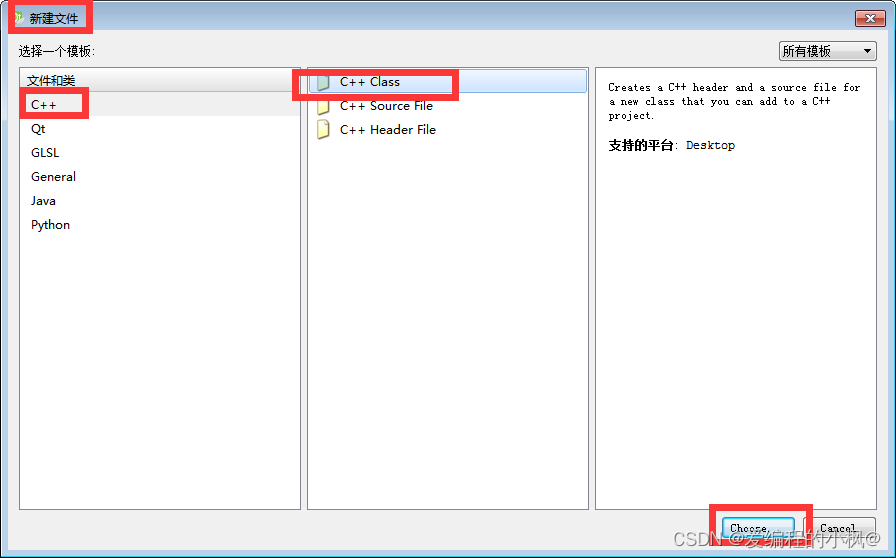
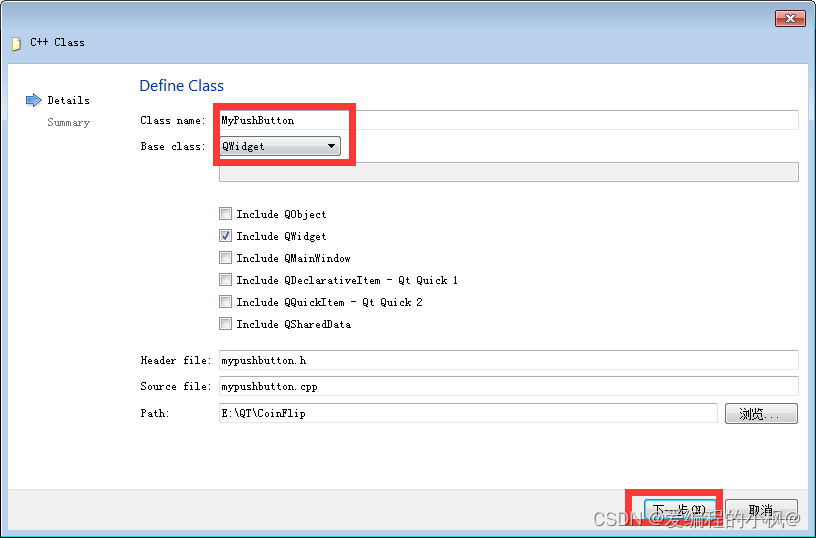
创建MyPushButton,继承与QPushButton
点击完成。
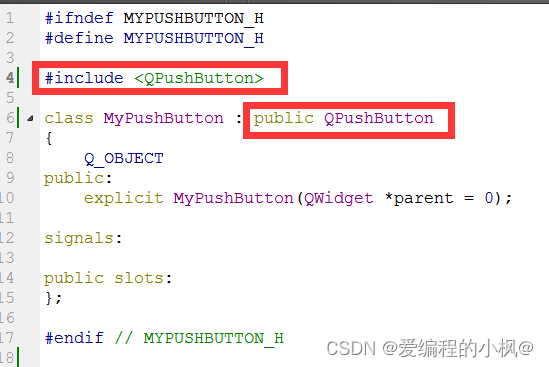
修改MyPushButton的父类
2.构造函数
提供MyPushButton的构造的重载版本,可以让MyPushButton提供正常显示的图片以及按下后显示的图片
MyPushButton.h代码如下
    //构造函数 参数1 正常显示的图片路径  参数2 按下后显示的图片路径
    MyPushButton(QString normalImg,QString pressImg = "");
    //成员属性 保存用户传入的默认显示路径 以及按下后显示的图片路径
    //normalImg 代表正常显示的图片
    //pressImg  代表按下后显示的图片,默认为空
    QString normalImgPath;
    QString pressImgPath;
实现的重载版本MyPushButton构造函数代码如下:
MyPushButton::MyPushButton(QString normalImg,QString pressImg)
{
   this->normalImgPath = normalImg;
   this->pressImgPath = pressImg;

   QPixmap pix;
   bool ret = pix.load(normalImg);
   if(!ret)
   {
       qDebug()<<"图片加载失败";
       return;
   }

   //设置图片固定大小
   this->setFixedSize(pix.width(),pix.height());

   //设置不规则图片样式
   this->setStyleSheet("QPushButton{border:Opx}");

   //设置图标
   this->setIcon(pix);

   //设置图标大小
   this->setIconSize(QSize(pix.width(),pix.height()));
}
回到MainScene的构造函数中,创建开始按钮
    //开始按钮
    MyPushButton * startBtn = new MyPushButton(":/res/MenuSceneStartButton.png");
    startBtn->setParent(this);
    //设置按钮位置,位于窗口的正下方
    startBtn->move(this->width()*0.5-startBtn->width()*0.5,this->height()*0.7);
运行效果:
不规则的开始按钮添加完成。
3.测试开始按钮
连接信号槽,监听开始按钮点击
    connect(startBtn,&MyPushButton::clicked,[=](){
        qDebug()<<"点击了开始";
});
4.开始制作弹跳特效
zoom1与zoom2 为MyPushButton中扩展的特效代码,具体如下:
zoom1(向下跳)
void MyPushButton::zoom1()//向下跳
{
    //创建动态对象
    QPropertyAnimation * animation = new QPropertyAnimation(this,"geometry");
    //设置动画时间间隔
    animation->setDuration(200);
    //起始位置
    animation->setStartValue(QRect(this->x(),this->y(),this->width(),this->height()));
    //结束位置
    animation->setEndValue(QRect(this->x(),this->y()+10,this->width(),this->height()));
    //设置曲线
    animation->setEasingCurve(QEasingCurve::OutBounce);
    //执行动画
    animation->start();
}
zoom2 (向上跳)
void MyPushButton::zoom2()//向上跳
{
    //创建动态对象
    QPropertyAnimation * animation = new QPropertyAnimation(this,"geometry");
    //设置动画时间间隔
    animation->setDuration(200);
    //起始位置
    animation->setStartValue(QRect(this->x(),this->y()+10,this->width(),this->height()));
    //结束位置
    animation->setEndValue(QRect(this->x(),this->y(),this->width(),this->height()));
    //设置曲线
    animation->setEasingCurve(QEasingCurve::OutBounce);
    //执行动画
    animation->start();
}
connect(startBtn,&MyPushButton::clicked,[=](){
//qDebug()<<"点击了开始";
//做弹起的特效
startBtn->zoom1();
startBtn->zoom2();
});运行代码,点击按钮,测试弹跳效果。
五、创建选择关卡
点击开始按钮后,进入选择关卡场景。
首先我们先创建选择关卡场景,添加新的C++文件
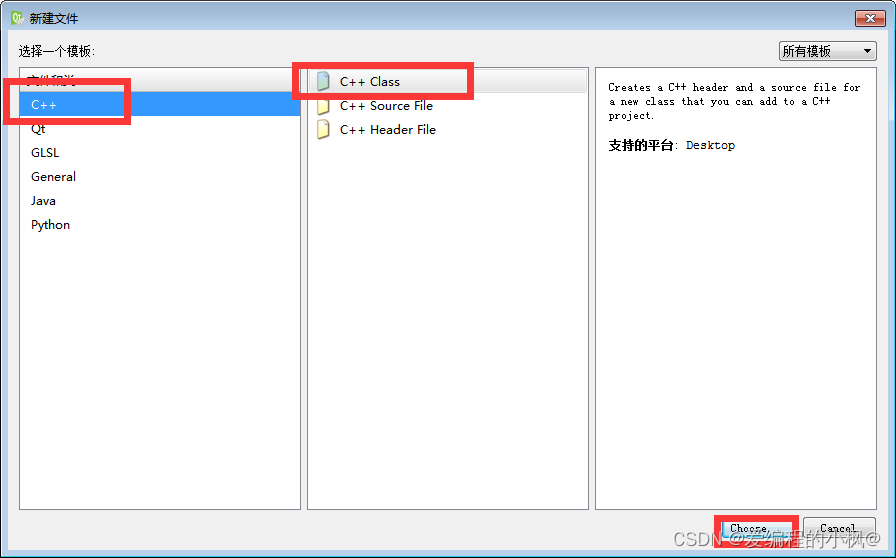
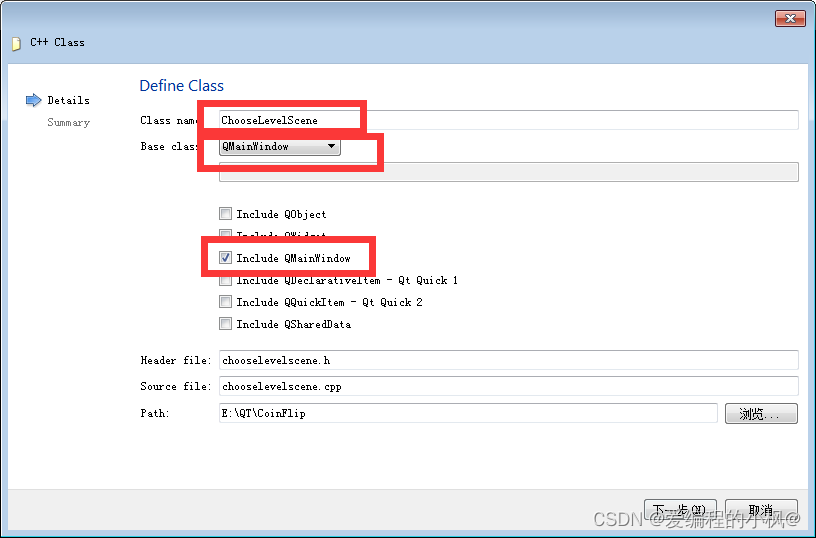
类名为ChooseLevelScene 选择基类为QMainWindow,点击下一步,然后点击完成。
1.进入关卡的按钮
目前点击主场景的开始按钮,只有弹跳特效,但是我们还需要有功能上的实现,特效结束后,我们应该进入选择关卡场景
在MainScene.h中 保存ChooseScene选择关卡场景对象
    //选择关卡场景
    ChooseLevelScene *chooseScene = new ChooseLevelScene;
我们在zoom1和zoom2特效后,延时0.5秒,进入选择关卡场景,代码如下:
            //延时进入到选择关卡场景中
            QTimer::singleShot(500,this,[=](){
            //进入到选择关卡中
            //自身隐藏
            this->hide();
            //显示选择关卡
            chooseScene->show();
        });
测试点击开始,执行特效后延时0.5秒进入选择关卡场景。
2.配置关卡场景
#include "chooselevelscene.h"
#include<QMenuBar>
#include<QPainter>
#include<mypushbutton.h>
#include<QDebug>
ChooseLevelScene::ChooseLevelScene(QWidget *parent) : QMainWindow(parent)
{
     //配置选择关卡的场景
    this->setFixedSize(400,588);

    //设置图标
    this->setWindowIcon(QPixmap(":/res/Coin0001.png"));

    //设置标题
    this->setWindowTitle("选择关卡场景");

    //创建菜单栏
    QMenuBar * bar = menuBar();
    setMenuBar(bar);
    //创建开始菜单项
    QMenu * startMenu = bar->addMenu("开始");

    //创建退出 菜单项
    QAction * quitAction = startMenu->addAction("退出");

    //点击退出 实现退出游戏
    connect(quitAction,&QAction::triggered,[=](){
        this->close();
    });
}
运行结果:
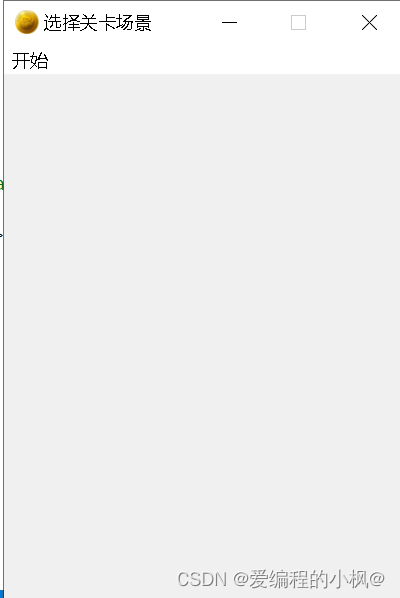
3.设置关卡背景
void ChooseLevelScene::paintEvent(QPaintEvent *)
{
     QPainter painter(this);
     QPixmap pix;
     pix.load(":/res/OtherSceneBg.png");
     painter.drawPixmap(0,0,this->width(),this->height(),pix);
     //加载标题
     pix.load(":/res/Title.png");
     painter.drawPixmap((this->width()-pix.width())*0.5,30,pix.width(),pix.height(),pix);
}
4.关卡返回按钮
创建返回按钮
    //返回按钮
    MyPushButton * backBtn = new MyPushButton(":/res/BackButton.png",":/res/BackButtonSelected.png");
    backBtn->setParent(this);
    backBtn->move(this->width()-backBtn->width(),this->height()-backBtn->height());
测试返回按钮
    //点击返回
    connect(backBtn,&MyPushButton::clicked,[=]()
    {
        qDebug()<<"点击了返回按钮";
    });
六、关卡返回按钮特效制作
返回按钮是有正常显示图片和点击后显示图片的两种模式,所以我们需要重写MyPushButton中的 MousePressEvent和MouseReleaseEvent
1.重写鼠标按下事件
//重写按钮 按下 和释放事件
void MyPushButton:: mousePressEvent(QMouseEvent *e)
{
    if(this->pressImgPath != "")//传入的按下图片不为空 说明需要有按下的状态 ,切换图片
    {
        QPixmap pix;
        bool ret = pix.load(this->pressImgPath);
        if(!ret)
        {
            qDebug()<<"图片加载失败";
            return;
        }

        //设置图片固定大小
        this->setFixedSize(pix.width(),pix.height());

        //设置不规则图片样式
        this->setStyleSheet("QPushButton{border:Opx}");

        //设置图标
        this->setIcon(pix);

        //设置图标大小
        this->setIconSize(QSize(pix.width(),pix.height()));
    }

    //让父类执行其他的内容
    return QPushButton::mousePressEvent(e);
}
2.重写鼠标释放操作
void MyPushButton:: mouseReleaseEvent(QMouseEvent *e)
{
    if(this->pressImgPath != "")//传入的按下图片不为空 说明需要有按下的状态 ,切换初始图片
    {
        QPixmap pix;
        bool ret = pix.load(this->normalImgPath);
        if(!ret)
        {
            qDebug()<<"图片加载失败";
            return;
        }

        //设置图片固定大小
        this->setFixedSize(pix.width(),pix.height());

        //设置不规则图片样式
        this->setStyleSheet("QPushButton{border:Opx}");

        //设置图标
        this->setIcon(pix);

        //设置图标大小
        this->setIconSize(QSize(pix.width(),pix.height()));
    }

    //让父类执行其他的内容
    return QPushButton::mouseReleaseEvent(e);
}
七、开始与选择关卡场景切换
1.自定义信号
点击选择关卡场景的返回按钮,发送一个自定义信号
    //chooselevelscene.h
    //写一个自定义信号,告诉主场景 点击了返回
    void ChooseSceneBack();
2.场景切换
在主场景中监听这个信号,并且当触发信后后,重新显示主场景,隐藏掉
    //chooselevelscence.cpp
    //点击返回
    connect(backBtn,&MyPushButton::clicked,[=](){
        //qDebug()<<"点击了返回按钮";
        //告诉主场景 我返回了,主场景监听ChooseLevelScene的返回按钮
        //延时返回
        QTimer::singleShot(500,this,[=](){
            emit this->ChooseSceneBack();
        });
    });
//mainscene.cpp
//监听选择关卡的返回按钮的信号
connect(chooseScene,&ChooseLevelScene::ChooseSceneBack,this,[=](){
chooseScene->hide();//将选择关卡场景,隐藏掉
this->show();//重新显示主场景
});八、关卡按钮创建
1. 布置按钮
利用for循环将所有按钮布置到场景中
    //chooselevelscene.cpp
    //创建选择关卡的按钮
    //面试:如何用一个for循环写出一个矩阵
    for(int i = 0;i<20;i++)
    {
        MyPushButton * menuBtn = new MyPushButton(":/res/LevelIcon.png");
        menuBtn->setParent(this);
        menuBtn->move(65 + i%4 * 70,130 + i/4 * 70);
    }
2.按钮上显示关卡数
在按钮上面,设置一个QLabel用来显示关卡数。
        QLabel * label = new QLabel;
        label->setParent(this);
        label->setFixedSize(menuBtn->width(),menuBtn->height());
QLabel属性设置
//设置数字
label->setText(QString::number(i+1));
//对齐每个按钮
label->move(65 + i%4 * 70,130 + i/4 * 70);
//设置label上的文字对齐方式 水平居中 和 垂直居中
label->setAlignment(Qt::AlignHCenter | Qt::AlignVCenter);
//设置让鼠标进行穿透 51号属性
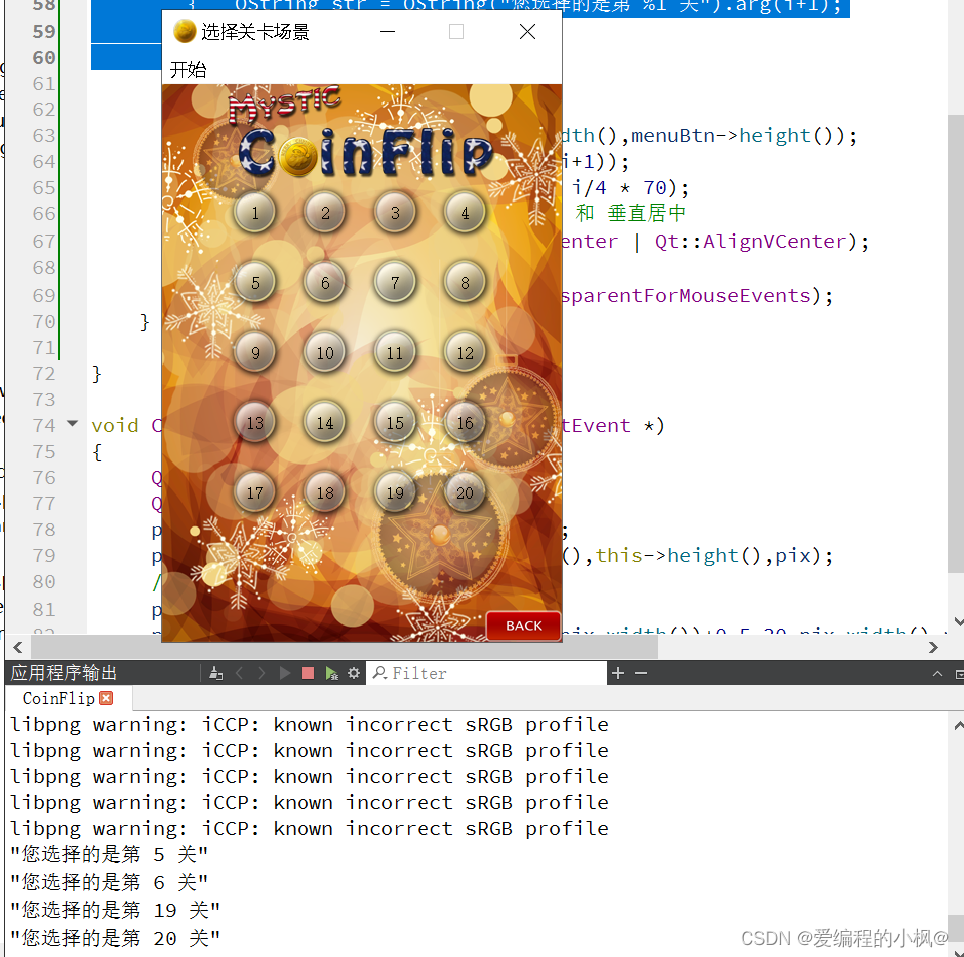
label->setAttribute(Qt::WA_TransparentForMouseEvents);3.监听按钮
监听每个按钮的点击事件
        //先监听,后设置QLabel
        //监听每个按钮的点击
        connect(menuBtn,&MyPushButton::clicked,[=]()
        {   QString str = QString("您选择的是第 %1 关").arg(i+1);
            qDebug()<<str;
        });
最终效果:
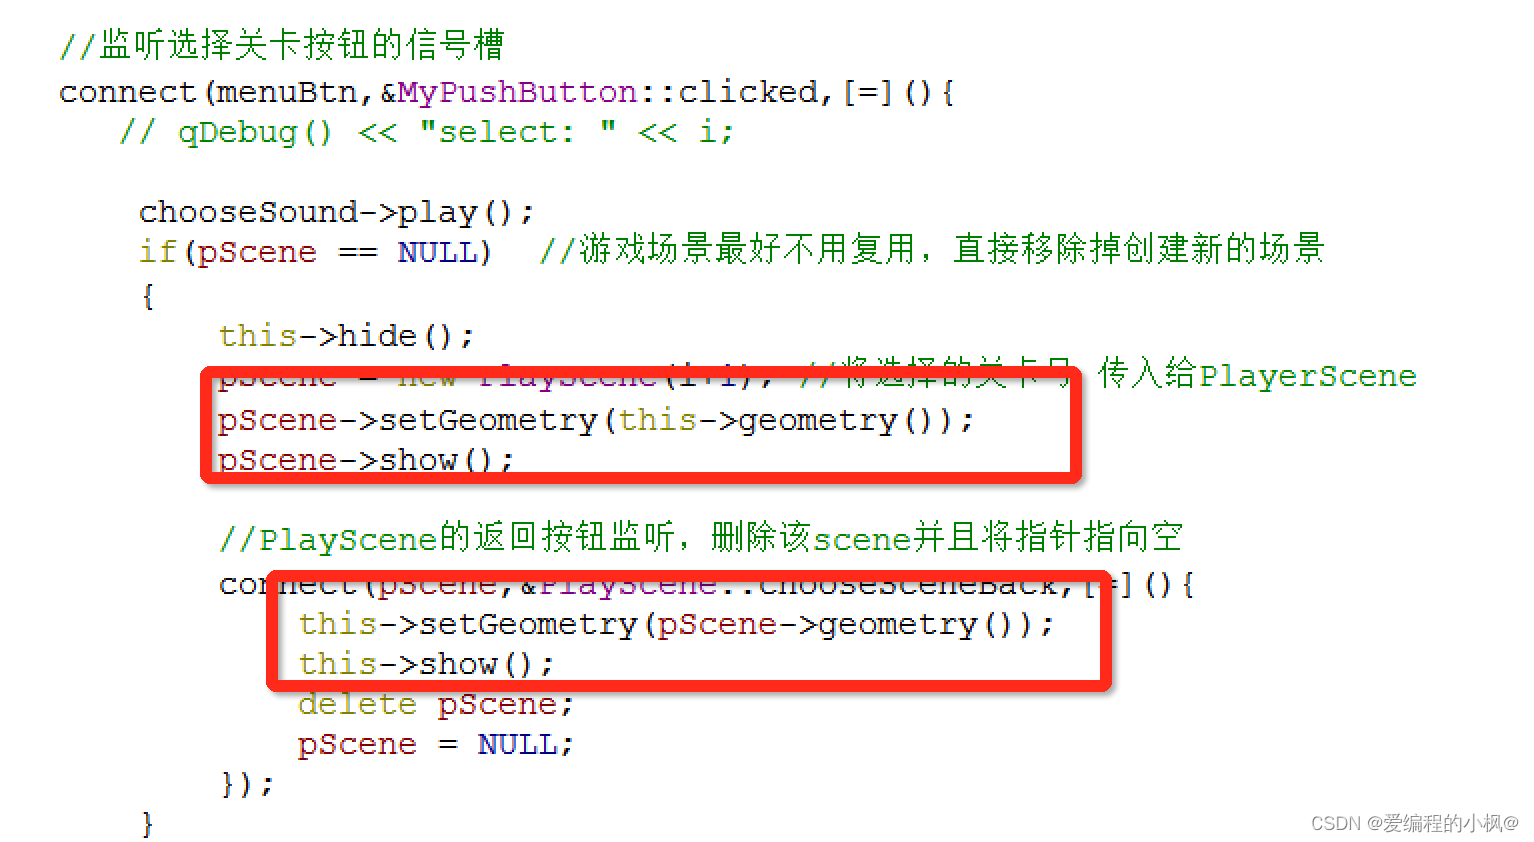
九、翻金币场景创建
1.进入场景
点击关卡按钮后,会进入游戏的核心场景,也就是翻金币的场景,首先先创建出该场景的.h和.cpp文件
创建PlayScene
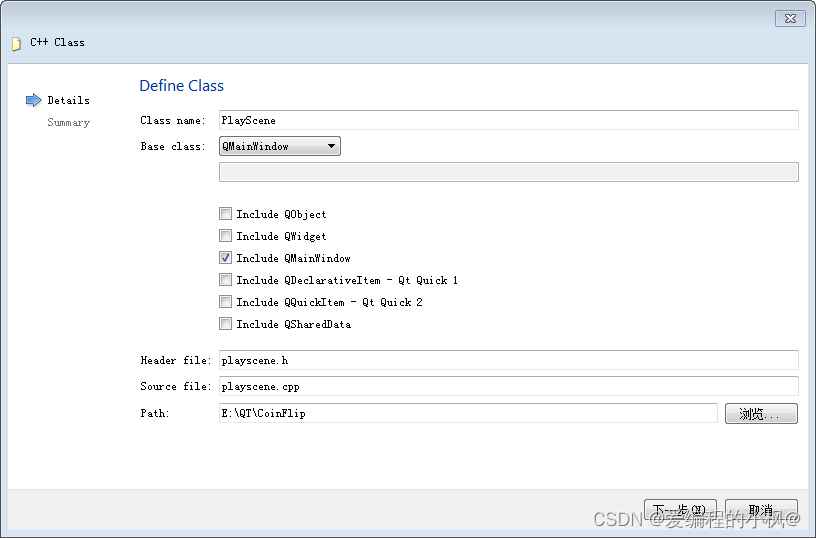
PlayScene.h中 声明成员变量,用于记录当前用户选择的关卡
int levelIndex;//内部成员属性 记录所选的关卡重写构造函数
PlayScene(int levelNum);chooselevelscene.ccpfor循环中监听每个按钮的点击
        //监听每个按钮的点击
        connect(menuBtn,&MyPushButton::clicked,[=]()
        {   QString str = QString("您选择的是第 %1 关").arg(i+1);
            qDebug()<<str;

            //进入游戏场景
            this->hide();//将选择关场景隐藏掉
            play = new PlayScene(i+1);//创建游戏场景
            play->show();//显示游戏场景
        }
运行效果:
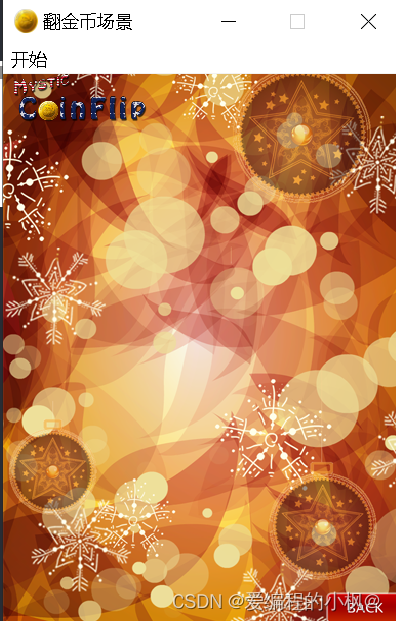
2.配置属性
PlayScene.cpp中 初始化该场景配置,设置标题、图标、大小、设置背景
QString str = QString("进入了第 %1 关").arg(levelNum);
    qDebug()<<str;
    this->levelIndex = levelNum;

    //初始化游戏场景
    //设置固定大小
    this->setFixedSize(400,580);
    //设置图标
    this->setWindowIcon(QPixmap(":/res/Coin0001.png"));
    //设置标题
    this->setWindowTitle("翻金币场景");

    //创建菜单栏
    QMenuBar * bar = menuBar();
    setMenuBar(bar);
    //创建开始菜单项
    QMenu * startMenu = bar->addMenu("开始");

    //创建退出 菜单项
    QAction * quitAction = startMenu->addAction("退出");

    //点击退出 实现退出游戏
    connect(quitAction,&QAction::triggered,[=](){
        this->close();
    });
    //返回按钮
    MyPushButton * backBtn = new
    MyPushButton(":/res/BackButton.png",":/res/BackButtonSelected.png");
    backBtn->setParent(this);
    backBtn->move(this->width()-backBtn->width(),this->height()-backBtn->height());
}
画背景,重写paintEvent事件
void PlayScene::paintEvent(QPaintEvent *)
{
    QPainter painter(this);
    QPixmap pix;
    pix.load(":/res/PlayLevelSceneBg.png");
    painter.drawPixmap(0,0,this->width(),this->height(),pix);
    //加载标题
    pix.load(":/res/Title.png");
    pix = pix.scaled(pix.width()*0.5,pix.height()*0.5);
    painter.drawPixmap(10,30,pix.width(),pix.height(),pix);

}
运行效果图:
3.返回按钮
实现返回按钮,可以返回到上一个场景(选关场景)
    //playscene.cpp
    //返回按钮
    MyPushButton * backBtn = new MyPushButton(":/res/BackButton.png",":/res/BackButtonSelected.png");
    backBtn->setParent(this);
    backBtn->move(this->width()-backBtn->width(),this->height()-backBtn->height());

    //点击返回
    connect(backBtn,&MyPushButton::clicked,[=](){
        //qDebug()<< "翻金币场景点击了返回按钮";
        //延时返回
        QTimer::singleShot(500,this,[=](){
            emit this->ChooseSceneBack();
        });
    });
chooselevelscene.ccpfor循环监听每个按钮点击中加入链接
            connect(play,&PlayScene::ChooseSceneBack,[=](){
                this->show();
                delete play;
                play = NULL;
            });
4.场景切换
至此实现了三个场景之间的切换。
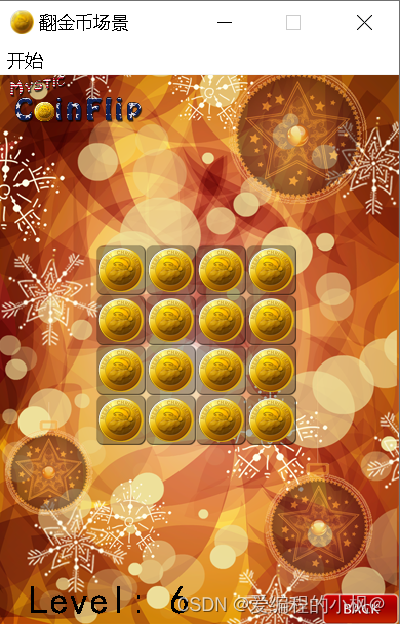
十、实现显示关卡标签
标签创建及属性设置
    //显示当前关卡数
    QLabel * label = new QLabel;
    label->setParent(this);
    //字体,字号
    QFont font;
    font.setFamily("黑体");
    font.setPointSize(20);
    //具体内容
    QString str1 = QString("Level: %1").arg(levelNum);
    //将字体设置到标签控件中
    label->setFont(font);
    label->setText(str1);
    //大小位置
    label->setGeometry(30,this->height() - 50,200,50);
十一、创建金币类
1.创建金币背景
先将金币的背景图案放入到PlayScene中。
//显示金币背景图案
    for(int i = 0;i<4;i++)
    {
        for(int j = 0;j<4;j++)
        {
            //绘制背景图片
            QPixmap pix = QPixmap(":/res/BoardNode.png");
            QLabel * label = new QLabel;
            label->setGeometry(0,0,pix.width(),pix.height());
            //label->setPixmap(QPixmap(":/res/BoardNode.png"));
            label->setPixmap(pix);
            label->setParent(this);
            label->move(97 + i*50,200 + j*50);
}
效果图:

2.创建金币类 MyCoin
我们知道,金币是本游戏的核心对象,并且在游戏中可以利用二维数组进行维护,拥有支持点击,翻转特效等特殊性,因此不妨将金币单独封装到一个类中,完成金币所需的所有功能。
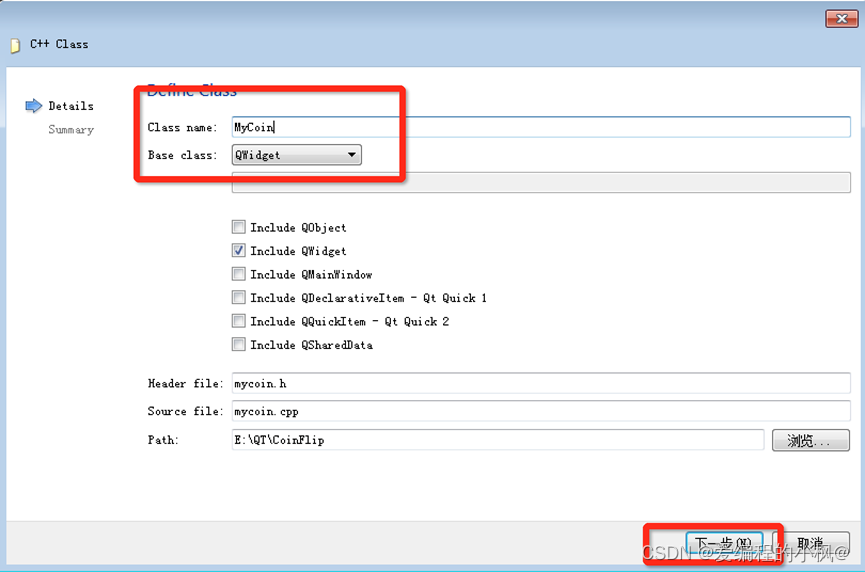
并修改MyCoin的基类为QPushButton
构造函数
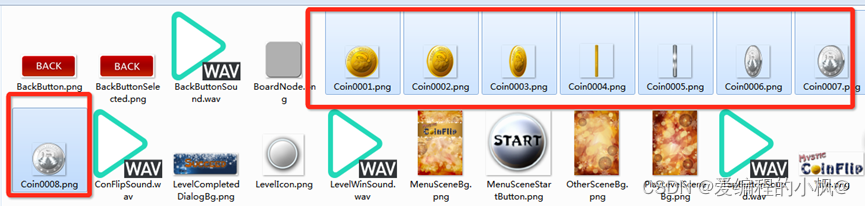
在资源图片中,我们可以看到,金币翻转的效果原理是多张图片切换而形成的,而以下八张图片中,第一张与最后一张比较特殊,因此我们在给用户看的时候,无非是金币Coin0001或者是银币 Coin0008这两种图。
因此我们在创建一个金币对象时候,应该提供一个参数,代表着传入的是金币资源路径还是银币资源路径,根据路径我们创建不同样式的图案。
在MyCoin.h中声明:
MyCoin(QString butImg); //代表图片路径在MyCoin.cpp中进行实现
MyCoin::MyCoin(QString btnImag)
{
    QPixmap pix;
    bool ret = pix.load(btnImag);
    if(!ret)
    {
        QString str = QString("图片 %1 加载失败").arg(btnImag);
        qDebug()<<str;
        return;
    }
    this->setFixedSize(pix.width(),pix.height());
    //固定样式 边框 0像素
    this->setStyleSheet("QPushButton{border:0px}");
    this->setIcon(pix);
    this->setIconSize(QSize(pix.width(),pix.height()));
}
3.创建金币
在PlayScene创建所有的金币
            //创建金币
            MyCoin * coin = new MyCoin(":/res/Coin0001.png");
            coin->setParent(this);
            coin->move(99 + i*50,203 + j*50);
效果图:
4.每个关卡默认显示
引入数据
先引入dataConfig.h和dataConfig.cpp文件到项目中
维护关卡数据
在PlayScene.h加入成员数组
    //二维数组 维护每个关卡的具体数据
    int gameArray[4][4];
在PlayScene.cpp中写了int gameArray[4][4]的数组,维护每个关卡的金币状态
    dataConfig config;
    //初始化每个关卡的二维数组
    for(int i = 0;i<4;i++)
    {
        for(int j = 0;j<4;j++)
        {
            this->gameArray[i][j] = config.mData[this->levelIndex][i][j];

        }
    }
初始化
初始化每个关卡的显示
            //位置playscene.cpp显示金币背景图案中
            //创建金币
            QString str;
            if(this->gameArray[i][j]==1)
            {
                //显示金币
                str = ":/res/Coin0001.png";
            }
            else
            {
                str = ":/res/Coin0008.png";
            }
            MyCoin * coin = new MyCoin(str);
            coin->setParent(this);
            coin->move(99 + i*50,203 + j*50);
5.金币反转特效
硬币属性设置
给每个硬币加属性:posX坐标x,posY坐标y,bool flag 正反面标志(MyCoin.h)
    //金币的属性
    //坐标
    int posX;
    int posY;
    int flag;//正反
赋值(PlayScene::PlayScene(int levelNum))
            //金币属性赋值
            coin->posX = i;
            coin->posY = j;
            coin->flag = this->gameArray[i][j];//1正面 0反面
改变函数
给MyCoin加函数 changFlag改变标志
    //改变标志的方法
    void changeFlag();
    QTimer* timer1;//正面翻反面的定时器
    QTimer* timer2;//反面翻正面的定时器
    int min = 1;//图片0001
    int max = 8;//图片0008
如果是flag为true改为false,并且开启定时器1(正面翻反面)
如果是flag为false改为true,并且开启定时器2(反面翻正面)
//改变正反面标志的方法
void MyCoin:: changeFlag()
{
    //如果是正面 翻成反面
    if(this->flag)
    {
        //开始正面 翻成反面
        timer1->start(30);
        this->flag = false;
    }
    else
    {
        //反面翻正面
        timer2->start(30);
        this->flag = true;
    }
}
实现定时器中的内容(MyCoin::MyCoin(QString btnImag))
    //监听正面翻反面的信号,并且反转金币
    connect(timer1,&QTimer::timeout,[=](){
        QPixmap pix;
        QString str = QString(":/res/Coin000%1").arg(this->min++);
        pix.load(str);

        this->setFixedSize(pix.width(),pix.height());
        this->setStyleSheet("QPushButton{border:0px;}");
        this->setIcon(pix);
        this->setIconSize(QSize(pix.width(),pix.height()));

        //判断 如果翻完了,将min重置为1
        if(this->min > this->max)
        {
            this->min = 1;
            timer1->stop();
        }
    });

    //监听反面翻正面的信号,并且反转银币
    connect(timer2,&QTimer::timeout,[=](){
        QPixmap pix;
        QString str = QString(":/res/Coin000%1").arg(this->max--);
        pix.load(str);

        this->setFixedSize(pix.width(),pix.height());
        this->setStyleSheet("QPushButton{border:0px;}");
        this->setIcon(pix);
        this->setIconSize(QSize(pix.width(),pix.height()));

        //判断 如果翻完了,将min重置为1
        if(this->min > this->max)
        {
            this->max = 8;
            timer2->stop();
        }
    });
测试
PlayScene.cpp中建立连接,进行测试
            //点击金币 进行翻转
            connect(coin,&MyCoin::clicked,[=](){
                coin->changeFlag();
            });
6.快速点击
解决快速点击的效果不好
在MyCoin中加入isAnimation判断(是否在做动画)
    //执行动画的标志
    bool isAnimation = false;
当按下MyCoin判断是否在做动画,如果做动画,直接return,保证金币和银币动态切换的完整效果。
重写鼠标按下操作
    //重写 按下 和 释放
    void mousePressEvent(QMouseEvent *);
实现
void MyCoin::mousePressEvent(QMouseEvent *e)
{
    if(this->isAnimation)
    {
        return;
    }
    else
    {
        QPushButton::mousePressEvent(e);
    }
}
7.翻转周围金币
将用户点击的周围 上下左右4个金币也进行延时翻转,代码写到监听点击金币下。
此时我们发现还需要记录住每个按钮的内容,所以我们将所有金币按钮也放到一个二维数组中,在PlayScene.h中声明
    //维护金币
    MyCoin * coinBtn[4][4];
加入位置:

延时翻转周围金币
QTimer::singleShot(300,this,[=](){
                //周围的右侧硬币翻转条件
                if(coin->posX + 1<=3)//周围的右侧金币翻转的条件
                {
                    coinBtn[coin->posX+1][coin->posY]->changeFlag();
                    this->gameArray[coin->posX+1][coin->posY]
                     = this->gameArray[coin->posX+1][coin->posY] == 0 ? 1 : 0;
                }
                //周围的左侧硬币翻转条件
                if(coin->posX - 1>=0)//周围的右侧金币翻转的条件
                {
                    coinBtn[coin->posX-1][coin->posY]->changeFlag();
                    this->gameArray[coin->posX-1][coin->posY]
                     = this->gameArray[coin->posX-1][coin->posY] == 0 ? 1 : 0;
                }
                //周围上侧的硬币翻转条件
                if(coin->posY + 1 <= 3)
                {
                    coinBtn[coin->posX][coin->posY+1]->changeFlag();
                    this->gameArray[coin->posX][coin->posY+1]
                     = this->gameArray[coin->posX][coin->posY+1] == 0 ? 1 : 0;
                }
                //周围下侧的硬币翻转条件
                if(coin->posY -1 >= 0)
                {
                    coinBtn[coin->posX][coin->posY-1]->changeFlag();
                    this->gameArray[coin->posX][coin->posY-1]
                     = this->gameArray[coin->posX][coin->posY-1] == 0 ? 1 : 0;
                }

            });
8.判断胜利
在PlayScene.h和MyCoin.h中均加入胜利的标志
    //是否胜利
    bool isWin;
如果胜利了,打印胜利信息。若胜利,将所有按钮屏蔽掉点击。
延时翻转周围金币中,加入判断是否胜利。
               //判断是否胜利
                this->isWin = true;
                for(int i = 0;i<4;i++)
                {
                    for(int j = 0;j<4;j++)
                    {
                        if(coinBtn[i][j]->flag == false)//只要有一个是反面,那就算失败
                        {
                            this->isWin = false;
                            break;
                        }
                    }
                }
                if(this->isWin == true)
                {
                    //胜利
                    qDebug()<<"游戏胜利!";
                    //将所有的按钮的胜利标志改为true,如果再次点击,直接return,不做响应
                    for(int i = 0;i<4;i++)
                    {
                        for(int j = 0;j<4;j++)
                        {
                            coinBtn[i][j]->isWin = true;
                        }
                    }
                }
8.胜利特效
胜利图片
将图片先放置到游戏场景外部。代码放入到PlayScens.cpp构造函数中的初始化二维数组下方
//胜利图片显示
QLabel* winLabel = new QLabel;
QPixmap tmpPix;
tmpPix.load(":/res/LevelCompletedDialogBg.png");
winLabel->setGeometry(0,0,tmpPix.width(),tmpPix.height());
winLabel->setPixmap(tmpPix);
winLabel->setParent(this);
winLabel->move( (this->width() - tmpPix.width())*0.5 , -tmpPix.height());
当游戏胜利时,移动到屏幕上方,做出胜利的效果。所有的按钮的胜利标志改为true的for循环下方。
                    //将胜利的图片移下来
                    QPropertyAnimation* animation1 = new
                    QPropertyAnimation(winLabel,"geometry");
                    //设置时间间隔
                    animation1->setDuration(1000);
                    //设置开始位置
                    animation1->setStartValue(QRect(winLabel->x(),winLabel-
                    >y(),winLabel->width(),winLabel->height()));
                    //设置结束位置
                    animation1->setEndValue(QRect(winLabel->x(),winLabel-
                    >y()+114,winLabel->width(),winLabel->height()));
                    //设置缓和曲线
                    animation1->setEasingCurve(QEasingCurve::OutBounce);
                    //启动
                    animation1->start();
6 .音效添加
1 .开始音效
QSound *startSound = new QSound(":/res/TapButtonSound.wav",this);点击开始按钮,播放音效
startSound->play(); //开始音效2. 选择关卡音效
在选择关卡场景中,添加音效
//选择关卡按钮音效

    QSound *chooseSound = new QSound(":/res/TapButtonSound.wav",this);
选中关卡后,播放音效
chooseSound->play();3.返回按钮音效
在选择关卡场景与翻金币游戏场景中,分别添加返回按钮音效如下:
//返回按钮音效

    QSound *backSound = new QSound(":/res/BackButtonSound.wav",this);
分别在点击返回按钮后,播放该音效
backSound->play();4.翻金币与胜利音效
在PlayScene中添加,翻金币的音效以及 胜利的音效
  //翻金币音效

    QSound *flipSound = new QSound(":/res/ConFlipSound.wav",this);

    //胜利按钮音效

    QSound *winSound = new QSound(":/res/LevelWinSound.wav",this);
在翻金币时播放 翻金币音效
flipSound->play();胜利时,播放胜利音效
winSound->play();测试音效,使音效正常播放。
十二、项目优化
当我们移动场景后,如果进入下一个场景,发现场景还在中心位置,如果想设置场景的位置,需要添加如下下图中的代码:
MainScene中添加:
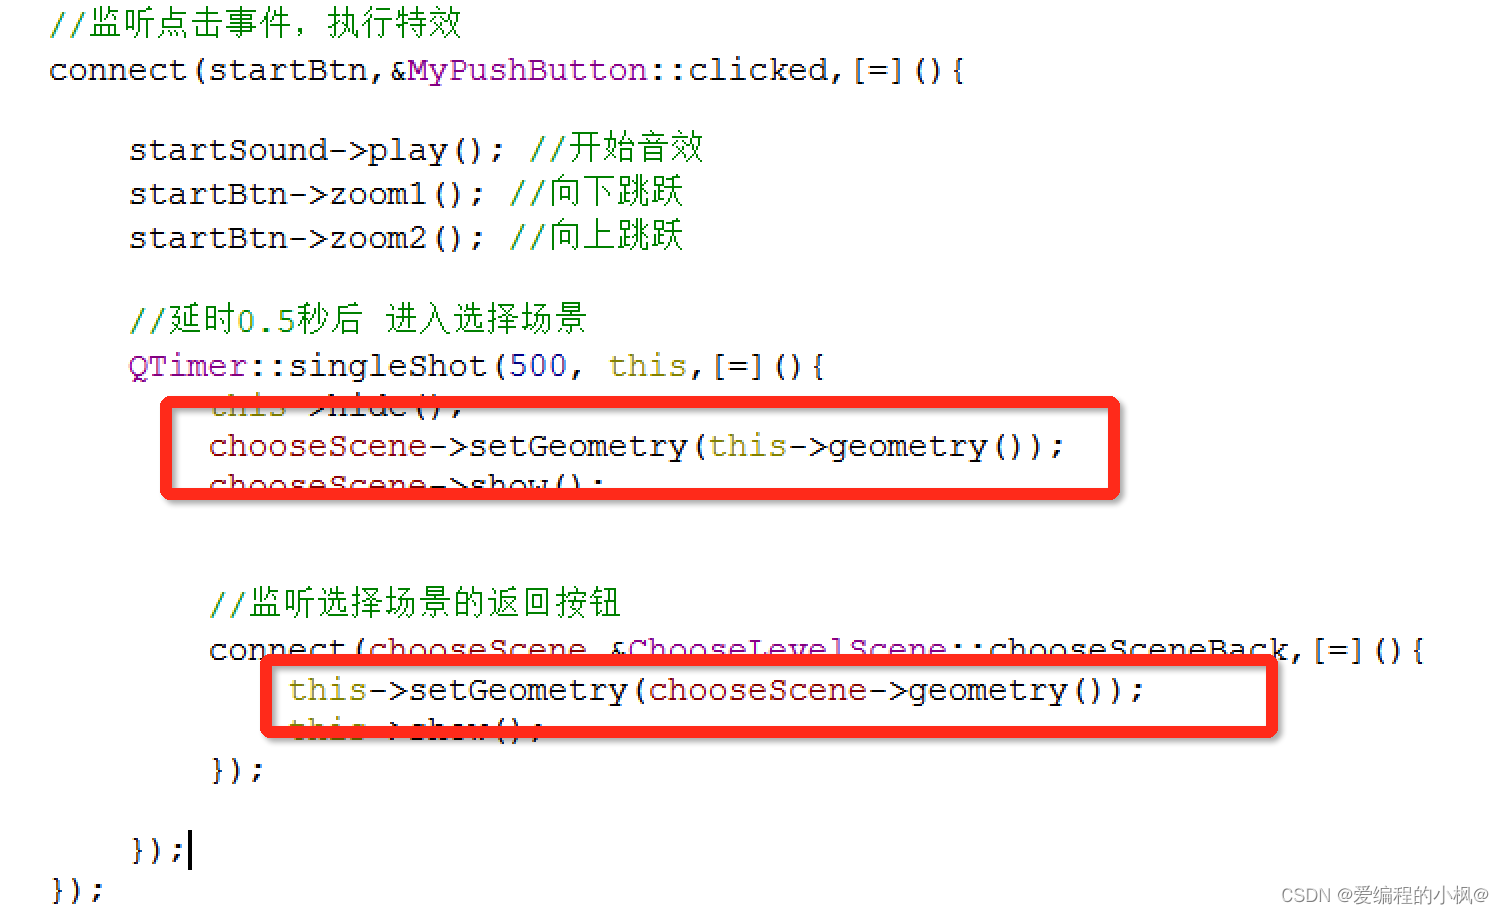
ChooseScene中添加:
测试切换三个场景的进入与返回都在同一个位置下,优化成功。
至此,本案例全部制作完成。
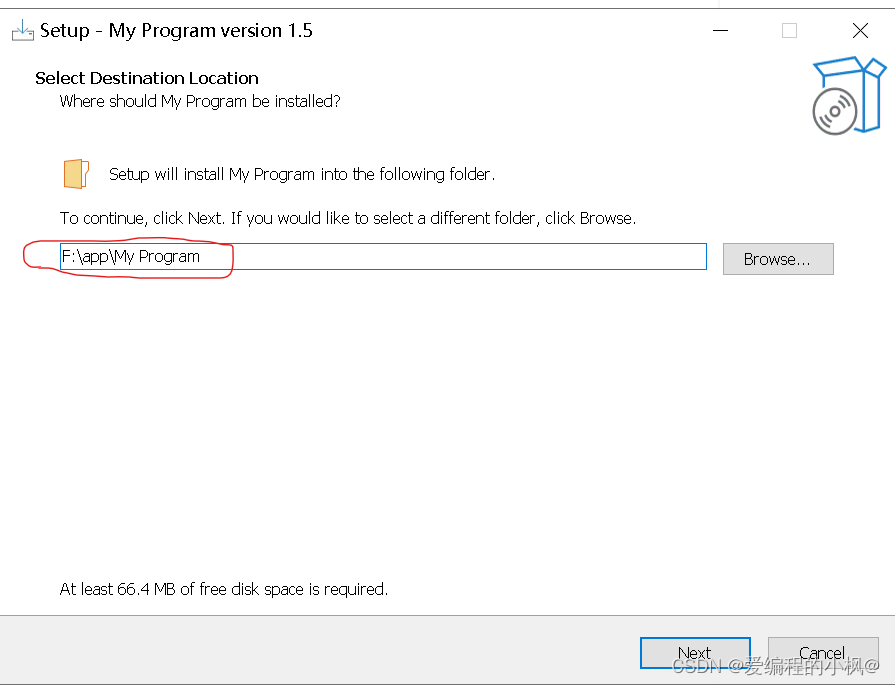
十三、制作安装包
安装注意事项:
1.选择当前电脑存在的路径
画圈部分路径是生成安装包时指定的路径,换电脑,路径自然不存在。
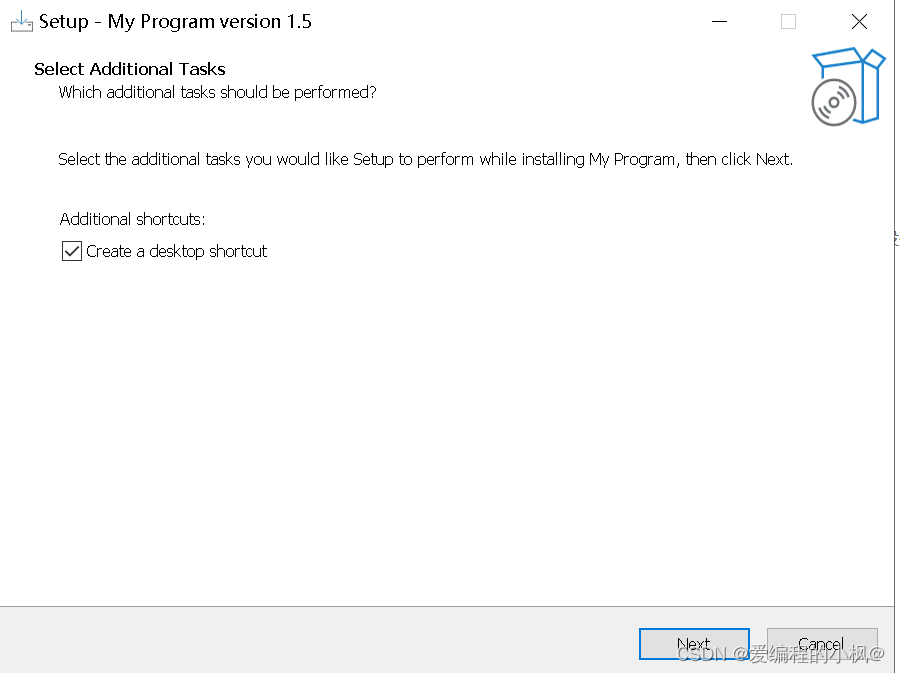
2.勾选创建快捷方式
已制好的安装包下载链接:
百度云链接,提取码: ije4![]() https://pan.baidu.com/s/1OpmMyihD2ENbbHWZVwb4Cw?pwd=ije4
https://pan.baidu.com/s/1OpmMyihD2ENbbHWZVwb4Cw?pwd=ije4
分享完毕,关注我,带你了解更多的编程知识。
看到这里,不妨点个攒,关注一下吧!

最后,谢谢你的观看!


 2122
2122

 被折叠的 条评论
为什么被折叠?
被折叠的 条评论
为什么被折叠?
 到【灌水乐园】发言


