


A Short Guide to Qt Quick Effects
Qt Quick效果简短指南
April 21, 2023 by Kaj Grönholm | Comments
2023年4月21日:Kaj Grönholm | 评论
With the Qt 6.5 LTS out in the wild, it is a good time to write more about the Qt 6 and effects. Laszlo already wrote a blog post about post-processing effects in Qt 6.5, focusing mostly on Qt Quick 3D, ExtendedSceneEnvironment and the general Qt effects story. This blog post gives a bit more details about the latest Qt Quick (2D) effects offerings.
随着Qt 6.5 LTS的发布,现在是写更多关于Qt 6和效果的好时机。Laszlo已经写了一篇关于Qt 6.5中后期处理效果的博客文章,主要关注Qt Quick 3D、ExtendedScenneEnvironment和一般的Qt效果故事。这篇博客文章提供了更多关于最新Qt Quick(2D)效果产品的细节。
With Qt 6.5 the Qt Quick effects story is now pretty solid. Qt 5 was a great platform for effects and Qt 6 is even better. Here's a cheat sheet image you can print and hang on the wall:
有了Qt 6.5,Qt Quick效果的故事现在已经相当扎实了。Qt 5是一个很好的特效平台,Qt 6甚至更好。这是一张可以打印并挂在墙上的备忘单图像:

Simple Effects: Qt Quick MultiEffect
简单效果:Qt Quick MultiEffect
Let's start with the bread and butter, the simple effects. This is when you want to add a drop shadow to a UI element, blur the background of a panel, mask elements with a threshold or maybe just slightly adjust the brightness. In these common effect cases, your new friend is the Qt Quick MultiEffect element. MultiEffect supports 7 effects (blur, shadow, mask, colorization, brightness, contrast and saturation) and of course combinations of these all. Depending on which effects are enabled, the most optimal shader gets used. And as it uses Qt 6 RHI, the shaders naturally contain OpenGL, Vulkan, Metal and Direct3D versions compactly packed into the qsb file.
让我们从面包和黄油开始,简单的效果。这是当你想给UI元素添加阴影,模糊面板的背景,用阈值屏蔽元素,或者只是稍微调整亮度时。在这些常见效果的情况下,你的新朋友是Qt Quick MultiEffect元素。MultiEffect支持7种效果(模糊、阴影、遮罩、着色、亮度、对比度和饱和度),当然还有所有这些的组合。根据启用的效果,将使用最佳的着色器。由于它使用Qt 6 RHI,着色器自然包含OpenGL、Vulkan、Metal和Direct3D版本,这些版本被压缩到qsb文件中。
Here is a simple code example of a component using Qt Quick MultiEffect:
以下是使用Qt Quick MultiEffect的组件的简单代码示例:
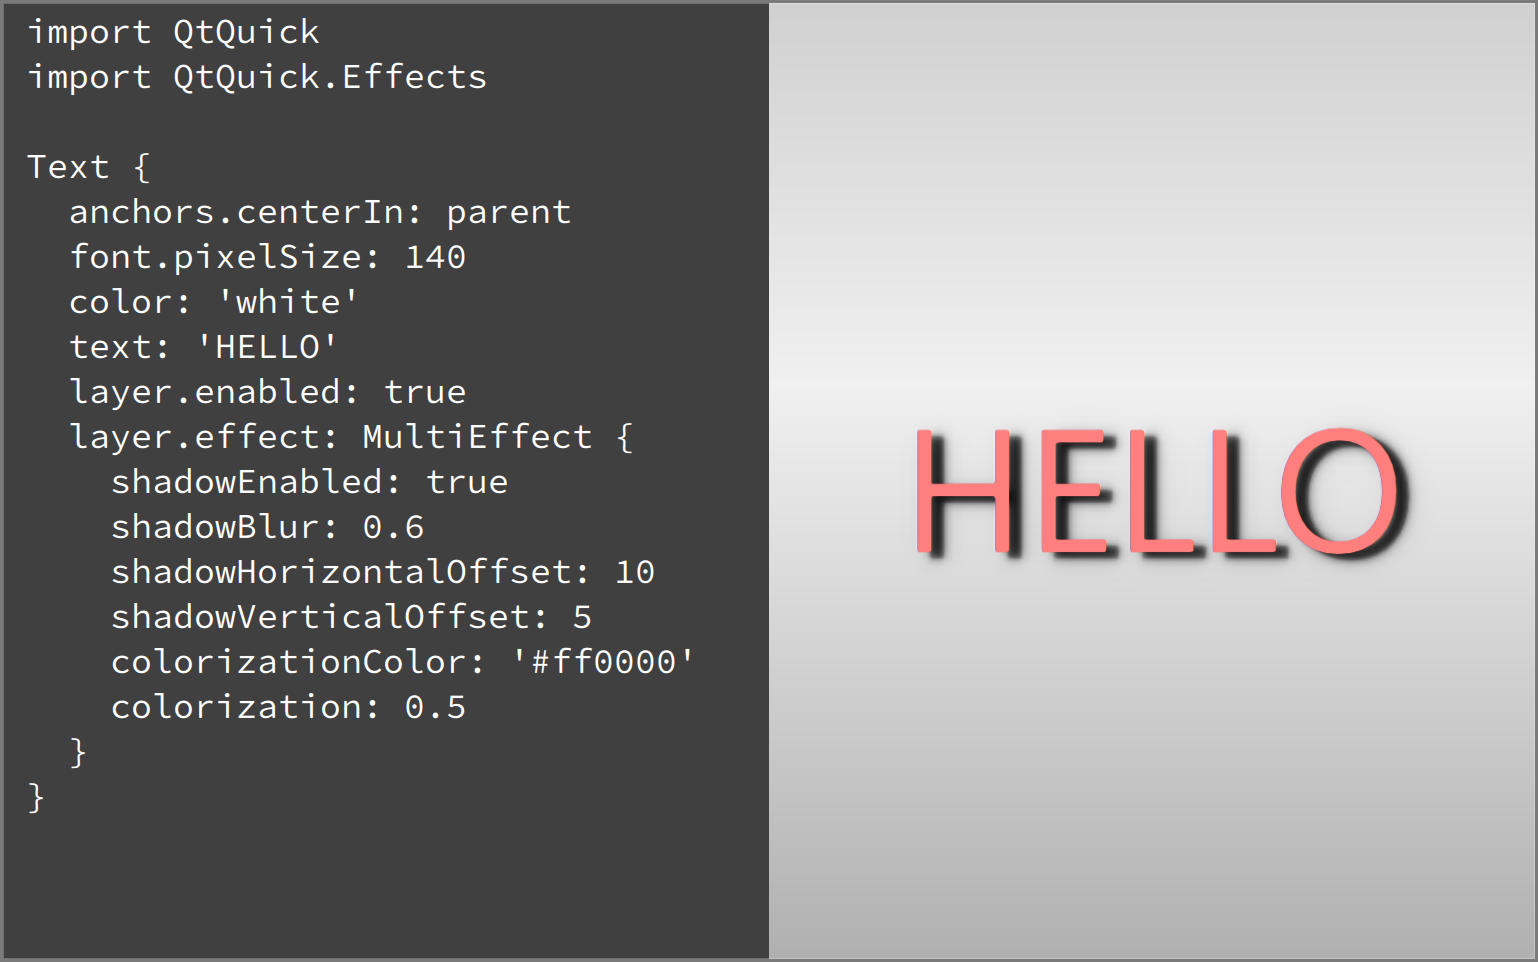
So, we first import the QtQuick.Effects module which contains MultiEffect. Then create a 'HELLO' text element and apply MultiEffect with shadow and some colorization for it. Output can be seen on the right side: The white text becomes red with a blurred drop shadow. Easy and powerful!
因此,我们首先导入包含MultiEffect的QtQuick.Effects模块。然后创建一个“HELLO”文本元素,并为其应用阴影和一些着色的MultiEffect。输出可以在右侧看到:白色文本变成红色,并带有模糊的阴影。轻松有力!
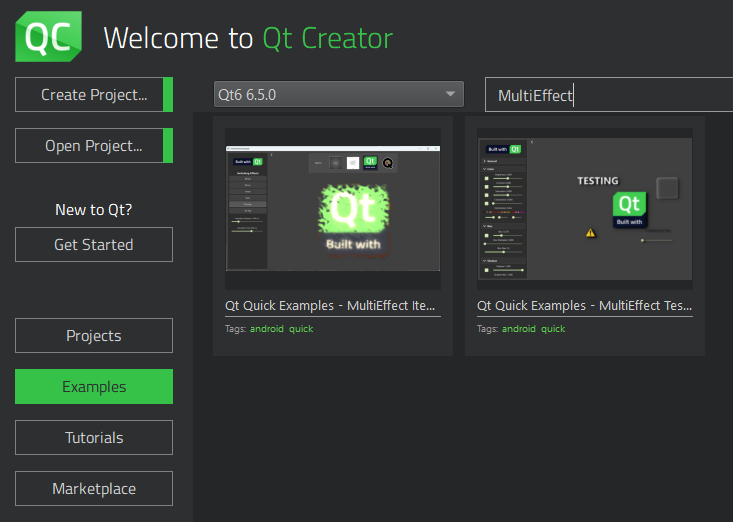
Qt 6.5 includes two MultiEffect examples. So if you want to see more, just type 'MultiEffect' into the Qt Creator examples view:
Qt 6.5包括两个MultiEffect示例。因此,如果你想看到更多,只需在Qt Creator示例视图中键入“MultiEffect”即可:
Custom Effects: Qt Quick Effect Maker
自定义效果:Qt Quick Effect Maker
Sometimes reaching the designer's visions will require a more dedicated approach. Creating a custom effect beforehand is usually a more performant option than combining shaders/images/layers at the runtime. The Qt tool created specifically for this task is called the Qt Quick Effect Maker. You can read more about the QQEM features from the introduction blog post or the example usage post.
有时,达到设计师的愿景需要一种更加专注的方法。预先创建自定义效果通常比在运行时组合着色器/图像/层更具性能。专门为该任务创建的Qt工具称为Qt Quick Effect Maker。可以从介绍博客文章或示例使用文章中阅读更多关于QQEM功能的信息。
QQEM has already been used in many projects and more will join now when it is easily accessible as part of the Qt 6.5 installation. Here's a short video showing it in action:
QQEM已经在许多项目中使用,当它作为Qt 6.5安装的一部分很容易访问时,还会有更多的项目加入。下面是一段短视频,展示了它的实际操作:
If you are interested in testing the QQEM for your projects, just follow these installation instructions. You can also open the new Wiggly example which contains an effect made with QQEM. If you want to modify the effect, open the WigglyEffect.qep project file with QQEM and go wild.
如果有兴趣为项目测试QQEM,只需遵循以下安装说明即可。还可以打开新的Wiggly示例,该示例包含使用QQEM制作的效果。如果想修改效果,请使用QQEM打开WigglyEffect.qep项目文件,然后进行野生操作。
Transition: The MultiEffect node
过渡:“多重效果”节点
Now someone may say "I would use MultiEffect, but...", explaining how it applies some effect differently than they would prefer or is missing just the one important effect. Or maybe the development started with MultiEffect and it is later realized that some tweaking is required. We have considered also this, making the transition easier.
现在有人可能会说“我会使用MultiEffect,但是……”,解释它是如何以不同于他们喜欢的方式应用某些效果的,或者只缺少一个重要的效果。或者可能是从MultiEffect开始的开发,后来人们意识到需要进行一些调整。我们也考虑过这一点,使过渡更加容易。

In this case, you can use the MultiEffect node available in the Qt Quick Effect Maker. This node has the same effects API as the Qt Quick MultiEffect and the rendering output is also the same (because of the matching shader code). If you don't believe me, watch what happens when I switch the testbed example to use custom MultiEffect instead of the standard MultiEffect:
在这种情况下,可以使用Qt Quick Effect Maker中提供的“多重效果”节点。该节点具有与Qt Quick MultiEffect相同的效果API,并且渲染输出也相同(因为匹配的着色器代码)。如果你不相信我,请注意当我将测试台示例切换为使用自定义MultiEffect而不是标准MultiEffect时会发生什么:
The effect output remains the same, just showing that warning about paddings which MultiEffect can do automatically. Also note that with the MultiEffect node, you should select which effects are enabled in QQEM properties view before exporting the effect to get the most optimal shader. Qt Quick MultiEffect contains multiple shaders so it can select the optimal one at runtime.
效果输出保持不变,只是显示了MultiEffect可以自动执行的填充警告。还请注意,使用“MultiEffect”节点,在导出效果以获得最佳着色器之前,应选择在QQEM属性视图中启用的效果。Qt Quick MultiEffect包含多个着色器,因此可以在运行时选择最佳着色器。
With the MultiEffect node, it is possible to freely modify the shader to your liking. Also, it is possible to extend it with any other nodes. You can initially use the simple Qt Quick MultiEffect and then smoothly switch to the custom effect.
使用“多重效果”节点,可以根据自己的喜好自由修改着色器。此外,还可以使用任何其他节点对其进行扩展。可以先使用简单的Qt Quick MultiEffect,然后平滑切换到自定义效果。
Other options
其他选项
The above approaches are the recommended first options to add effects to your Qt Quick UIs. Obviously, there are also other options.
以上方法是为Qt Quick UI添加效果的第一个推荐选项。显然,还有其他选择。
Qt Graphical Effects are still available in the Qt 5 compatibility module. We don't recommend using them with new code, but if your application uses these and they work for you, feel free to continue the usage also with Qt 6.
Qt Graphical Effects仍然可以在Qt 5兼容模块中使用。我们不建议将它们与新代码一起使用,但如果您的应用程序使用这些代码,并且它们对您有效,请随时在Qt 6中继续使用。
Likewise, if you want to use the ShaderEffect element directly, that is also still a valid option. The effects exported from QQEM also use it, so the difference is just that with QQEM you usually have better productivity due to automatic baking, live preview, integrated properties, shader inspection etc. But if you already have a perfect shader effect, just pass that as qsb to ShaderEffect.
同样,如果要直接使用ShaderEffect元素,这也是一个有效的选项。从QQEM导出的效果也使用它,所以不同的是,使用QQEM-,由于自动烘焙、实时预览、集成属性、着色器检查等,您通常会有更好的生产力。但是如果已经有了一个完美的着色器效果,只需将其作为qsb传递给ShaderEffect即可。
Summary
总结
Qt 6 has always had a very powerful architecture for shader effects with the Qt Rendering Hardware Interface (RHI) and the Qt Shader Tools. With Qt 6.5, we now offer APIs and tools to make it even easier to use this power. The common Qt Quick effects story (since Qt 6.5) can be simplified to:
使用Qt渲染硬件接口(RHI)和Qt着色器工具,Qt 6一直具有非常强大的着色器效果架构。有了Qt 6.5,我们现在提供了API和工具,可以更轻松地使用这种功能。常见的Qt Quick效果故事(从Qt 6.5开始)可以简化为:
For simple effects, use the Qt Quick MultiEffect. For custom effects, use the Qt Quick Effect Maker.
对于简单效果,请使用Qt Quick MultiEffect。对于自定义效果,请使用Qt Quick Effect Maker。


 1425
1425


 被折叠的 条评论
为什么被折叠?
被折叠的 条评论
为什么被折叠?
 到【灌水乐园】发言


