


Android多线程
UI线程
- 当一个应用程序启动时,Android系统会开启一个线程来执行这个应用,这个线程就叫做主线程(Main Thread)。
- 主线程是应用程序唯一的,负责所有用户界面的显示和用户操作的响应任务,所有也将其称为UI线程。
- 不能将耗时操作放在UI线程中执行。
- 不能再非UI线程中更新UI。
在子线程中更新UI
上面提到不能再非UI线程中更新UI,但是有的时候我们必须在子线程中去执行一些耗时的任务,然后根据任务的执行结果去更新相应的UI控件,这时我们就需要Android提供的异步消息处理机制来解决这个问题!
异步消息处理机制
异步消息处理机制主要由4个部分组成,Message、Handler、MessageQueue和Looper。
1. Message是在线程之间传递的消息,它可以在内部携带少量的信息,用于在不同的线程间交换数据。
2. Handler是处理者的意思,它主要用于发送和处理消息。发送消息一般是使用sendMessage()方法,而发出的消息经过一系列的处理后,会传递的handleMessage()方法中。
3. MessageQueue是消息队列的意思,它主要用于存放所有通过Handler发送的消息。每个线程只会有一个MessageQueue对象
4. Looper是每个线程中MessageQueue的管家,调用loop()方法后,就会进入一个无限循环中,然后每当发现MessageQueue中存在一条消息,就会将它取出,并传递到handleMessage()方法中。每个线程只会有一个Looper对象。
子线程向主线程发送Message
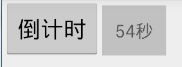
我们这里点击按钮,模拟一个倒计时的效果
首先在我们的布局中加入一个Button和一个TextView
<LinearLayout xmlns:android="http://schemas.android.com/apk/res/android"
    xmlns:tools="http://schemas.android.com/tools"
    android:layout_width="match_parent"
    android:layout_height="match_parent"
    tools:context=".MainActivity">

    <Button
        android:id="@+id/button"
        android:layout_width="wrap_content"
        android:layout_height="wrap_content"
        android:text="倒计时"/>
    <TextView
        android:id="@+id/textview"
        android:layout_width="wrap_content"
        android:layout_height="wrap_content"
        android:padding="10dp"
        android:background="#30000000"
        android:text="60秒" />
</LinearLayout>
然后修改MAinActivity中的代码
import android.app.Activity;
import android.os.Bundle;
import android.os.Handler;
import android.os.Message;
import android.view.View;
import android.widget.Button;
import android.widget.TextView;

public class MainActivity extends Activity {
    private TextView textView;
    private static final int TIME_DESC = 0x23;
    private int count = 60;
    private Handler handler = new Handler() {
        @Override
        public void handleMessage(Message msg) {
            switch (msg.what) {
                case TIME_DESC:
                    String time= (String) msg.obj;
                    textView.setText(time);
                    break;
                default:
                    break;
            }
        }
    };

    @Override
    protected void onCreate(Bundle savedInstanceState) {
        super.onCreate(savedInstanceState);
        setContentView(R.layout.activity_main);
        textView = (TextView) findViewById(R.id.textview);
        Button button = (Button) findViewById(R.id.button);
        button.setOnClickListener(new View.OnClickListener() {
            @Override
            public void onClick(View v) {
               new Thread(new Runnable() {
                    @Override
                    public void run() {
                        while (count>0){
                            count--;
                            try {
                                Thread.sleep(1000);
                            } catch (InterruptedException e) {
                                e.printStackTrace();
                            }
                            //Message message = new Message();
                            Message message = handler.obtainMessage();
                            message.what = TIME_DESC;
                            message.obj=count+"秒";
                            handler.sendMessage(message);
                        }
                    }
                }).start();
            }
        });
    }
}
运行结果:点击倒计时按钮,就会开始60秒倒计时
主线程向子线程发送Message
在上面一个例子中,想在子线程中进行UI操作,调用sendMessage()方法将消息发送出去,然后主线程的handleMessage()方法接收到这条消息,进行UI操作。
那么相反的,主线程同样的也能通过此方法给子线程发送Message。不过通常都不去用这个东西!这里主要用于加深我们对机制的理解!
首先我们在布局中添加一个按钮,用于点击发送Message
<LinearLayout xmlns:android="http://schemas.android.com/apk/res/android"
    xmlns:tools="http://schemas.android.com/tools"
    android:layout_width="match_parent"
    android:layout_height="match_parent"
    tools:context=".MainActivity">
    <Button
        android:id="@+id/button"
        android:layout_width="match_parent"
        android:layout_height="wrap_content"
        android:text="主线程给子线程发消息"/>
</LinearLayout>
然后修改MAinActivity中的代码
import android.app.Activity;
import android.os.Bundle;
import android.os.Handler;
import android.os.Looper;
import android.os.Message;
import android.util.Log;
import android.view.View;
import android.widget.Button;

public class MainActivity extends Activity {
    private Handler handler;
    private static final int TO_MYTHREAD=0x23;

    @Override
    protected void onCreate(Bundle savedInstanceState) {
        super.onCreate(savedInstanceState);
        setContentView(R.layout.activity_main);
        new MyThread().start();//开启子线程
        Button button= (Button) findViewById(R.id.button);
        button.setOnClickListener(new View.OnClickListener() {
            @Override
            public void onClick(View v) {
                Message message=new Message();
                message.what=TO_MYTHREAD;
                message.obj="你好,子线程!";
                handler.sendMessage(message);//主线程发送Message
            }
        });
    }
    class MyThread extends Thread{
        @Override
        public void run() {
            Looper.prepare();
            handler=new Handler(){
                @Override
                public void handleMessage(Message msg) {
                    switch (msg.what){
                        case TO_MYTHREAD:
                            String text= (String) msg.obj;
                            Log.d("MyThread",text);
                            break;
                        default:
                            break;
                    }

                }
            };
            Looper.loop();
        }
    }
}
运行结果:点击按钮,得到打印信息。

使用AsyncTask
AsyncTask可以让我们更加方便的在子线程中对UI进行操作,可以十分简单的从子线程切换到主线程。
AsyncTask是一个抽象类,所有我们必须创建一个子类去继承它,在继承时我们要为AsyncTask类指定三个泛型参数。
1. Params:在执行AsyncTask时需要传入的参数,可用于在后台任务中使用
2. Progress:在后台任务执行时,如果需要在界面上显示当前进度,则使用这里指定的泛型作为进度单位
3. Result:当任务执行完毕后,如果需要对结果进行返回,则使用这里指定的泛型作为返回值的类型。
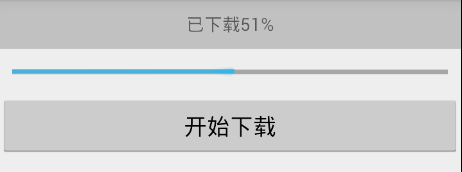
这里我们模拟一个下载过程,点击按钮,进度条开始增加,并且用一个TextView显示当前下载进度!
<LinearLayout xmlns:android="http://schemas.android.com/apk/res/android"
    xmlns:tools="http://schemas.android.com/tools"
    android:layout_width="match_parent"
    android:layout_height="match_parent"
    android:orientation="vertical"
    tools:context=".MainActivity">
    <TextView
        android:id="@+id/textview"
        android:layout_width="match_parent"
        android:layout_height="wrap_content"
        android:gravity="center"
        android:padding="10dp"
        android:background="#30000000"
        android:text="已下载0%"/>

    <ProgressBar
        android:id="@+id/progressbar"
        style="?android:attr/progressBarStyleHorizontal"
        android:layout_width="match_parent"
        android:layout_height="wrap_content"
        android:padding="10dp"/>
    <Button
        android:id="@+id/button"
        android:layout_width="match_parent"
        android:layout_height="wrap_content"
        android:text="开始下载"/>
</LinearLayout>
然后修改主活动中的代码
import android.app.Activity;
import android.os.AsyncTask;
import android.os.Bundle;
import android.view.View;
import android.widget.Button;
import android.widget.ProgressBar;
import android.widget.TextView;
import android.widget.Toast;
public class MainActivity extends Activity {
private int count=0;
private ProgressBar progressBar;
private TextView textview;
@Override
protected void onCreate(Bundle savedInstanceState) {
super.onCreate(savedInstanceState);
setContentView(R.layout.activity_main);
progressBar= (ProgressBar) findViewById(R.id.progressbar);
textview= (TextView) findViewById(R.id.textview);
Button button= (Button) findViewById(R.id.button);
button.setOnClickListener(new View.OnClickListener() {
@Override
public void onClick(View v) {
new MyAsyncTask().execute();//启动任务
}
});
}
class MyAsyncTask extends AsyncTask<Integer,Integer,String>{
@Override
protected String doInBackground(Integer... params) {
while (count<100){
count++;
publishProgress(count);
try {
Thread.sleep(100);
} catch (InterruptedException e) {
e.printStackTrace();
}
}
return "您好,已经下载完毕!";
}
@Override
protected void onProgressUpdate(Integer... values) {
super.onProgressUpdate(values);
progressBar.setProgress(values[0]);
textview.setText("已下载"+values[0]+"%");
}
@Override
protected void onPostExecute(String s) {
super.onPostExecute(s);
Toast.makeText(getApplicationContext(), s, Toast.LENGTH_SHORT).show();
}
}
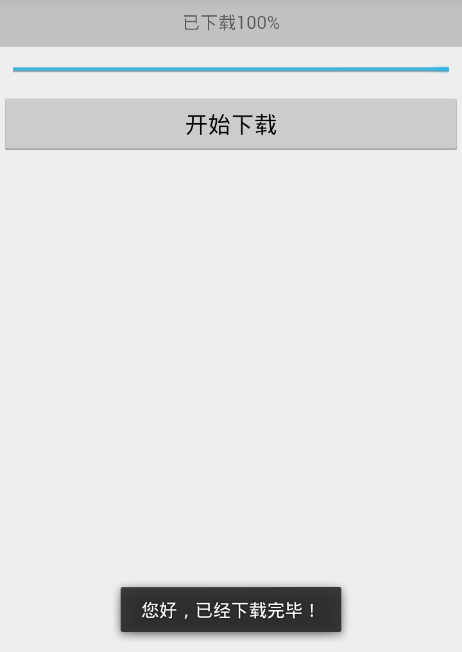
}运行结果:点击开始下载按钮,进度条增加,且显示当前下载进度
下载完成后,短暂显示提示!


 97
97

 被折叠的 条评论
为什么被折叠?
被折叠的 条评论
为什么被折叠?
 到【灌水乐园】发言


