


How to Rollback or Uninstall NVIDIA Drivers in Windows 11
Written by: Dilum Senevirathne
Posted on: February 12th, 2024 in: Windows 11
Keeping your video drivers up-to-date is crucial for optimizing performance in Windows 11. But there are also rare instances where an update might create graphical anomalies in applications, produce choppy FPS (frames per second) in games, or affect the operating system’s stability.
If a driver update to your NVIDIA graphics card is causing problems, you should revert to an earlier version during routine troubleshooting. This tutorial will show you how to roll back or uninstall NVIDIA drivers in Microsoft Windows.
Table of Contents
- Rollback NVIDIA Driver in Device Manager
- Rollback to a Specific NVIDIA Driver Version in Device Manager
- Download and Downgrade to an Older NVIDIA Driver Version
- Uninstall NVIDIA Graphics Drivers Only
- That’s a Wrap

Rollback NVIDIA Driver in Device Manager
Suppose you began experiencing issues immediately after updating your NVIDIA video card drivers. In that case, you can use the Device Manager in Windows 11 to revert to the driver version you were on before. Here’s how:
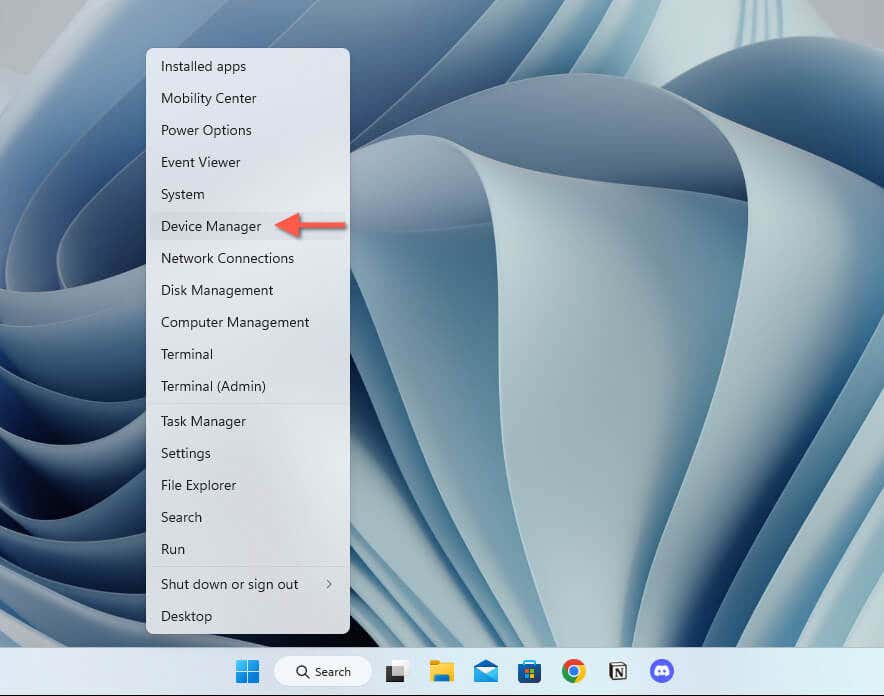
- Right-click the Start button and open Device Manager.
- Expand the Display adapters section.
- Right-click your NVIDIA GPU—e.g., NVIDIA GeForce RTX 3090—and select Properties.

- Go to the Driver tab.
- Check the Driver Version field for the current driver version (optional).
- Select the Roll Back Driver button.

Note: If the Roll Back option appears grayed out, it means there’s no prev
 最低0.47元/天 解锁文章


 1616
1616

 被折叠的 条评论
为什么被折叠?
被折叠的 条评论
为什么被折叠?
 到【灌水乐园】发言


