


前置准备
1.换源
# 备份原有源
sudo mv /etc/yum.repos.d/CentOS-Base.repo /etc/yum.repos.d/CentOS-Base.repo.backup

# 下载阿里云镜像源(推荐用curl避免wget依赖问题)
sudo curl -o /etc/yum.repos.d/CentOS-Base.repo http://mirrors.aliyun.com/repo/Centos-7.repo

# 清除旧缓存
sudo yum clean all && rm -rf /var/cache/yum

# 重建缓存
sudo yum makecache
2.关闭和禁用防火墙
systemctl stop firewalld
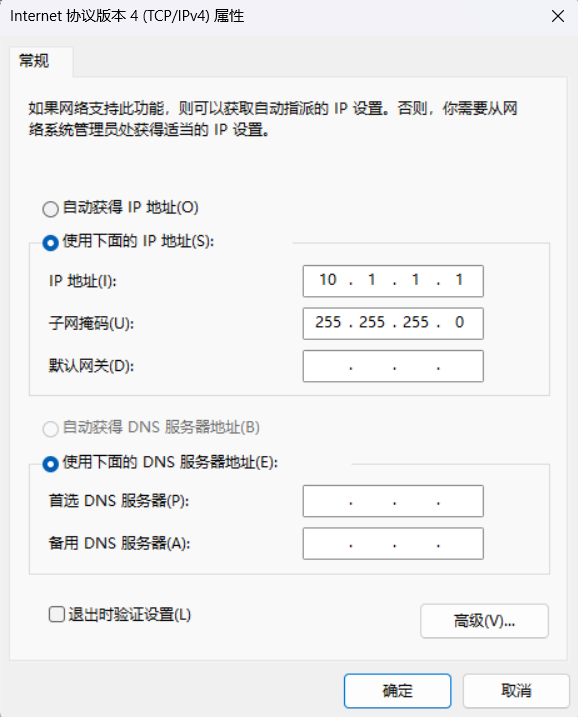
systemctl disable firewalld3.配置网络
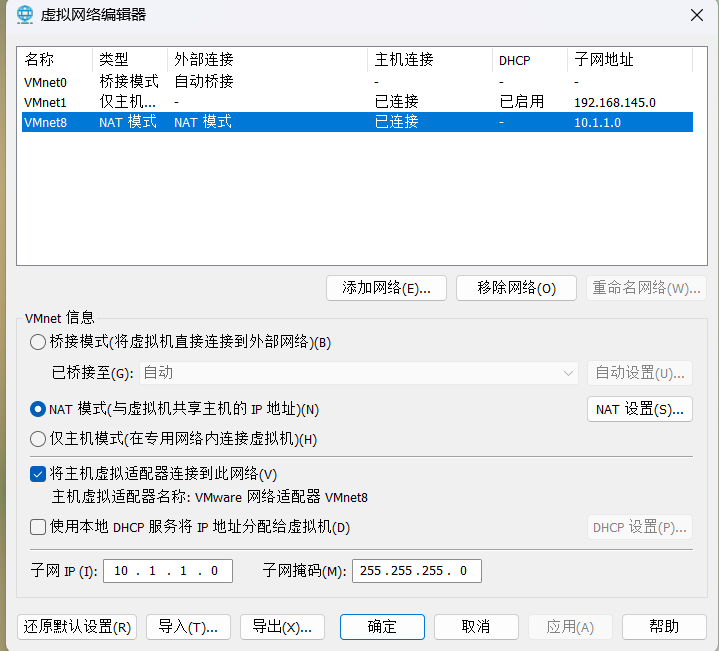
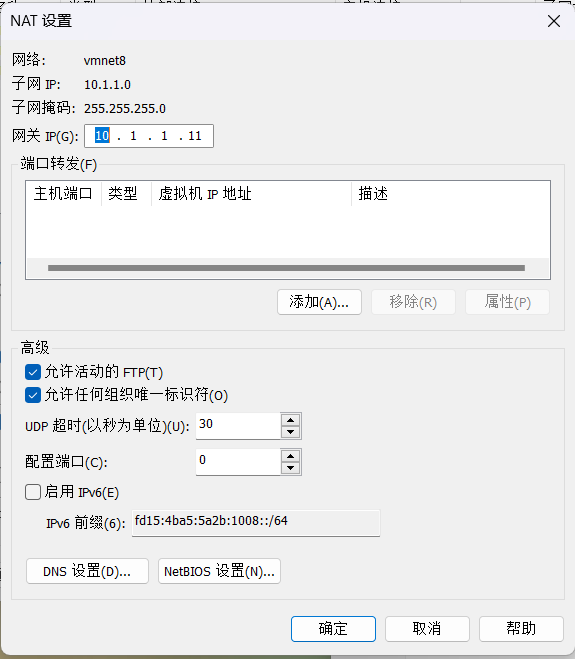
说明:因为Kickstart 是Red Hat开发的传统无人值守安装工具,与RHEL/CentOS深度集成,支持图形化配置。而ubuntu是利用cloud-init,基于yaml配置文件(user-data和meta-data)。ubuntu20版本之前需要考虑pxe+preseed安装,20版本之后使用autoinstall框架
开始配置
1.安装必要软件包
yum install dhcp tftp-server httpd syslinux xinetd -y
2.配置TFTP服务:
编辑/etc/xinetd.d/tftp文件,将disable的值从yes改为no:
service tftp
{
    socket_type             = dgram
    protocol                = udp
    wait                    = yes
    user                    = root
    server                  = /usr/sbin/in.tftpd
    server_args             = -s /var/lib/tftpboot
    disable                 = no  # 修改此处
    per_source              = 11
    cps                     = 100 2
    flags                   = IPv4
}
创建 TFTP 根目录并设置权限:
mkdir -p /var/lib/tftpboot
chmod -R 777 /var/lib/tftpboot
启动 TFTP 服务并设置开机自启:
systemctl start xinetd
systemctl enable xinetd3.编辑/etc/dhcp/dhcpd.conf文件,添加以下内容:
subnet 10.1.1.0 netmask 255.255.255.0 {
    range 10.1.1.200 10.1.1.230;
    option subnet-mask 255.255.255.0;
    default-lease-time 21600;
    max-lease-time 43200;
    next-server 10.1.1.134;
    filename "pxelinux.0";
}
启动 DHCP 服务并设置开机自启:
systemctl start dhcpd && systemctl enable dhcpd4.配置TFTP
1.准备TFTP目录
复制PXE引导文件并创建目录结构:
mkdir /var/lib/tftpboot/pxelinux.cfg
cp /usr/share/syslinux/pxelinux.0 /var/lib/tftpboot/
2.挂载Ubuntu镜像并复制内核文件
mount -o loop ubuntu-20.04.2-live-server-amd64.iso /mnt
cp /mnt/casper/{vmlinuz,initrd} /var/lib/tftpboot/
umount /mnt
3.配置引导菜单
创建/var/lib/tftpboot/pxelinux.cfg/default,内容如下:
default autoinstall
timeout 10
label autoinstall
    kernel vmlinuz
    append initrd=initrd ip=dhcp url=http://10.1.1.134/ubuntu-20.04.2-live-server-amd64.iso autoinstall ds=nocloud-net;s=http://10.1.1.134/autoinstall/
解释:
timeout 10 #设置Grub菜单的等待时间为10秒。
ip=dhcp:通过DHCP协议自动获取IP地址,确保网络连通性以访问安装资源 59 36。url=http://.../ubuntu-20.04.2-live-server-amd64.iso:指定Ubuntu安装镜像的HTTP下载路径,用于拉取系统文件 59 20。autoinstall:启用Ubuntu自动安装模式,跳过交互式安装界面 39 69。ds=nocloud-net;s=http://10.1.1.134/autoinstall/:
-
ds=nocloud-net:使用Cloud-Init的“NoCloud”数据源,允许通过HTTP提供自动安装配置。s=http://...:指定user-data和meta-data文件的HTTP路径(自动拼接路径为http://10.1.1.134/autoinstall/user-data和.../meta-data)
1.提供安装镜像和应答文件
将Ubuntu ISO文件复制到HTTP目录:(安装程序启动后需要访问完整的Ubuntu安装介质)
cp ubuntu-20.04.2-live-server-amd64.iso /var/www/html/2.设置权限
确保Apache可以访问文件:
chmod -R 755 /var/www/html/
chown -R apache:apache /var/www/html/
3.创建目录结构
mkdir -p /var/www/html/autoinstall4.创建自动应答文件/var/www/html/autoinstall/user-data
#cloud-config
autoinstall:
  version: 1
  shutdown: reboot  # 安装完成后自动重启

  # APT镜像源
  apt:
    primary:
      - arches: [amd64]
        uri: http://mirrors.aliyun.com/ubuntu

  # 用户认证配置
  identity:
    hostname: #填写自己的主机名字
    username: #填写自己的用户名字
    password: "$6$ARMRbY0SiNH/wnNG$1kBS5HK.02nm9aFdY.5H9IAGCnMjLidY9qi8tTgmPtgGwJ7YCPMKuBxDtOH7Glc.ESmEwxb7p0SUBGU2XvpOe."   #密码是123456

  # 全盘自动分区
  storage:
    layout:
      name: direct

  # 基础SSH配置
  ssh:
    install-server: true
    allow-pw: true

  # 必要预安装操作
  early-commands:
    - systemctl stop ssh

  # 安装后操作
  late-commands:
    - systemctl start ssh
密码我是通过ubuntu安装sudo apt install whois生成的
mkpasswd -m sha-512 <这是自己想要加密的密码>。
创建meta-data文件
该文件可为空,但必须存在
touch /var/www/html/autoinstall/meta-data启动Apache
systemctl start httpd && systemctl enable httpd验证文件可访问性
在浏览器或通过curl检查文件是否正常访问:
curl http://localhost/ubuntu-20.04.2-live-server-amd64.iso       # 应返回二进制流
curl http://localhost/autoinstall/user-data                    # 应返回YAML内容
注:本文基于centos7配置安装ubuntu-20.04.2-live-server-amd64.iso
可以参考这个文章:前言 — Ubuntu 22.04下的autoinstall自动安装配置服务设置 2022-09 文档


 1089
1089

 被折叠的 条评论
为什么被折叠?
被折叠的 条评论
为什么被折叠?
 到【灌水乐园】发言


