


前提条件:Eclipse已安装Gradle的buildship插件,本机已安装和配置Gradle环境。
测试环境:Gradle-version:2.4 JDK:1.7.0_51。
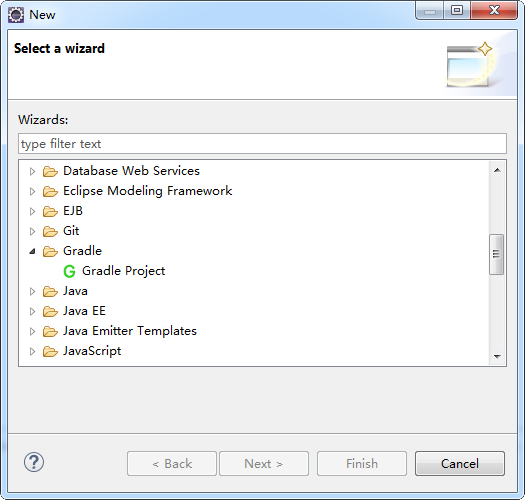
1.创建Gradle项目
New >Others...>选择Gradle视图目录:
选择Gradle Project点击Next:

输入项目名称"MyGradle",点击Next:

选择Gradle的安装路径,点击Next:

最后点击Finish完成项目创建。
2.修改build.gradle配置
build.gradle初始文件配置如下:
/*
 * This build file was auto generated by running the Gradle 'init' task
 * by 'pengjunlin' at '16-11-25 上午11:12' with Gradle 2.4
 *
 * This generated file contains a sample Java project to get you started.
 * For more details take a look at the Java Quickstart chapter in the Gradle
 * user guide available at http://gradle.org/docs/2.4/userguide/tutorial_java_projects.html
 */

// Apply the java plugin to add support for Java
apply plugin: 'java'

// In this section you declare where to find the dependencies of your project
repositories {
    // Use 'jcenter' for resolving your dependencies.
    // You can declare any Maven/Ivy/file repository here.
    jcenter()
}

// In this section you declare the dependencies for your production and test code
dependencies {
    // The production code uses the SLF4J logging API at compile time
    compile 'org.slf4j:slf4j-api:1.7.12'

    // Declare the dependency for your favourite test framework you want to use in your tests.
    // TestNG is also supported by the Gradle Test task. Just change the
    // testCompile dependency to testCompile 'org.testng:testng:6.8.1' and add
    // 'test.useTestNG()' to your build script.
    testCompile 'junit:junit:4.12'
}
此文件需要做相应的修改,修改成如下配置:
/*
 * This build file was auto generated by running the Gradle 'init' task
 * by 'pengjunlin' at '16-11-25 上午9:48' with Gradle 2.4
 *
 * This generated file contains a sample Java project to get you started.
 * For more details take a look at the Java Quickstart chapter in the Gradle
 * user guide available at http://gradle.org/docs/2.4/userguide/tutorial_java_projects.html
 */

// Apply the java plugin to add support for Java
apply plugin: 'java'
// Apply the war plugin to add support for Java
apply plugin: 'war'
// Tomcat plugin
apply plugin: 'com.bmuschko.tomcat'

// In this section you declare where to find the dependencies of your project
repositories {
    // Use 'jcenter' for resolving your dependencies.
    // You can declare any Maven/Ivy/file repository here.
    jcenter()
}

// In this section you declare the dependencies for your production and test code
dependencies {
    // The production code uses the SLF4J logging API at compile time
    compile 'org.slf4j:slf4j-api:1.7.12'

    // Declare the dependency for your favourite test framework you want to use in your tests.
    // TestNG is also supported by the Gradle Test task. Just change the
    // testCompile dependency to testCompile 'org.testng:testng:6.8.1' and add
    // 'test.useTestNG()' to your build script.
    testCompile 'junit:junit:4.12'
}

// TomcatServer
dependencies {
    def tomcatVersion = '7.0.59'

    tomcat "org.apache.tomcat.embed:tomcat-embed-core:${tomcatVersion}",
           "org.apache.tomcat.embed:tomcat-embed-logging-juli:${tomcatVersion}",
           "org.apache.tomcat.embed:tomcat-embed-jasper:${tomcatVersion}"
}


// Build script
buildscript {

    repositories {
        jcenter()
    }

    dependencies {
        classpath 'com.bmuschko:gradle-tomcat-plugin:2.2.2'
    }
}
刷新项目:

3.创建业务实体类HelloWorld.java
package com.boonya.gradle.entity;

public class HelloWorld {

	private String greeting;

	public String getGreeting() {
		if (greeting == null)
			greeting = sayHelloWorld();
		return greeting;
	}

	public void setGreeting(String greeting) {
		this.greeting = greeting;
	}

	public String sayHelloWorld() {
		return "Hello world!";
	}

}
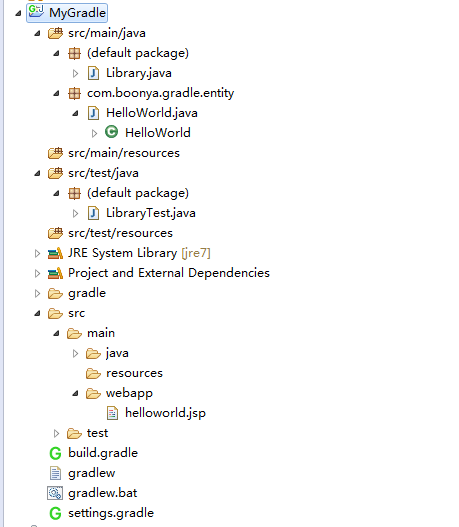
4.创建JSP页面helloworld.jsp
<%@ page language="java" contentType="text/html; charset=UTF-8"
	pageEncoding="UTF-8"%>
<!DOCTYPE html PUBLIC "-//W3C//DTD HTML 4.01 Transitional//EN" "http://www.w3.org/TR/html4/loose.dtd">
<html>
<head>
<meta http-equiv="Content-Type" content="text/html; charset=UTF-8">
<title>Hello World</title>
</head>
<body>

	<jsp:useBean id="helloworld"
		class="com.boonya.gradle.entity.HelloWorld">
		<h2 style="color: red;">${helloworld.greeting}</h2>
	</jsp:useBean>

</body>
</html>
最后展示一下项目结构:
5.将Gradle项目运行至Tomcat
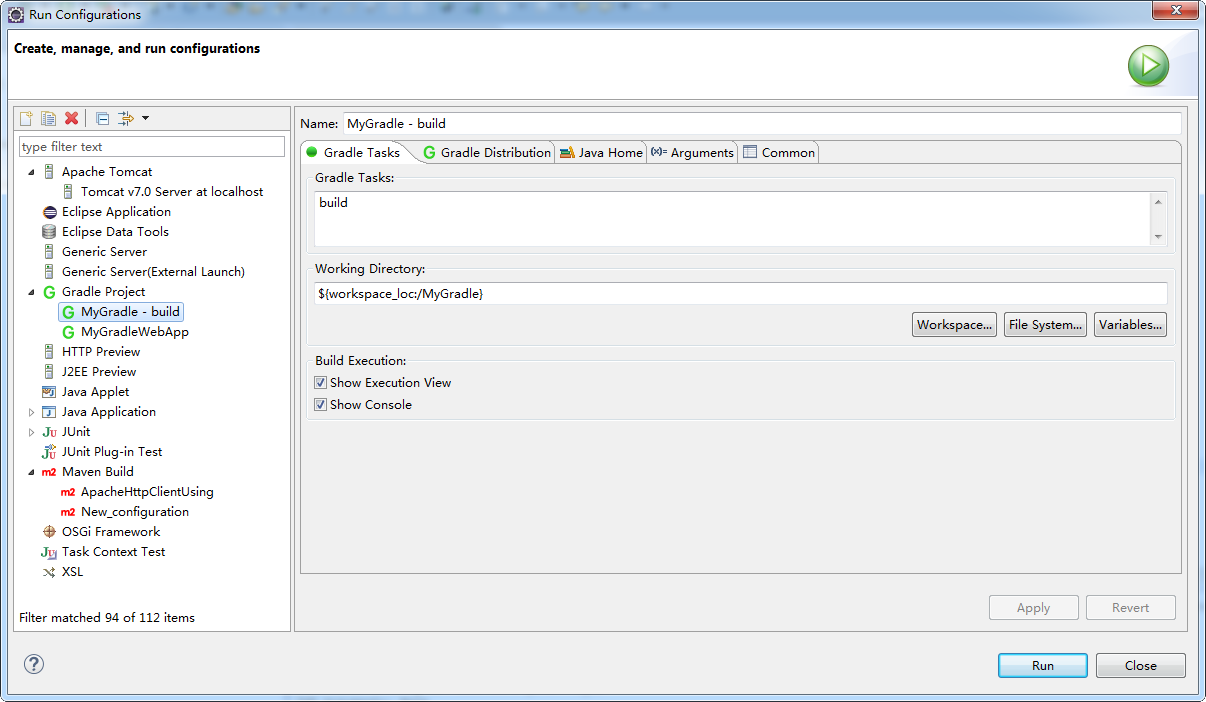
Gradle>build项目:
build项目日志:
Working Directory: C:\DEVELOPER_WORKSPACE\DEVELOPERS\ECLIPSE\eclipse_luna_SR2\workspace\MyGradle
Gradle User Home: C:\Users\pengjunlin\.gradle
Gradle Distribution: Local installation at C:\DEVELOPER_INSTALLS\gradle-2.4
Gradle Version: 2.4
Java Home: C:\Program Files\Java\jdk1.7.0_51
JVM Arguments: None
Program Arguments: None
Gradle Tasks: build

:compileJava UP-TO-DATE
:processResources UP-TO-DATE
:classes UP-TO-DATE
:war UP-TO-DATE
:assemble UP-TO-DATE
:compileTestJava UP-TO-DATE
:processTestResources UP-TO-DATE
:testClasses UP-TO-DATE
:test UP-TO-DATE
:check UP-TO-DATE
:build UP-TO-DATE

BUILD SUCCESSFUL

Total time: 4.616 secs
项目右键>Run as>Run Configurations:
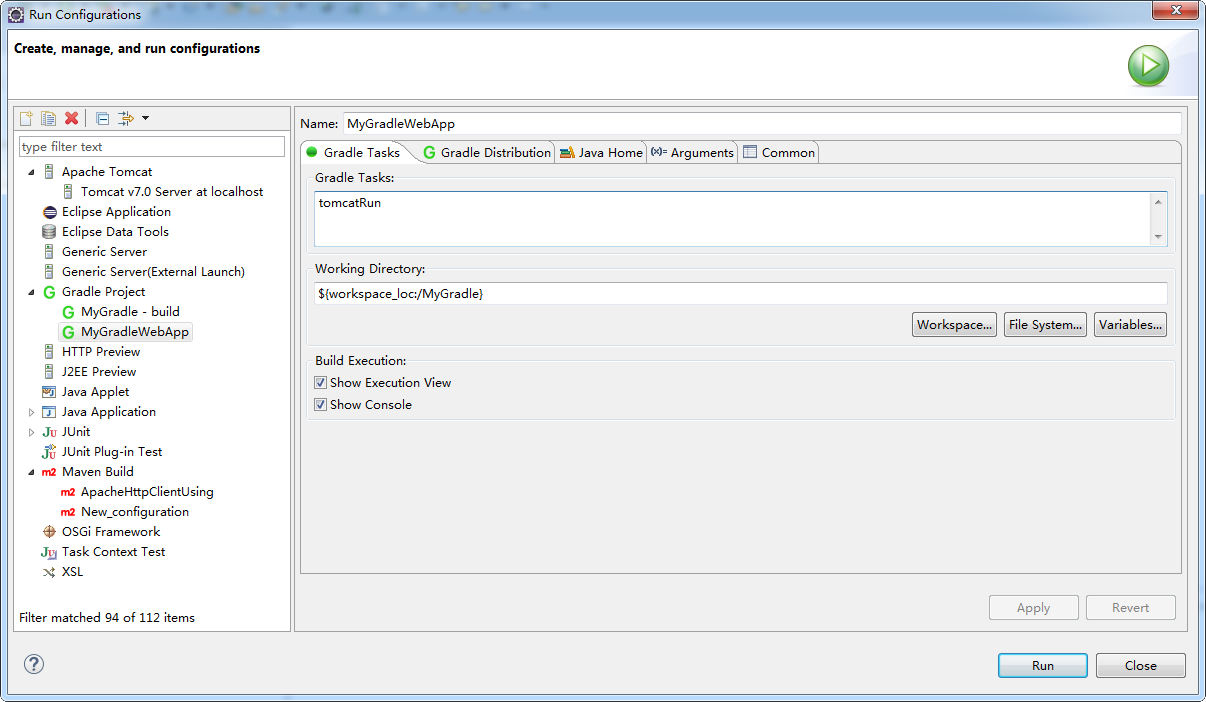
输入如上图所示的参数,然后选择项目运行需要的Java Home:
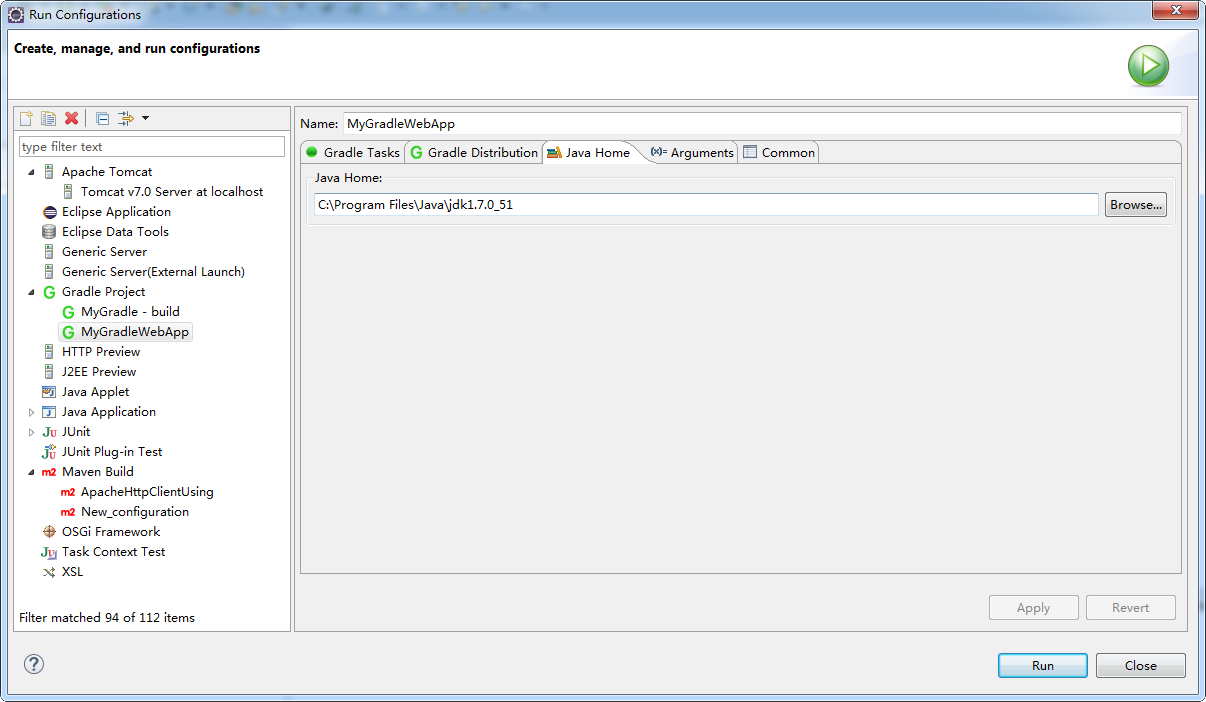
点击Run按钮即可运行。后台启动日志:
Working Directory: C:\DEVELOPER_WORKSPACE\DEVELOPERS\ECLIPSE\eclipse_luna_SR2\workspace\MyGradle
Gradle User Home: C:\Users\pengjunlin\.gradle
Gradle Distribution: Gradle wrapper from target build
Gradle Version: 2.4
Java Home: C:\Program Files\Java\jdk1.7.0_51
JVM Arguments: None
Program Arguments: None
Gradle Tasks: tomcatRun

:compileJava UP-TO-DATE
:processResources UP-TO-DATE
:classes UP-TO-DATE
:tomcatRun
Started Tomcat Server
The Server is running at http://localhost:8080/MyGradle
注意:Gradle默认在Tomcat的8080端口运行。运行效果如下:

6.Eclipse运行处理进程问题

运行期间右下角进程中一直处于加载过程中,对此不是很明白,但是控制台确实是启动成功了的。
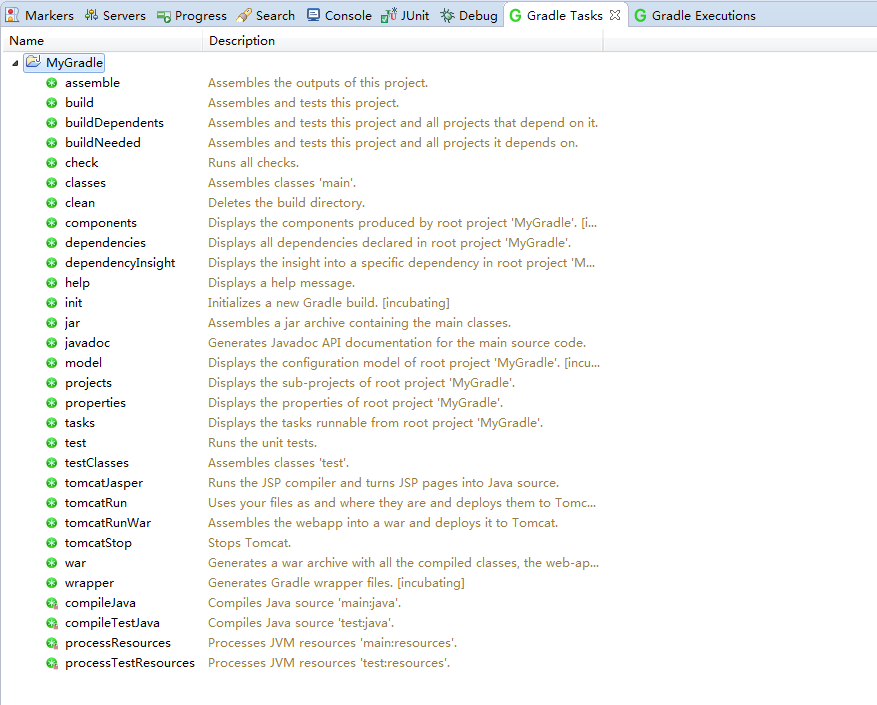
7.Gradle 可以配置的Tasks


 4421
4421

 被折叠的 条评论
为什么被折叠?
被折叠的 条评论
为什么被折叠?
 到【灌水乐园】发言


