


音视频实践学习
- android全平台编译ffmpeg以及x264与fdk-aac实践
- ubuntu下使用nginx和nginx-rtmp-module配置直播推流服务器
- android全平台编译ffmpeg合并为单个库实践
- android-studio使用cmake编译ffmpeg实践
- android全平台下基于ffmpeg解码MP4视频文件为YUV文件
- android全平台编译ffmpeg支持命令行实践
- android全平台基于ffmpeg解码本地MP4视频推流到RTMP服务器
- android平台下音频编码之编译LAME库转码PCM为MP3
- ubuntu平台下编译vlc-android视频播放器实践
- 图解YU12、I420、YV12、NV12、NV21、YUV420P、YUV420SP、YUV422P、YUV444P的区别
- 图解RGB565、RGB555、RGB16、RGB24、RGB32、ARGB32等格式的区别
- YUV420P、YUV420SP、NV12、NV21和RGB互相转换并存储为JPEG以及PNG图片
- android全平台编译libyuv库实现YUV和RGB的转换
概述
整个音视频设计到的模块是很庞大的,之前按照雷神的博客,操作了推流,也成功了,但是没有深入理解这个过程,最近一段时间看了下很多相关的博客,对这个过程有了一点理解,现在重新整理一下这个博客内容,先从最基本的视频推流开始,我们在电脑上使用ffmpeg完成对视频文件推流,很简单,直接使用ffmpeg的推流命令即可。
ffmpeg -re -i input.mp4 -vcodec copy -f flv rtmp://192.168.1.102:1935/onzhou/live
下面会结合一个完整的推流实例,来记录一下这个过程
推流流程分析
如果你和我一样,刚开始接触音视频的相关处理,云里雾里很正常,建议多去看看雷神的博客,再加上自己的理解和实践,会更深刻一些

不太喜欢直接拿别人的原文,无论如何自己都要操作一遍,上图是笔者结合新版本的ffmpeg-3.3.8版本中部分API,重新整理的一个流程图
//注册FFmpeg所有编解码器。
av_register_all()
//初始化网络组件。
avformat_network_init()
//打开一个输入流。
avformat_open_input()
//获取媒体的信息。
avformat_find_stream_info()
//推荐API用来代替avcodec_copy_context()
avcodec_parameters_to_context()
//输出RTMP
avformat_alloc_output_context2()
//申请AVCodecContext空间
avcodec_alloc_context3()
//初始化一个视音频编解码器的AVCodecContext
avcodec_open2()
配置环境
操作系统:ubuntu 16.05
ndk版本:android-ndk-r16b版本
ffmpeg版本:ffmpeg-3.3.8(使用android-ndk-r10e版本编译)

工程实践
新建个子工程:ffmpeg-stream-mp4
配置CMakeLists.txt文件和build.gradle文件比较简单,不多赘述
- 定义好
java层的类文件:主要传递MP4视频文件的路径到native层中处理,第二个参数是目标流地址
package com.onzhou.ffmpeg.streamer;

public class NativeStreamer {

    static {
        System.loadLibrary("native-stream");
    }

    public native int startPublish(String mp4Path, String stream);

    public native void stopPublish();

}
与之对于的native层的类实现:
AVOutputFormat *ofmt = NULL;
AVCodecContext *codec_ctx = NULL;
AVFormatContext *in_fmt = NULL, *out_fmt = NULL;
AVPacket avPacket;

//退出标记
int exit_flag = 1;

int start_publish(const char *mp4Path, const char *stream) {
    //记录帧下标
    int frame_index = 0;
    //退出标记
    exit_flag = 1;
    //1.注册所有组件
    av_register_all();
    //2.初始化网络
    avformat_network_init();
    //3.打开文件输入
    if (avformat_open_input(&in_fmt, mp4Path, 0, 0) < 0) {
        LOGE("Could not open input file.");
        goto end_line;
    }
    //4.查找相关流信息
    if (avformat_find_stream_info(in_fmt, 0) < 0) {
        LOGE("Failed to retrieve input stream information");
        goto end_line;
    }
    //遍历视频轨
    int videoIndex = -1;
    for (int index = 0; index < in_fmt->nb_streams; index++)
        if (in_fmt->streams[index]->codecpar->codec_type == AVMEDIA_TYPE_VIDEO) {
            videoIndex = index;
            break;
        }
    //5.初始化输出码流的AVFormatContext
    avformat_alloc_output_context2(&out_fmt, NULL, "flv", stream); //RTMP
    if (!out_fmt) {
        LOGE("Could not create output context");
        goto end_line;
    }
    ofmt = out_fmt->oformat;
    for (int index = 0; index < in_fmt->nb_streams; index++) {
        //6. 根据输入流创建一个输出流
        AVStream *in_stream = in_fmt->streams[index];
        codec_ctx = avcodec_alloc_context3(NULL);
        avcodec_parameters_to_context(codec_ctx, in_stream->codecpar);
        AVStream *out_stream = avformat_new_stream(out_fmt, codec_ctx->codec);
        if (!out_stream) {
            LOGE("Failed allocating output stream");
            goto end_line;
        }
        codec_ctx->codec_tag = 0;
        if (out_fmt->oformat->flags & AVFMT_GLOBALHEADER) {
            codec_ctx->flags |= CODEC_FLAG_GLOBAL_HEADER;
        }
        if (avcodec_parameters_from_context(out_stream->codecpar, codec_ctx) < 0) {
            goto end_line;
        }
    }
    //7.打开网络输出流
    if (!(ofmt->flags & AVFMT_NOFILE)) {
        if (avio_open(&out_fmt->pb, stream, AVIO_FLAG_WRITE) < 0) {
            LOGE("Could not open output URL '%s'", stream);
            goto end_line;
        }
    }
    //8.写文件头部
    if (avformat_write_header(out_fmt, NULL) < 0) {
        LOGE("Error occurred when opening output URL");
        goto end_line;
    }

    AVStream *in_stream = NULL, *out_stream = NULL;
    //记录开始时间
    int64_t start_time = av_gettime();
    //读取帧数据AVPacket
    while (exit_flag && av_read_frame(in_fmt, &avPacket) >= 0) {
        if (avPacket.stream_index == videoIndex) {
            //时间基
            AVRational time_base = in_fmt->streams[videoIndex]->time_base;
            AVRational time_base_q = {1, AV_TIME_BASE};
            int64_t pts_time = av_rescale_q(avPacket.dts, time_base, time_base_q);
            int64_t now_time = av_gettime() - start_time;
            if (pts_time > now_time) {
                av_usleep(pts_time - now_time);
            }
        }
        in_stream = in_fmt->streams[avPacket.stream_index];
        out_stream = out_fmt->streams[avPacket.stream_index];

        //PTS主要用于度量解码后的视频帧什么时候被显示出来
        avPacket.pts = av_rescale_q_rnd(avPacket.pts, in_stream->time_base, out_stream->time_base,
                                        AV_ROUND_NEAR_INF | AV_ROUND_PASS_MINMAX);
        //DTS主要是标识读入内存中的字节流在什么时候开始送入解码器中进行解码
        avPacket.dts = av_rescale_q_rnd(avPacket.dts, in_stream->time_base, out_stream->time_base,
                                        AV_ROUND_NEAR_INF | AV_ROUND_PASS_MINMAX);
        avPacket.duration = av_rescale_q(avPacket.duration, in_stream->time_base,
                                         out_stream->time_base);
        avPacket.pos = -1;

        if (avPacket.stream_index == videoIndex) {
            LOGI("Send %8d video frames to output URL", frame_index);
            frame_index++;
        }
        if (av_interleaved_write_frame(out_fmt, &avPacket) < 0) {
            LOGE("Error write frame");
            break;
        }
        av_packet_unref(&avPacket);
    }
    //9.收尾工作
    av_write_trailer(out_fmt);

    end_line:

    //10.关闭
    avformat_close_input(&in_fmt);
    if (out_fmt && !(ofmt->flags & AVFMT_NOFILE)) {
        avio_close(out_fmt->pb);
    }
    avformat_free_context(out_fmt);
    return 0;
}

/**
 * 停止推流
 */
void stop_publish() {
    exit_flag = 0;
}
停止推流的函数比较简单,直接标记exit_flag=0,推流服务器的搭建,可以参考之前的文章ubuntu下使用nginx和nginx-rtmp-module配置直播推流服务器
最后是应用层的调用
public void onStartClick(View view) {
  mBtnStartPublish.setEnabled(false);
  mBtnStopPublish.setEnabled(true);
  if (nowStreamer == null) {
      nowStreamer = new NativeStreamer();
  }
  if (publishDisposable == null) {
      publishDisposable = Schedulers.newThread().scheduleDirect(new Runnable() {
          @Override
          public void run() {
              final File inputVideo = new File(getExternalFilesDir(null), "input.mp4");
              nowStreamer.startPublish(inputVideo.getAbsolutePath(), PUBLISH_ADDRESS);
          }
      });
  }
}
运行应用,开始推流
 ```
```
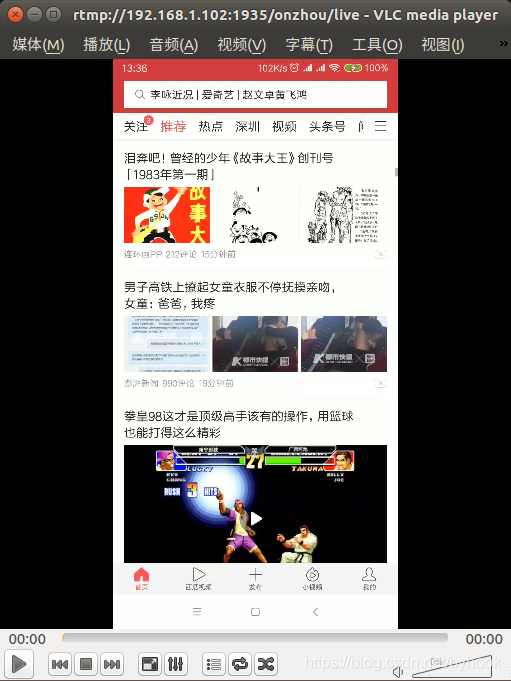
我们在局域网中使用vlc播放器,打开网络串流rtmp://192.168.1.102:1935/onzhou/live
PTS/DTS问题
PTS:主要用于度量解码后的视频帧什么时候被显示出来
DTS:主要是标识读入内存中的字节流在什么时候开始送入解码器中进行解码
通常谈论到PTS和DTS的时候,一般都是跟time_base相关联的,time_base使用来度量时间概念的,如果把1秒分为25等份,你可以理解就是一把尺,那么每一格表示的就是1/25秒。此时的time_base={1,25}
如果你是把1秒分成90000份,每一个刻度就是1/90000秒,此时的time_base={1,90000},time_base表示的就是每个刻度是多少秒
注意:正常情况下,一个视频文件都会有帧率信息,这个帧率影响画面流畅度(你可以理解为单位时间内出现的视频画面),那么我们在发送数据的时候就需要控制数据的发送间隔,过快和过慢都会导致画面显示不正常,计算PTS,DTS,间隔时间
项目地址:ffmpeg-stream-mp4
https://github.com/byhook/ffmpeg4android
参考:
https://blog.csdn.net/leixiaohua1020/article/details/47056051
https://blog.csdn.net/leixiaohua1020/article/details/39803457
https://blog.csdn.net/bixinwei22/article/details/78770090


 1026
1026

 被折叠的 条评论
为什么被折叠?
被折叠的 条评论
为什么被折叠?
 到【灌水乐园】发言


