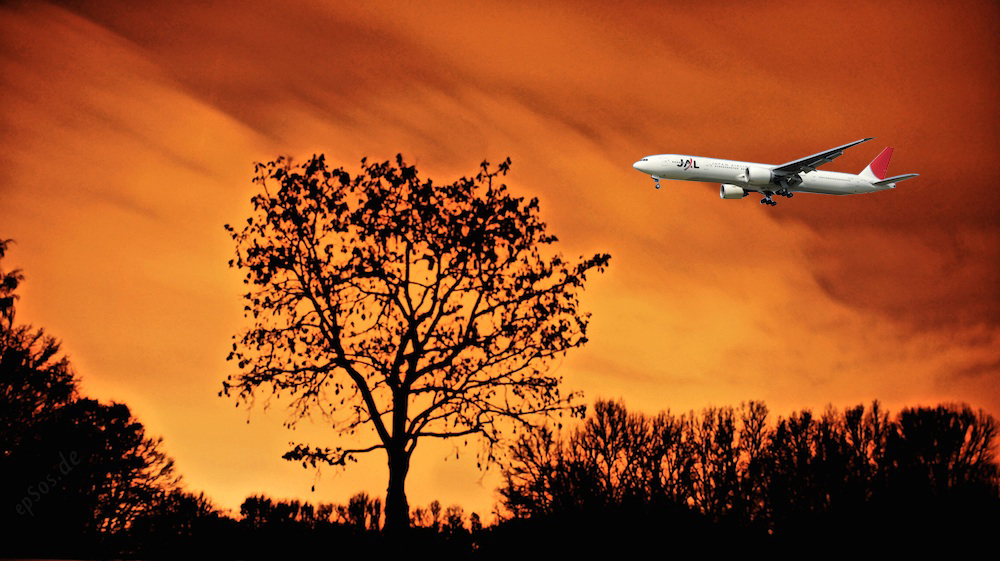
图1:无缝克隆示例:一架飞机被克隆到傍晚的天空中。
https://www.learnopencv.com/seamless-cloning-using-opencv-python-cpp/
OpenCV 3中引入的令人兴奋的新功能之一称为无缝克隆。使用此新功能,您可以从一个图像中复制对象,然后将其粘贴到另一图像中,从而使合成看起来无缝自然。上面的图像是使用天空和飞机场景创建的。如果我只是简单地将飞机图像覆盖在天空图像上,则结果看起来很可笑(见图2)。
图2:天空与飞机重叠。
当然,现在没有人在他们的头脑中会做这样的构图。您显然会仔细掩盖该图像,也许在Photoshop中呆了半天后,得到的图像如图3所示。

图3:飞机遮盖了仔细遮罩的天空图像。
如果您是艺术家,则需要花费半天时间,然后仔细调整飞机上的照明以适应天空图像的照明,并创造出美丽的构图。
但是,有两个问题。首先,您没有半天的时间。其次,您可能不是艺术家!
如果您可以在飞机周围做一个非常粗糙的面具,却又创造出如图1所示的漂亮构图,这不是很酷吗?如果仅用10行代码便会怎样呢?现在,这不仅很酷,还将是严重的坏蛋!
在向您展示代码之前,让我花一个小时来解释无缝克隆背后令人兴奋的理论。哦,等等,我有个更好的主意。让我们先深入研究代码。
无缝克隆实例
快速了解用法
Python
0 | output = cv2.seamlessClone(src, dst, mask, center, flags) |
C ++
0 | seamlessClone(Mat src, Mat dst, Mat mask, Point center, Mat output, int flags) |
| src | 将被复制到目标图像的源图像。在我们的示例中是飞机。 |
| dst | 源映像将被克隆到的目标映像。在我们的示例中,它是天空图像。 |
| 面具 | 要克隆的对象周围的粗糙蒙版。这应该是源图像的大小。如果您很懒,请将其设置为全白图像! |
| 中央 | 源图像中心在目标图像中的位置。 |
| 标志 | 当前工作的两个标志是NORMAL_CLONE和MIXED_CLONE。我提供了一个例子来说明差异。 |
| 输出 | 输出/结果图像。 |
现在,让我们看一下我用来生成上面图像的代码。
Python范例
6 | src = cv2.imread("images/airplane.jpg") |
7 | dst = cv2.imread("images/sky.jpg") |
10 | # Create a rough mask around the airplane. |
11 | src_mask = np.zeros(src.shape, src.dtype) |
12 | poly = np.array([ [4,80], [30,54], [151,63], [254,37], [298,90], [272,134], [43,122] ], np.int32) |
13 | cv2.fillPoly(src_mask, [poly], (255, 255, 255)) |
15 | # This is where the CENTER of the airplane will be placed |
19 | output = cv2.seamlessClone(src, dst, src_mask, center, cv2.NORMAL_CLONE) |
22 | cv2.imwrite("images/opencv-seamless-cloning-example.jpg", output); |
C ++示例
3 | // Read images : src image will be cloned into dst |
4 | Mat src = imread("images/airplane.jpg"); |
5 | Mat dst = imread("images/sky.jpg"); |
8 | // Create a rough mask around the airplane. |
9 | Mat src_mask = Mat::zeros(src.rows, src.cols, src.depth()); |
11 | // Define the mask as a closed polygon |
13 | poly[0][0] = Point(4, 80); |
14 | poly[0][1] = Point(30, 54); |
15 | poly[0][2] = Point(151,63); |
16 | poly[0][3] = Point(254,37); |
17 | poly[0][4] = Point(298,90); |
18 | poly[0][5] = Point(272,134); |
19 | poly[0][6] = Point(43,122); |
21 | const Point* polygons[1] = { poly[0] }; |
22 | int num_points[] = { 7 }; |
24 | // Create mask by filling the polygon |
26 | fillPoly(src_mask, polygons, num_points, 1, Scalar(255,255,255)); |
28 | // The location of the center of the src in the dst |
31 | // Seamlessly clone src into dst and put the results in output |
33 | seamlessClone(src, dst, src_mask, center, output, NORMAL_CLONE); |
36 | imwrite("images/opencv-seamless-cloning-example.jpg", output); |
在上面的示例中,我使用的克隆类型(标志)为NORMAL_CLONE。还有另一种MIXED_CLONE,与NORMAL_CLONE稍有不同。让我们看看这两种类型在细节上有何不同。
普通克隆(NORMAL_CLONE)与混合克隆(MIXED_CLONE)
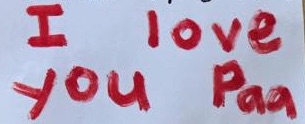
我有一个5岁的儿子,如果我对他好,他会给我“我爱你”门票。曾经有一段时间,孩子们渴望得到父母的批准,但如今,父母们必须竭尽全力获得“我爱你”的门票。无论如何,回到克隆。我将在Computer Vision服务中使用这些“我爱你的票”之一(请参见图4)。

图4:“我爱你”门票。
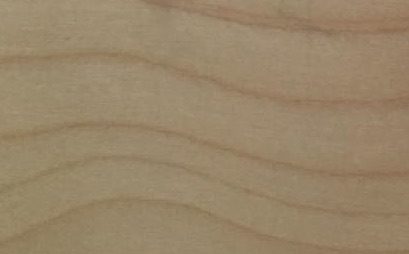
让我们尝试将该图像克隆到图5所示的木质纹理上。我们会很懒,使用全白色的源蒙版,然后将源图像克隆在木质纹理图像的中心。

图5:木材纹理
Python范例
4 | # Read images : src image will be cloned into dst |
5 | im = cv2.imread("images/wood-texture.jpg") |
6 | obj= cv2.imread("images/iloveyouticket.jpg") |
8 | # Create an all white mask |
9 | mask = 255 * np.ones(obj.shape, obj.dtype) |
11 | # The location of the center of the src in the dst |
12 | width, height, channels = im.shape |
13 | center = (height/2, width/2) |
15 | # Seamlessly clone src into dst and put the results in output |
16 | normal_clone = cv2.seamlessClone(obj, im, mask, center, cv2.NORMAL_CLONE) |
17 | mixed_clone = cv2.seamlessClone(obj, im, mask, center, cv2.MIXED_CLONE) |
20 | cv2.imwrite("images/opencv-normal-clone-example.jpg", normal_clone) |
21 | cv2.imwrite("images/opencv-mixed-clone-example.jpg", mixed_clone) |
C ++示例
2 | Mat src = imread("images/iloveyouticket.jpg"); |
3 | Mat dst = imread("images/wood-texture.jpg"); |
5 | // Create an all white mask |
6 | Mat src_mask = 255 * Mat::ones(src.rows, src.cols, src.depth()); |
8 | // The location of the center of the src in the dst |
9 | Point center(dst.cols/2,dst.rows/2); |
11 | // Seamlessly clone src into dst and put the results in output |
15 | seamlessClone(src, dst, src_mask, center, normal_clone, NORMAL_CLONE); |
16 | seamlessClone(src, dst, src_mask, center, mixed_clone, MIXED_CLONE); |
19 | imwrite("images/opencv-normal-clone-example.jpg", normal_clone); |
20 | imwrite("images/opencv-mixed-clone-example.jpg", mixed_clone); |
正常克隆结果
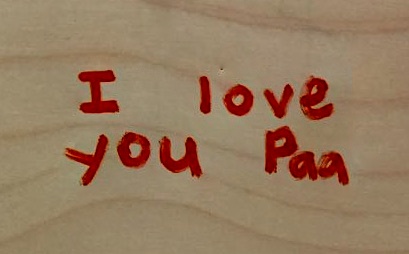
如果我们通过使用NORMAL_CLONE标志使用“正常克隆”,我们将得到如图6所示的结果。现在我们没有使用良好的蒙版,您会发现单词“ I”和“ Love”之间以及“ you”之间的过度平滑”和“ Paa”。当然,我们很懒。我们本可以创建一个粗糙的蒙版并改善结果。但是,如果您懒惰和聪明,则可以使用混合克隆。
图6:OpenCV普通克隆示例
混合克隆结果
在“正常克隆”中,源图像的纹理(渐变)保留在克隆的区域中。在混合克隆中,克隆区域的纹理(渐变)由源图像和目标图像的组合确定。混合克隆不会产生平滑区域,因为它会选择源图像和目标图像之间的主要纹理(渐变)。混合克隆的结果如图7所示。请注意,“ I”和“ Love”之间以及“ you”和“ Paa”之间的纹理不再平滑。懒人加油!

图7:OpenCV混合克隆示例
无缝克隆视频结果
我拍摄了飞机和天空的图像,并更改了飞机的位置以创建此动画。MIXED_CLONE提供了更好的结果,并且您几乎没有注意到任何工件。将300×194图像(飞机)克隆到1000×560图像(天空)需要大约0.4秒。
下载无缝克隆代码和示例图像
向下滚动到下载部分(此文章底部)以立即访问此文章中的C ++和Python代码以及图像。
泊松图像编辑
在OpenCV的无缝克隆一个标题为一个有影响力的SIGGRAPH 2003纸的实现“泊松图像编辑”,由帕特里克·佩雷斯,米歇尔Gangnet和安德鲁·布雷克。
现在我们知道,如果使用精心创建的遮罩将源图像(飞机)的强度(RGB值)与目标图像(天空)混合,我们将获得如图3所示的结果。使用图像梯度而不是图像强度可以产生更真实的结果。无缝克隆后,蒙版区域中结果图像的强度与蒙版区域中源区域的强度不同。相反,结果图像在遮罩区域中的梯度与源区域在遮罩区域中的梯度大约相同。另外,在遮蔽区域的边界处的结果图像的强度与目的地图像(天空)的强度相同。
作者表明,这是通过求解泊松方程来完成的,因此可以解决论文的标题-泊松图像编辑。该论文的理论和实现细节实际上很酷,但超出了本文的范围。但是,如果您阅读本文并有疑问,请随时在评论部分提问。


 2012
2012

 被折叠的 条评论
为什么被折叠?
被折叠的 条评论
为什么被折叠?
 到【灌水乐园】发言


