


在微服务架构中,使用Spring Cloud集成Apache Kafka来实现异步通信是一种常见且高效的做法。Kafka作为一个分布式流处理平台,能够处理高吞吐量的数据,非常适合用于微服务之间的消息传递。
微服务之间的通信方式包括同步通信和异步通信。
1)同步通信:通常通过HTTP RESTful API或RPC(远程过程调用)实现。服务消费者通过发送HTTP请求到服务提供者,服务提供者处理请求后返回响应。这种方式简单直接,但可能会受到网络延迟和并发量的影响。
同步通信的实现代码参见博文:微服务3:微服务间接口远程调用(同步通信方式)-CSDN博客
2)异步通信:通过消息队列(如RabbitMQ、Kafka等)实现。服务消费者将消息发送到队列中,服务提供者从队列中拉取消息并进行处理。这种方式实现了服务之间的解耦,提高了系统的可扩展性和容错性。但也需要考虑消息的顺序性、一致性和可靠性等问题。
1、本文目标
本文的目标是使用微服务Spring Cloud集成Kafka实现异步通信。本文实现了一个简单的Kafka Producer微服务,连接至部署再Ubuntu系统上的Kafka Server,同时在Ubuntu通过命令行终端启动一个监听的消费者,当通过浏览器测试接口想Kafka Producer微服务发送一条消息,Kafka Producer微服务即刻将该消息发送至Ubuntu系统上的Kafka Server,同时在Kafka consumer终端上可收到并显示出该消息。具体系统架构如下图所示。
部署Kafka Server和Kafka consumer,参见博文:Ubuntu下Kafka安装及使用-CSDN博客
Eureka注册中心的实现,参见博文:
微服务1:搭建微服务注册中心(命令行简易版,不使用IDE)-CSDN博客
 2、创建Kafka Producer
mvn archetype:generate -DgroupId=com.test -DartifactId=microservice-kafka -DarchetypeArtifactId=maven-archetype-quickstart
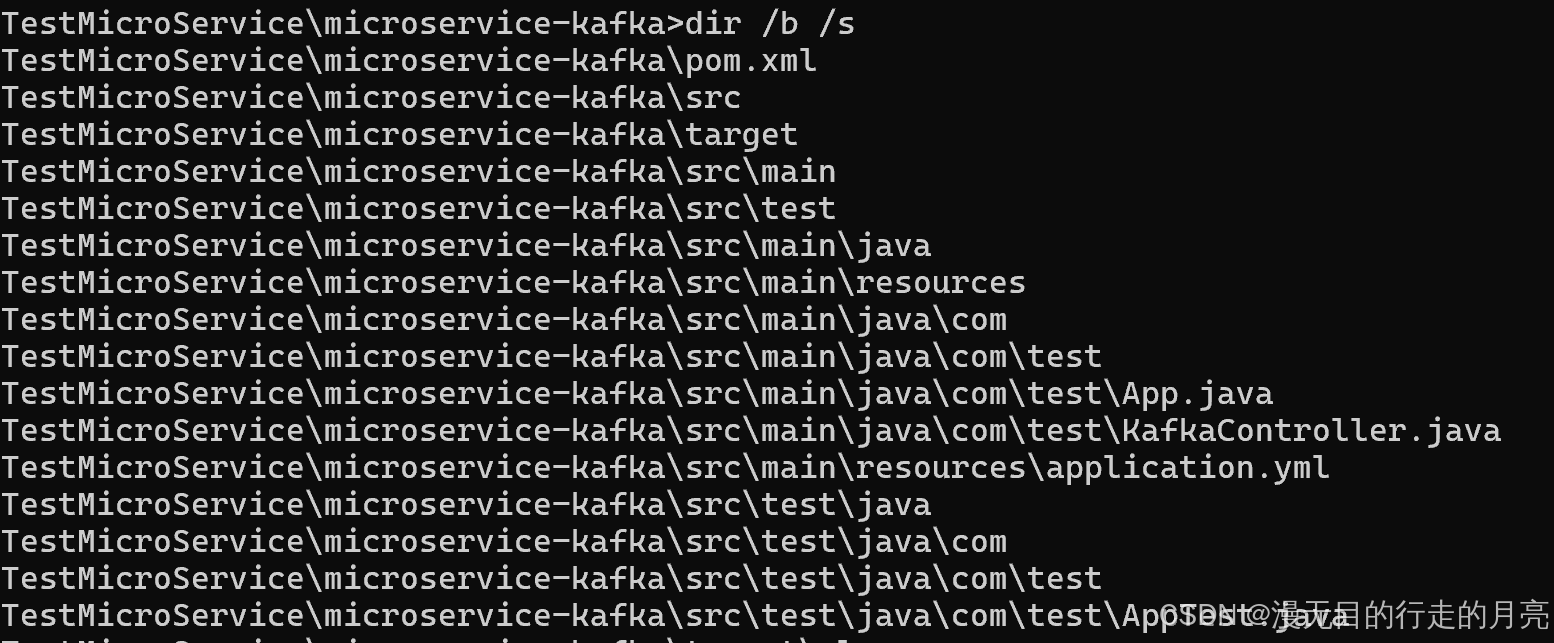
完整代码的目录如下:
编辑pom.xml,添加依赖包:
<dependency>
<groupId>org.springframework.cloud</groupId>
<artifactId>spring-cloud-stream-binder-kafka</artifactId>
</dependency>
<project xmlns="http://maven.apache.org/POM/4.0.0" xmlns:xsi="http://www.w3.org/2001/XMLSchema-instance"
  xsi:schemaLocation="http://maven.apache.org/POM/4.0.0 http://maven.apache.org/maven-v4_0_0.xsd">
  <modelVersion>4.0.0</modelVersion>

  <groupId>com.test</groupId>
  <artifactId>microservice-kafka</artifactId>
  <packaging>jar</packaging>
  <version>1.0-SNAPSHOT</version>
  <name>microservice-kafka</name>
  <url>http://maven.apache.org</url>

  <parent>
    <groupId>org.springframework.boot</groupId>
    <artifactId>spring-boot-starter-parent</artifactId>
    <version>2.3.0.RELEASE</version>
    <relativePath/>
  </parent>

  <dependencies>
  	<dependency>
        <groupId>org.springframework.boot</groupId>
        <artifactId>spring-boot-starter-web</artifactId>
    </dependency>
    <dependency>
        <groupId>org.springframework.cloud</groupId>
        <artifactId>spring-cloud-starter-netflix-eureka-client</artifactId>
    </dependency>

    <dependency>
      <groupId>junit</groupId>
      <artifactId>junit</artifactId>
      <version>3.8.1</version>
      <scope>test</scope>
    </dependency>

    <dependency>
      <groupId>org.springframework.cloud</groupId>
      <artifactId>spring-cloud-stream-binder-kafka</artifactId>
    </dependency>


  </dependencies>

    <dependencyManagement>
    <dependencies>
        <dependency>
            <groupId>org.springframework.cloud</groupId>
            <artifactId>spring-cloud-dependencies</artifactId>
            <version>Hoxton.SR4</version>
            <type>pom</type>
            <scope>import</scope>
        </dependency>
    </dependencies>
  </dependencyManagement>

  <build>
		<plugins>
			<plugin>
				<groupId>org.springframework.boot</groupId>
				<artifactId>spring-boot-maven-plugin</artifactId>
			</plugin>
		</plugins>
	</build>

</project>
编辑application.yml,配置kafka:
bootstrap-servers: 192.168.23.131:9092其中192.168.23.131是Kafka Server的IP地址。
server:
  port: 8020
spring:
  application:
    name: microservice-kafka
  kafka:
    bootstrap-servers: 192.168.23.131:9092
    producer:
      retries: 0
      batch-size: 16384
      buffer-memory: 33554432
      key-serializer: org.apache.kafka.common.serialization.StringSerializer
      value-serializer: org.apache.kafka.common.serialization.StringSerializer
      acks: all

eureka:
  client:
    serviceUrl:
      defaultZone: http://localhost:8080/eureka/
  instance:
    prefer-ip-address: true
App.java的完整代码如下:
package com.test;

import org.springframework.boot.ApplicationRunner;
import org.springframework.boot.SpringApplication;
import org.springframework.boot.autoconfigure.SpringBootApplication;
import org.springframework.cloud.client.discovery.EnableDiscoveryClient;


@SpringBootApplication
@EnableDiscoveryClient
public class App
{
    public static void main( String[] args )
    {
        System.out.println( "Hello World!" );
        SpringApplication.run(App.class, args);
    }
}
KafkaController.java的完整代码如下:
package com.test;

import org.springframework.beans.factory.annotation.Autowired;
import org.springframework.web.bind.annotation.GetMapping;
import org.springframework.web.bind.annotation.PathVariable;
import org.springframework.web.bind.annotation.RequestMapping;
import org.springframework.web.bind.annotation.RestController;
import org.springframework.kafka.core.*;


@RequestMapping("/kafka")
@RestController
public class KafkaController {

	  @Autowired
    private KafkaTemplate<String,String> kafkaTemplate;

    @GetMapping("sendMsg")
    public String helloProducer(String msg){
        kafkaTemplate.send("mydemo1",msg);
        return "ok";
    }

}
启动Kafka Producer 和Eureka
mvn spring-boot:run
3、启动Kafka Server及Consumer
bin/kafka-server-start.sh config/server.properties&
创建主题
./bin/kafka-topics.sh --create --bootstrap-server demo1:9092 --replication-factor 1 --partitions 1 --topic mydemo1
在命令行终端启动消费者
bin/kafka-console-consumer.sh --bootstrap-server demo1:9092 --topic mydemo1
4、浏览器测试
在浏览器输入:
http://localhost:8020/kafka/sendMsg?msg=测试消息testmsg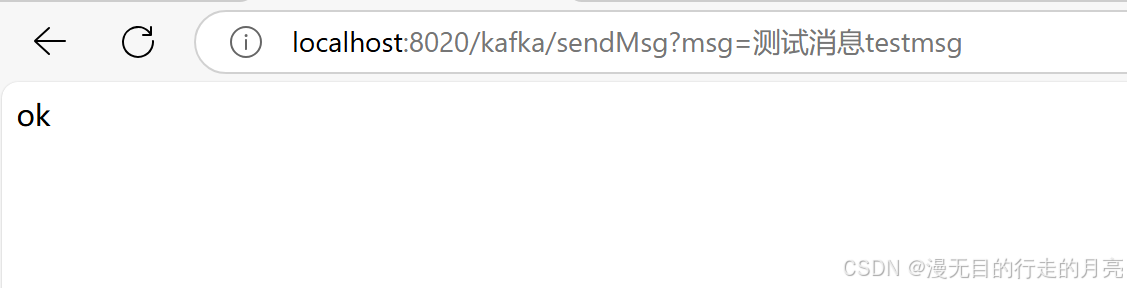
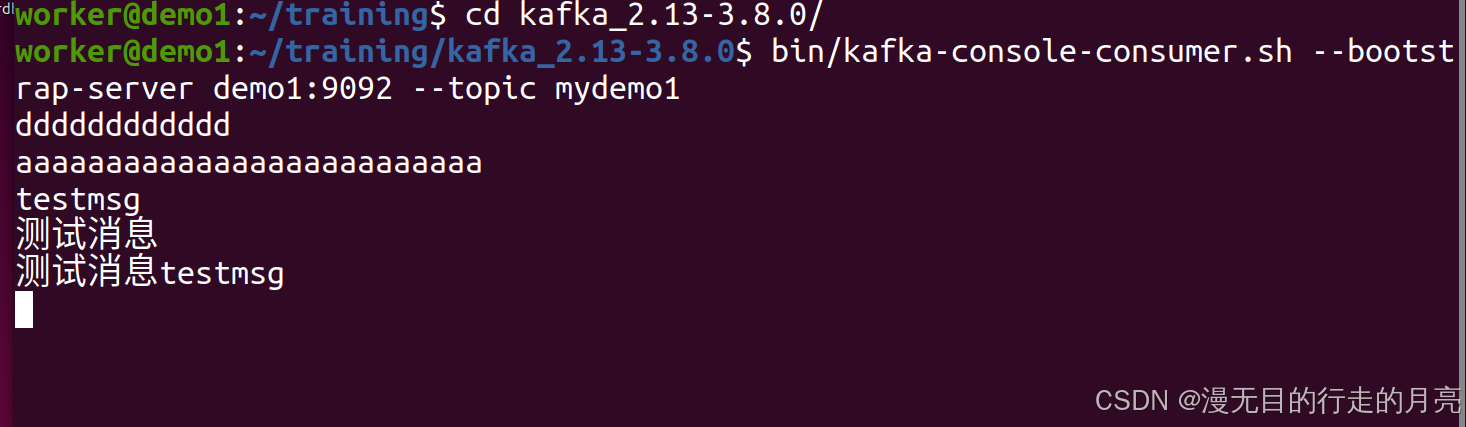
此时在Ubuntu的Consumer终端可以看到从浏览器输入的消息。


 164万+
164万+

 被折叠的 条评论
为什么被折叠?
被折叠的 条评论
为什么被折叠?
 到【灌水乐园】发言


