


目录
引言
Colorful Image Colorization是一个较为稳定的黑白图片上色算法,其原理和代码也相对简单。在ECCV 2016上展示了第一代模型,后来又在SIGGRAPH 2017发布了改进之后的模型。优化后的模型更加稳定,上色效果也更加接近现实。

算法原理
一、网络结构
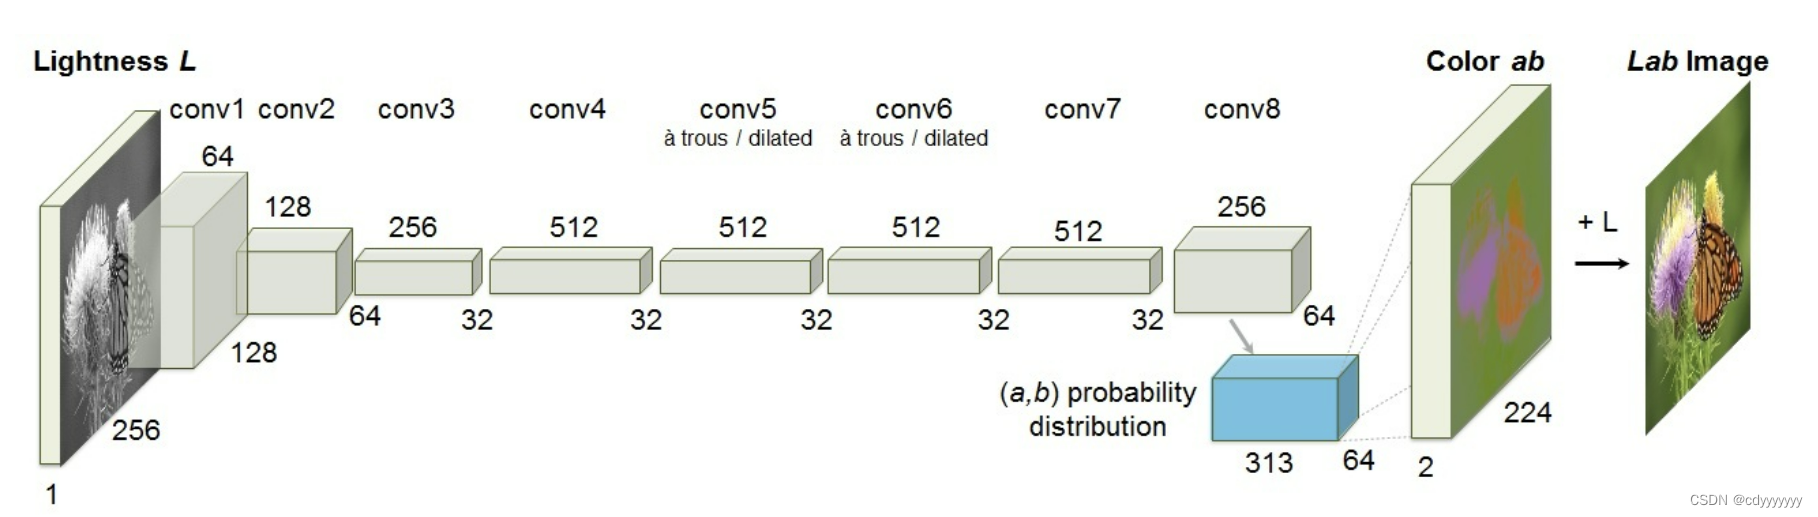
算法的主要原理是,将一张LAB格式灰度图片的L通道,输入模型进行推理,推理出其AB通道,最后将原始的L通道和推理出的AB通道结合起来,得到一张上色的图片。
一般常见的图片格式是RGB,有三个通道分别表示红色、绿色、蓝色。三个颜色组合出各种不同的颜色。而LAB图片格式的L通道表示图像的亮度,取值范围为0到100,颜色越大表示颜色越亮。AB的值域都是从-128到+128,A代表从绿色到红色的分量,B代表从蓝色到黄色的分量。

二、图像预处理和后处理
所有输入的图像都会被resize成256×256的大小。为了最后输出图像的清晰度,所以需要保留原始输入图像的L通道。将图像转换成LAB格式,然后提取L通道,输入模型。输入模型的size应该是1×1×256×256。
经过模型推理,输出的size应该是1×2×256×256。将预测的AB通道resize成原始图像大小,然后和原始图像的L通道合并,得到最后的结果。
源代码解析
一、目录结构
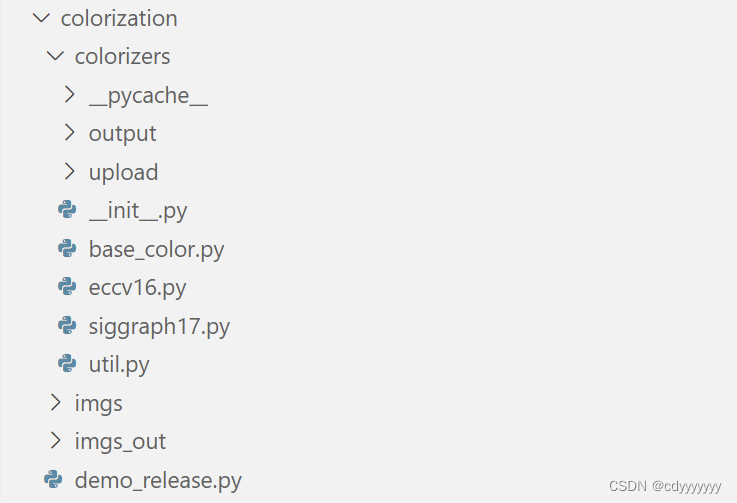
colorizers中是主要的模型代码以及图片处理的代码
imgs 存放输入图片
imgs_out 存放输出图片
demo_release.py 组织代码,运行程序的文件
二、demo_release.py
import argparse
import matplotlib.pyplot as plt

from colorizers import *

parser = argparse.ArgumentParser()
parser.add_argument('-i','--img_path', type=str, default='imgs/ansel_adams3.jpg') #输入图片路径
parser.add_argument('--use_gpu', action='store_true', help='whether to use GPU') #是否使用GPU
parser.add_argument('-o','--save_prefix', type=str, default='saved', help='will save into this file with {eccv16.png, siggraph17.png} suffixes') #保存图片路径
opt = parser.parse_args()

# load colorizers
colorizer_eccv16 = eccv16(pretrained=True).eval()  #初始化eccv16网络
colorizer_siggraph17 = siggraph17(pretrained=True).eval()  #初始化siggraph17网络
if(opt.use_gpu):
	colorizer_eccv16.cuda()
	colorizer_siggraph17.cuda()

img = load_img(opt.img_path)  #加载图片
(tens_l_orig, tens_l_rs) = preprocess_img(img, HW=(256,256))  #图片预处理
if(opt.use_gpu):
	tens_l_rs = tens_l_rs.cuda()

img_bw = postprocess_tens(tens_l_orig, torch.cat((0*tens_l_orig,0*tens_l_orig),dim=1))
out_img_eccv16 = postprocess_tens(tens_l_orig, colorizer_eccv16(tens_l_rs).cpu())  #推理和图片后处理
out_img_siggraph17 = postprocess_tens(tens_l_orig, colorizer_siggraph17(tens_l_rs).cpu())   #推理和图片后处理

plt.imsave('%s_eccv16.png'%opt.save_prefix, out_img_eccv16)  #保存图片
plt.imsave('%s_siggraph17.png'%opt.save_prefix, out_img_siggraph17)  #保存图片
在此文件中可以自定义输入输出文件路径。
三、eccv16.py siggraph17.py
定义eccv16和siggraph17的网络结构,下载对应的权重文件。
四、util.py
from PIL import Image
import numpy as np
from skimage import color
import torch
import torch.nn.functional as F
from IPython import embed

def load_img(img_path):  # 加载图片
	out_np = np.asarray(Image.open(img_path))  #将图片转为numpy数组
	if(out_np.ndim==2):
		out_np = np.tile(out_np[:,:,None],3)
	return out_np

def resize_img(img, HW=(256,256), resample=3):  # 调整图片大小
	return np.asarray(Image.fromarray(img).resize((HW[1],HW[0]), resample=resample))

def preprocess_img(img_rgb_orig, HW=(256,256), resample=3):  #图片与处理

	img_rgb_rs = resize_img(img_rgb_orig, HW=HW, resample=resample)   #将图片调整为256×256

	img_lab_orig = color.rgb2lab(img_rgb_orig)    #rgb格式转换为lab格式
	img_lab_rs = color.rgb2lab(img_rgb_rs)

	img_l_orig = img_lab_orig[:,:,0]   #取图片的L通道
	img_l_rs = img_lab_rs[:,:,0]

	tens_orig_l = torch.Tensor(img_l_orig)[None,None,:,:]   #转换成tensor
	tens_rs_l = torch.Tensor(img_l_rs)[None,None,:,:]

	return (tens_orig_l, tens_rs_l)

def postprocess_tens(tens_orig_l, out_ab, mode='bilinear'):   #图片后处理

	HW_orig = tens_orig_l.shape[2:]  #取原始图片的长宽
	HW = out_ab.shape[2:]

	if(HW_orig[0]!=HW[0] or HW_orig[1]!=HW[1]):   #恢复到原始图片大小
		out_ab_orig = F.interpolate(out_ab, size=HW_orig, mode='bilinear')
	else:
		out_ab_orig = out_ab

	out_lab_orig = torch.cat((tens_orig_l, out_ab_orig), dim=1)   # L+AB
	return color.lab2rgb(out_lab_orig.data.cpu().numpy()[0,...].transpose((1,2,0)))  #转换为rgb图片
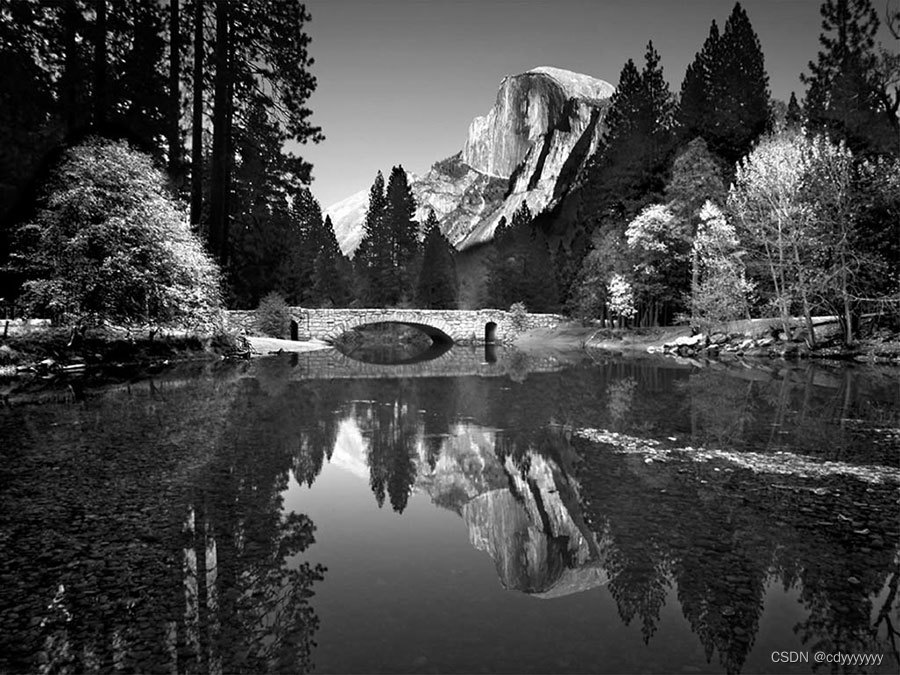
结果展示
原图:
ECCV 2016:

SIGGRAPH 2017 :


 4718
4718


 被折叠的 条评论
为什么被折叠?
被折叠的 条评论
为什么被折叠?
 到【灌水乐园】发言


