


springboot 加载一个properties文件转换为对象、List和Map数据结构
一、springboot 加载一个properties文件转换为对象
1.1、配置文件-blog.properties
com.chenheng.blog.name=陈大大
com.chenheng.blog.title=Spring Boot学习教程
com.chenheng.blog.desc=${com.chenheng.blog.name}正在努力写《${com.chenheng.blog.title}》
# 随机字符串
com.chenheng.blog.value=${random.value}
# 随机int
com.chenheng.blog.number=${random.int}
# 随机long
com.chenheng.blog.bignumber=${random.long}
# 10以内的随机数
com.chenheng.blog.test1=${random.int(10)}
# 10-20的随机数
com.chenheng.blog.test2=${random.int[10,20]}
1.2、Blog2Properties类
package com.chenheng.properties;

import lombok.Data;
import org.springframework.boot.context.properties.ConfigurationProperties;
import org.springframework.context.annotation.PropertySource;
import org.springframework.stereotype.Component;

/**
 * @author chenheng
 * @date 2022/4/30 21:17
 */
@PropertySource(value={"classpath:config/blog.properties"})
@ConfigurationProperties(prefix = "com.chenheng.blog")
@Component
@Data
public class Blog2Properties {
    private String name;
    private String title;
    private String desc;
    private String value;
    private String number;
    private String bignumber;
    private String test1;
    private String test2;
}
1.3、运行
package com.chenheng;

import com.chenheng.properties.Blog2Properties;
import com.chenheng.properties.BlogProperties;
import com.chenheng.properties.PersonProperties;
import org.junit.jupiter.api.Test;
import org.springframework.beans.factory.annotation.Autowired;
import org.springframework.boot.test.context.SpringBootTest;
/**
 * @author chenheng
 * @date 2022/4/30 20:49
 */
@SpringBootTest
public class SpringBootTest01 {
    @Autowired
    private Blog2Properties blog2Properties;
    @Test
    void testProperties02(){
        System.out.println(blog2Properties);
    }
}
二、springboot 加载一个properties文件转换为List
2.1、配置文件-cityCode.properties
#List properties
com.city.code.list[0]=www
com.city.code.list[1]=localhost
com.city.code.list[2]=wuhan
com.city.code.list[3]=tianjin
#Map Properties
com.city.code.map.www=4201
com.city.code.map.wuhan=4201
com.city.code.map.tianjin=1200
2.2、CityCodeProperties类
package com.chenheng.properties;

import lombok.Data;
import org.springframework.boot.context.properties.ConfigurationProperties;
import org.springframework.context.annotation.PropertySource;
import org.springframework.stereotype.Component;

import java.util.ArrayList;
import java.util.HashMap;
import java.util.List;
import java.util.Map;

/**
 * @author chenheng
 * @date 2022/5/1 14:39
 */
@PropertySource(value={"classpath:config/cityCode.properties"})
@ConfigurationProperties(prefix = "com.city.code")
@Component
@Data
public class CityCodeProperties {
    private List<String> list = new ArrayList<>();

    private Map<String, String> map = new HashMap<>();
}
2.3、运行
package com.chenheng;

import com.chenheng.properties.Blog2Properties;
import com.chenheng.properties.BlogProperties;
import com.chenheng.properties.CityCodeProperties;
import com.chenheng.properties.PersonProperties;
import org.junit.jupiter.api.Test;
import org.springframework.beans.factory.annotation.Autowired;
import org.springframework.boot.test.context.SpringBootTest;

import java.util.List;
import java.util.Map;

/**
 * @author chenheng
 * @date 2022/4/30 20:49
 */
@SpringBootTest
public class SpringBootTest01 {
    @Autowired
    private CityCodeProperties cityCodeProperties;
    @Test
    void testCityCodeProperties(){
        List<String> list = cityCodeProperties.getList();
        Map<String, String> map = cityCodeProperties.getMap();
        System.out.println(list + "->" + map);
    }
}
三、springboot 加载一个properties文件转换为Map
前言
springboot中比较常见的获取properties中的值,就是直接在字段上面添加@Value的属性.
但有时候我们不确定key有多少, 但会有一定的规律(这个规律是根据业务来定的,如下), 这时候我们就可以考虑将properties中的信息转换为一个map, 然后根据key的规律操作响应的数据
1. 创建一个properties文件, properties文件内容:
名称为
customExportFields.properties
文件路径为
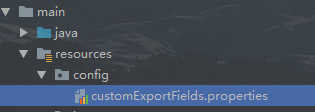
内容为
#15-排名
custom.customData.15=rank
#17-店铺ID
custom.customData.17=shopId
2、在java中将该properties文件转换为map
package com.xxx.config;

import java.util.HashMap;
import java.util.Map;
import lombok.Data;
import org.springframework.boot.context.properties.ConfigurationProperties;
import org.springframework.context.annotation.PropertySource;
import org.springframework.stereotype.Component;

// lombok专用注解
@Data
// 指定配置文件
@PropertySource("classpath:config/customExportFields.properties")
// custom指的是customExportFields.properties中前缀
@ConfigurationProperties(prefix = "custom")
@Component
public class CustomExportPropertiesConfig {
// prefix的值+customData变量名为properties key的前一部分, 将key剩余的部分作为map的key, value作为map的value
  public Map<String, String> customData = new HashMap<>();
}
3、注意事项
customExportFields.properties文件中
custom.customData.15=rank
对象JavaConfig类中
属性文件中的custom是@ConfigurationProperties(prefix = "custom")对应的前缀名称
属性文件中的customData即是Map<String, String> customData = new HashMap<>()中customData集合的变量名,这一点一定要注意,不然找不到值
属性文件中的15即是customData集合中的key,而rank是customData集合中15这个key所对应的value值
四、遇到的问题:@PropertySource 注解实现读取 yml 文件
4.1、配置文件-person.yml
person:
  name: lucy
  age: 16
  addr: 北京
  books: [java,kafka,netty]
  course-map-teacher: {key1: v1,key2: v2}
  dog:
    name: ${person.name}
    age: ${random.int(5)} #表达式
4.2、PersonProperties类
package com.chenheng.properties;

import factory.MyPropertySourceFactory;
import lombok.Data;
import org.springframework.boot.context.properties.ConfigurationProperties;
import org.springframework.context.annotation.PropertySource;
import org.springframework.stereotype.Component;

import java.util.List;
import java.util.Map;

/**
 * @author chenheng
 * @date 2022/4/30 22:19
 * @PropertySource 默认的无法读取yml文件,需要写一个类即MyPropertySourceFactory
 * https://juejin.cn/post/6844903768308334606
 */
@PropertySource(value={"classpath:config/person.yml"},encoding = "utf-8",factory = MyPropertySourceFactory.class)
@ConfigurationProperties(prefix = "person")
@Component
@Data
public class PersonProperties {
    private String name;

    private int age;

    private String addr;

    private List<String> books;

    private Map<String, String> courseMapTeacher;

    private Dog dog;
}
4.3、MyPropertySourceFactory 类
在实际的开发中使用 @PropertySource 注解无法加载 yml 配置文件问题,需要继承DefaultPropertySourceFactory类,重写createPropertySource方法
package factory;

import org.springframework.boot.env.YamlPropertySourceLoader;
import org.springframework.core.env.PropertySource;
import org.springframework.core.io.support.DefaultPropertySourceFactory;
import org.springframework.core.io.support.EncodedResource;

import java.io.IOException;
import java.util.List;

/**
 * @author chenheng
 * @date 2022/4/30 22:34
 */
public class MyPropertySourceFactory extends DefaultPropertySourceFactory {
    @Override
    public PropertySource<?> createPropertySource(String name, EncodedResource resource) throws IOException {
        if (resource == null){
            return super.createPropertySource(name, resource);
        }
        List<PropertySource<?>> sources = new YamlPropertySourceLoader().load(resource.getResource().getFilename(), resource.getResource());
        return sources.get(0);
    }
}
4.4、运行
package com.chenheng;

import com.chenheng.properties.Blog2Properties;
import com.chenheng.properties.BlogProperties;
import com.chenheng.properties.CityCodeProperties;
import com.chenheng.properties.PersonProperties;
import org.junit.jupiter.api.Test;
import org.springframework.beans.factory.annotation.Autowired;
import org.springframework.boot.test.context.SpringBootTest;

import java.util.List;
import java.util.Map;

/**
 * @author chenheng
 * @date 2022/4/30 20:49
 */
@SpringBootTest
public class SpringBootTest01 {
    @Autowired
    private PersonProperties personProperties;
    @Test
    void testPersonProperties(){
        System.out.println(personProperties);
    }
}
五、参考链接
1、springboot 加载一个properties文件转换为map
2、Springboot读取properties配置文件的List、Map格式的配置项(属性)
3、SpringBoot 从配置文件读取值到对象中
4、@PropertySource 注解实现读取 yml 文件
5、@PropertySource 解析 yml 配置文件,自定义解析 yaml 工厂类
6、@PropertySource 注解的使用


 2万+
2万+

 被折叠的 条评论
为什么被折叠?
被折叠的 条评论
为什么被折叠?
 到【灌水乐园】发言


