


版权声明:转载时请务必保留以下作者信息和链接
作者:陈维(chenweionline@hotmail.com)作者的网站:http://www.chenwei.mobi
当应用程序启动初始,进行各种类库的初始化和装载,此时出现一个醒目的 Splash 屏幕提示着用户软件正在进行初始化工作,同时可以通过显示广告、法律许可和软件 logo 等等,给予软件用户更积极的反馈。
熟悉 Java SE 6 的朋友应该知道 Java 6 允许一个应用程序在 JVM 启动前就可以显示一个 Splash 屏幕,而我今天要说的是针对无数使用旧版本 Java 的用户——如何在使用 Java 6 之前版本开发的软件中创建一个 Splash 屏幕。
我们可以把 Splash 屏幕看作一个在程序主窗体显示前显示的画布组件,当程序初始化完毕,主窗体在屏幕上显示后Splash 屏幕自动关闭,完成它的使命。
在了解了 Splash 屏幕的行为及作用后,我选择扩展 JDialog 来完成对它的实现。
首先定制 JDialog 的外观使它符合 Splash 屏幕的外形。
在构造函数通过设置设置属性 alwaysOnTop 使窗体变成顶层窗体永远出现在屏幕最上层;属性 undecorated 禁用 dialog 的装饰,这样可以去除窗体上的文本栏以及窗体最大 / 最小化 / 关闭按钮,使其完全作为一个画布存在;最后根据将在其上绘制图像的大小尺寸设置 size 属性并且将 locationRelativeTo 属性设置为 null,使其显示时出现在屏幕正中。
 setAlwaysOnTop(
true
);setUndecorated(
true
);setSize(
new
Dimension(image.getWidth(), image.getHeight()));setLocationRelativeTo(
null
);
setAlwaysOnTop(
true
);setUndecorated(
true
);setSize(
new
Dimension(image.getWidth(), image.getHeight()));setLocationRelativeTo(
null
);
然后覆写 dialog 的 paint(Graphics g) 方法完成指定图像(广告、法律许可和 logo 等等)在画布上的绘制。

 public
void
paint(Graphics g)
...
{
public
void
paint(Graphics g)
...
{
 if(image != null) ...{
 g.drawImage(image, 0, 0, this);
 }
} }
}
接下来我们需要编写控制 Splash 行为的代码。
从用户体验上看,Splash 屏幕在程序主窗体打开前显示,在主窗体打开后关闭。那么它必定和主窗体的打开事件相关联,我们在 dialog 的构造函数里传入一个主窗体的引用,向其添加一个 ComponentListener, 当主窗体变为可见时销毁当前的 dialog 实例。
frame.addComponentListener(
new
ComponentAdapter()
...
{ @Override public void componentShown(ComponentEvent e) ...{ JSplashScreen.this.dispose(); }}
);
到这里,一个 Splash 屏幕的主要代码就完成了。
通过给它添加一个鼠标监听器用来监听鼠标按下事件,使其也可以作为 About 窗体使用。当鼠标在画布上点击,窗体自动销毁。同时,我们在这个组件里定义两个静态常量用来标识它是作为 Splash 还是 About 使用。
//
public static final int SPLASH_MODE = 0;
//
public static final int ABOUT_MODE = 1;
if
(mode
==
SPLASH_MODE)
...
{ frame.addComponentListener(new ComponentAdapter() ...{ @Override public void componentShown(ComponentEvent e) ...{ JSplashScreen.this.dispose(); } }); }
else
...
{ addMouseListener(new MouseAdapter() ...{ @Override public void mouseClicked(java.awt.event.MouseEvent evt) ...{ dispose(); } }); }
下面是 Splash 屏幕组件 JSplashScreen.java 的完整代码
/**/
/* * JSplashScreen.java * * Created on 2007年11月20日, 下午1:42 */
package
mobi.chenwei.wing.swing;
import
java.awt.Dimension;
import
java.awt.Frame;
import
java.awt.Graphics;
import
java.awt.event.ComponentAdapter;
import
java.awt.event.ComponentEvent;
import
java.awt.event.MouseAdapter;
/** */
/** * Splash Screen * 根据不同的 mode 属性设置,也可以作为 About 窗体使用。 * * @author Chen Wei * @website www.chenwei.mobi * @email chenweionline@hotmail.com */
public
class
JSplashScreen
extends
javax.swing.JDialog
...
{ public static final int SPLASH_MODE = 0; public static final int ABOUT_MODE = 1; private Frame frame = null; private int mode = SPLASH_MODE; private BufferedImage image = null; public JSplashScreen(Frame frame, int mode, BufferedImage image) ...{ if (frame == null) ...{ throw new IllegalArgumentException("frame must be non null"); } if (mode != SPLASH_MODE && mode != ABOUT_MODE) ...{ throw new IllegalArgumentException("mode must be one of: SPLASH_MODE or ABOUT_MODE"); } if (image == null) ...{ throw new IllegalArgumentException("image must be non null"); } this.frame = frame; this.mode = mode; this.image = image; if (mode == SPLASH_MODE) ...{ frame.addComponentListener(new ComponentAdapter() ...{ @Override public void componentShown(ComponentEvent e) ...{ JSplashScreen.this.dispose(); } }); } else ...{ addMouseListener(new MouseAdapter() ...{ @Override public void mouseClicked(java.awt.event.MouseEvent evt) ...{
JSplashScreen.this.
dispose(); } }); } initComponents(); setSize(new Dimension(image.getWidth(), image.getHeight())); setLocationRelativeTo(null); } /** *//** This method is called from within the constructor to * initialize the form. * WARNING: Do NOT modify this code. The content of this method is * always regenerated by the Form Editor. */ // <editor-fold defaultstate="collapsed" desc="Generated Code"> private void initComponents() ...{ setDefaultCloseOperation(javax.swing.WindowConstants.DISPOSE_ON_CLOSE); setAlwaysOnTop(true); setUndecorated(true); getContentPane().setLayout(null); }// </editor-fold> @Override public void paint(Graphics g) ...{ if (image != null) ...{ g.drawImage(image, 0, 0, this); } }}
使用方法:
package
mobi.chenwei.wing.swing;
import
java.awt.image.BufferedImage;
/** */
/** * Splash Screen 的测试类 * * @author Chen Wei * @website www.chenwei.mobi * @email chenweionline@hotmail.com */
public
class
TestSplash
extends
javax.swing.JFrame
...
{ public TestSplash () ...{ // 给 Splash 屏幕添加一个背景图 BufferedImage image = new BufferedImage(400, 300, BufferedImage.TYPE_INT_BGR); // 初始化 Splash 屏幕并显示 JSplashScreen splash = new JSplashScreen(this, JSplashScreen.SPLASH_MODE, image); splash.setVisible(true); // 耗时的初始化方法 initComponents(); } private void initComponents() ...{ setDefaultCloseOperation(javax.swing.WindowConstants.EXIT_ON_CLOSE); java.awt.Dimension screenSize = java.awt.Toolkit.getDefaultToolkit().getScreenSize(); setBounds((screenSize.width - 800) / 2, (screenSize.height - 600) / 2, 800, 600); } public static void main(String args[]) ...{ java.awt.EventQueue.invokeLater(new Runnable() ...{ public void run() ...{ new TestSplash().setVisible(true); } }); }}
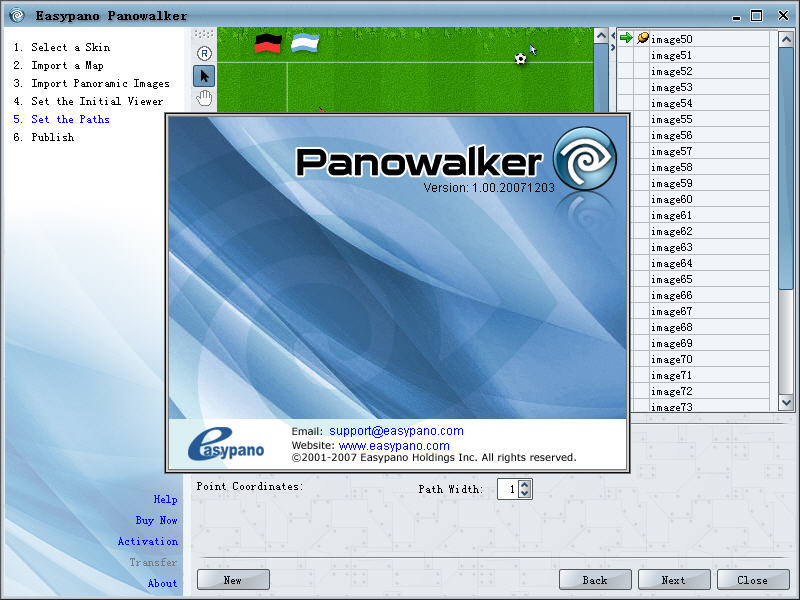
JSplashSceen 组件应用在 Panowalker_1.0 上的屏幕截图


 239
239

 被折叠的 条评论
为什么被折叠?
被折叠的 条评论
为什么被折叠?
 到【灌水乐园】发言


