


1.spring 在web中的应用:
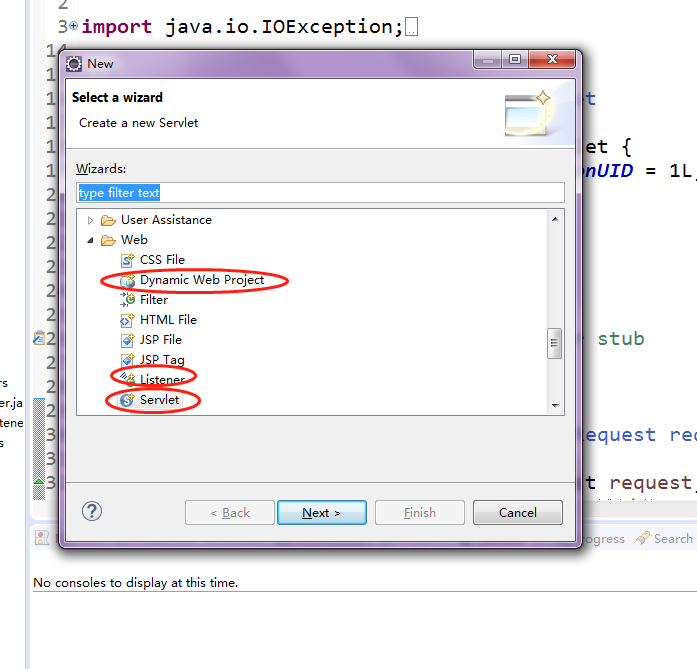
创建dynamic web项目
创建SpringServletContextListener监听器(需实现ServletContextListener)
创建TestServlet(需继承HttpServlet)
1).需要加入额外的jar 包: spring-web-4.0.0.RELEASE.jar
spring-webmvc-4.0.0.RELEASE.jar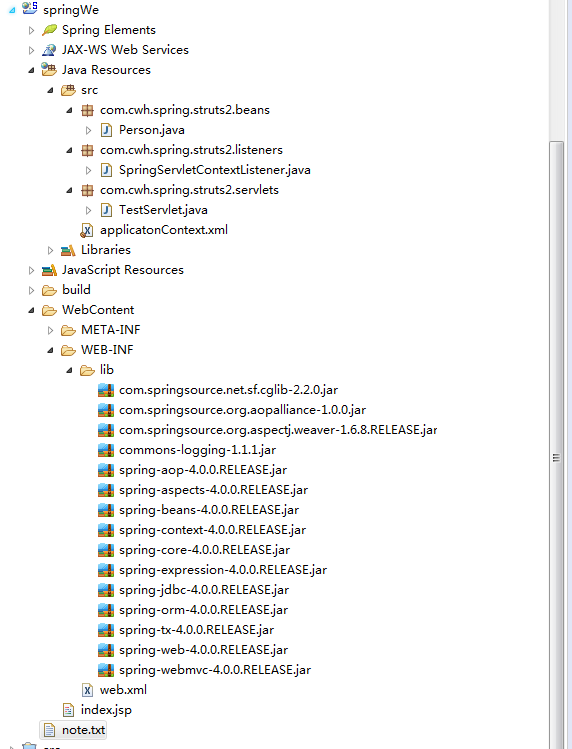
2).Spring 的配置文件(没有什么不一样)
<?xml version="1.0" encoding="UTF-8"?>
<beans xmlns="http://www.springframework.org/schema/beans"
    xmlns:xsi="http://www.w3.org/2001/XMLSchema-instance"
    xsi:schemaLocation="http://www.springframework.org/schema/beans http://www.springframework.org/schema/beans/spring-beans.xsd">

    <bean id="person" class="com.cwh.spring.struts2.beans.Person">
        <property name="username" value="cwh"></property>
    </bean>
</beans>
3).创建IOC 容器
非WEB 应用在main 方法中直接创建:new ClassPathXmlApplicationContext("applicationContext.xml");
在WEB 应用被服务器加载时就创建IOC 容器:
所以最合适是在ServletContextlistener监听器类的contextInitialized(ServletContextEvent sce) 初始方法中创建IOC 容器。
在WEB 应用的其他组件中方位IOC 容器:
在ServletContextlistener类的contextInitialized(ServletContextEvent sce) 方法中创建IOC 容器后,
把IOC 容器放在ServletContext (即application 域)的一个属性中。
SpringServletContextListener.java
package com.cwh.spring.struts2.listeners;

import javax.servlet.ServletContext;
import javax.servlet.ServletContextEvent;
import javax.servlet.ServletContextListener;

import org.springframework.context.ApplicationContext;
import org.springframework.context.support.ClassPathXmlApplicationContext;

public class SpringServletContextListener implements ServletContextListener {

    public SpringServletContextListener() {
        // TODO Auto-generated constructor stub
    }

    public void contextDestroyed(ServletContextEvent arg0)  {
         // TODO Auto-generated method stub
    }

    public void contextInitialized(ServletContextEvent arg0)  {
        // 0.获取Spring 配置文件的文件名。其实web 文件不配置这个的话,直接使用文件名即可。
        // 读取web 配置
        ServletContext servletContext = arg0.getServletContext();
        //根据 param-name, 获取  param-value
        String config = servletContext.getInitParameter("configlocation");

        // 1.创建IOC 容器
        ApplicationContext applicationContext = new ClassPathXmlApplicationContext(config);

        // 2.把IOC 容器放在ServletContext(application域) 的一个属性中。需要用到时就拿出来
        servletContext.setAttribute("ApplicationContext",  applicationContext);
    }

}
TestServlet.java:
package com.cwh.spring.struts2.servlets;

import java.io.IOException;

import javax.servlet.ServletContext;
import javax.servlet.ServletException;
import javax.servlet.http.HttpServlet;
import javax.servlet.http.HttpServletRequest;
import javax.servlet.http.HttpServletResponse;

import org.springframework.context.ApplicationContext;

import com.cwh.spring.struts2.beans.Person;

/**
 * Servlet implementation class TestServlet
 */
public class TestServlet extends HttpServlet {
    private static final long serialVersionUID = 1L;

    /**
     * [@see](https://my.oschina.net/weimingwei) HttpServlet#HttpServlet()
     */
    public TestServlet() {
        super();
        // TODO Auto-generated constructor stub
    }

    /**
     * [@see](https://my.oschina.net/weimingwei) HttpServlet#doGet(HttpServletRequest request, HttpServletResponse response)
     */
    protected void doGet(HttpServletRequest request, HttpServletResponse response) throws ServletException, IOException {
        // 1.从ServletContext中(即application域中)获取IOC 容器的引用
        ServletContext servletContext = getServletContext();
        ApplicationContext applicationContext = (ApplicationContext) servletContext.getAttribute("ApplicationContext");

        // 2.从IOC 容器获取需要的bean
        Person  person = (Person) applicationContext.getBean("person");
        person.hello();
    }

    /**
     * [@see](https://my.oschina.net/weimingwei) HttpServlet#doPost(HttpServletRequest request, HttpServletResponse response)
     */
    protected void doPost(HttpServletRequest request, HttpServletResponse response) throws ServletException, IOException {
        // TODO Auto-generated method stub
        doGet(request, response);
    }

}
web.xml
<?xml version="1.0" encoding="UTF-8"?>
<web-app xmlns:xsi="http://www.w3.org/2001/XMLSchema-instance" xmlns="http://java.sun.com/xml/ns/javaee" xsi:schemaLocation="http://java.sun.com/xml/ns/javaee http://java.sun.com/xml/ns/javaee/web-app_2_5.xsd" id="WebApp_ID" version="2.5">
  <display-name>springWe</display-name>
  <context-param>
    <param-name>configlocation</param-name>
    <!-- 配置的Spring 配置文件文件名 ,所以可以不用默认文件名的 -->
    <param-value>classpath:applicatonContext.xml</param-value>
  </context-param>
  <listener>
    <listener-class>com.cwh.spring.struts2.listeners.SpringServletContextListener</listener-class>
  </listener>

    <!--  如果用这段配置取代上面的配置,就可以直接省略手动创建Listener的步骤
  	 配置Spring配置文件的名称和位置
	<context-param>
		<param-name>contextConfigLocation</param-name>
		<param-value>classpath:applicationContext.xml</param-value>
	</context-param>

	spring自带的listener ,用於啟動IOC容器。里面的方法自动实现了创建applicationContext,并且放入到域中
	<listener>
		<listener-class>org.springframework.web.context.ContextLoaderListener</listener-class>
	</listener>
     -->

  <servlet>
    <description></description>
    <display-name>TestServlet</display-name>
    <servlet-name>TestServlet</servlet-name>
    <servlet-class>com.cwh.spring.struts2.servlets.TestServlet</servlet-class>
  </servlet>
  <servlet-mapping>
    <servlet-name>TestServlet</servlet-name>
    <url-pattern>/TestServlet</url-pattern>
  </servlet-mapping>
</web-app>
2.Spring 整合Struts2 跟页面交互(略)
实体类:
package com.cwh.spring.struts2.beans;
public class Person {
private String username;
public String getUsername() {
return username;
}
public void setUsername(String username) {
this.username = username;
}
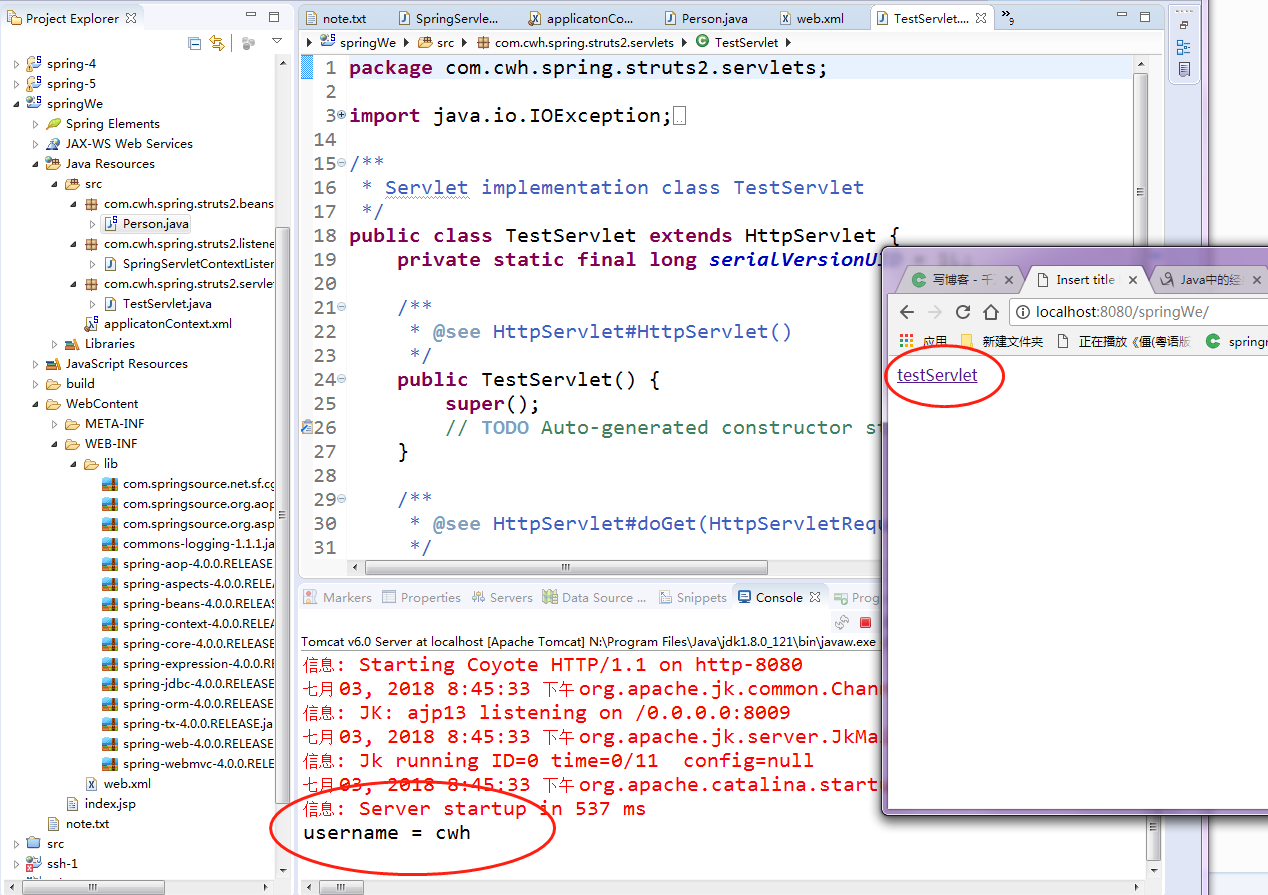
public void hello(){
System.out.println("username = " + username);
}
}测试结果:


 757
757

 被折叠的 条评论
为什么被折叠?
被折叠的 条评论
为什么被折叠?
 到【灌水乐园】发言


