


In the last mission, we explored the basics of git version control. In this project, we'll walk you through how to setup git on your own machine and authenticate with Github. Then, you'll be able to keep the changes you make to data science projects locally synced with Github. Finally, when you're ready, you'll be able to publish your code to Github and build your portfolio of projects for others to see.
Debugging your installation is outside the scope of this project unfortunately since there can be many potential reasons for the failure. Whenever you encounter an error in any of the installation steps, use Google and StackOverflow to attempt to debug and fix the issue. If you're still having difficulty, post in the Dataquest
2: Git
Thankfully, installing git doesn't have many steps for any operating system.
- Navigate to the git downloads page and download the appropriate installer for your operating system.
- Run the installer and step through the installation wizard.
- Open the command line program (Terminal for Linux and Mac and Command Prompt for Windows) and run
git version.
As long as the output describes the current git version and doesn't throw an error, then you have git installed!
3: Configuring Git
Let's now configure git with your name and email address. Run the following shell command, but replace "YOUR NAME" with your actual name:
git config --global user.name "YOUR NAME"
Then, run the following shell command, but replace "YOUR EMAIL ADDRESS" with your actual email address:
git config --global user.email "YOUR EMAIL ADDRESS"
4: Github
Use a web browser to navigate to Github and create an account. There are 3 main steps you'll have to complete:
- Creating a personal account: select a unique username and password and enter your email.
- Plan: if you choose the free plan, all of your code (which is organized in repositories) will be public. Select the free plan for now and you can always upgrade to a paid plan, which would allow you to have private repositories.
- Read the Github Hello World guide: which is available here.
Complete the instructions in step 1 of the Hello World guide to create your first repository on Github.
5: Authenticating With Github
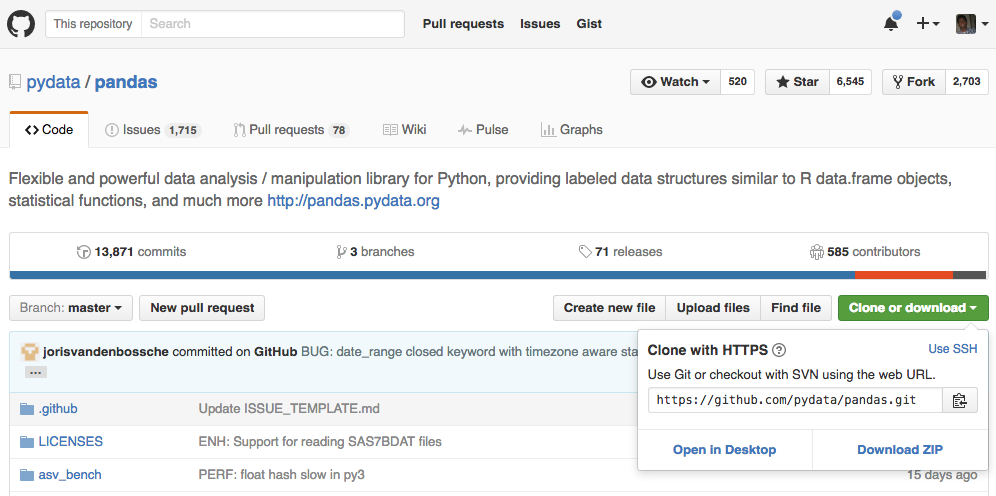
Now, you need to authenticate your computer with Github so you can push code to your remote repositories on Github. The easiest way t o do this is to clone the repo you created on Github to your local computer. Click the Clone or Download button on the repository page and then click Use HTTPS in the floating window to reveal the clone URL:
Then, run git clone {url} from the command line using the clone URL. You'll be asked to login using your Github username and your password. Finally, your repository will be downloaded to your local computer as a new folder(if there's any files in the repo).
To test that you can push changes to your Github repo:
- create a branch (
git checkout -b testbranch), - make a small change (use
nanoif you want to edit a file from command line), - commit the change (
git commit -am 'test') - push the branch to Github (
git push origin testbranch).
Whenever you run git push, git pull, or other git commands to the remote repository, you'll be asked to login every time. You can use a credential helper to avoid having to type your username and password each time, which you can read more about here.


 2033
2033


 被折叠的 条评论
为什么被折叠?
被折叠的 条评论
为什么被折叠?
 到【灌水乐园】发言


