


21.1 nosql介绍
 、
、
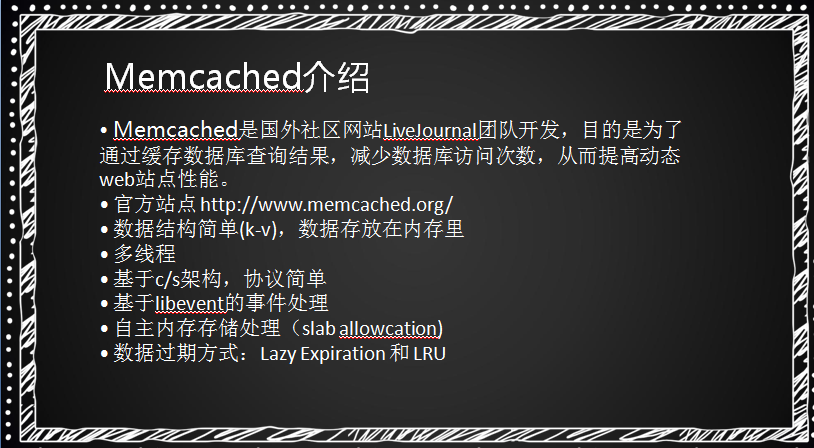
21.2 memrcached介绍


21.3 安装memcached
使用yum安装
[root@liuhongwei-01 ~]# yum install -y memcached
已加载插件:fastestmirror
base                                                                                                          | 3.6 kB  00:00:00
extras                                                                                                        | 3.4 kB  00:00:00
updates                                                                                                       | 3.4 kB  00:00:00
zabbix                                                                                                        | 2.9 kB  00:00:00
zabbix-non-supported                                                                                          |  951 B  00:00:00
(1/2): extras/7/x86_64/primary_db                                                                             | 174 kB  00:00:13
(2/2): updates/7/x86_64/primary_db                                                                            | 5.2 MB  00:00:21
Determining fastest mirrors
正在解决依赖关系
--> 正在检查事务
---> 软件包 memcached.x86_64.0.1.4.15-10.el7_3.1 将被 安装
--> 解决依赖关系完成
安装memcached是依赖于libevent这个包,查看一下这个包有没有安装,如果系统没有安装这个包,那么在安装memcached的时候会自动安装上。
[root@liuhongwei-01 ~]# rpm -qa libevent
libevent-2.0.21-4.el7.x86_64
然后启动memcached
[root@liuhongwei-01 ~]# systemctl start memcached
[root@liuhongwei-01 ~]# ps aux|grep memcache
memcach+  2567  0.0  0.1 344032  1664 ?        Ssl  21:48   0:00 /usr/bin/memcached -u memcached -p 11211 -m 64 -c 1024
root      2575  0.0  0.0 112664   960 pts/0    R+   21:48   0:00 grep --color=auto memcache
上面的memcached的进程参数详解:
-u:表示以哪个用户启动
-p:是监听的端口
-c:是最大并发数
-m:是分配的内存多大
[root@liuhongwei-01 ~]# netstat -lntp
Active Internet connections (only servers)
Proto Recv-Q Send-Q Local Address           Foreign Address         State       PID/Program name
tcp        0      0 0.0.0.0:11211           0.0.0.0:*               LISTEN      2567/memcached
tcp        0      0 0.0.0.0:111             0.0.0.0:*               LISTEN      759/rpcbind
tcp        0      0 0.0.0.0:22              0.0.0.0:*               LISTEN      1312/sshd
tcp        0      0 127.0.0.1:25            0.0.0.0:*               LISTEN      2332/master
tcp        0      0 0.0.0.0:10051           0.0.0.0:*               LISTEN      2334/zabbix_server
tcp6       0      0 :::3306                 :::*                    LISTEN      2321/mysqld
tcp6       0      0 :::11211                :::*                    LISTEN      2567/memcached
tcp6       0      0 :::111                  :::*                    LISTEN      759/rpcbind
tcp6       0      0 :::80                   :::*                    LISTEN      1298/httpd
tcp6       0      0 :::22                   :::*                    LISTEN      1312/sshd
tcp6       0      0 ::1:25                  :::*                    LISTEN      2332/master
tcp6       0      0 :::10051                :::*                    LISTEN      2334/zabbix_server
再启动的时候可以使用命令行的形式去启动:指定参数
/usr/bin/memcached -u memcached -p 11211 -m 64 -c 1024可以在memcached的配置文件中去修改参数
[root@liuhongwei-01 ~]# vim /etc/sysconfig/memcached

PORT="11211"
USER="memcached"
MAXCONN="1024"
CACHESIZE="64"
OPTIONS="
21.4 查看memcachedq状态
查看状态使用下面的命令
[root@liuhongwei-01 ~]# memcached-tool 127.0.0.1:11211 stats
#127.0.0.1:11211   Field       Value
         accepting_conns           1
               auth_cmds           0
             auth_errors           0
                   bytes           0
              bytes_read           7
           bytes_written           0
              cas_badval           0
                cas_hits           0
              cas_misses           0
               cmd_flush           0
                 cmd_get           0
                 cmd_set           0
               cmd_touch           0
             conn_yields           0
   connection_structures          11
        curr_connections          10
              curr_items           0
               decr_hits           0
             decr_misses           0
             delete_hits           0
           delete_misses           0
       evicted_unfetched           0
               evictions           0
       expired_unfetched           0
                get_hits           0
              get_misses           0
              hash_bytes      524288
       hash_is_expanding           0
        hash_power_level          16
               incr_hits           0
             incr_misses           0
                libevent 2.0.21-stable
          limit_maxbytes    67108864
     listen_disabled_num           0
                     pid        2612
            pointer_size          64
               reclaimed           0
            reserved_fds          20
           rusage_system    0.008800
             rusage_user    0.003520
                 threads           4
                    time  1534859907
       total_connections          11
             total_items           0
              touch_hits           0
            touch_misses           0
                  uptime          44
                 version      1.4.15
[root@liuhongwei-01 ~]#
我们平时需要关注get_hits 和curr_items 这二项数字,这二项相除,查看命中率。
还有一种查看状态的命令,但是需要安装nc工具
使用yum安装
[root@liuhongwei-01 ~]# yum install -y nc
已加载插件:fastestmirror
Loading mirror speeds from cached hostfile
正在解决依赖关系
--> 正在检查事务
---> 软件包 nmap-ncat.x86_64.2.6.40-13.el7 将被 安装
--> 解决依赖关系完成
[root@liuhongwei-01 ~]# echo stats |nc 127.0.0.1 11211
STAT pid 2612
STAT uptime 417
STAT time 1534860280
STAT version 1.4.15
STAT libevent 2.0.21-stable
STAT pointer_size 64
STAT rusage_user 0.011584
STAT rusage_system 0.030891
STAT curr_connections 10
STAT total_connections 12
STAT connection_structures 11
STAT reserved_fds 20
STAT cmd_get 0
STAT cmd_set 0
STAT cmd_flush 0
STAT cmd_touch 0
STAT get_hits 0
STAT get_misses 0
STAT delete_misses 0
STAT delete_hits 0
STAT incr_misses 0
STAT incr_hits 0
STAT decr_misses 0
STAT decr_hits 0
STAT cas_misses 0
STAT cas_hits 0
STAT cas_badval 0
STAT touch_hits 0
STAT touch_misses 0
STAT auth_cmds 0
STAT auth_errors 0
STAT bytes_read 13
STAT bytes_written 1023
STAT limit_maxbytes 67108864
STAT accepting_conns 1
STAT listen_disabled_num 0
STAT threads 4
STAT conn_yields 0
STAT hash_power_level 16
STAT hash_bytes 524288
STAT hash_is_expanding 0
STAT bytes 0
STAT curr_items 0
STAT total_items 0
STAT expired_unfetched 0
STAT evicted_unfetched 0
STAT evictions 0
STAT reclaimed 0
END
这种结果和上面的第一种结果基本一致
还有一种查看状态的命令,前提是需要安装libmemcached
首先查看一下有没有安装这个包,没有就安装一下
[root@liuhongwei-01 ~]# rpm -qa libmemcached
[root@liuhongwei-01 ~]# yum install -y libmemcached
已加载插件:fastestmirror
Loading mirror speeds from cached hostfile
正在解决依赖关系
--> 正在检查事务
---> 软件包 libmemcached.x86_64.0.1.0.16-5.el7 将被 安装
--> 解决依赖关系完成
[root@liuhongwei-01 ~]# memstat --servers=127.0.0.1:11211
Server: 127.0.0.1 (11211)
	 pid: 2612
	 uptime: 662
	 time: 1534860525
	 version: 1.4.15
	 libevent: 2.0.21-stable
	 pointer_size: 64
	 rusage_user: 0.024621
	 rusage_system: 0.038690
	 curr_connections: 10
	 total_connections: 13
	 connection_structures: 11
	 reserved_fds: 20
	 cmd_get: 0
	 cmd_set: 0
	 cmd_flush: 0
	 cmd_touch: 0
	 get_hits: 0
	 get_misses: 0
	 delete_misses: 0
	 delete_hits: 0
	 incr_misses: 0
	 incr_hits: 0
	 decr_misses: 0
	 decr_hits: 0
	 cas_misses: 0
	 cas_hits: 0
	 cas_badval: 0
	 touch_hits: 0
	 touch_misses: 0
	 auth_cmds: 0
	 auth_errors: 0
	 bytes_read: 30
	 bytes_written: 2067
	 limit_maxbytes: 67108864
	 accepting_conns: 1
	 listen_disabled_num: 0
	 threads: 4
	 conn_yields: 0
	 hash_power_level: 16
	 hash_bytes: 524288
	 hash_is_expanding: 0
	 bytes: 0
	 curr_items: 0
	 total_items: 0
	 expired_unfetched: 0
	 evicted_unfetched: 0
	 evictions: 0
	 reclaimed: 0
[root@liuhongwei-01 ~]#
21.5 memcached命令行
跟msql一样,安装完memcached使用telnet进入到命令行,没有telnet命令安装一下
[root@liuhongwei-01 ~]# telnet 127.0.0.1 11211
-bash: telnet: 未找到命令
[root@liuhongwei-01 ~]# yum install -y telnet
已加载插件:fastestmirror
Loading mirror speeds from cached hostfile
正在解决依赖关系
--> 正在检查事务
---> 软件包 telnet.x86_64.1.0.17-64.el7 将被 安装
--> 解决依赖关系完成
存储数据的命令如下:
[root@liuhongwei-01 ~]# telnet 127.0.0.1 11211
Trying 127.0.0.1...
Connected to 127.0.0.1.
Escape character is '^]'.
set key2 0 30 2
12
STORED
上面的set表示存储命令,key2表示key的名字,0表示,30表示过期时间,2表示需要写的字符节是2个
查看一条数据有没有存储,使用get key1如下:
get key1
VALUE key1 0 1
q
END
举例:
END
set key2 1 100 4
abcd
STORED
replace key2 1 0 4
qwer
STORED
get key2
VALUE key2 1 4
qwer
END
delete key2
DELETED
get key2
END
在命令行中的按键:删除一个字符ctrl+退格键 退出mencached:ctrl+]在输入quit 退出
^]
telnet> quit
Connection closed.
[root@liuhongwei-01 ~]#
21.6 memcached数据导出和导入
有的时候重启memcached的时候,需要去导出数据,以防数据丢失
首先我们创建几个数据
set name 1 0 5
aming
STORED
set age 2 0 2
24
STORED
set sex 1 0 1 ^H
1
STORED
get name
VALUE name 1 5
aming
END
get age
VALUE age 2 2
24
END
get se^X
END
get sex
VALUE sex 1 1
1
END
我们退出后看一下memcached的状态
[root@liuhongwei-01 ~]# memcached-tool 127.0.0.1:11211 stats
#127.0.0.1:11211   Field       Value
         accepting_conns           1
               auth_cmds           0
             auth_errors           0
                   bytes         213
              bytes_read         288
           bytes_written        3301
              cas_badval           0
                cas_hits           0
              cas_misses           0
               cmd_flush           0
                 cmd_get           8
                 cmd_set           7
               cmd_touch           0
             conn_yields           0
   connection_structures          11
        curr_connections          10
              curr_items           3
               decr_hits           0
             decr_misses           0
             delete_hits           1
           delete_misses           0
       evicted_unfetched           0
               evictions           0
       expired_unfetched           0
                get_hits           5
              get_misses           3
              hash_bytes      524288
       hash_is_expanding           0
        hash_power_level          16
               incr_hits           0
             incr_misses           0
                libevent 2.0.21-stable
          limit_maxbytes    67108864
     listen_disabled_num           0
                     pid        2612
            pointer_size          64
               reclaimed           1
            reserved_fds          20
           rusage_system    0.090175
             rusage_user    0.090175
                 threads           4
                    time  1534861827
       total_connections          16
             total_items           7
              touch_hits           0
            touch_misses           0
                  uptime        1964
                 version      1.4.15
然后导出
[root@liuhongwei-01 ~]# memcached-tool 127.0.0.1:11211 dump > data.txt
Dumping memcache contents
  Number of buckets: 1
  Number of items  : 3
Dumping bucket 1 - 3 total items
[root@liuhongwei-01 ~]# cat data.txt
add name 1 1534859863 5
aming
add age 2 1534859863 2
24
add sex 1 1534859863 1
1
导入数据:
[root@liuhongwei-01 ~]# nc 127.0.0.1 11211 < data.txt
NOT_STORED
NOT_STORED
NOT_STORED
这个时候显示失败了,失败的原因是add了这个数据,add之前有的数据肯定是导入不进去的,所以应该重启一下memcached服务在导入:
[root@liuhongwei-01 ~]# systemctl restart memcached
[root@liuhongwei-01 ~]# nc 127.0.0.1 11211 < data.txt
STORED
STORED
STORED
注意:导出的数据是带有一个时的时间点,如果当前时间已经超过该时间戳,那么是导入不进去的间戳的,这个时间戳就是该条数据过期
所以把data.txt文件的时间戳改一小时后的时间戳,然后在试试。
[root@liuhongwei-01 ~]# date -d "+1 hour" +%s
1534866047
[root@liuhongwei-01 ~]# vim data.txt

add name 1 1534866047 5
aming
add age 2 1534859863 2
24
add sex 1 1534859863 1
然后在导入,接着看一下有没有导入成功:
[root@liuhongwei-01 ~]# nc 127.0.0.1 11211 < data.txt
STORED
STORED
STORED
[root@liuhongwei-01 ~]# telnet 127.0.0.1 11211
Trying 127.0.0.1...
Connected to 127.0.0.1.
Escape character is '^]'.
get name
VALUE name 1 5
aming
END
get age
END
这样因为name的时间戳改了所以导入成功,而age的数据时过期的
21.7 php连接memcached
首先先先安装php的memcache扩展,进入到src目录下:
[root@liuhongwei-01 ~]# cd /usr/local/src
[root@liuhongwei-01 src]#
然后下载一个包
[root@liuhongwei-01 src]# wget http://www.apelearn.com/bbs/data/attachment/forum/memcache-2.2.3.tgz
--2018-08-21 22:47:46--  http://www.apelearn.com/bbs/data/attachment/forum/memcache-2.2.3.tgz
正在解析主机 www.apelearn.com (www.apelearn.com)... 47.104.7.242
正在连接 www.apelearn.com (www.apelearn.com)|47.104.7.242|:80... 已连接。
已发出 HTTP 请求,正在等待回应... 200 OK
长度:27366 (27K) [application/octet-stream]
正在保存至: “memcache-2.2.3.tgz”

100%[===========================================================================================>] 27,366      --.-K/s 用时 0.03s

2018-08-21 22:47:51 (861 KB/s) - 已保存 “memcache-2.2.3.tgz” [27366/27366]
解压包
[root@liuhongwei-01 src]# tar zxvf memcache-2.2.3.tgz
package.xml
memcache-2.2.3/config.m4
memcache-2.2.3/config9.m4
memcache-2.2.3/config.w32
memcache-2.2.3/CREDITS
memcache-2.2.3/example.php
memcache-2.2.3/memcache.c
memcache-2.2.3/memcache_queue.c
memcache-2.2.3/memcache_session.c
memcache-2.2.3/memcache_standard_hash.c
memcache-2.2.3/memcache_consistent_hash.c
memcache-2.2.3/memcache.dsp
memcache-2.2.3/php_memcache.h
memcache-2.2.3/memcache_queue.h
memcache-2.2.3/README
[root@liuhongwei-01 src]# cd memcache-2.2.3
[root@liuhongwei-01 memcache-2.2.3]# ls
config9.m4  example.php                 memcache_queue.c          php_memcache.h
config.m4   memcache.c                  memcache_queue.h          README
config.w32  memcache_consistent_hash.c  memcache_session.c
CREDITS     memcache.dsp                memcache_standard_hash.c
然后去编译
[root@liuhongwei-01 memcache-2.2.3]# /usr/local/php-fpm/bin/phpize
Configuring for:
PHP Api Version:         20131106
Zend Module Api No:      20131226
Zend Extension Api No:   220131226
[root@liuhongwei-01 memcache-2.2.3]# ./configure --with-php-config=/usr/local/php-fpm/bin/php-config
[root@liuhongwei-01 memcache-2.2.3]# echo $?
0
make make install
[root@liuhongwei-01 memcache-2.2.3]# make install
Installing shared extensions:     /usr/local/php-fpm/lib/php/extensions/no-debug-non-zts-20131226/
然后看一下有没有生成一个。so的文件
[root@liuhongwei-01 memcache-2.2.3]# ls  /usr/local/php-fpm/lib/php/extensions/no-debug-non-zts-20131226/
memcache.so  opcache.a  opcache.so
接着编辑php.ini增加一行:
[root@liuhongwei-01 memcache-2.2.3]# vim /usr/local/php-fpm/etc/php.ini

[PHP]
在这个位置下面添加一行
;extension=php_openssl.dll
;extension=php_pdo_firebird.dll
;extension=php_pdo_mysql.dll
;extension=php_pdo_oci.dll
;extension=php_pdo_odbc.dll
;extension=php_pdo_pgsql.dll
;extension=php_pdo_sqlite.dll
;extension=php_pgsql.dll
;extension=php_shmop.dll
extension="memcache.so
然后看一下有没有这个模块
[root@liuhongwei-01 memcache-2.2.3]# /usr/local/php-fpm/bin/php -m
[PHP Modules]
Core
ctype
curl
date
dom
ereg
exif
fileinfo
filter
ftp
gd
hash
iconv
json
libxml
mbstring
mcrypt
memcache
mysql
mysqli
openssl
pcre
PDO
pdo_mysql
pdo_sqlite
Phar
posix
Reflection
session
SimpleXML
soap
SPL
sqlite3
standard
tokenizer
xml
xmlreader
xmlwriter
zlib

[Zend Modules]
然后去测试一下:首先下载一个php脚本
[root@liuhongwei-01 memcache-2.2.3]# curl www.apelearn.com/study_v2/.memcache.txt > 1.php 2>/dev/null
[root@liuhongwei-01 memcache-2.2.3]# cat 1.php
<?php
//连接Memcache Memcache
$mem = new Memcache;
$mem->connect("localhost", 11211);
//保存数据
$mem->set('key1', 'This is first value', 0, 60);
$val = $mem->get('key1');
echo "Get key1 value: " . $val ."<br>";
//替换数据
$mem->replace('key1', 'This is replace value', 0, 60);
$val = $mem->get('key1');
echo "Get key1 value: " . $val . "<br>";
//保存数组数据
$arr = array('aaa', 'bbb', 'ccc', 'ddd');
$mem->set('key2', $arr, 0, 60);
$val2 = $mem->get('key2');
echo "Get key2 value: ";
print_r($val2);
echo "<br>";
//删除数据
$mem->delete('key1');
$val = $mem->get('key1');
echo "Get key1 value: " . $val . "<br>";
//清除所有数据
$mem->flush();
$val2 = $mem->get('key2');
echo "Get key2 value: ";
print_r($val2);
echo "<br>";
//关闭连接
$mem->close();
?>
执行脚本
[root@liuhongwei-01 memcache-2.2.3]# /usr/local/php-fpm/bin/php 1.php
Get key1 value: This is first value<br>Get key1 value: This is replace value<br>Get key2 value: Array
(
    [0] => aaa
    [1] => bbb
    [2] => ccc
    [3] => ddd
)
<br>Get key1 value: <br>Get key2 value: <br>[root@liuhongwei-01 memcache-2.2.3]#
21.8 memcached中存储sessions
本实例是在lamp/lnmp环境下实现
编辑php.ini添加两行

session.save_handler = memcache
session.save_path = "tcp://192.168.0.9:11211"
或者httpd.conf中对应的虚拟主机中添加
php_value session.save_handler "memcache"
php_value session.save_path "tcp://192.168.0.9:11211" 或者php-fpm.conf对应的pool中添加
php_value[session.save_handler] = memcache
php_value[session.save_path] = " tcp://192.168.0.9:11211先下载php的文件
[root@liuhongwei-01 ~]# wget http://study.lishiming.net/.mem_se.txt
--2018-08-22 00:16:26--  http://study.lishiming.net/.mem_se.txt
正在解析主机 study.lishiming.net (study.lishiming.net)... 182.254.152.182
正在连接 study.lishiming.net (study.lishiming.net)|182.254.152.182|:80... 已连接。
已发出 HTTP 请求,正在等待回应... 301 Moved Permanently
位置:http://www.apelearn.com/study_v2/.mem_se.txt [跟随至新的 URL]
--2018-08-22 00:16:32--  http://www.apelearn.com/study_v2/.mem_se.txt
正在解析主机 www.apelearn.com (www.apelearn.com)... 47.104.7.242
正在连接 www.apelearn.com (www.apelearn.com)|47.104.7.242|:80... 已连接。
已发出 HTTP 请求,正在等待回应... 200 OK
长度:237 [text/plain]
正在保存至: “.mem_se.txt”

100%[===========================================================================================>] 237         --.-K/s 用时 0s

2018-08-22 00:16:38 (12.3 MB/s) - 已保存 “.mem_se.txt” [237/237])
[root@liuhongwei-01 ~]# cat .mem_se.txt
<?php
session_start();
if (!isset($_SESSION['TEST'])) {
$_SESSION['TEST'] = time();
}
$_SESSION['TEST3'] = time();
print $_SESSION['TEST'];
print "<br><br>";
print $_SESSION['TEST3'];
print "<br><br>";
print session_id();
?>
这个脚本就是存session的php脚本
然后把下载的脚本放到虚拟主机根目录下面去,使用curl访问一下,会看到tmp下面多一个session
[root@liuhongwei-01 curl localhost/session.php
1534869691<br><br>1534869691<br><br>flnok8gd4hdlaqdn3n7ktaeq94
[root@liuhongwei-01 default]# ls /tmp/
aming.sock  mysql.sock  php-fcgi.sock  sess_b4mfjjfmahjsjov0t4f4m5usk4  sess_flnok8gd4hdlaqdn3n7ktaeq94  test.com.log
然后编辑php-fpm。conf中对应的pool中添加
[root@liuhongwei-01 ~]# vim /usr/local/php-fpm/etc/php-fpm.d/aming.conf

[aming.com]
listen = /tmp/aming.sock
listen.mode=666
user = php-fpm
group = php-fpm
pm = dynamic
pm.max_children = 50
pm.start_servers = 20
pm.min_spare_servers = 5
pm.max_spare_servers = 35
pm.max_requests = 500
rlimit_files = 1024
php_value[session.save_handler] = memcache
php_value[session.save_path] = " tcp://192.168.93.129:11211 "
然后在使用curl访问的时候发现tmp目录下没有了sess的文件了,这是因为session存储到了memcached里面去了
[root@liuhongwei-01 ~]# curl localhost/session.php
1534874814<br><br>1534874814<br><br>fto4sjdlve207su8s9effroua5
[root@liuhongwei-01 ~]# ls /tmp
aming.sock  mysql.sock  php-fcgi.sock  test.com.log
然后导出一下数据到data.txt,进入到memcacahed里面去,get到值 就可以了
[root@liuhongwei-01 ~]# memcached-tool 127.0.0.1:11211 dump > data.txt
Dumping memcache contents
  Number of buckets: 1
  Number of items  : 2
Dumping bucket 3 - 2 total items
[root@liuhongwei-01 ~]# telnet 127.0.0.1 11211
Trying 127.0.0.1...
Connected to 127.0.0.1.
Escape character is '^]'.
get rt693aug9c3u16qdmi25ojomm1
VALUE rt693aug9c3u16qdmi25ojomm1 0 37
TEST|i:1534874941;TEST3|i:1534874941;
END
面试技巧重点
礼貌 着装 心态 言语交流
自我介绍 言简意赅
注意问的相关问题怎么回答
技术面的问题 掌握牢固
投简历的时候 看好哪家公司的电话 做好准备
懂的问题就回答 彻底不会的 就说不知道 不要不懂装懂


 2150
2150

 被折叠的 条评论
为什么被折叠?
被折叠的 条评论
为什么被折叠?
 到【灌水乐园】发言


