


22.1 代码管理平台介绍

22.2 安装svn
使用yum安装
[root@liuhongwei-01 ~]# yum install -y subversion
创建目录
[root@liuhongwei-01 ~]# mkdir -p /data/svnroot/myproject
[root@liuhongwei-01 ~]#
创建好的目录是空文件
drwxr-xr-x 2 root root  6 8月  29 09:58 .
drwxr-xr-x 3 root root 22 8月  29 09:58 ..
[root@liuhongwei-01 ~]#
然后初始化一些文件内容
[root@liuhongwei-01 ~]# svnadmin create /data/svnroot/myproject
[root@liuhongwei-01 ~]# ls -la !$
ls -la /data/svnroot/myproject
总用量 16
drwxr-xr-x 6 root root   80 8月  29 09:59 .
drwxr-xr-x 3 root root   22 8月  29 09:58 ..
drwxr-xr-x 2 root root   51 8月  29 09:59 conf
drwxr-sr-x 6 root root 4096 8月  29 09:59 db
-r--r--r-- 1 root root    2 8月  29 09:59 format
drwxr-xr-x 2 root root 4096 8月  29 09:59 hooks
drwxr-xr-x 2 root root   39 8月  29 09:59 locks
-rw-r--r-- 1 root root  229 8月  29 09:59 README.txt
[root@liuhongwei-01 ~]#
编辑文件内容
[root@liuhongwei-01 ~]# cd !$/conf
cd /data/svnroot/myproject/conf
[root@liuhongwei-01 conf]# ls
authz  passwd  svnserve.conf
[root@liuhongwei-01 conf]#
authz为权限配置文件,passwd为密码文件
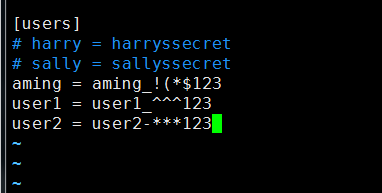
编辑authz文件,加入下面的内容

编辑passwd文件,加入如下内容
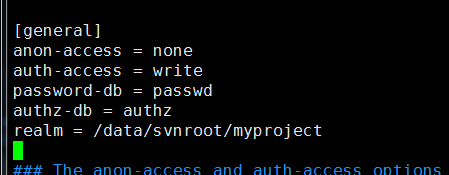
编辑svnserver.conf
启动服务
[root@liuhongwei-01 conf]# svnserve -d -r /data/svnroot
[root@liuhongwei-01 conf]# ps aux|grep vn
root      2680  0.0  0.0 180660   800 ?        Ss   10:08   0:00 svnserve -d -r /data/svnroot
root      2682  0.0  0.0 112664   960 pts/0    R+   10:08   0:00 grep --color=auto vn
[root@liuhongwei-01 conf]# netstat -lntp|grep svn
tcp        0      0 0.0.0.0:3690            0.0.0.0:*               LISTEN      2680/svnserve
[root@liuhongwei-01 conf]#
还要检查有没有防火墙规则
[root@liuhongwei-01 conf]# iptables -nvL
Chain INPUT (policy ACCEPT 0 packets, 0 bytes)
 pkts bytes target     prot opt in     out     source               destination

Chain FORWARD (policy ACCEPT 0 packets, 0 bytes)
 pkts bytes target     prot opt in     out     source               destination

Chain OUTPUT (policy ACCEPT 0 packets, 0 bytes)
 pkts bytes target     prot opt in     out     source               destination
[root@liuhongwei-01 conf]# getenforce
Disabled
[root@liuhongwei-01 conf]#
22.3 客户端上使用svn(linux)
客户端也要安装subversion
[root@hongwei-02 ~]# yum install -y subversion
使用命令远程到服务端,去下载这个代码,先要创建一个目录
[root@hongwei-02 ~]# cd /home/
[root@hongwei-02 home]# ls
mysql  nfstestdir  php-fpm  pure-ftp  virftp
[root@hongwei-02 home]# mkdir svntest
[root@hongwei-02 home]# cd !$
cd svntest
[root@hongwei-02 svntest]# ls
[root@hongwei-02 svntest]#
[root@hongwei-02 svntest]# svn checkout svn://192.168.93.129/myproject --username=aming
认证领域: <svn://192.168.93.129:3690> /data/svnroot/myproject
“aming”的密码:

-----------------------------------------------------------------------
注意!  你的密码,对于认证域:

   <svn://192.168.93.129:3690> /data/svnroot/myproject

只能明文保存在磁盘上!  如果可能的话,请考虑配置你的系统,让 Subversion
可以保存加密后的密码。请参阅文档以获得详细信息。

你可以通过在“/root/.subversion/servers”中设置选项“store-plaintext-passwords”为“yes”或“no”,
来避免再次出现此警告。
-----------------------------------------------------------------------
保存未加密的密码(yes/no)?yes
取出版本 0。
[root@hongwei-02 svntest]#
checkout是检出的意思
[root@hongwei-02 svntest]# ls -la myproject
总用量 0
drwxr-xr-x 3 root root 17 8月  29 10:15 .
drwxr-xr-x 3 root root 22 8月  29 10:15 ..
drwxr-xr-x 4 root root 70 8月  29 10:15 .svn
可以在项目里拷贝一些文件过来
[root@hongwei-02 myproject]# cp /etc/fstab .
[root@hongwei-02 myproject]# ls
fstab
[root@hongwei-02 myproject]#
添加到版本控制中心
[root@hongwei-02 myproject]# svn add ./fstab
A         fstab
把文件上传到服务器
[root@hongwei-02 myproject]# svn commit -m "add file"
正在增加       fstab
传输文件数据.
提交后的版本为 1。
[root@hongwei-02 myproject]#
在本地删除
[root@liuhongwei-01 myproject]# svn delete fstab
D         fstab
在服务器上删除
[root@liuhongwei-01 myproject]# svn commit -m "delete fstab"
正在删除       fstab

提交后的版本为 2。
回到客户端看一下
[root@hongwei-02 myproject]# svn up
正在升级 '.':
D    fstab
更新到版本 2。
[root@hongwei-02 myproject]# ls
[root@hongwei-02 myproject]#
查看变更日志
[root@hongwei-02 myproject]# svn log
------------------------------------------------------------------------
r2 | aming | 2018-08-29 10:38:54 +0800 (三, 2018-08-29) | 1 行

delete fstab
------------------------------------------------------------------------
r1 | aming | 2018-08-29 10:23:07 +0800 (三, 2018-08-29) | 1 行

add file
------------------------------------------------------------------------
[root@hongwei-02 myproject]#
22.4 客户端上使用svn(windows)
让问官网去下载
https://tortoisesvn.net/index.zh.html
下载对应的操作系统

下载之后要在电脑上安装

下载完成之后,要在本地磁盘新建一个文件夹,单击右键出现svn和小乌龟的图标,点击svn之后,出现下面的界面
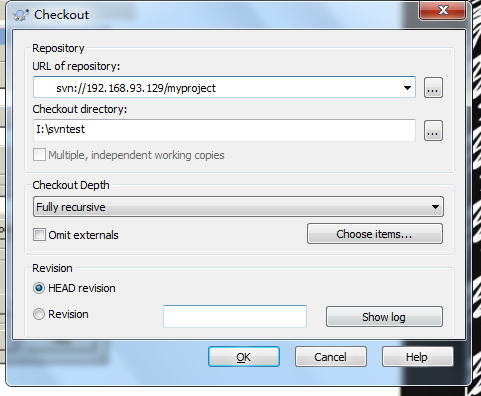
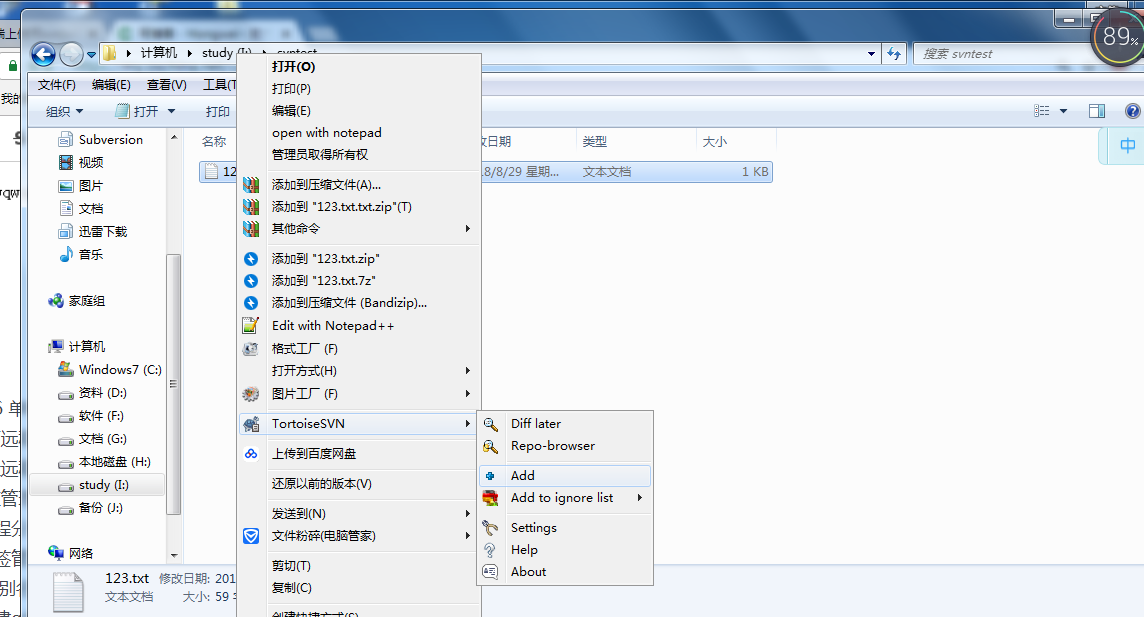
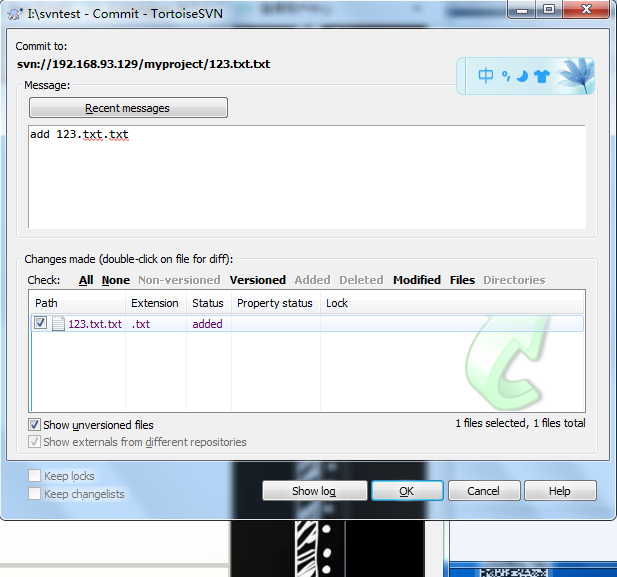
点击ok,之后进入到文件夹里面去,创建一个新的txt文件,里面随便写一些内容,然后单击右键的add

然后在右键点击commmit,出现对话框,输入一些说明
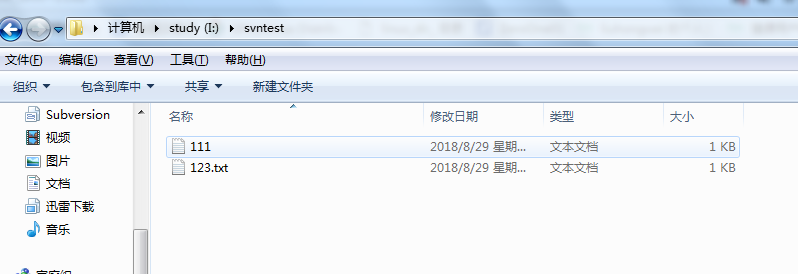
然后回到虚拟机上,svn up看一下有没有刚才写的文件
[root@liuhongwei-01 myproject]# svn up
正在升级 '.':
A    123.txt.txt
更新到版本 3。
[root@liuhongwei-01 myproject]# ls
123.txt.txt
[root@liuhongwei-01 myproject]# cat 123.txt.txt
qwqwqw
qwqwqw
1212121
12121
wqwqwqw
qwqwqwqwqwqw
qwqw[root@liu
另一台客户端也更新了
[root@hongwei-02 myproject]# svn up
正在升级 '.':
A    123.txt.txt
更新到版本 3。
[root@hongwei-02 myproject]# ls
123.txt.txt
[root@hongwei-02 myproject]#
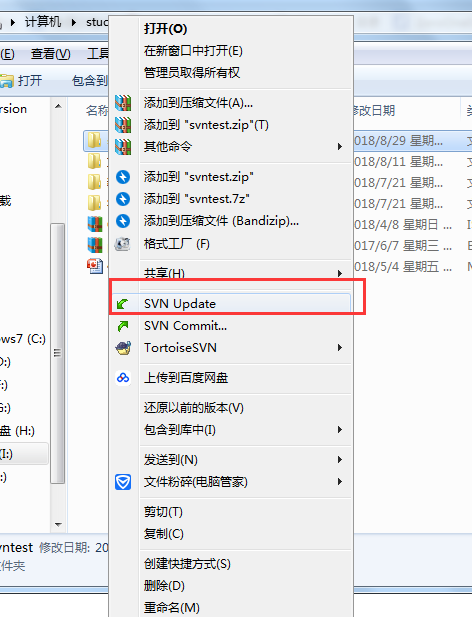
我们也可以在客户端上去创建一个文件,然后回到windows下,右键,update一下看一下
qwqw[root@liuhongwei-01 myproject]# vim 111.txt
[root@liuhongwei-01 myproject]# svn add 111.txt
A         111.txt
[root@liuhongwei-01 myproject]# svn commit -m "add 111.txt"
正在增加       111.txt
传输文件数据.
提交后的版本为 4。
[root@liuhongwei-01 myproject]#
22.5/22.6 单机上使用git
使用yum安装git
[root@liuhongwei-01 ~]# yum install -y git
创建git目录
[root@liuhongwei-01 ~]# mkdir /data/gitroot
[root@liuhongwei-01 ~]# cd !$
cd /data/gitroot
[root@liuhongwei-01 gitroot]# ls
初始化仓库
[root@liuhongwei-01 gitroot]# git init
初始化空的 Git 版本库于 /data/gitroot/.git/
[root@liuhongwei-01 gitroot]#
[root@liuhongwei-01 gitroot]# ls -la
总用量 4
drwxr-xr-x   3 root root   17 8月  29 11:12 .
drwxr-xr-x. 12 root root 4096 8月  29 11:12 ..
drwxr-xr-x   7 root root  111 8月  29 11:12 .git
[root@liuhongwei-01 gitroot]#
在库里面创建一个新文件,添加到仓库
[root@liuhongwei-01 gitroot]# git commit -m "add 1.txt"
[master(根提交) ee46c65] add 1.txt
 1 file changed, 11 insertions(+)
 create mode 100644 1.txt
• 再次更改1.txt,在次添加
[root@liuhongwei-01 gitroot]# git add 1.txt
[root@liuhongwei-01 gitroot]# git commit -m "add 1.txt"
[master 67ad5a0] add 1.txt
 1 file changed, 2 insertions(+), 1 deletion(-)
[root@liuhongwei-01 gitroot]#
查看当前仓库中的状态,比如是否有改动的文件
[root@liuhongwei-01 gitroot]# git status
# 位于分支 master
无文件要提交,干净的工作区
[root@liuhongwei-01 gitroot]#
如果我们只是文件改动,没有做add 没有做commit,在次查看状态,会显示不一样的结果
[root@liuhongwei-01 gitroot]# vim 1.txt
[root@liuhongwei-01 gitroot]# git status
# 位于分支 master
# 尚未暂存以备提交的变更:
#   (使用 "git add <file>..." 更新要提交的内容)
#   (使用 "git checkout -- <file>..." 丢弃工作区的改动)
#
#	修改:      1.txt
#
修改尚未加入提交(使用 "git add" 和/或 "git commit -a")
[root@liuhongwei-01 gitroot]#
可以对比1.txt本次修改了什么内容,相比较仓库里面的版本
[root@liuhongwei-01 gitroot]# git diff 1.txt
diff --git a/1.txt b/1.txt
index 9f87b79..763c920 100644
--- a/1.txt
+++ b/1.txt
@@ -9,4 +9,4 @@ d
 sad
 dasdsadas
 dsdsdsdsdsdsd
-q
+dsdsdq
[root@liuhongwei-01 gitroot]#
查看所有提交记录
[root@liuhongwei-01 gitroot]# git log
commit 67ad5a0ed67872989e033beca1b1b34da8ad34f2
Author: liuhongwei <42010201@qq.com>
Date:   Wed Aug 29 11:21:17 2018 +0800

    add 1.txt

commit ee46c6576c281987e5aef9ee9b9ba979fdafa6bc
Author: liuhongwei <42010201@qq.com>
Date:   Wed Aug 29 11:19:53 2018 +0800

    add 1.txt
[root@liuhongwei-01 gitroot]#
一行显示
[root@liuhongwei-01 gitroot]# git log --pretty=oneline
67ad5a0ed67872989e033beca1b1b34da8ad34f2 add 1.txt
ee46c6576c281987e5aef9ee9b9ba979fdafa6bc add 1.txt
[root@liuhongwei-01 gitroot]#
回退版本,其中后面跟的字符串
[root@liuhongwei-01 gitroot]# git reset --hard 67ad5a0ed67872989e033beca1b1b34da8ad34f2
HEAD 现在位于 67ad5a0 add 1.txt
回退之后,之前的就没有了
查看所有历史版本
[root@liuhongwei-01 gitroot]# git reflog
67ad5a0 HEAD@{0}: commit: add 1.txt
ee46c65 HEAD@{1}: commit (initial): add 1.txt
[root@liuhongwei-01 gitroot]#
不小心删除了1.txt
[root@liuhongwei-01 gitroot]# rm -f 1.txt
[root@liuhongwei-01 gitroot]# ls
[root@liuhongwei-01 gitroot]#
恢复1.txt
[root@liuhongwei-01 gitroot]#  git checkout -- 1.txt
[root@liuhongwei-01 gitroot]# ls
1.txt
[root@liuhongwei-01 gitroot]#
如果1.txt文件修改,add后但没有commit,再想回退到上一次提交的状态,可以使用git reset HEAD 1.txt,再执行git checkout -- 1.txt
[root@liuhongwei-01 gitroot]# vim 1.txt
[root@liuhongwei-01 gitroot]# git add 1.txt
[root@liuhongwei-01 gitroot]# git reset HEAD 1.txt
重置后撤出暂存区的变更:
M	1.txt
[root@liuhongwei-01 gitroot]# git checkout -- 1.txt
[root@liuhongwei-01 gitroot]#
删除文件
git rm 3.txt在服务器上删除
git commit -m "rm 2.txt"22.7 建立远程仓库
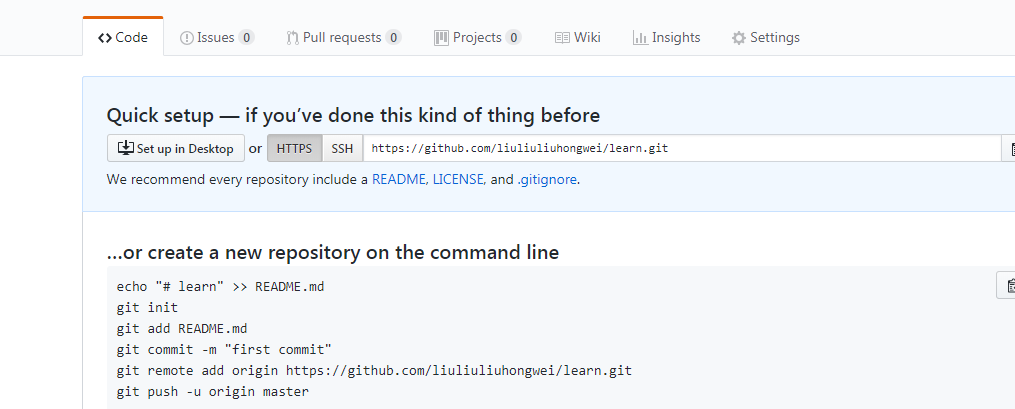
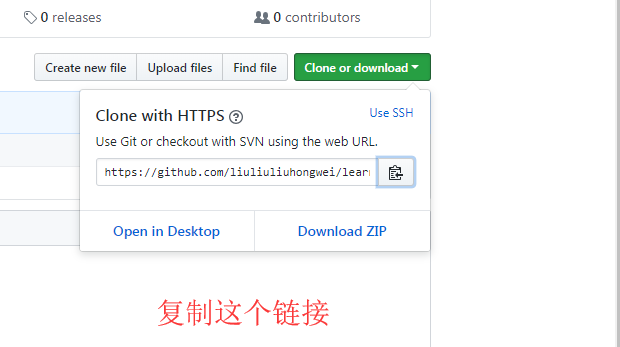
首先到 https://github.com 注册一个账号,创建自己的git,点repositories 再点new
新建一个仓库,名字自定义,比如叫studygit 选择public 点 create repository
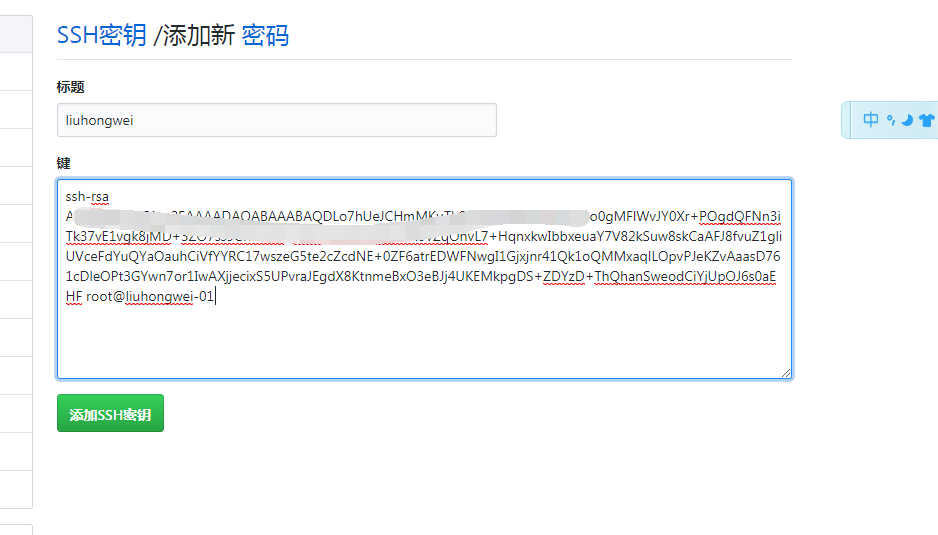
添加key:右上角点自己头像,选择settings,左侧选择SSH and GPG keys
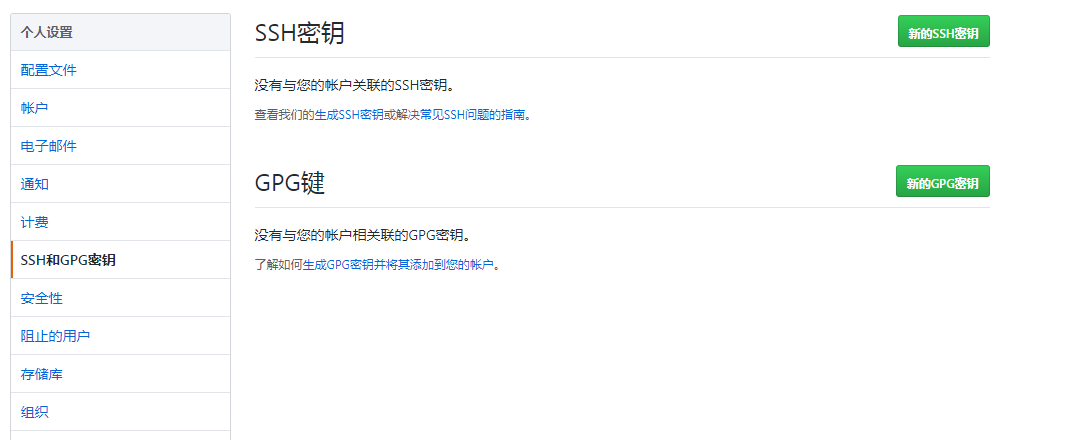
• 左侧点New SSH key,把linux机器上的~/.ssh/id_rsa.pub内容粘贴到这里
没有公钥,要生成一下
[root@liuhongwei-01 ~]# ssh-keygen
Generating public/private rsa key pair.
Enter file in which to save the key (/root/.ssh/id_rsa):
Enter passphrase (empty for no passphrase):
Enter same passphrase again:
Your identification has been saved in /root/.ssh/id_rsa.
Your public key has been saved in /root/.ssh/id_rsa.pub.
The key fingerprint is:
1f:7c:5e:e1:42:c5:95:d0:d2:51:72:de:5f:9f:ea:3b root@liuhongwei-01
The key's randomart image is:
+--[ RSA 2048]----+
|             o*oB|
|             o.B.|
|            . o +|
|         . . . .=|
|        S o o o.o|
|         . + o.  |
|          . ..   |
|            .E   |
|             oo  |
+-----------------+
[root@liuhongwei-01 ~]# cat /root/.ssh/id_rsa.pub
ssh-rsa AAAAB3NzaC1yc2EAAAADAQABAAABAQDLo7hUeJCHmMKuTk6dY3jH8l8AfGVIx4yt1o0gMFlWvJY0Xr+POgdQFNn3iTk37vE1vgk8jMD+3ZO7ss9CfecKPv+aSpoVp242ogsDmN9vZqOnvL7+HqnxkwIbbxeuaY7V82kSuw8skCaAFJ8fvuZ1gliUVceFdYuQYaOauhCiVfYYRC17wszeG5te2cZcdNE+0ZF6atrEDWFNwgI1Gjxjnr41Qk1oQMMxaqlLOpvPJeKZvAaasD7S+ZDYzD+ThQhanSweodCiYjUpOJ6s0aEHF root@liuhongwei-01
把本地仓库推送到远程仓库
先在本地创建一个目录,名字要和官网写的名字一样
[root@liuhongwei-01 tmp]# mkdir learn
[root@liuhongwei-01 tmp]#
[root@liuhongwei-01 ~]# cd /tmp
[root@liuhongwei-01 tmp]# ls
aming.sock mysql.sock test.com.log
mongobak php-fcgi.sock
mongodb-27017.sock systemd-private-02f3083fd4804508a404fd9431d100c7-httpd.service-JTxTkA
[root@liuhongwei-01 tmp]# mkdir learn
[root@liuhongwei-01 tmp]# cd learn/
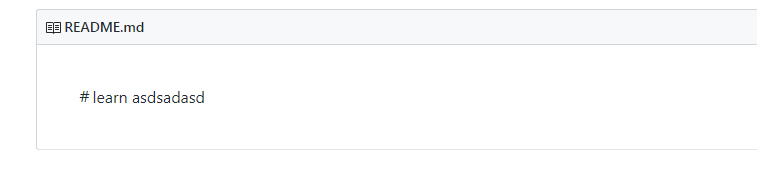
[root@liuhongwei-01 learn]# echo "#learn">> README.md
[root@liuhongwei-01 learn]# git init \
> ^C
[root@liuhongwei-01 learn]# git init
初始化空的 Git 版本库于 /tmp/learn/.git/
[root@liuhongwei-01 learn]# ls -la
总用量 8
drwxr-xr-x 3 root root 33 8月 29 12:00 .
drwxrwxrwt. 10 root root 4096 8月 29 11:58 ..
drwxr-xr-x 7 root root 111 8月 29 12:00 .git
-rw-r--r-- 1 root root 9 8月 29 11:59 README.md
[root@liuhongwei-01 learn]# git add README.md
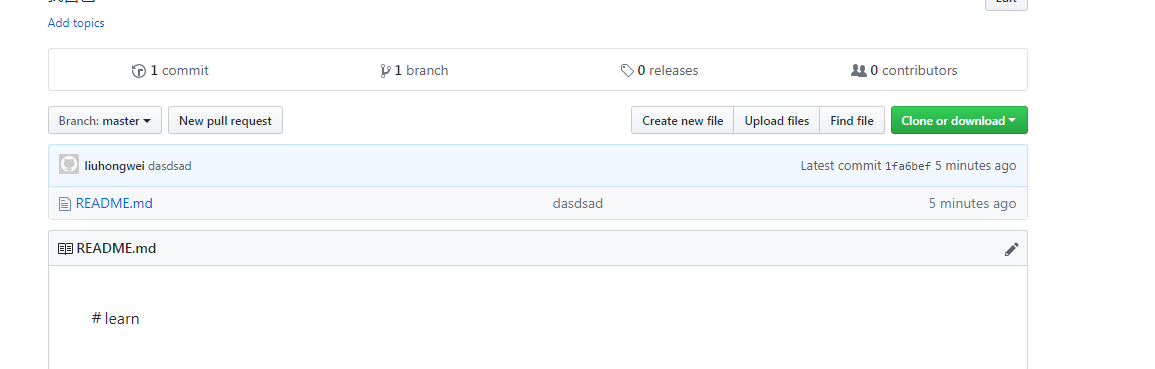
[root@liuhongwei-01 learn]# git commit -m "dasdsad"
[master(根提交) 1fa6bef] dasdsad
1 file changed, 1 insertion(+)
create mode 100644 README.md
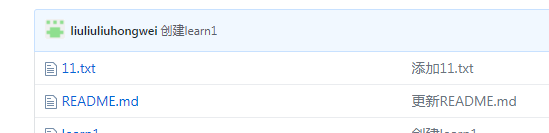
[root@liuhongwei-01 learn]# git remote add origin https://github.com/liuliuliuhongwei/learn.git
[root@liuhongwei-01 learn]# git push -u origin master
Username for 'https://github.com': liuliuliuhongwei
Password for 'https://liuliuliuhongwei@github.com':
Counting objects: 3, done.
Writing objects: 100% (3/3), 216 bytes | 0 bytes/s, done.
Total 3 (delta 0), reused 0 (delta 0)
To https://github.com/liuliuliuhongwei/learn.git
* [new branch] master -> master
分支 master 设置为跟踪来自 origin 的远程分支 master。
[root@liuhongwei-01 learn]#
例如:在创建一个新的文件,然后推送到远程
[root@liuhongwei-01 learn]# vim 11.txt
[root@liuhongwei-01 learn]# git add 11.txt
[root@liuhongwei-01 learn]# git commit -m "add 11.txt"
[master a1ed547] add 11.txt
 1 file changed, 4 insertions(+)
 create mode 100644 11.txt
[root@liuhongwei-01 learn]# git push -u origin master
Username for 'https://github.com': liuliuliuhongwei
Password for 'https://liuliuliuhongwei@github.com':
Counting objects: 4, done.
Compressing objects: 100% (2/2), done.
Writing objects: 100% (3/3), 282 bytes | 0 bytes/s, done.
Total 3 (delta 0), reused 0 (delta 0)
To https://github.com/liuliuliuhongwei/learn.git
   1fa6bef..a1ed547  master -> master
分支 master 设置为跟踪来自 origin 的远程分支 master。
[root@liuhongwei-01 learn]#
22.8 克隆远程仓库
[root@liuhongwei-01 learn]# cd /home/
[root@liuhongwei-01 home]# git clone https://github.com/liuliuliuhongwei/learn.git
正克隆到 'learn'...
remote: Counting objects: 6, done.
remote: Compressing objects: 100% (3/3), done.
remote: Total 6 (delta 0), reused 6 (delta 0), pack-reused 0
Unpacking objects: 100% (6/6), done.
[root@liuhongwei-01 home]# cd learn/
[root@liuhongwei-01 learn]# ls
11.txt  README.md
[root@liuhongwei-01 learn]#
编辑一下文件,然后提交
[root@liuhongwei-01 learn]# vim README.md
[root@liuhongwei-01 learn]#
把更改的上传到服务端上
[root@liuhongwei-01 learn]# vim README.md
[root@liuhongwei-01 learn]# git add README.md
[root@liuhongwei-01 learn]# git commit -m "change readme.md"
[master a8a7e5b] change readme.md
 1 file changed, 1 insertion(+)
[root@liuhongwei-01 learn]# git push -u origin master
Username for 'https://github.com': liuliuliuhongwei
Password for 'https://liuliuliuhongwei@github.com':
Counting objects: 5, done.
Compressing objects: 100% (2/2), done.
Writing objects: 100% (3/3), 291 bytes | 0 bytes/s, done.
Total 3 (delta 0), reused 0 (delta 0)
To https://github.com/liuliuliuhongwei/learn.git
   a1ed547..a8a7e5b  master -> master
分支 master 设置为跟踪来自 origin 的远程分支 master。
[root@liuhongwei-01 learn]#
然后回到浏览器刷新一下,看一下有没有更改的内容
在浏览器上去更改一下内容,然后要在传到本地
在虚拟机上使用下面命令去拉下来
[root@liuhongwei-01 learn]# git pull
remote: Counting objects: 3, done.
remote: Compressing objects: 100% (2/2), done.
remote: Total 3 (delta 0), reused 0 (delta 0), pack-reused 0
Unpacking objects: 100% (3/3), done.
来自 https://github.com/liuliuliuhongwei/learn
   a8a7e5b..f82afa8  master     -> origin/master
更新 a8a7e5b..f82afa8
Fast-forward
 README.md | 2 ++
 1 file changed, 2 insertions(+)
[root@liuhongwei-01 learn]# cat README.md
#learn
asdsadasd
dsdsd
dsdsdsdsd
[root@liuhongwei-01 learn]#
22.9 分支管理
查看分支
[root@liuhongwei-01 learn]# cd /data/gitroot/
[root@liuhongwei-01 gitroot]# git branch
* master
[root@liuhongwei-01 gitroot]#
创建分支
[root@liuhongwei-01 gitroot]# git branch aming
[root@liuhongwei-01 gitroot]# git branch
  aming
* master
切换到了aming分支下
[root@liuhongwei-01 gitroot]# git checkout  aming
切换到分支 'aming'
[root@liuhongwei-01 gitroot]# git branch
* aming
  master
[root@liuhongwei-01 gitroot]#
可以看到*号跑到了aming
在aming分支下创建一个新的分支,写入内容
[root@liuhongwei-01 gitroot]# vim 5.txt
[root@liuhongwei-01 gitroot]#
[root@liuhongwei-01 gitroot]# git add 5.txt
[root@liuhongwei-01 gitroot]# git commit -m "add 5.txt"
[aming 3ac6e05] add 5.txt
1 file changed, 4 insertions(+)
create mode 100644 5.txt
[root@liuhongwei-01 gitroot]# ls然后切换到master分支下,可以看到没有那个文件了,说明分支和分支间是隔离开的
[root@liuhongwei-01 gitroot]# git checkout master
切换到分支 'master'
[root@liuhongwei-01 gitroot]# ls
1.txt  2.txt  3.txt
[root@liuhongwei-01 gitroot]#
把aming分支合并到了master,合并分支之前,先切换到目标分支
[root@liuhongwei-01 gitroot]# git merge aming
更新 67ad5a0..3ac6e05
Fast-forward
 5.txt | 4 ++++
 1 file changed, 4 insertions(+)
 create mode 100644 5.txt
[root@liuhongwei-01 gitroot]# ls
1.txt  2.txt  3.txt  5.txt
[root@liuhongwei-01 gitroot]#
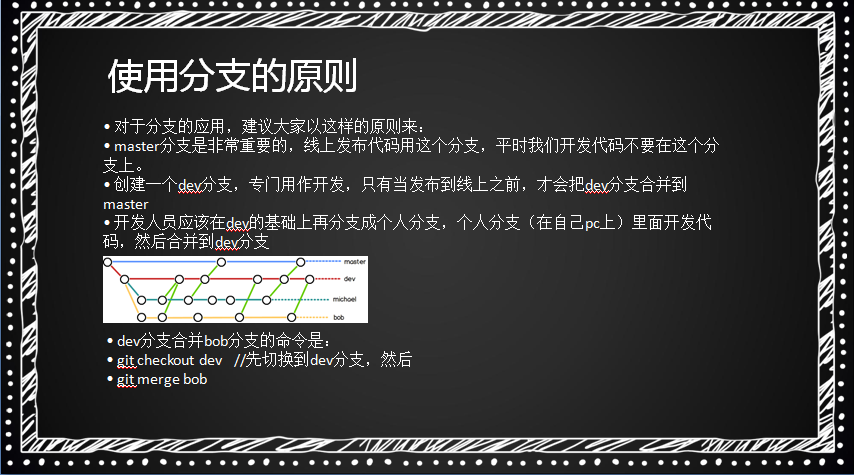
| • 如果master分支和aming分支都对2.txt进行了编辑,当合并时会提示冲突,需要先解决冲突才可以继续合并。 • 解决冲突的方法是在master分支下,编辑2.txt,改为aming分支里面2.txt的内容。 然后提交2.txt,再合并aming分支。 • 但是这样有一个问题,万一master分支更改的内容是我们想要的呢? 可以编辑2.txt内容,改为想要的,然后提交。切换到aming分支,然后合并master分支到aming分支即可(倒着合并)。合并分支有一个原则,那就是要把最新的分支合并到旧的分支。也就是说merge后面跟的分支名字一定是最新的分支。 |
删除分支
git branch -d aming • 如果分支没有合并,删除之前会提示,那就不合并,强制删除
git branch -D aming22.10 远程分支管理
先在浏览器创建一个新的文件,然后在创建一个新的分支

然后回到虚拟机上去克隆一下,看看有几个分支
[root@liuhongwei-01 tmp]# mkdir test
[root@liuhongwei-01 tmp]# cd !$
cd test
[root@liuhongwei-01 test]# git clone https://github.com/liuliuliuhongwei/learn.git
正克隆到 'learn'...
remote: Counting objects: 15, done.
remote: Compressing objects: 100% (9/9), done.
remote: Total 15 (delta 1), reused 9 (delta 0), pack-reused 0
Unpacking objects: 100% (15/15), done.
[root@liuhongwei-01 test]# git branch
fatal: Not a git repository (or any of the parent directories): .git
[root@liuhongwei-01 test]# ls
learn
[root@liuhongwei-01 test]# cd learn/
[root@liuhongwei-01 learn]# git branch
* master
[root@liuhongwei-01 learn]#
实际上我们在网站上克隆的分支只有master
查看远程分支
[root@liuhongwei-01 learn]# git ls-remote origin
2b80661bafd131578718afbc78aeda19722fbd08	HEAD
2b80661bafd131578718afbc78aeda19722fbd08	refs/heads/dev
2b80661bafd131578718afbc78aeda19722fbd08	refs/heads/master
[root@liuhongwei-01 learn]#
对于git push分支分两种情况
当本地分支和远程分支一致时
git push会把所有本地分支的变更一同推送到远程,如果想只推送一个分支,使用git push origin branch-name
当本地分支比远程分支多,默认git push 只推送本地和远程一致的分支,想要把多出来的本地分支推送到远程时,使用git push origin branch-name 如果推送失败,先用git pull抓取远程的新提交
git clone的时候默认只把master分支克隆下来,如果想把所有分支都克隆下来,需要手动创建,在本地创建和远程分支对应的分支,使用git checkout -b branch-name origin/branch-name,本地和远程分支的名称要一致
[root@liuhongwei-01 learn]# git checkout -b dev origin/dev
分支 dev 设置为跟踪来自 origin 的远程分支 dev。
切换到一个新分支 'dev'
[root@liuhongwei-01 learn]# git brsncj
git:'brsncj' 不是一个 git 命令。参见 'git --help'。

您指的是这个么?
	branch
[root@liuhongwei-01 learn]# git branch
* dev
  master
[root@liuhongwei-01 learn]#
[root@liuhongwei-01 learn]# ls
11.txt  learn1  README.md
[root@liuhongwei-01 learn]#
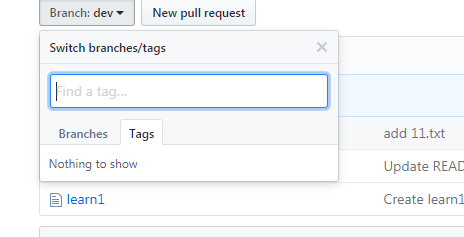
22.11 标签管理
标签类似于快照功能,可以给版本库打一个标签,记录某个时刻库的状态。也可以随时恢复到该状态
先切到master分支上
[root@liuhongwei-01 learn]# git checkout master
切换到分支 'master'
[root@liuhongwei-01 learn]#
给master打一个标签v1.0
[root@liuhongwei-01 learn]# git tag v1.0
[root@liuhongwei-01 learn]# git tag
v1.0
查看标签信息
v1.0
[root@liuhongwei-01 learn]# git show v1.0
commit 2b80661bafd131578718afbc78aeda19722fbd08
Author: liuliuliuhongwei <42793963+liuliuliuhongwei@users.noreply.github.com>
Date:   Wed Aug 29 12:50:27 2018 +0800

    Create learn1

diff --git a/learn1 b/learn1
new file mode 100644
index 0000000..bce834c
--- /dev/null
+++ b/learn1
@@ -0,0 +1,3 @@
+dasdsadsad
+asdsadsadsad
+asdasdasdasd
[root@liuhongwei-01 learn]#
• tag是针对commit来打标签的,所以可以针对历史的commit来打tag
先查看历史的commit
[root@liuhongwei-01 learn]# git log --pretty=oneline --abbrev-commit
2b80661 Create learn1
f82afa8 Update README.md
a8a7e5b change readme.md
a1ed547 add 11.txt
1fa6bef dasdsad
[root@liuhongwei-01 learn]#
[root@liuhongwei-01 learn]# git tag v0.9 a1ed547
[root@liuhongwei-01 learn]# git tag
v0.9
v1.0
[root@liuhongwei-01 learn]#
可以对标签进行描述
[root@liuhongwei-01 learn]# git tag -a v0.1 -m "first tag" a8a7e5b
[root@liuhongwei-01 learn]# git tag
v0.1
v0.9
v1.0
[root@liuhongwei-01 learn]# git show v0.1
tag v0.1
Tagger: liuhongwei <42010201@qq.com>
Date:   Wed Aug 29 13:28:10 2018 +0800

first tag

commit a8a7e5bb2e30864cc9146b8bc6a04104b7cf0f33
Author: liuhongwei <42010201@qq.com>
Date:   Wed Aug 29 12:17:51 2018 +0800

    change readme.md

diff --git a/README.md b/README.md
index 061c9ff..730f7e8 100644
--- a/README.md
+++ b/README.md
@@ -1 +1,2 @@
 #learn
+asdsadasd
[root@liuhongwei-01 learn]#
删除标签
[root@liuhongwei-01 learn]# git tag -d v0.1
已删除 tag 'v0.1'(曾为 d2fb08d)
[root@liuhongwei-01 learn]#
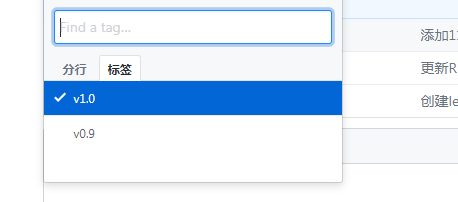
推送指定标签到远程
[root@liuhongwei-01 learn]# git push origin v1.0
Username for 'https://github.com': liuliuliuhongwei
Password for 'https://liuliuliuhongwei@github.com':
Total 0 (delta 0), reused 0 (delta 0)
To https://github.com/liuliuliuhongwei/learn.git
 * [new tag]         v1.0 -> v1.0
[root@liuhongwei-01 learn]#

推送所有标签
[root@liuhongwei-01 learn]#  git push --tag origin
Username for 'https://github.com': liuliuliuhongwei
Password for 'https://liuliuliuhongwei@github.com':
Total 0 (delta 0), reused 0 (delta 0)
To https://github.com/liuliuliuhongwei/learn.git
 * [new tag]         v0.9 -> v0.9
[root@liuhongwei-01 learn]#
如果本地删除了一个标签,远程也想要删除需要这样操作:
删除本地标签
[root@liuhongwei-01 learn]# git tag v1.0 -d
已删除 tag 'v1.0'(曾为 2b80661)
删除远程标签
[root@liuhongwei-01 learn]# git push origin :refs/tags/v1.0
Username for 'https://github.com': liuliuliuhongwei
Password for 'https://liuliuliuhongwei@github.com':
To https://github.com/liuliuliuhongwei/learn.git
 - [deleted]         v1.0
[root@liuhongwei-01 learn]#
22.12 git别名
git commit 这个命令是不是有点长? 用别名可以提高我们的工作效率
更改commit别名
git config --global alias.ci commit更改checkout别名
git config --global alias.co checkout更改branch别名
git config --global alias.br branch查看git别名使用命令
[root@liuhongwei-01 learn]# git config --list |grep alias
[root@liuhongwei-01 learn]#
[root@liuhongwei-01 learn]# git config --list
user.email=42010201@qq.com
user.name=liuhongwei
core.repositoryformatversion=0
core.filemode=true
core.bare=false
core.logallrefupdates=true
remote.origin.url=https://github.com/liuliuliuhongwei/learn.git
remote.origin.fetch=+refs/heads/*:refs/remotes/origin/*
branch.master.remote=origin
branch.master.merge=refs/heads/master
branch.dev.remote=origin
branch.dev.merge=refs/heads/dev
[root@liuhongwei-01 learn]#
还有一种更改别名的方法,编辑配置文件,
[root@liuhongwei-01 learn]# vim /root/.gitconfig

[user]
        email = 42010201@qq.com
        name = liuhongwei
~
~
查询log小技巧:
[root@liuhongwei-01 learn]# git config --global alias.lg "log --color --graph --pretty=format:'%Cred%h%Creset -%C(yellow)%d%Creset %s %Cgreen(%cr) %C(bold blue)<%an>%Creset' --abbrev-commit"
[root@liuhongwei-01 learn]#
取消别名
git config --global --unset alias.br
22.13 搭建git服务器
• github毕竟是公开的,而私有仓库又得花钱买。所以我们可以想办法搭建一个私有的,只自己公司使用的。Gitlab是个不错的选择。在介绍它之前,先讲述一下命令行的git服务器
一台服务器安装git
[root@hongwei-02 ~]# yum install -y git
已加载插件:fastestmirror
Loading mirror speeds from cached hostfile
正在解决依赖关系
添加git用户,并且设置shell为/usr/bin/git-shell,目的是为了不让git用户远程登陆
[root@hongwei-02 ~]# useradd -s /usr/bin/git-shell git
[root@hongwei-02 ~]#  cd /home/git
创建.ssh
[root@hongwei-02 git]# mkdir .ssh
[root@hongwei-02 git]#
在。ssh目录下载创建文件
[root@hongwei-02 git]# touch .ssh/authorized_keys
[root@hongwei-02 git]#
[root@hongwei-02 git]# chown -R git.git .ssh
[root@hongwei-02 git]# chmod 600 .ssh/authorized_keys
[root@hongwei-02 git]#
然后把01机器的公钥放到02机器git用户下的密码文件里面去
[root@hongwei-02 git]# vi .ssh/authorized_keys
然后看一下能不能登录
[root@liuhongwei-01 ~]# ssh git@192.168.93.128
Last failed login: Wed Aug 29 15:31:08 CST 2018 from 192.168.93.129 on ssh:notty
There were 6 failed login attempts since the last successful login.
Last login: Wed Aug 29 15:19:08 2018 from 192.168.93.128
fatal: Interactive git shell is not enabled.
hint: ~/git-shell-commands should exist and have read and execute access.
Connection to 192.168.93.128 closed.
[root@liuhongwei-01 ~]#
创建git仓库
[root@hongwei-02 git]# cd /data/
[root@hongwei-02 data]# mkdir /data/gitroot
[root@hongwei-02 data]#
会创建一个裸仓库,裸仓库没有工作区,因为服务器上的Git仓库纯粹是为了共享,所以不让用户直接登录到服务器上去改工作区,并且服务器上的Git仓库通常都以.git结尾
[root@hongwei-02 data]#  git init --bare sample.git
初始化空的 Git 版本库于 /data/sample.git/
[root@hongwei-02 data]#
设置一个属组属主
[root@hongwei-02 data]# chown -R git.git sample.git
[root@hongwei-02 data]#
以上操作是在git服务器上做的,平时git服务器是不需要开发人员登录修改代码的,它仅仅是充当着一个服务器的角色,就像github一样,平时操作都是在我们自己的pc上做的
在客户端上(自己pc)克隆远程仓库
[root@liuhongwei-01 ~]# git clone git@192.168.93.128:/data/gitroot/sample.git
正克隆到 'sample'...
warning: 您似乎克隆了一个空版本库。
[root@liuhongwei-01 ~]#
然后进去到sample的目录下面去
[root@liuhongwei-01 ~]# cd sample/
[root@liuhongwei-01 sample]# ls -la
总用量 4
drwxr-xr-x   3 root root   17 8月  29 15:36 .
dr-xr-x---. 16 root root 4096 8月  29 15:36 ..
drwxr-xr-x   7 root root  111 8月  29 15:36 .git
[root@liuhongwei-01 sample]#
然后拷贝一下启动脚本,
[root@liuhongwei-01 sample]# cp /etc/init.d/mysqld .
[root@liuhongwei-01 sample]# git add .
[root@liuhongwei-01 sample]# git commit -m "add new file"
[master(根提交) e983dea] add new file
 1 file changed, 390 insertions(+)
 create mode 100755 mysqld
[root@liuhongwei-01 sample]# git pus
然后git push
[root@liuhongwei-01 sample]# git push
warning: push.default 未设置,它的默认值将会在 Git 2.0 由 'matching'
修改为 'simple'。若要不再显示本信息并在其默认值改变后维持当前使用习惯,
进行如下设置:

  git config --global push.default matching

若要不再显示本信息并从现在开始采用新的使用习惯,设置:

  git config --global push.default simple

参见 'git help config' 并查找 'push.default' 以获取更多信息。
('simple' 模式由 Git 1.7.11 版本引入。如果您有时要使用老版本的 Git,
为保持兼容,请用 'current' 代替 'simple' 模式)

No refs in common and none specified; doing nothing.
Perhaps you should specify a branch such as 'master'.
fatal: The remote end hung up unexpectedly
error: 无法推送一些引用到 'git@192.168.93.128:/data/gitroot/sample.
[root@liuhongwei-01 sample]# git push origin master
Counting objects: 3, done.
Compressing objects: 100% (2/2), done.
Writing objects: 100% (3/3), 3.88 KiB | 0 bytes/s, done.
Total 3 (delta 0), reused 0 (delta 0)
To git@192.168.93.128:/data/gitroot/sample.git
 * [new branch]      master -> master
[root@liuhongwei-01 sample]#
当我们再次创建一个文件的时候,在推送的时候,就不会出现问题
[root@liuhongwei-01 sample]# echo "112121212" > 22.txt
[root@liuhongwei-01 sample]# ls
22.txt  mysqld
[root@liuhongwei-01 sample]# git add 22.txt
[root@liuhongwei-01 sample]# git commit -m "add 22.txt"
[master a593bdd] add 22.txt
 1 file changed, 1 insertion(+)
 create mode 100644 22.txt
[root@liuhongwei-01 sample]# git push
warning: push.default 未设置,它的默认值将会在 Git 2.0 由 'matching'
修改为 'simple'。若要不再显示本信息并在其默认值改变后维持当前使用习惯,
进行如下设置:

  git config --global push.default matching

若要不再显示本信息并从现在开始采用新的使用习惯,设置:

  git config --global push.default simple

参见 'git help config' 并查找 'push.default' 以获取更多信息。
('simple' 模式由 Git 1.7.11 版本引入。如果您有时要使用老版本的 Git,
为保持兼容,请用 'current' 代替 'simple' 模式)

Counting objects: 4, done.
Compressing objects: 100% (2/2), done.
Writing objects: 100% (3/3), 276 bytes | 0 bytes/s, done.
Total 3 (delta 0), reused 0 (delta 0)
To git@192.168.93.128:/data/gitroot/sample.git
   e983dea..a593bdd  master -> master
[root@liuhongwei-01 sample]#
我们也可以进入到tmp目录下去,把代码下载下来
[root@liuhongwei-01 tmp]# git clone git@192.168.93.128:/data/gitroot/sample.git
正克隆到 'sample'...
remote: Counting objects: 6, done.
remote: Compressing objects: 100% (4/4), done.
remote: Total 6 (delta 0), reused 0 (delta 0)
接收对象中: 100% (6/6), 4.12 KiB | 0 bytes/s, done.
[root@liuhongwei-01 tmp]# ls
aming.sock          php-fcgi.sock
learn               sample
mongobak            systemd-private-02f3083fd4804508a404fd9431d100c7-httpd.service-JTxTkA
mongodb-27017.sock  test
mysql.sock          test.com.log
[root@liuhongwei-01 tmp]# cd sample/
[root@liuhongwei-01 sample]# ls
22.txt  mysqld
[root@liuhongwei-01 sample]# cat 22.txt
112121212
[root@liuhongwei-01 sample]#
我们把22.txt文件做一个更改
[root@liuhongwei-01 sample]# vim 22.txt
[root@liuhongwei-01 sample]# cat 22.txt
112121212
sadasdas`
[root@liuhongwei-01 sample]# git add 22.txt
[root@liuhongwei-01 sample]# git commit -m "ch 22.txt"
[master 1f329d5] ch 22.txt
 1 file changed, 1 insertion(+)
[root@liuhongwei-01 sample]# git push
warning: push.default 未设置,它的默认值将会在 Git 2.0 由 'matching'
修改为 'simple'。若要不再显示本信息并在其默认值改变后维持当前使用习惯,
进行如下设置:

  git config --global push.default matching

若要不再显示本信息并从现在开始采用新的使用习惯,设置:

  git config --global push.default simple

参见 'git help config' 并查找 'push.default' 以获取更多信息。
('simple' 模式由 Git 1.7.11 版本引入。如果您有时要使用老版本的 Git,
为保持兼容,请用 'current' 代替 'simple' 模式)

Counting objects: 5, done.
Compressing objects: 100% (2/2), done.
Writing objects: 100% (3/3), 286 bytes | 0 bytes/s, done.
Total 3 (delta 0), reused 0 (delta 0)
To git@192.168.93.128:/data/gitroot/sample.git
   a593bdd..1f329d5  master -> master
[root@liuhongwei-01 sample]# cd /root/
1$                                   logs/
1.txt                                .mongorc.js
aming.txt                            .mysql_history
anaconda-ks.cfg                      .oracle_jre_usage/
.bash_history                        .pki/
.bash_logout                         .rediscli_history
.bash_profile                        .rnd
.bashrc                              rpmbuild/
.config/                             sample/
.cshrc                               shell/
data.txt                             .ssh/
.dbshell                             .subversion/
.gem/                                .tcshrc
.gitconfig                           temp/
hongwei/                             .viminfo
.local/                              .viminfo.tmp
log/                                 zabbix-release-3.2-1.el7.noarch.rpm
[root@liuhongwei-01 sample]# cd /root/sample/
22.txt  .git/   mysqld
[root@liuhongwei-01 sample]# cd /root/sample/
[root@liuhongwei-01 sample]# ls
22.txt  mysqld
[root@liuhongwei-01 sample]# git pull
remote: Counting objects: 5, done.
remote: Compressing objects: 100% (2/2), done.
remote: Total 3 (delta 0), reused 0 (delta 0)
Unpacking objects: 100% (3/3), done.
来自 192.168.93.128:/data/gitroot/sample
   a593bdd..1f329d5  master     -> origin/master
更新 a593bdd..1f329d5
Fast-forward
 22.txt | 1 +
 1 file changed, 1 insertion(+)
[root@liuhongwei-01 sample]# cat 22.txt
112121212
sadasdas`
[root@liuhongwei-01 sample]#
22.14/22.15 安装gitlab
•gitlab官网 https://about.gitlab.com/gitlab-com/
• 官方安装文档 https://about.gitlab.com/installation/?version=ce#centos-7 (ce/ee)
• 要求服务器内存不少于2g
搭建一个浏览器码云
[root@liuhongwei-01 ~]# vim /etc/yum.repos.d/gitlab.repo

[gitlab-ce]
name=Gitlab CE Repository
baseurl=https://mirrors.tuna.tsinghua.edu.cn/gitlab-ce/yum/el$releasever/
gpgcheck=0
enabled=1
安装
[root@liuhongwei-01 ~]# yum install -y gitlab-ce
然后自动安装
[root@liuhongwei-01 ~]# gitlab-ctl reconfigure
查看监听端口和进程
[root@liuhongwei-01 ~]# ps aux|grep git
root      4830  0.0  0.0   4332    28 ?        Ss   16:08   0:00 runsvdir -P /opt/gitlab/service log: ...........................................................................................................................................................................................................................................................................................................................................................................................................
gitlab-+  4852  0.1  0.0  37384   696 ?        Ssl  16:08   0:09 /opt/gitlab/embedded/bin/redis-server 127.0.0.1:0
gitlab-+  4913  0.0  0.0 315164   964 ?        Ss   16:08   0:00 /opt/gitlab/embedded/bin/postgres -D /var/opt/gitlab/postgresql/data
gitlab-+  4918  0.0  0.0 315444   236 ?        Ss   16:08   0:00 postgres: checkpointer process
gitlab-+  4919  0.0  0.0 315164   136 ?        Ss   16:08   0:00 postgres: writer process
gitlab-+  4920  0.0  0.0 315164    92 ?        Ss   16:08   0:00 postgres: wal writer process
gitlab-+  4921  0.0  0.0 315756   952 ?        Ss   16:08   0:01 postgres: autovacuum launcher process
gitlab-+  4922  0.0  0.0  32868   720 ?        Ss   16:08   0:00 postgres: stats collector process
git       5124  0.0  0.0  11636   848 ?        Ss   16:11   0:00 /bin/bash /opt/gitlab/embedded/bin/gitlab-unicorn-wrapper
git       5147  1.9 21.7 710292 219104 ?       Sl   16:11   1:48 unicorn master -D -E production -c /var/opt/gitlab/gitlab-rails/etc/unicorn.rb /opt/gitlab/embedded/service/gitlab-rails/config.ru
git       5163  1.5 22.4 688624 226168 ?       Dsl  16:11   1:26 /opt/gitlab/embedded/bin/sidekiq -C /opt/gitlab/embedded/service/gitlab-rails/config/sidekiq_queues.yml -e production -r /opt/gitlab/embedded/service/gitlab-rails -t 4 -c 25
root      5178  0.0  0.0   4180     8 ?        Ss   16:12   0:00 runsv gitlab-workhorse
root      5220  0.0  0.0   4180    16 ?        Ss   16:12   0:00 runsv gitaly
gitlab-+  5292  0.0  0.1  17224  1392 ?        Ssl  16:13   0:01 /opt/gitlab/embedded/bin/node_exporter --web.listen-address=localhost:9100 --collector.textfile.directory=/var/opt/gitlab/node-exporter/textfile_collector
root      5314  0.0  0.0   4180    92 ?        Ss   16:13   0:00 runsv gitlab-monitor
gitlab-+  5427  0.0  0.1  62656  1084 ?        Ssl  16:14   0:01 /opt/gitlab/embedded/bin/redis_exporter -web.listen-address=localhost:9121 -redis.addr=unix:///var/opt/gitlab/redis/redis.socket
gitlab-+  5777  0.0  0.1 420664  1012 ?        Ss   16:22   0:00 postgres: gitlab gitlabhq_production [local] idle
root      7440  0.0  0.0  11628   380 ?        Ss   17:12   0:00 /bin/sh /opt/gitlab/embedded/bin/gitlab-logrotate-wrapper
root      8094  0.0  0.0   4324   228 ?        S    17:30   0:00 svlogd -tt /var/log/gitlab/redis
root      8095  0.0  0.0   4324    56 ?        S    17:30   0:00 svlogd -tt /var/log/gitlab/postgresql
root      8097  0.0  0.0   4324   348 ?        S    17:30   0:00 svlogd -tt /var/log/gitlab/unicorn
root      8099  0.0  0.0   4324    56 ?        S    17:30   0:00 svlogd -tt /var/log/gitlab/sidekiq
git       8116  0.0  0.3 209296  3148 ?        Ssl  17:30   0:00 /opt/gitlab/embedded/bin/gitlab-workhorse -listenNetwork unix -listenUmask 0 -listenAddr /var/opt/gitlab/gitlab-workhorse/socket -authBackend http://localhost:8080 -authSocket /var/opt/gitlab/gitlab-rails/sockets/gitlab.socket -documentRoot /opt/gitlab/embedded/service/gitlab-rails/public -pprofListenAddr  -prometheusListenAddr localhost:9229 -secretPath /opt/gitlab/embedded/service/gitlab-rails/.gitlab_workhorse_secret -config config.toml
root      8122  0.0  0.0   4324   240 ?        S    17:30   0:00 svlogd -tt /var/log/gitlab/gilab-workhorse
root      8123  0.0  0.0   4324   200 ?        S    17:30   0:00 svlogd -tt /var/log/gitlab/nginx
root      8125  0.0  0.0   4324    68 ?        S    17:30   0:00 svlogd -tt /var/log/gitlab/logrotate
git       8132  0.3  0.8 339476  8984 ?        Ssl  17:30   0:02 /opt/gitlab/embedded/bin/gitaly /var/opt/gitlab/gitaly/config.toml
root      8142  0.0  0.0   4324   184 ?        S    17:30   0:00 svlogd -tt /var/log/gitlab/gialy
root      8151  0.0  0.0   4324    56 ?        S    17:30   0:00 svlogd -tt /var/log/gitlab/node-exporter
git       8165  0.7  0.3 865172  3520 ?        Sl   17:31   0:06 ruby /opt/gitlab/embedded/service/gitaly-ruby/bin/gitaly-ruby 8132 /tmp/gitaly-ruby568941940/socket.0
git       8166  0.7  0.2 865080  2756 ?        Sl   17:31   0:06 ruby /opt/gitlab/embedded/service/gitaly-ruby/bin/gitaly-ruby 8132 /tmp/gitaly-ruby568941940/socket.1
root      8186  0.0  0.0   4324   240 ?        S    17:31   0:00 svlogd -tt /var/log/gitlab/gilab-monitor
root      8187  0.0  0.0   4324    56 ?        S    17:31   0:00 svlogd -tt /var/log/gitlab/redis-exporter
gitlab-+  8190  1.3  2.0 428608 20948 ?        Ssl  17:31   0:11 /opt/gitlab/embedded/bin/prometheus -web.listen-address=localhost:9090 -storage.local.path=/var/opt/gitlab/prometheus/data -storage.local.chunk-encoding-version=2 -storage.local.target-heap-size=46884372 -config.file=/var/opt/gitlab/prometheus/prometheus.yml
root      8202  0.0  0.0   4324   212 ?        S    17:31   0:00 svlogd -tt /var/log/gitlab/prometheus
gitlab-+  8207  0.2  0.1 234804  1884 ?        Ssl  17:31   0:02 /opt/gitlab/embedded/bin/alertmanager --web.listen-address=localhost:9093 --storage.path=/var/opt/gitlab/alertmanager/data --config.file=/var/opt/gitlab/alertmanager/alertmanager.yml
root      8209  0.0  0.0   4324   240 ?        S    17:31   0:00 svlogd -tt /var/log/gitlab/alertmanager
gitlab-+  8229  0.0  0.0 126812    28 ?        Ssl  17:31   0:00 /opt/gitlab/embedded/bin/postgres_exporter --web.listen-address=localhost:9187 --extend.query-path=/var/opt/gitlab/postgres-exporter/queries.yaml
gitlab-+  8233  0.0  0.1 421144  1204 ?        Ss   17:31   0:00 postgres: gitlab-psql postgres [local] idle
root      8236  0.0  0.0   4324   240 ?        S    17:31   0:00 svlogd -tt /var/log/gitlab/postgres-exporter
git       8275  0.1  0.0  90188   976 ?        Ssl  17:32   0:01 /opt/gitlab/embedded/bin/ruby /opt/gitlab/embedded/bin/gitlab-mon web -c /var/opt/gitlab/gitlab-monitor/gitlab-monitor.yml
git       8652  0.0 21.4 710292 216116 ?       Sl   17:41   0:00 unicorn worker[0] -D -E production -c /var/opt/gitlab/gitlab-rails/etc/unicorn.rb /opt/gitlab/embedded/service/gitlab-rails/config.ru
git       8655  0.0 21.4 710292 216352 ?       Sl   17:41   0:00 unicorn worker[1] -D -E production -c /var/opt/gitlab/gitlab-rails/etc/unicorn.rb /opt/gitlab/embedded/service/gitlab-rails/config.ru
root      8906  0.1  0.0 112664   964 pts/0    R+   17:44   0:00 grep --color=auto git
root      8917  2.0  0.3  38400  3068 ?        Ss   17:44   0:00 /opt/gitlab/embedded/sbin/nginx -p /var/opt/gitlab/nginx
建议先停掉nginx服务
[root@liuhongwei-01 ~]# systemctl stop nginx
使用下面的命令去停掉git服务
[root@liuhongwei-01 ~]# gitlab-ctl stop
ok: down: alertmanager: 0s, normally up
ok: down: gitaly: 0s, normally up
ok: down: gitlab-monitor: 0s, normally up
ok: down: gitlab-workhorse: 0s, normally up
ok: down: logrotate: 0s, normally up
ok: down: nginx: 0s, normally up
ok: down: node-exporter: 1s, normally up
ok: down: postgres-exporter: 0s, normally up
ok: down: postgresql: 0s, normally up
ok: down: prometheus: 0s, normally up
ok: down: redis: 1s, normally up
ok: down: redis-exporter: 0s, normally up
ok: down: sidekiq: 0s, normally up
ok: down: unicorn: 0s, normally up
停掉redis服务
[root@liuhongwei-01 ~]# killall redis-server
redis-server: no process found
在开启git服务
[root@liuhongwei-01 ~]# gitlab-ctl stop
ok: down: alertmanager: 0s, normally up
ok: down: gitaly: 0s, normally up
ok: down: gitlab-monitor: 0s, normally up
ok: down: gitlab-workhorse: 0s, normally up
ok: down: logrotate: 0s, normally up
ok: down: nginx: 0s, normally up
ok: down: node-exporter: 1s, normally up
ok: down: postgres-exporter: 0s, normally up
ok: down: postgresql: 0s, normally up
ok: down: prometheus: 0s, normally up
ok: down: redis: 1s, normally up
ok: down: redis-exporter: 0s, normally up
ok: down: sidekiq: 0s, normally up
ok: down: unicorn: 0s, normally up
[root@liuhongwei-01 ~]# killall redis-server
redis-server: no process found
[root@liuhongwei-01 ~]# ^C
[root@liuhongwei-01 ~]# gitlab-ctl start
ok: run: alertmanager: (pid 9732) 0s
ok: run: gitaly: (pid 9739) 1s
ok: run: gitlab-monitor: (pid 9743) 0s
ok: run: gitlab-workhorse: (pid 9753) 1s
ok: run: logrotate: (pid 9756) 0s
ok: run: nginx: (pid 9769) 0s
ok: run: node-exporter: (pid 9771) 1s
ok: run: postgres-exporter: (pid 9775) 0s
ok: run: postgresql: (pid 9777) 1s
ok: run: prometheus: (pid 9782) 0s
ok: run: redis: (pid 9785) 1s
ok: run: redis-exporter: (pid 9790) 0s
ok: run: sidekiq: (pid 9800) 1s
ok: run: unicorn: (pid 9813) 0s
22.16 使用gitlab
查看监听端口
[root@liuhongwei-01 ~]# netstat -lnpt
Active Internet connections (only servers)
Proto Recv-Q Send-Q Local Address           Foreign Address         State       PID/Program name
tcp        0      0 192.168.93.129:27017    0.0.0.0:*               LISTEN      2389/mongod
tcp        0      0 127.0.0.1:27017         0.0.0.0:*               LISTEN      2389/mongod
tcp        0      0 0.0.0.0:3690            0.0.0.0:*               LISTEN      2680/svnserve
tcp        0      0 127.0.0.1:9100          0.0.0.0:*               LISTEN      9771/node_exporter
tcp        0      0 127.0.0.1:9229          0.0.0.0:*               LISTEN      9753/gitlab-workhor
tcp        0      0 0.0.0.0:111             0.0.0.0:*               LISTEN      760/rpcbind
tcp        0      0 127.0.0.1:9168          0.0.0.0:*               LISTEN      9743/ruby
tcp        0      0 127.0.0.1:9236          0.0.0.0:*               LISTEN      9739/gitaly
tcp        0      0 0.0.0.0:22              0.0.0.0:*               LISTEN      1034/sshd
tcp        0      0 127.0.0.1:25            0.0.0.0:*               LISTEN      2334/master
tcp        0      0 0.0.0.0:8060            0.0.0.0:*               LISTEN      -
tcp        0      0 127.0.0.1:9121          0.0.0.0:*               LISTEN      9790/redis_exporter
tcp        0      0 127.0.0.1:9090          0.0.0.0:*               LISTEN      9782/prometheus
tcp        0      0 127.0.0.1:9187          0.0.0.0:*               LISTEN      9775/postgres_expor
tcp        0      0 0.0.0.0:10051           0.0.0.0:*               LISTEN      2342/zabbix_server
tcp        0      0 127.0.0.1:9093          0.0.0.0:*               LISTEN      9732/alertmanager
tcp6       0      0 :::3306                 :::*                    LISTEN      2290/mysqld
tcp6       0      0 :::111                  :::*                    LISTEN      760/rpcbind
tcp6       0      0 ::1:9168                :::*                    LISTEN      9743/ruby
tcp6       0      0 :::80                   :::*                    LISTEN      1039/httpd
tcp6       0      0 :::22                   :::*                    LISTEN      1034/sshd
tcp6       0      0 ::1:25                  :::*                    LISTEN      2334/master
tcp6       0      0 :::10051                :::*                    LISTEN      2342/zabbix_server
tcp6       0      0 :::9094                 :::*                    LISTEN      9732/alertmanager
[root@liuhongwei-01 ~]#
浏览器访问gitlab,输入ip即可
gitlab常用命令 https://www.cnyunwei.cc/archives/1204
22.17 gitlab备份和恢复
•gitlab备份 gitlab-rake gitlab:backup:create
• 备份目录在/var/opt/gitlab/backups
• gitlab 恢复 先停服务 gitlab-ctl stop unicorn ; gitlab-ctl stop sidekiq
• gitlab-rake gitlab:backup:restore BACKUP=xxxxx (这里是一个编号,即备份文件的前缀)
• 再启动服务 gitlab-ctl start


 4991
4991

 被折叠的 条评论
为什么被折叠?
被折叠的 条评论
为什么被折叠?
 到【灌水乐园】发言


