


So you have this SharePoint project you are working on... And as with any project, you need a bug tracker in order to communicate properly with the QAs and BAs in the company. What do you use?
OnTime?
Mantis?
Bugzilla?
Why not SharePoint itself? It's already (presumably) set up for you, users are familiar with it and you are only couple of steps away from setting up your own Issue Tracker.
To get it up and running, here is what you should do, step by step:
1. Open your SharePoint web site as admin
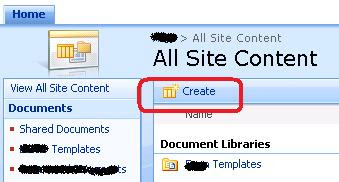
2. Click on 'View All Site Content' (usually top left) or open http://server:port/_layouts/viewlsts.aspx
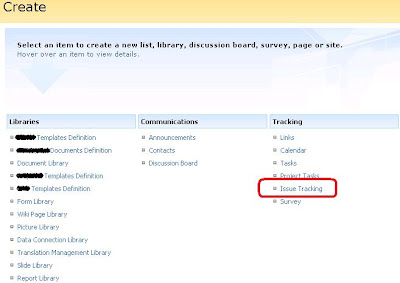
3. Click on 'Create' to create a new list (shortcut: http://server:port/_layouts/create.aspx)
4. From the 'Tracking' column select 'Issue Tracking'
5. Type in the name and description of the list where issues will be tracked
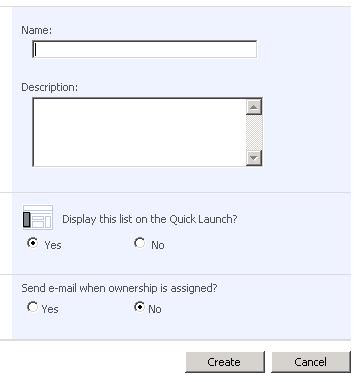
You may want to select 'Yes' on 'Send e-mail when ownership is assigned', to send emails to the users assigned to issues.
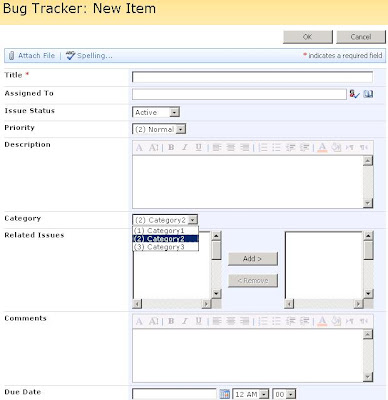
6. Click 'Create' button and your bug tracker is created. You should see a list with the name you have given on step 5. This is the tracker, open it. Click 'New Item' to see the default fields and their values you get.
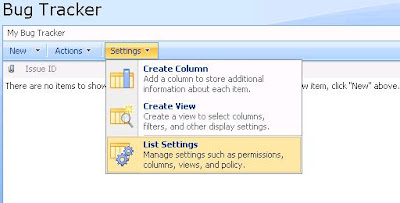
7. Time to customize according to your needs. Go to the List Settings of your issue tracking list.
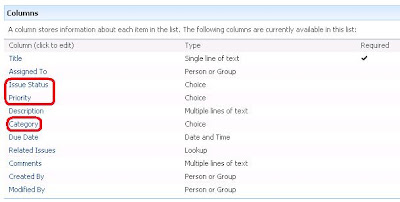
8. Scroll down to the Columns section. You will want to modify the highlighted columns - Issue Status, Priority and Category, for starter.
9. Click on any of them, let's say 'Issue Status'. Scroll down to the 'Additional Column Settings'

You can now change the possible statuses your issues may have. For example, you may want to add 'Acknowledged', 'Postponed', 'Invalid', 'Cannot fix', etc... You may also change the default value or make the field required (a smart choice). When you are happy with your changes, click Ok.
10. Do the same for Category and Priority.
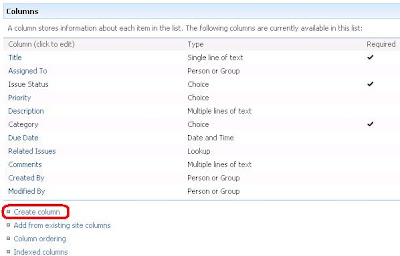
11. You can extend your tracker further, by adding extra columns. Let's say, Product (as you may be working on different products at the same time) or Version (as your product may have many production versions). To do this, go to the Settings of the list again (as in step 7). Scroll down to columns and click Create Column.
12. Type in the name of your column and select its type. In this case, I will name it 'Product Version' and make it a dropdown list.
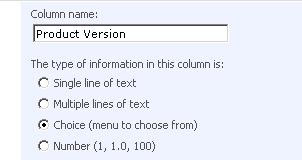
13. Make the column required (if you want to), specify the available choices and select the type of the control (dropdown, radio buttons or check boxes).
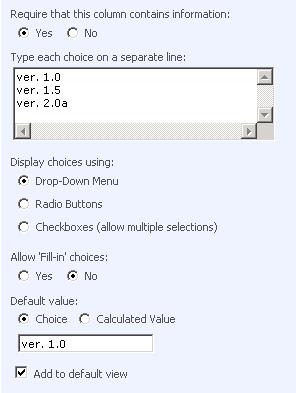
Then click Ok and you are all set.
14. Let's test your bug tracker. Go to the list and create a new item

15. Fill all the fields you want to and click Ok. You have now logged a new Issue.

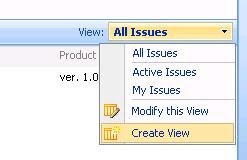
16. To customize your tracker further, you may want to create new Views, which sort and arrange the items in categories, assignees and what not
17. You may need to add users (give permissions) to the site or the list.
Now you have your own tracker, embedded in your SharePoint environment. Hope this was helpful!
Why not SharePoint itself? It's already (presumably) set up for you, users are familiar with it and you are only couple of steps away from setting up your own Issue Tracker.
To get it up and running, here is what you should do, step by step:
1. Open your SharePoint web site as admin
2. Click on 'View All Site Content' (usually top left) or open http://server:port/_layouts/viewlsts.aspx
3. Click on 'Create' to create a new list (shortcut: http://server:port/_layouts/create.aspx)

4. From the 'Tracking' column select 'Issue Tracking'
5. Type in the name and description of the list where issues will be tracked
You may want to select 'Yes' on 'Send e-mail when ownership is assigned', to send emails to the users assigned to issues.
6. Click 'Create' button and your bug tracker is created. You should see a list with the name you have given on step 5. This is the tracker, open it. Click 'New Item' to see the default fields and their values you get.

7. Time to customize according to your needs. Go to the List Settings of your issue tracking list.

8. Scroll down to the Columns section. You will want to modify the highlighted columns - Issue Status, Priority and Category, for starter.

9. Click on any of them, let's say 'Issue Status'. Scroll down to the 'Additional Column Settings'

You can now change the possible statuses your issues may have. For example, you may want to add 'Acknowledged', 'Postponed', 'Invalid', 'Cannot fix', etc... You may also change the default value or make the field required (a smart choice). When you are happy with your changes, click Ok.
10. Do the same for Category and Priority.
11. You can extend your tracker further, by adding extra columns. Let's say, Product (as you may be working on different products at the same time) or Version (as your product may have many production versions). To do this, go to the Settings of the list again (as in step 7). Scroll down to columns and click Create Column.

12. Type in the name of your column and select its type. In this case, I will name it 'Product Version' and make it a dropdown list.

13. Make the column required (if you want to), specify the available choices and select the type of the control (dropdown, radio buttons or check boxes).

Then click Ok and you are all set.
14. Let's test your bug tracker. Go to the list and create a new item

15. Fill all the fields you want to and click Ok. You have now logged a new Issue.

16. To customize your tracker further, you may want to create new Views, which sort and arrange the items in categories, assignees and what not

17. You may need to add users (give permissions) to the site or the list.
Now you have your own tracker, embedded in your SharePoint environment. Hope this was helpful!


 263
263

 被折叠的 条评论
为什么被折叠?
被折叠的 条评论
为什么被折叠?
 到【灌水乐园】发言


